We’ve all been here. A track presents itself with problematic frequencies and resonances but no matter how much tweaking is done, just won’t fit in a mix. Maybe you’re a professional in a fast-paced audio environment who needs precision on the go. Maybe you’re new to the mixing game and need a little help learning what to look for when EQing tracks. Or… maybe you’re just a lazy engineer. There’s no shame in any of that; Sonible Smart:EQ+ has you covered. This EQ uses intelligent algorithms in its “smart” bands to analyze the content of tracks and suggests an EQ curve, more precise and accurate than conventional EQ.
The plugin comes in all of the standard VST, AU, and AAX flavors and installation is a breeze. Registration comes via a computer bound license model and can only be installed on two systems. This can be problematic for engineers on the go due to not being able to store the license on USB thumb drives or iLoks but registration is fairly quick and easy. Note: I hear iLok is coming in the near future. A trial can be utilized for 30 days with no limitations as well. Another incredible fact that I hope EVERY plugin company sees rests in the bottom right corner of the GUI. If an update is available for the plugin, the area with the magic wand will display that a new version is available. For every engineer, this is beyond valuable given the sheer amount of plugins most have in their DAW. I can’t stress enough how genius this feature is.
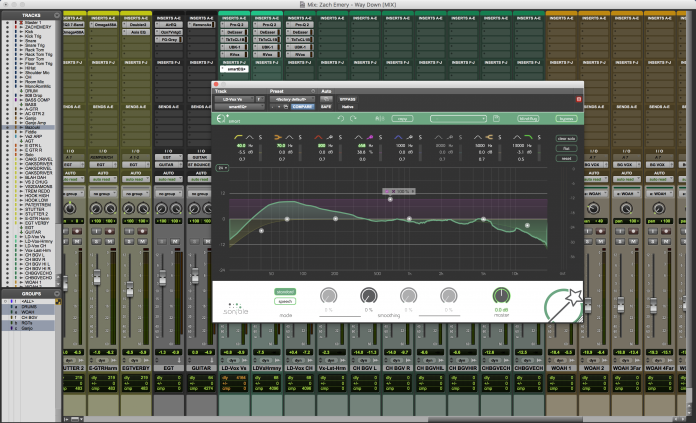
At its core, Smart:EQ+ is an 8 band linear phase EQ with adjustable “Q” and fully sweep-able filters. The high and low pass filters as well as the shelving bands can also be toggled to bell filters if more are needed on a track. The interface is very straight-forward and can even be placed in “blind:flug” mode whereby all graphics are disabled and the user can depend on their ears to make key decisions. In order to make learning their plugin easier, hovering over a feature will pop up a brief description of the use of the feature. Each of the 8 bands have all of the trappings of most EQs with sweep-able frequency, gain, solo and Q, but there are a few other tricks Smart:EQ+ has under its sleeve.
To the right of the bands are three buttons stacked on each other. The Clear Solo will remove the solo feature from all bands for quick reference to the whole picture. Flat will return all gains but will leave all other settings intact and Reset will default the whole plugin. The visuals on the interface are great and the layout is superb. Each band has a representative color and Q values and gain can be seen very quickly when making adjustments using the color coded system. Overall even just as EQ plugins go, Smart:EQ+ is right up there at the top as far as function and presentation, but what sets it apart rests in the “magic wand” icon.
Smart Mode sits proudly in the middle four bands and serves a very useful and unique purpose. When the wand is clicked between the filter and solo buttons, a menu will pop up on the node of the band, waiting for audio to be played in order to analyze the frequency content and create a custom EQ curve. This curve is created to balance deficiencies and bring out what the algorithm sees best for the track. All that needs to be done on the user’s end is to pick either Speech (for vocal tracks) or Standard for everything else and a section of the track that has minimal silence and press the wand on a band. The wand will flash and will listen for audio for 15 seconds to analyze the frequency content. Once analyzing is complete, a check box will appear on the node of the band in which Smart mode was selected. Once Smart Mode is active, the gain behaves like a quasi-wet/dry knob where the more gain is applied, the more of Smart Mode’s EQ curve is applied. The gain can even be applied backwards to take out what Smart Mode suggested. The Q knob now controls how wide the EQ curve spans. P.S. Don’t worry about reanalyzing the band if you want Smart Mode to span more or less of the frequency spectrum. When a band is analyzed, it analyzes the entire spectrum every time. The only time Smart Mode would need reanalyzing is if the section analyzed didn’t affect the audio in a way the user saw as beneficial. Multiple bands in multiple areas can employ smart mode to only affect small pockets or one band can open the Q to 0 to give an EQ curve for the whole signal. Just note: if spanning the entire frequency spectrum, higher frequency content may behave a little erratically (past 15kHz) so care must be taken to dial the Q to compensate. On top of the basic controls of smart mode, a global “Smooth” control at the bottom will apply a broader, more natural curve to Smart Mode as well. This is used more to create a slightly more subtle impact.
So the interface is easy to use, versatile, and aesthetically pleasing. The update notification in the GUI is one of the most genius, useful things I’ve seen a plugin company do in ages. I also had no trouble learning smart mode and putting it to use. The Clear Solo, Flat, and Reset buttons were useful, but I would have loved to see them offer a “kick” mode similar to Eiosis AirEQ where “alt” or “shift” would allow for all solos or flat bands to be used quicky but still retain original settings. How I use this on AirEQ is I EQ the signal as I see fit and hold “alt” to quickly bypass my settings without having to press “bypass” two times. This would really pair great with Smart Mode to compare settings and speed up workflow.
So let’s get down to the question everyone is asking. How does the Smart Mode perform? On single tracks, like vocals in Speech mode, Smart:EQ+ performed very well, in almost all cases adding a pleasing balance to just about any track I threw at it, even not-so-greatly recorded vocals. I did find that parts with more dynamics like the chorus worked a little better than the verses to use for Smart Mode analysis. I attribute this to the principle that the more you give it spectrally, the more you get out of it. In songs with a bridge or slightly energetic second verse worked good for an overall baseline. Standard mode yielded very similar results that Speech mode with vocals as well but Standard really did shine with individual tracks. Instrument tracks saw a good benefit from Smart Mode as well, adding more fullness in guitars and removing resonances in snares. As a plugin on individual tracks, I say Smart:EQ+ is worth its weight in gold not only for the every day mix, but also for the budding engineer or professional on the go. This plugin does help shave off precious time on mixes no doubt. It’s almost like autopilot on EQ.
Some of the areas Smart Mode didn’t fare so well was on bus tracks and the master fader. When a great deal of frequency content is handed its way, it tends to not work as well. Don’t get me wrong, it still analyzes and suggests, but a lot more effort on the user’s part is needed to find the perfect spot to analyze. This isn’t necessarily Smart:EQ’s fault. Think about it – every part of a song has different instruments moving in and out and 30 seconds is a tough gauge for an entire song. What almost needs to happen is a “live” streaming mode where the EQ is making adjustments on the fly. This however would be pretty tough to accomplish in the grand scheme of things for a plugin manufacturer. Sonible is definitely headed down the correct path for this in the future but for now, we have a plugin that still performs and impressive feat.
Overall, I love the plugin. The combination of Smart Mode and adding bands to fill in the gaps the algorithm doesn’t detect seems to be a perfect pairing. If you go as far as have a little patience and a love for automation, the plugin could even analyze each section of a song to give you a slightly more dynamic form of Smart Mode. Ultimately, this plugin is staying in the front of the pack as far as my arsenal is concerned. I’m really excited to see Sonible push this innovative concept further in the future. Bravo!
For more information, and to purchase, visit http://www.sonible.com/smarteq/
Review: Sonible Smart:EQ+
Kush Omega 458a Gets an Update in 1.0.5
The Omega Preamp and Transformers are the perfect combination (Review HERE) and I think the 458a is quickly becoming my favorite go-to transformer. The 458a adds a distinct smooth but aggressive bite, perfect for electric guitars and vocals. Now the 458a has been upgraded with better CPU performance and an oversampling on / off switch.
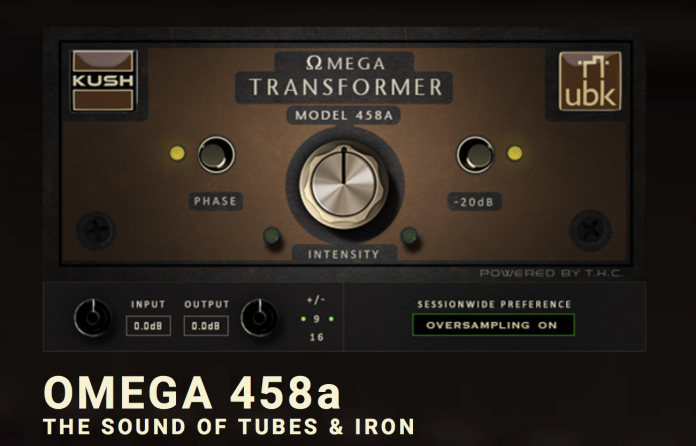
As of version 1.0.5, Omega 458a uses as little as 25% as much CPU as previous versions, and can also be run as a zero-latency plugin.
We added a session-wide ‘oversampling OFF’ mode that lets you easily switch every Omega 458a in your session into Oversampling Off mode while you mix, then flip back to Oversampling On mode for Mixdown. It’s the best of both worlds!
For the full changelog, read on…
•Implemented major DSP optimizations to reduce CPU usage by 50%
• Added a session-wide preference control for ‘Oversampling On/Off’ toggle to further reduce CPU usage by another 50%
• Toggling this switch sets the Oversampling mode for every Omega 458a in the current session.
• If needed, mix with Omega 458 in Oversampling Off mode, then switch On when ready to Bounce.
• When run with Oversampling Off, Omega 458a is now a zero-latency plugin
• Added Input and Output trim controls with Text entry fields
• Added a Gain Range switch, which changes the range of the above controls to +/-16dB
• This switch defaults to +/-9dB, to preserve compatibility with older sessions that use automation
• Fixed various lingering Bypass issues
• Added new AAX Page Tables
Price: $29.00
For more information, visit http://www.TheHouseofKush.com
Avid Pro Tools 12 Review Part 5 – Final Thoughts
Welcome to the final section of the Pro Tools 12 Review. For previous parts, visit the review section HERE. This section details the overall review for Pro Tools 12.
Part 5: Review
During the course of these Pro Tools 12.7 Explained series, a lot of ground has been covered. What started out as just a review of Pro Tools changes since version 11 became so big that it had to be broken into parts just to go over all of the major bells and whistles. This in itself should demonstrate that Avid is on the right path to undoing years of complacency in comparison to other companies. This brings us back to this reviewer at the beginning of this series sitting with my cursor hovering over the “buy now” button of Logic. Was all of this enough?
The short answer is a fairly emphatic yes. Although there are some things that make me raise my eyebrow and ponder (All Access Plan, lackluster tech support, and pricing), performance and functionality wise, Avid has really made massive strides. While there is no mention anywhere of any enhancements to the Avid Audio Engine, the amount of AAE-9173 errors has plummeted drastically on my system. A little unsettling is these errors have been replaced by the sound of my laptop cooling fan screaming like a Banshee, but the program runs like a race horse. I went into Pro Tools 12.7 almost certain my sessions would be full of snowflakes on just about every track (a veritable “winter wonderland of Track Freezes” if you will), but since upgrading, I only track freeze by choice to keep the CPU fans from flying out of the laptop like a helicopter. Gone are the days of hitting the space bar, praying that I can at least hear 30 seconds of audio without overloading and stopping. That in itself saved me from changing DAWs – something I dreaded due to having to re-learn a whole new system.
I’ve always liked the way Pro Tools was set up. Although it wasn’t my first pick (I started on Cakewalk, then Cubase), it made the most sense to me; but as my skills grew, the performance on Pro Tools didn’t. For years I simply pushed through the constant freeze ups, crashes, and errors that brought creativity to screeching halt. I can’t stress how bad it was having to press play so many times due to Pro Tools telling me my $3000 MacBook was out of CPU. My wife’s patience had run thin as well. After buying two new MacBook Pros in 4 years, a thunderbolt interface, and HD Native system, she was through hearing “just let me buy (insert new item) and this will all stop”. I say all of this not for pity, but to stress just how fed up I was with Avid. I also say this to render some credence to this review. I was not going to be easily swayed like a fanboy this time around. I went into this review like the biggest staunchest opponent of Avid. I was ready to rip them a new one, drop the mic and go somewhere else. I was half frustrated and half relieved when it was becoming clear there wasn’t much to tear apart.
It seems there isn’t a major area of this software that hasn’t been meticulously looked at, fixed, and even improved further. This is apparent in the fact that there is more than one way to handle tracks that either are using up too much processing, or need to be sent to other collaborators that do not have the same plugins. Commit works excellent at putting a final stamp of tracks that do not need to be tweaked. It encourages finality and to not look back on many decisions. Bouncing takes all of the routing out of the equation by allowing exporting right in the window. Although Avid could expand on these two by allowing the option to sum multiple selected tracks to one Committed or Bounced stem, this is a great start to an indispensable feature. Track Freeze works perfectly to free up processing until the track is ready to be committed. Being able to Freeze or Commit up to certain inserts takes these additions even further, thus creating a whole new workflow for sessions.
The new editing and visual updates take workflow even further with Clip Transparency, Tandem Trimming, Overlap Shadows and Layered Editing. I could never go back to not having the Clutch Slip mode for dragging audio. Fades have never been easier with live feedback and batch fades in one window as well. The ability to send fully overlapped recordings or edited tracks to new playlists preserves clips I otherwise would have totally forgotten have existed. Subscription plans even have some benefits with the massive trove of plugins that come with it for the duration of your plan. Cloud collaboration is even an exciting new feature. The list goes on and on, but there are some areas that I feel aren’t quite “there” yet.
I understand the new subscription model. I don’t mind a company needing constant revenue stream to further improve the software. Where it does bother me is in bug fixes and OS updates. Just because a person isn’t paying $400 (HD) $99 (Standard) a year doesn’t mean that person should have to stay on the last OS the version you have supports in order to stay functional. Now I have to pay $400 just to keep Pro Tools HD running AND have features ANOTHER company have offered me for free in a new OS. There needs to be some sort of system to accommodate this. I get if I don’t pay to stay current I can’t get the latest and greatest bells and whistles, but don’t hold my entire computer hostage in the process. I also get this is probably tough to accomplish, but operating systems do it all the time with service packs. This in itself almost pushes me to start learning another DAW in the meantime. I don’t feel I’m asking for much just to be able to use an older version of Pro Tools and update my computer’s OS at the same time.
Although this doesn’t affect me, it would be nice to be rewarded for needing multiple copies of Pro Tools. Some sort of discount for needing multiple subscription plans would make dedicated users feel a little more appreciated. I also feel that if a studio needs HD for a month, they should be able to get it for a month. Not have to buy a whole year. Smaller studios run on razor thin budgets and I’m sure are more than happy to pay to play, but at least give an option to use it on a more temporary basis.
Now we move onto Cloud Collaboration. This tool is going to get a lot of use here at Everything Recording HQ. Tracking with session musicians has never been easier… if those musicians use Pro Tools. I get that integrating with other DAWs is a huge task, but at least let people collaborate with the free version of Pro Tools as well. And for those people who use the free version, allow for remote controlling of the session to make it easier for the person who isn’t familiar with the DAW. A live streamed recording is somewhere in the future I feel, but at least add a voice chat and ability to help them out remotely.
I get that it is very easy for me to “arm chair quarterback” all of these changes and rant and rave about how this should be simple to change. The truth is Avid has improved by leaps and bounds. Sure they may have some distance to go in business model but if you notice, most of the gripes I had didn’t have anything to do with the actual software.
Many were merely suggestions for further enhancements which I’m sure they are already working on. Overall Pro Tools have not only plugged the hole in our metaphorical ship we described at the beginning of this series, but have built a faster, more comfortable vessel that encourages creativity and even circumvents pitfalls that aren’t even their responsibility (like older machines or plugin happy engineers). Although I came into this expecting to finally get to rage quit a DAW that I spent years using, I walked out its biggest proponent.
Overall I have a renewed sense of trust in the “industry standard DAW”. I do not feel that Avid will be resting on their laurels and even if they did, they’ve added enough features in the past 2 years to sit back and relax. I’m sure they won’t but that’s just how good the software is now. So for any of you looking to drop Pro Tools from your studio, just at least do yourself the favor of trying Pro Tools 12. I would be willing to bet the “itch to switch” will go away.
For more information and to choose a package for you, visit http://www.avid.com/pro-tools
Kush Audio Updates Clariphonic EQ with Mid-Side
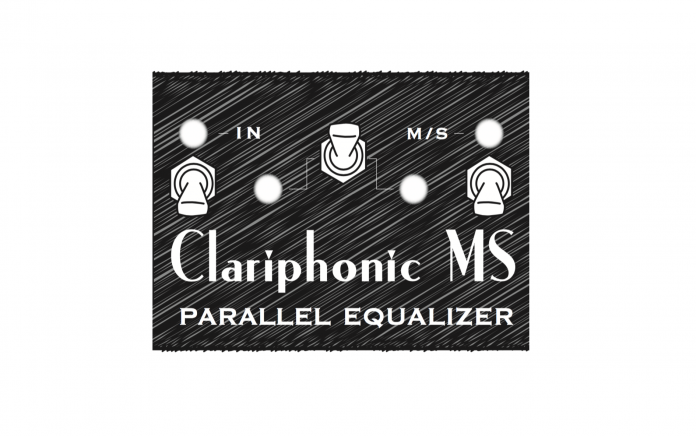
Considered by many as one of the most prized weapons in their hardware arsenal, the Clariphonic has proven to add the “expensive” sound most engineers have only dreamed of owning. The plugin version was updated not too long ago to include new features and Gregory Scott didn’t want to leave the hardware out as well. Therefore the Clariphonic M/S was created. Not only does this purveyor of high frequencies get an added Mid-Side mode, but it also includes an optional “cut” feature to the Focus section. Now Pultec style cutting and boosting can be performed all in one 19″ rackmountable box. But there’s more! Now all of your other hardware can be Mid-Side as well thanks to the new Mid-Side inserts on the back. Get your wallets out folks…
Los Angeles, CA – Kush Audio is delighted to announce the latest addition to its growing family of cutting edge audio tools: Clariphonic MS, an expanded version of the extremely popular Clariphonic EQ, featuring identical sonics and a slew of new functional enhancements that transform it into a more powerful and flexible processor.
The centerpiece of the upgrades is a selectable internal Mid/Side matrix which allows for more sophisticated EQ treatments than the familiar L/R operation. Clariphonic MS can also convert an entire rack of conventional signal processors into an MS powerhouse by way of the two MS insert jacks on the back of the unit, which allow any stereo processor to function in Mid/Side mode by inserting them between the Mid/Side encoder and decoder.
Other new features include 41-step detented pots for fast and accurate recall, a single relay-based Master Bypass switch, and the ability to switch the midrange Focus bands into Cut mode, allowing for a thoroughly modern twist on the classic Pultec-style push-pull on the treble.
“People have been asking for some of these features for years” says Gregory Scott, Kush Audio’s benevolent dictator. “It’s great to include all of them, plus a few more that no one saw coming.”
Clariphonic MS will sell for $2199 MSRP, $1999 MAP. It will be available at authorized Kush Audio dealers worldwide by the time you read this.
For more information, visit http://www.theHouseofKush.com
With a focus on sleek industrial design, innovative product concepts, and artistically intuitive user interfaces, Kush Audio is redefining what customers want and expect from their pro audio gear and the people who build it.
Avid Pro Tools 12 Review Part 4 – Updates for HD Only
This is Part 4 of a 5 part series reviewing Pro Tools 12. For previous parts, visit the Reviews section HERE. This section lays out new features only available in Pro Tools HD.
Part 4: HD only Features
Of course, all of the new features that both Standard and HD Pro Tools carry in version 12.6 is a long and impressive list, but what’s the point of upgrading to HD. No worries folks, Avid have that department covered with a few features that may or may not have you pulling the wallet out for an upgrade.
For starters, the amount of tracks is increased from Pro Tools standard’s 128 tracks (at 44.1kHz) to 768 (at 44.1kHz). The track count for simultaneous recording goes up from Pro Tools Standard’s 32 to a staggering 256. For film, HD is a must due to it being the only version that can mix surround.
For those working with 5.1 and stereo sessions, Pro Tools 12.6 can upmix or downmix busses to physical outputs without having to change the actual session routing. Upmixing is handled by distributing the mismatched channels of an output bus channel to both channels of a stereo output path, or the Surround path from an LCRS source to the Left Surround and Right Surround paths of a 5.1 output. Although mixing while monitoring through upmixed or downmixed outputs isn’t the best idea, Pro Tools now can handle assigning the proper output assignment to differing channel widths. Path order for newly created paths can be selected as well via the Path Order setting in the I/O window.
Probably the most impressive feature to come to Pro Tools 12 is Clip Based Effects. In previous versions, if multiple clips needed differing EQ and dynamics, this was handled via Audiosuite. Once the change was rendered via the Audiosuite plugin, any changes could not be made and if you didn’t like it later on, too bad. Now this can be mitigated by using Clip Effects. Although this feature does not work with any other plugin than Avid’s Channel Strip plugin, individual clips in a track can now be edited separately and changes can be made at any time. This takes a huge burden off of engineers who are stuck with multiple vocal takes from different studios using different equipment. Presets can also be saved and applied to parts of other clips. Clip Effects shows up in place of the Universe display just below the Edit Window controls at the top. A shortcut is available to bring it up via Option+6 (Mac) or Alt+6 (Windows) or by selecting View>Other Displays> Clip Effects. The Channel Strip plugin appears at the top and clips can be selected and edited at will in a track. Once a clip is selected and audio is changed, an “EQ” or “Dyn” label will appear at the top of each clip to display what processing has been applied to each clip. Multiple clips from multiple tracks and be edited at once. If the processing isn’t working out, selecting the green button to the left of each section of the strip will turn processing off and the “EQ” or “Dyn” will disappear. Although this feature is a Godsend in comparison to what was available before, I wish other plugins could use this feature. This would be perfect for quickly processing delay throws on tracks or even just a different flavor of compression on one part.
And don’t worry non-HD users, if a session is received with clip effects, they can still be played and removed. They just can’t be edited.
Stay tuned for the final overall review in Section 5…
Propellerhead Reason 9.5 Adds VST Support
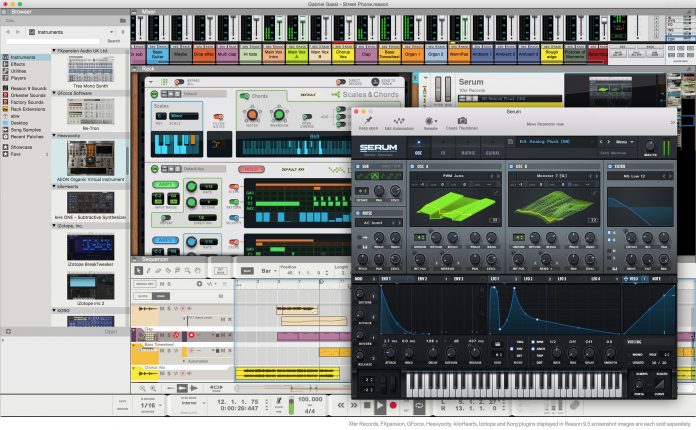
In our previous Reason review (HERE) we mentioned that we would like to see Reason break out of their shell and allow for VST plugins. Well all of our prayers have been answered. Reason 9.5 now adds the ability to use VST.
Stockholm, Sweden, April 28, 2017 – Propellerhead Software today announced Reason 9.5, the newest update to the award-winning Reason music production software. Reason 9.5 is a free update for Reason 9 owners that introduces VST support – the number-one feature request by both Reason and non-Reason owners alike.Drag and drop from the browser, use CV and audio connections with your plugins, play in new ways with Players, put them in Combinators with Reason’s own devices or Rack Extensions. Explore a new workflow and discover new creative ways to use VST plugins with Reason 9.5.“Today’s music makers need access to all the great software instruments and effects out there – but without compromising their creative process,” said Mattias Häggström Gerdt, Reason Product Manager. “Opening your favorite VST plugins in Reason taps into Reason’s legendary workflow, from simply playing your favorite instruments to using the audio and CV connections for a truly modular music-making experience.”Reason 9 was released in June of last year and introduced a host of new devices, sounds and creative tools that inspire music makers to create more and better music – from creative spark to polished production. Since Reason 9’s release, Propellerhead has released two free updates, bringing Ableton’s Link technology to the Reason rack and improving their Rack Extension SDK with highly requested features.Buy Reason 9 today and receive the Reason 9.5 update for free. Reason 9.5 will be released on May 29, and any owner of Reason 9 will receive the new version for free through Reason’s auto update.For full details regarding the Reason 9.5 update, visit www.propellerheads.se.View the Reason 9.5 video here.
Reason 9.5 will be released on May 29, and any owner of Reason 9 will receive the new version for free through Reason’s auto update.
Reason 9 USD $449 / EUR €405
Reason Essentials 9 USD $129 / EUR €120
Reason 9 Upgrade (from any previous Reason version) USD $129 / EUR €129
Waves Releases Smack Attack Transient Shaper Plugin
Transient shapers are all the rage. Waves have stepped in the ring with their own iteration. Smack Attack gives their own spin and extended controls to add more pop, sustain, and punch to your tracks.
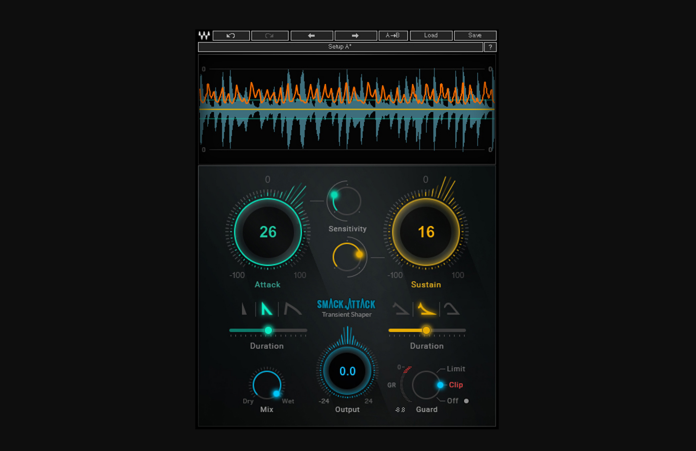
KNOXVILLE, TN, May 1, 2017 — Waves Audio, a leading provider of digital signal processing solutions, is now shipping the Smack Attack transient shaper plugin. The Waves Smack Attack plugin adds smack and bite to drums, loops, synth hits and all percussive sounds, by designing the level, shape and duration of their transients’ attack and sustain – from surgical tweaks to savage effects.
Smack Attack can control the exact level, shape and duration of transients, giving your tracks the perfect tightness and dynamics they need. You can unleash or tame kicks, snares, claps, drum samples, or any other drum or percussion instrument – but also guitar and bass plucks, quick piano arpeggios, synth stabs, or even your entire mix.Unlike traditional transient shapers, Smack Attack has not only the standard Attack and Sustain level controls; it also gives you pinpoint control over the transients’ shape and duration. You can make a kick tighter than you’d ever imagined – or give your snares that extra crack. You also have a Sensitivity control for selective transient shaping: you can process all your transients, only the loudest ones, or anything in between.Smack Attack also features a user-friendly GUI with real-time graphic waves display; a limiter/clipper for driving your sound to the limit; and a Wet/Dry mix control for parallel processing. Smack Attack is also MIDI-control-assignable.Smack Attack will let you go sensitive or aggressive on your transients, design the perfect pulse in your tracks, and make every hit count.
Review: Tone2 Electra2
We’ve reviewed quite a few of Tone2’s products, (link to reviews for Nemesis, and Saurus,) and for the most part, they are great tools. Each bring their own flavor to the table and fit right into almost any style of music. So when we were given the chance to peek under the hood and kick the tires of Electra2, we jumped at the opportunity.
Electra2 is the second incarnation of Tone2’s ElectraX, a multi-layer software synthesizer with countless features. It comes in VST and AU varieties but is still leaving out the Pro Tools crowd. Installation is a breeze and authorizing comes to you via a t2k file that Tone2 generates. Simply open the t2k file from the plugin window upon opening for the first time, and you’re ready to go. It is worth noting that Electra2 is backwards compatible with its successor and overwrites ElectraX upon installation. This is great for loading old patches from sessions into the new versions but it would be nice to be allowed to run both sessions. Although only a few people online complained about a difference in sounds between old presets, this could just be isolated cases but if this is of any concern, make sure and print the tracks before upgrading for comparison.
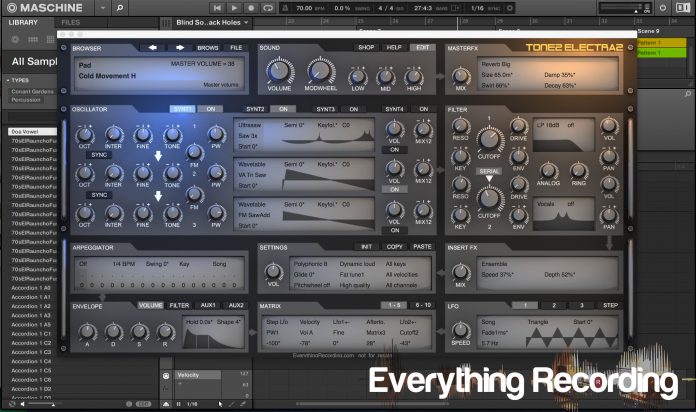
The interface is very sleek and laid out to accommodate the sometimes daunting task of sound design in a manner that is much more user friendly than most soft synths of this caliber. Each section flows into another, allowing you to quickly make changes where you see fit. If you’re just into browsing the 1200 professional quality presets, the interface can be scaled down to a smaller “rack view” to save precious monitor real estate. The browser is extremely easy to use and divided up into sections for quick reference. While in rack view, you are also given a few other controls such as volume, mod wheel, 3 band EQ, and Master effects. You can also shop for new sound banks and browse the help menu from the 3 tabs just above the EQ. These controls are great if you are looking to “set and forget” but the real magic happens when you expand Electra2 into editor view.
The editor view gives you a choice of 4 different tabs of “layers” that you can either edit individually or globally by using the Multilayer Edit Mode. Each layer has its own multi-timbral synthesizer and can incorporate many of their 14 different types of synthesis, including Tone2’s own Fractal Synthesis. On top of being able to choose multiple forms of synthesis across the 4 layers, Electra2 allows you to choose from different play modes per layer such as monophonic, polyphonic, glide, and legato. Arpeggiators can be set per layer as well for all out melodic bliss. Layers can then be saved as presets and combined to form global presets for all 4 layers as well. It’s like inception for synthesis. As an added visual bonus, Electra2’s individual layers are 4 different colors, making it easy to determine just which layer you are editing. All of this is tied together with an onscreen keyboard for quick testing of your presets.
If the multiple layers isn’t enough for you, Electra2 is packed with effects galore. You have an arsenal of 10 reverbs, 4 delay types, 12 mod effects, vocoder, EQ, amp simulator, and compression; giving you up to 32 different types of effects that are worthy to be inserts on your DAW. Don’t believe me? Go pick up a trial of Tone2’s UltraSpace. On top of the effects, you also have different single and multimode distortions and up to 37 different types of filters, most of which can self-oscillate. A great deal of them you can only find with Tone2. Stack all 14 of the different synthesis types, with a smart and easy to use arpeggiator with autochords, pitch slides, legato, swing-shuffle and matrix integration and you have limitless possibilities with sound design. Even your modulations can be set to BPM for more movement to your already evolving patches. You can even set up use Electra2 as a vocoder and sample based synthesizer.
Sampling can be a bit of a pain at times with synthesizers but Tone2 has a great wizard that pretty much does all of the work for you. Electra2 will import, tune your samples, as well as suggest loop points. Add in the effects for sampling and you can mangle your own voice to the point where it is unrecognizable. The Quick Import Vocoder can also guide you painlessly through setting up Electra2 as a vocoder. Once your samples are tweaked to the point of your liking, they are saved as FXPs so that you’re not having to hunt down your greatest creation. The sky is the limit with Electra2.
In operation, I found Electra2 to be very stable and was able to use many instances of the soft synth without any repercussions on my DSP. The interface is very inviting and even though I am not the best with sound design, I was able to create some pretty nice patches. One of the great things about all Tone2 products is the sheer quality of the presets they make in house, many of them needing little to no processing in your tracks. They just fit to the point that you don’t feel the need to make your own.
I did find myself wanting more effects per layer and a few times found patches to sound different upon opening them again. I did a couple of tests with the same patch on two separate tracks but could not repeat this phenomenon every time. Usually just closing the session in my DAW fixed it. Other than that, I’ve found that Electra2 has become one of the synths that has helped my tracks stand out and took my productions up a level. It truly is a one stop shop for synthesis if you’re looking to sound ahead of the game. Bravo to Tone2 for another desert island soft-synth.
For more information and to purchase, visit https://www.tone2.com/html/electra2%20overview.html
Avid Pro Tools 12 Review Part 3 – Updates for Standard and HD
Welcome to Part 3 of a 5 part Everything Recording Review or Pro Tools 12. For Part 1, click HERE. For Part 2, click HERE. This Section explains all of the new feature updates for both Pro Tools Standard and HD.
Part 3: Features for Standard and HD
All of these visual bells and whistles make life much easier and are great but functionality is king when it comes to making audio sound the best it can in the shortest amount of time. Don’t worry, Avid has you covered. First, let’s address the changes to non HD Pro Tools.
In the past, a lot of users complained of the lack of some of the more basic features in HD that weren’t in the standard Pro Tools. Some of these changes have made it over from HD in version 12. One of the more requested features is the input monitoring button. This is finally available for all versions. On top of Input Monitoring, Pro Tools standard now comes with AFL / PFL solo modes, “Copy to Send” command, 512 Instrument tracks, VCA Master Tracks, Advanced Metering, and the Fixed RAM disk Cache. The amount of tracks at 44.1 or 48 kHz, has also increased from 96 to 128.
As we’ve covered in the introduction, the I/O section has been updated to improve feedback on changes in the session, default output monitoring, and I/O mapping changes. Functionality has been improved as well. On both Pro Tools Standard and HD, virtually unlimited amounts out busses can be created. I even tested this out, and even though it takes a while to process, Pro Tools never denied me the opportunity to create new busses. On top of the unlimited number of busses, sub-paths can be created to route busses to physical outputs. This makes routing headphone mixes and stems for summing easier to manage by simply using a send assignment to a bus. The same keyboard modifiers used in assigning inputs, outputs, and sends can be used for output busses as well.
Session mapping is now also stored in the session and the system, allowing to choose between your own I/O or the layout that was used in the current session (remapped outputs display in the session notes as green and once saved change to black). Pro Tools 12 can even detect if the monitor output has changed and will automatically select the current system’s monitor output. Since this section was being updated, a huge improvement would be to the Playback Engine setup as well. Because I travel, I switch between my HD Native at home, other HDX systems, and even the built in output of my MacBook at times. An option for a primary preferred engine should be added that will look for the particular Playback engine and select that one if available at startup. It’s a bit of a pain to have to restart Pro Tools each time I come home and change to HD Native. I get that I could hold down the “n” button to change it but I constantly forget.
From the beginning of Pro Tools 12.0’s inception, the big feature touted was “Cloud Collaboration. One of the huge gripes from users who bought the initial subscription plan was that they pulled the trigger on the new version with the assumption it was around the corner; but at the end of the first yearly subscription, cloud collaboration still wasn’t here. Finally, in version 12.5 Cloud Collaboration made its debut.
This feature allows users to create sessions in a cloud based area and work together on “Projects” in one space. Storage plans can be purchased with the option of a free plan that gives the user 500MB of space (which is about 1 average session). Although this does not seem like much space, Avid uses lossless compression to condense the session file size 70%. Plans go 500MB (free) to 20GB ($9.99 per month) to 60GB ($24.99 per month). The session stays in the cloud, but is cached to the hard drive. Although the session must be created while online, changes can be made offline and updated once the computer connects to internet again. Project creation is handled by selecting “Project” instead of “Session” tab in the Dashboard, and the person creating the Project (Owner) takes on the storage, not the collaborators. Up to 2 additional collaborators with Pro Tools 12.5 and an Avid Master Account can be brought in to a session, and communication is handled in app via Artist Chat. Customizations include the ability to only share parts of the session and plugins not available on collaborator’s systems are given the option to rent if they’re available in the Marketplace. Do not mistake this collaboration for being a “real time” function. There is no way to live stream recording sessions with audio chat and changes from each collaborator have to be uploaded back and forth. Aside from not being a live collaboration, this update is very useful and easy to use in its own right and I’m sure Avid will expand this as releases continue.
As was stated in the introduction, other DAWs started offering new features that were slowly surpassing Pro Tools functionality. One particular feature was the ability to save processing power by “locking” the current state of the track and rendering the audio until further editing was needed. Initially in Pro Tools 12.3, this was “quasi” added with the “Commit” feature. Commit utilizes features similar to Pro Tools 11’s “Offline Bounce” and “Duplicate” to render plugin inserts, clip gain, elastic audio and HEAT (HD only) to a new track. Commit works on both audio and Midi, which makes freeing up processing power very easy, especially virtual instruments.
Other enhancements to Commit allow custom settings such as pan and volume automation to optionally commit to the new track or duplicate the settings to the next track. Plugin inserts can also be committed up to a certain point and rendered, with the uncommitted plugin inserts transferring over to the new track. Additional options include committing just a selection or the whole track, consolidating clips to one continuous clip, and automatically hiding and making the source track inactive. Once the track is committed, the new track will appear as the same name but with a “.cm” appended to it.
Conversely, another way Midi can be committed is by creating a new track of the same type as the source (mono / stereo) and simply dragging the Midi to the new track. Source tracks with multiple output assignments can be committed as well. With all of the flexibility Commit allows with audio, it seems that there should be an option to select multiple tracks and Commit all to one summed track. This could very easily be integrated into the Commit Tracks’ settings and would make creating custom stems extremely quick and easy.
On top of the addition of Commit, enhanced track bouncing became available without having to route sub busses just to bounce audio outside of Pro Tools. This issue has always been a pain, especially in the past when those dreaded 9173 errors start showing up and bouncing processor heavy tracks became crucial for saving sanity. Bouncing quick stems is now very simple. Auxiliary, audio, instrument, and master fader tracks can be bounced simply by right clicking the tracks and selecting “bounce”. A menu will appear with options similar to the old “bounce audio” menu, but with a couple of extra tricks. Automation can be rendered and session name prefix can be appended to the front of the track name. Just like Commit, I would like to see an option to sum multiple selected tracks to one bounce.
Both Commit and Enhanced Bouncing definitely help free up processing power and allow for easier collaboration with others by rendering tracks with plugins the other user might not have, but these features still are time consuming. Each time a change needs to be made to a committed track, the .cm track has to be deleted, the source track has to be enabled again, changed, and re committed. In order to address these woes, Track Freeze was born.
Track Freeze is an engineer’s dream come true. Instead of having to delete committed tracks and recommit the original, some data can be rendered in the very same track and if changes need to be made, can be “un-frozen” and tweaked. Audio tracks, instrument, and auxiliary tracks can be frozen and unfrozen with the same right click on the track that Commit and Bounce use. It must be noted that Midi, Plugins, Clip Gain, Heat (HD Only), and Elastic audio can only be frozen. Mute, volume, and pan automation cannot.
Like the Commit feature, tracks can be frozen up to a certain insert, leaving the other plugins free to be adjusted. Once a track is frozen, a small snowflake will appear on the track to indicate its status. Also, if any tracks in the session are frozen, the blue snowflake under the transport bar in the top of the edit window will turn blue. This snowflake in the edit window is more than just a visual. By right clicking on the blue snowflake, all frozen tracks can be quickly unfrozen at once. Alternatively, all tracks can be frozen using the very same right click. If only all audio, instrument, or auxiliary tracks want to be frozen, simply check the type of tracks desired and only those will freeze.
When a track is frozen, all data is rendered as an audio file. Once audio is initially detected, Track Freeze will render the audio until the clip ends or audio reaches below -144dBFS for 60 seconds. This ensures that long delay or reverb tails are preserved properly. Frozen instrument tracks employ Clip Transparency and the waveform shows up with the instrument data still visible underneath. This is a great quick visual check for frozen instrument tracks. If this all seems too good to be true, well, there are a few catches to freezing tracks. For starters, once a track is frozen, there isn’t much that can be done to it. Tempo changes in the session aren’t allowed, song start cannot be changed, the conductor cannot be enabled or disabled, clips cannot be edited, midi cannot be edited, and the list goes on. Pretty much all that can be done is automation, output changes, and basic volume, pan and send adjustments. The silver lining to the restriction is in how quick unfreezing a track takes. Then changes can be made and the track can be frozen again. What makes this feature even easier is that Frozen tracks will still play on systems that do not own the same plugin chain, just don’t expect to be able to do much editing until the track is committed and then taken off of the session.
Stay tuned for Part 4, where we get into the updates for Pro Tools HD only.
UVI Rotary Plugin
The Rotary speaker effect is an effect rarely put into plugin form. Usually it is simply thrown into an organ virtual instrument or as an afterthought. UVI have given the effect its very own plugin.
UVI announces Rotary, a modern emulation of the classic rotary speaker effect, delivering deep controls and wide-ranging tonal possibilities for a multitude of applications, available now at an introductory price of $49 | 49€
Paris, March 30th, 2017 – UVI announces Rotary, a modern emulation of the classic rotary speaker effect available now at an introductory price of $49 | 49€ ($79 | 79€ after April 5th). Rotary represents an evolution of the original design, delivering both a faithful reproduction of the iconic cabinet sound and a sophisticated musical tool for today’s artists and audio professionals. With an efficient and powerful engine and ergonomic interface, Rotary provides precise stereo mic placement and deep back panel controls allowing a huge range of tonal possibilities. Rotary can easily enhance any sound or instrument including guitars, keyboards, vocals and more by adding natural harmonics and creating the sensation of movement and depth.
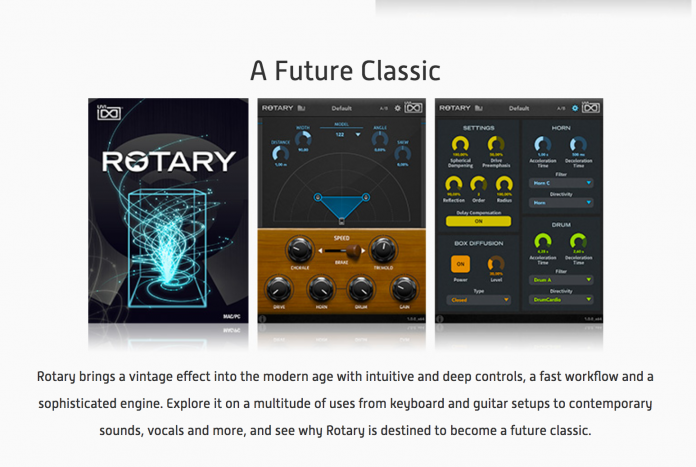
Multiple vintage rotary speaker cabinets were extensively profiled and modeled to allow both accurate reproduction of the original hardware sound and full parametric control over the mechanism, making completely new effects possible. Rotary’s tone can be easily shaped with discrete command of the horn and drum, including level, filters, acceleration and deceleration times and cabinet size, with results ranging from subtle to extreme, nostalgic to avant-garde.
Rotary’s simulation extends beyond the cabinet and into the room, providing fully independent positioning of 2 microphones. Quickly dial-in mic distance and width and then experiment with asymmetry to create interesting stereo effects, even click-drag the mics to easily position them anywhere you like. All controls are fully automatable allowing for custom evolving setups to be created in moments.
Rotary brings a classic effect into the modern age with an intuitive interface, deep controls and a versatile tonal palette, making it a unique and powerful tool useful for a multitude of applications.
Rotary is compatible with current versions of all major DAWs on both Mac and Windows platforms (VST, AU and AAX). A single license includes 3 activations that can be used on any combination of individual computer systems or iLok keys. A 15 day trial versions is available free through uvi.net.
Pricing and Availability:
Rotary is available immediately at an introductory price of $49 / 49€ through April 5th at uvi.net(regularly $79 / 79€)
Additional Information:
Additional information on Rotary is available at:
https://www.uvi.net/rotary.html


