76.2 F
Houston
Saturday, July 27, 2024
AffiliateMusic Software Bundles from Pluginboutique.com
Home Blog

MY WAVEFORMS ARE WEAPONS: THE AUDIOSCAPE D-COMP

“Oh my God, not another one.” – Mrs. B Church

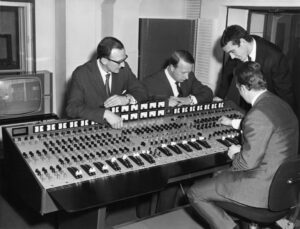
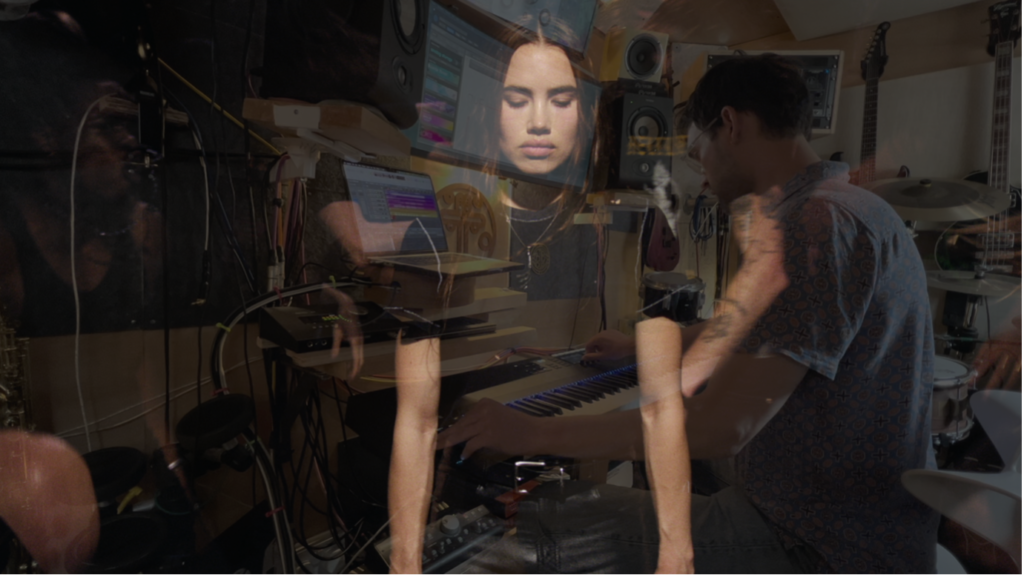
That’s the thing about leaving the big studios and setting up shop in a converted NYC bedroom, I guess. Not that my wife could tell you what any of my gear is or what it does in the context of producing music. Or that she cares, despite my occasional excited demonstrations. But splurge for so much as a new set of fancy 500 series thumb screws and she’ll smell the UPS truck from a zip code away. 

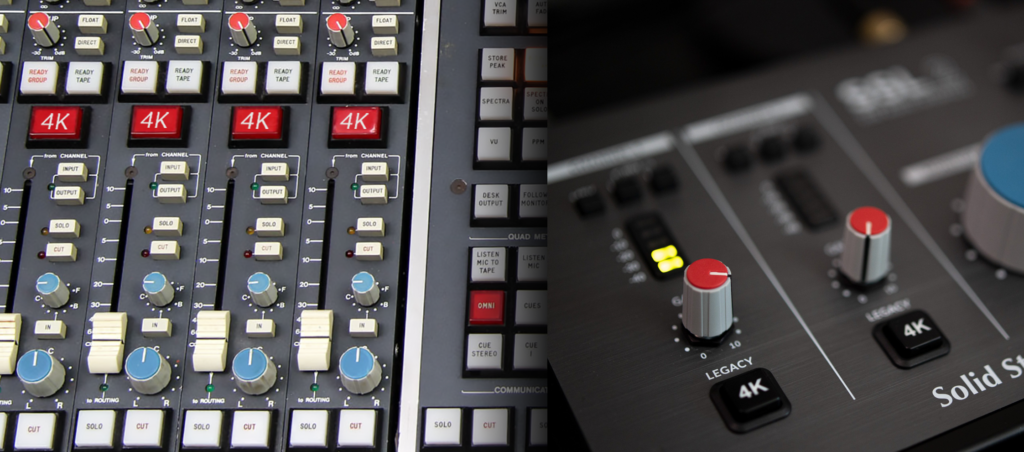
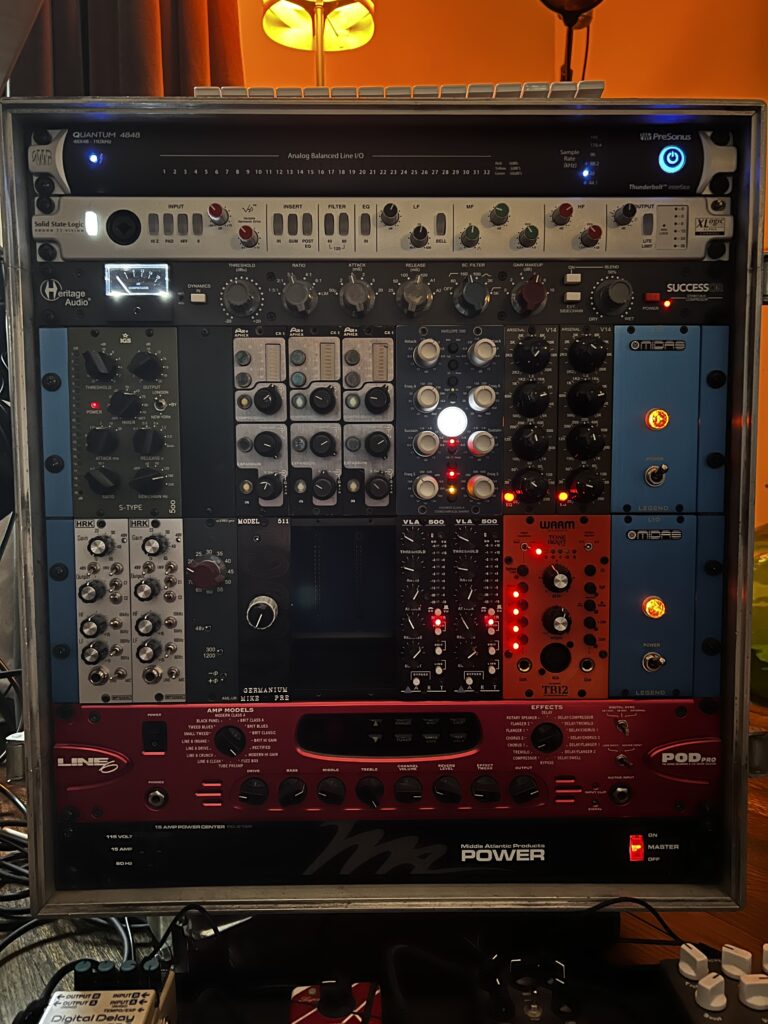
Her “ugh, it’s your money” groan trailed off into Miss Othmar’s trombone disdain while I disappeared behind my already-stuffed-full rack of vintage and vintage-inspired gear in search of two free channels to send to-and-fro my packed-to-the-gills interface. Seriously, a 32×32 converter might seem like overkill to most in these in-the-box times, but I’m using nearly all of it.

DO YOU EVEN AUDIOSCAPE, BRO?

Floridian bespoke makers AudioScape have been steadily cementing a very lucrative niche in the music production world. While they’re certainly not the only boat in the ‘vintage revival’ ocean, their products are handcrafted in small batches with love and attention to detail. Oh, and an uncanny ability to meet the market at the kind of price point normally occupied by units mass-produced halfway around the planet. 

And while a sizeable portion of their portfolio offers excellent recreations of stalwart studio greats (just in case the rock you threw five feet missed the other G-Comp and LA-2A clones out there), they’ve got a few pieces that take inspiration from where the technology’s been to build something that can truly define where we need it to go.  

No time for racking. Time to get cracking.

THE D-COMP: DYNAMICS IN A D-CUP

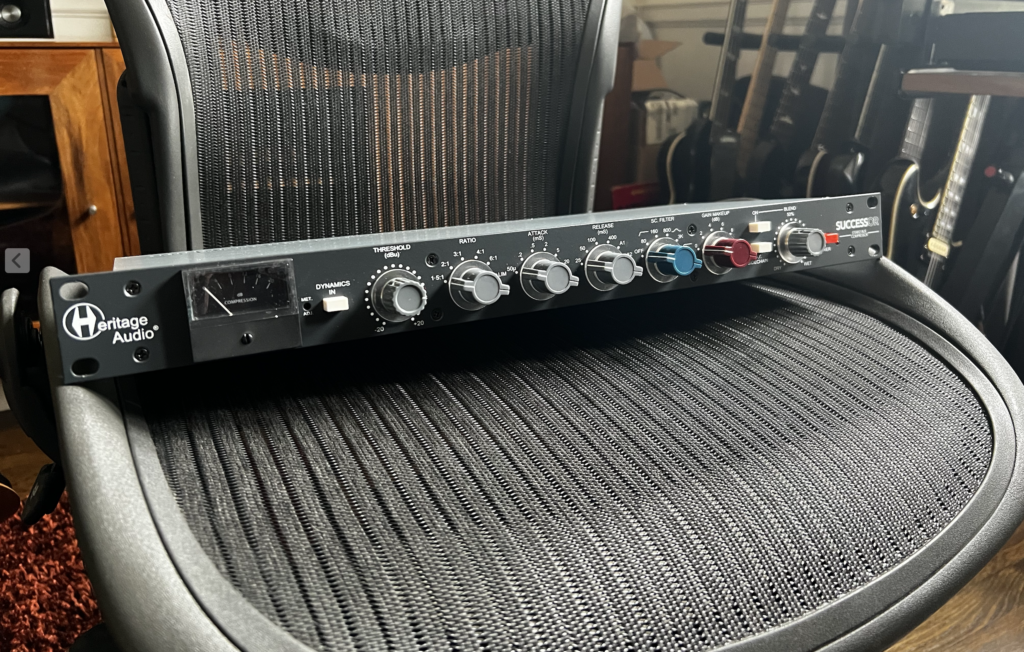
AudioScape’s DC-101 “D-Comp” ventures off into a place a bit more its own. From a 10,000-foot vantage point, the D-Comp is a dual-mono/stereo-linkable compressor/limiter based on four hand-matched pairs of zener diodes. Diode bridge compressors, like the Heritage Successor we reviewed earlier this year, are a much-less-common topology compared to VCA’s or optical attenuators. 

Why? In this modern day where we tend to buy analog outboard more for character than utility, that’s a fair question. Because, like the even more-ignored PWM compressor sound, nothing really sounds quite like these chest-beating tone machines. Zener compressors can not only clamp down on transient-rich material faster than a feral cat at a bird feeder, but they do so with a distinctive attitude uniquely their own. The goal may have been transparency in their 60’s/70’s salad days- but that’s not what happened. Call it ‘mojo’ if you want. I don’t. But you can.

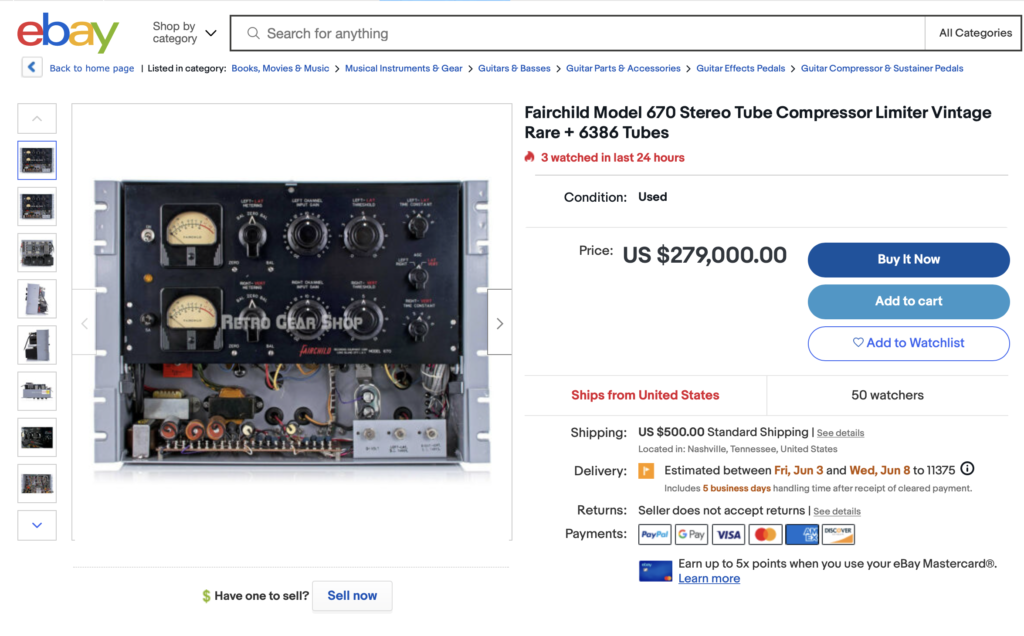
Where the Successor is a modernized stereo-only Neve 2254 with many excellent nice-to-haves like multiple hi-, low-, and even notch-filters before the sidechain and a parallel blend control, the D-Comp seems to have taken some inspiration from the hallowed EMI TG124 design used famously in Abbey Road Studios’ golden era. This original design was chasing after a similar sound to the Fairchild 670, using diodes in place of the EZ-Bake Oven amount of tubes.

Back here on Earth, the D-Comp does its will as it is in Fairchild/EMI Heaven closer to the Chandler TG-1. But like the aforementioned Heritage, the addition of several key features open up an entire new set of controls and tonal options – expanding the list to a much, much wider set of potential applications. 

Set your alarms for 7:59 PM, these things go quick.

MEETING MY ONLINE HOOKUP

Even getting your grubby little mitts on an AudioScape anything takes a little more than a PayPal account and a young cowboy’s smile. Here in NYC, there’s a bakery that has chocolate croissants that are, and this is not for the lack of a better word, orgasmic. Thing is, everyone from within about three subway stops knows this and you’ve got to be there, patiently waiting in line on a Sunday morning at 9AM sharp to get one. 

That’s a quite similar experience, actually. AudioScape produces small batches, all hand-wired and assembled right in the Floridian swampland of guns, flags, and bald eagles. Feedin’ time begins promptly at 8:00PM every Wednesday and Saturday night and whatever they’ve got is going to be sold. Quickly. And if you aren’t reloading their page with your payment information ready to go, you’re going to miss out. We’ll call it “part of the fun” – just know it’s not as simple as a trip to Sweetwater.

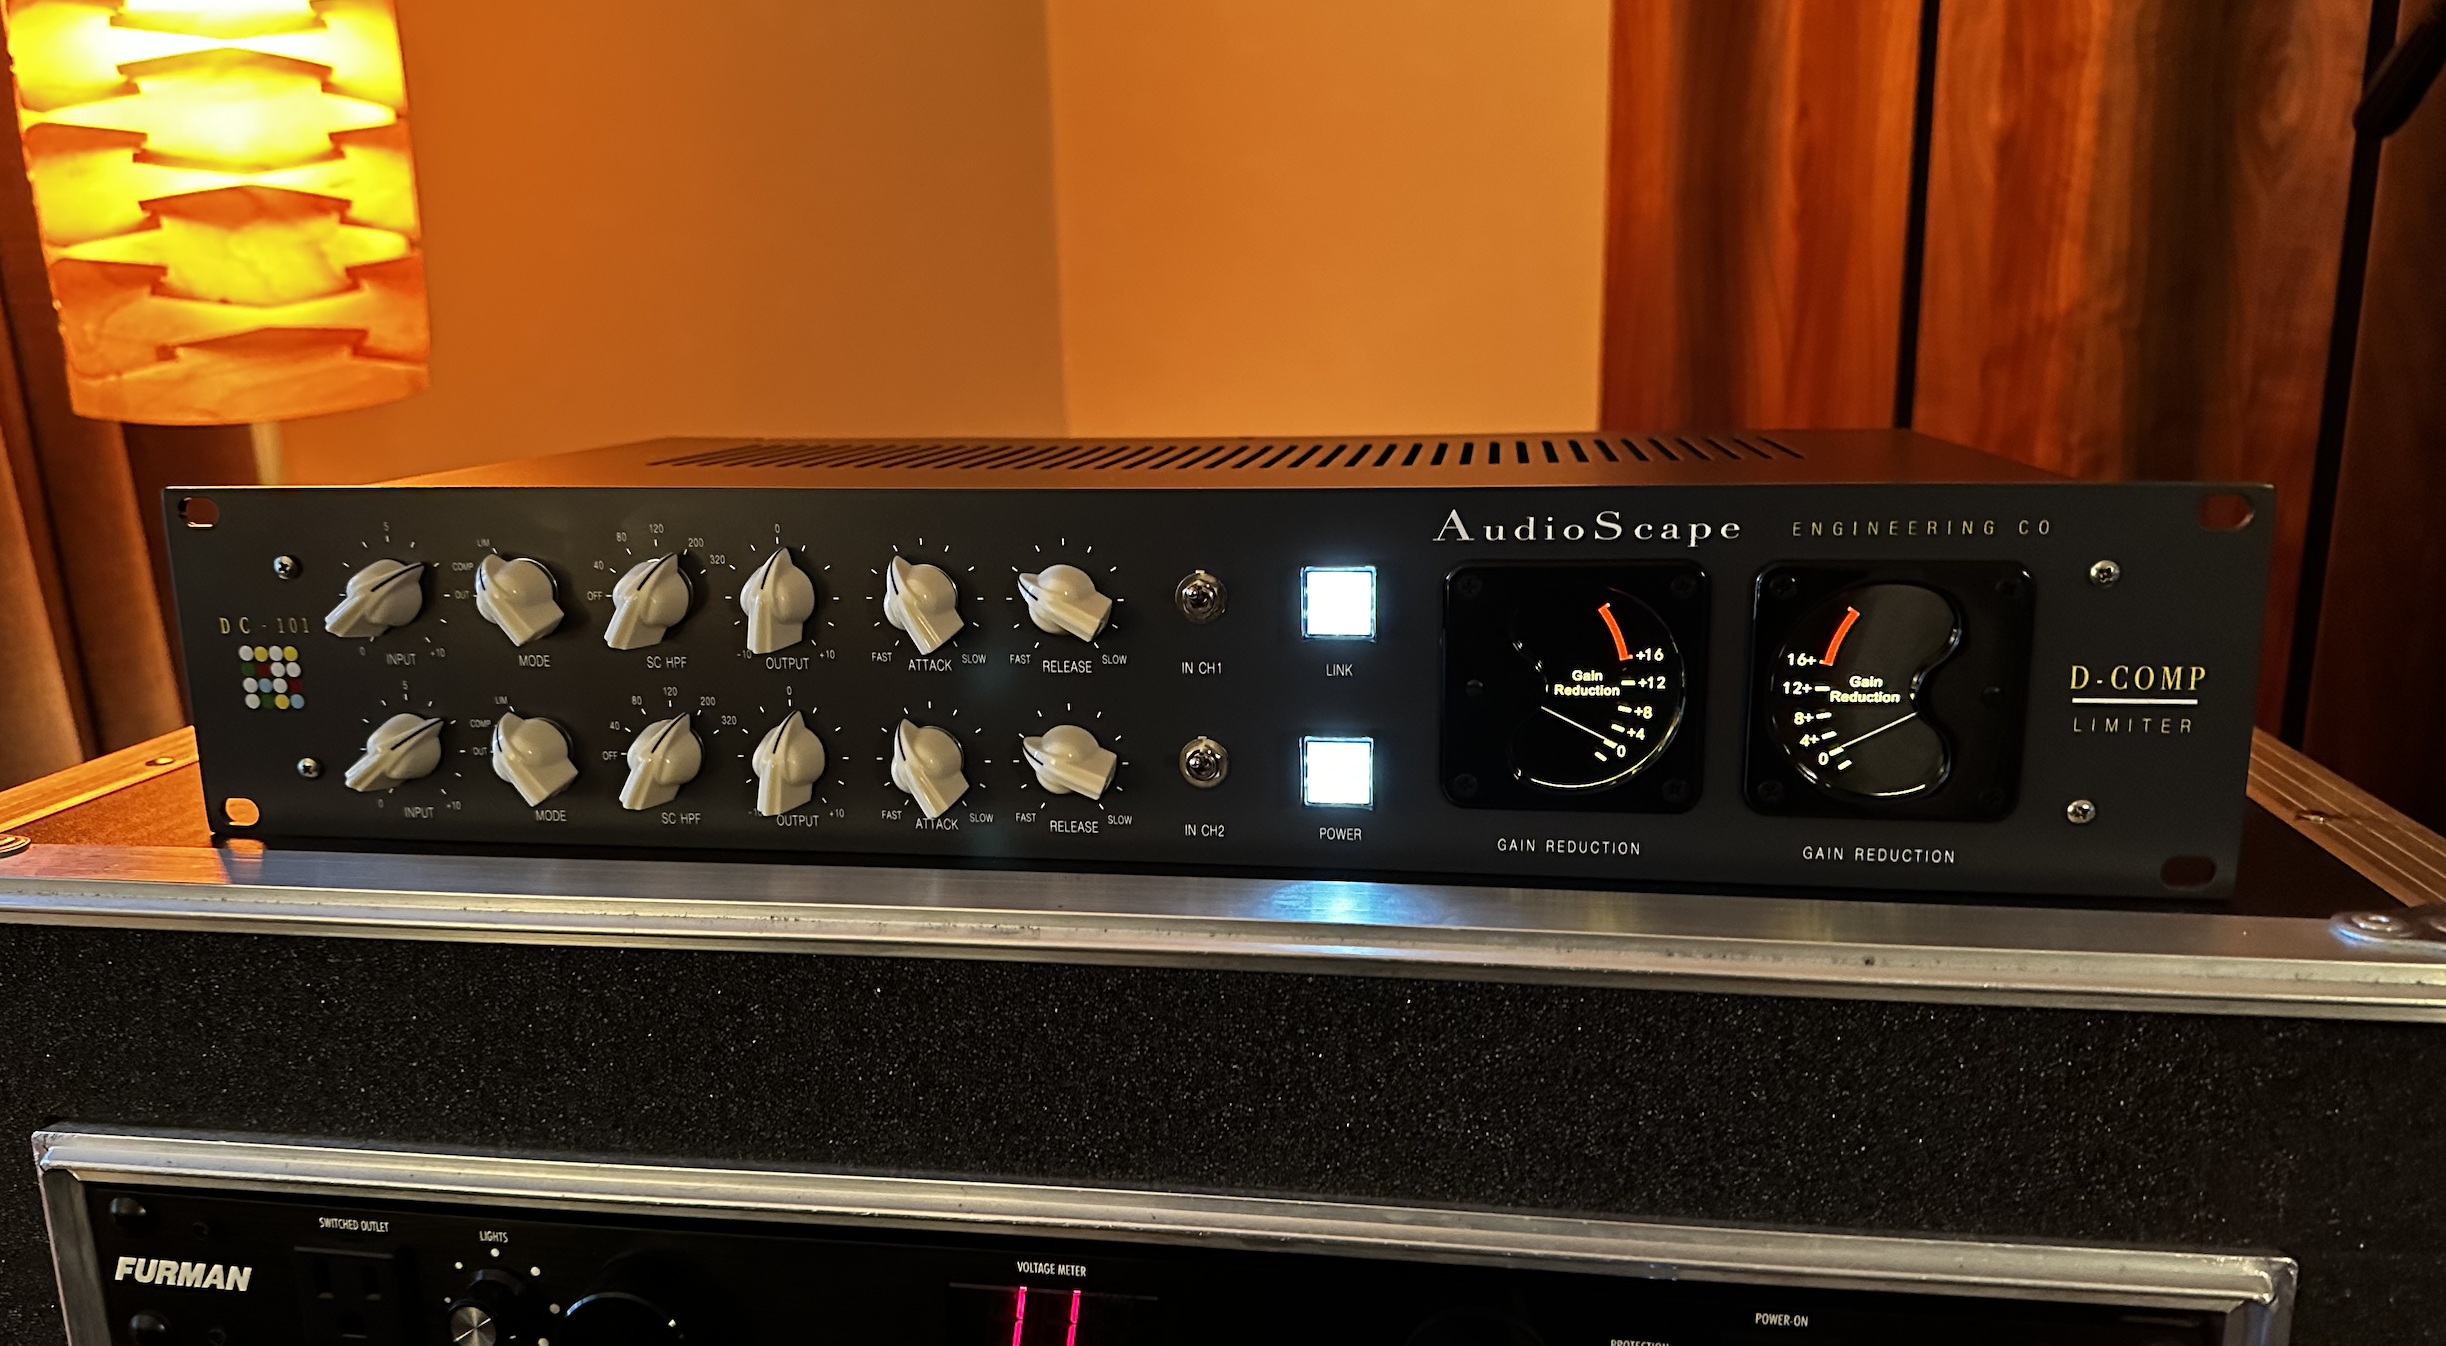
Pulling the DC-101 from its cardboard confines, I was immediately struck by the handsome, sturdy build. Across the board, every corner, knob, and connector felt solid and in it for the long haul. A chonker of an external power supply filled me with confidence that there would be headroom to burn (and less heat inside my admittedly tight amount of rack space). With the Neutrik connectors clicked into place, I hit that jolly square power lozenge and ceremoniously cracked my knuckles to see what the buzz has been all about.

CONTROL FREAKS REJOICE!

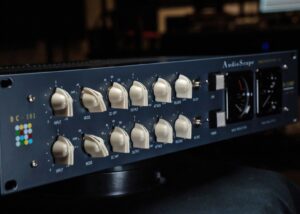
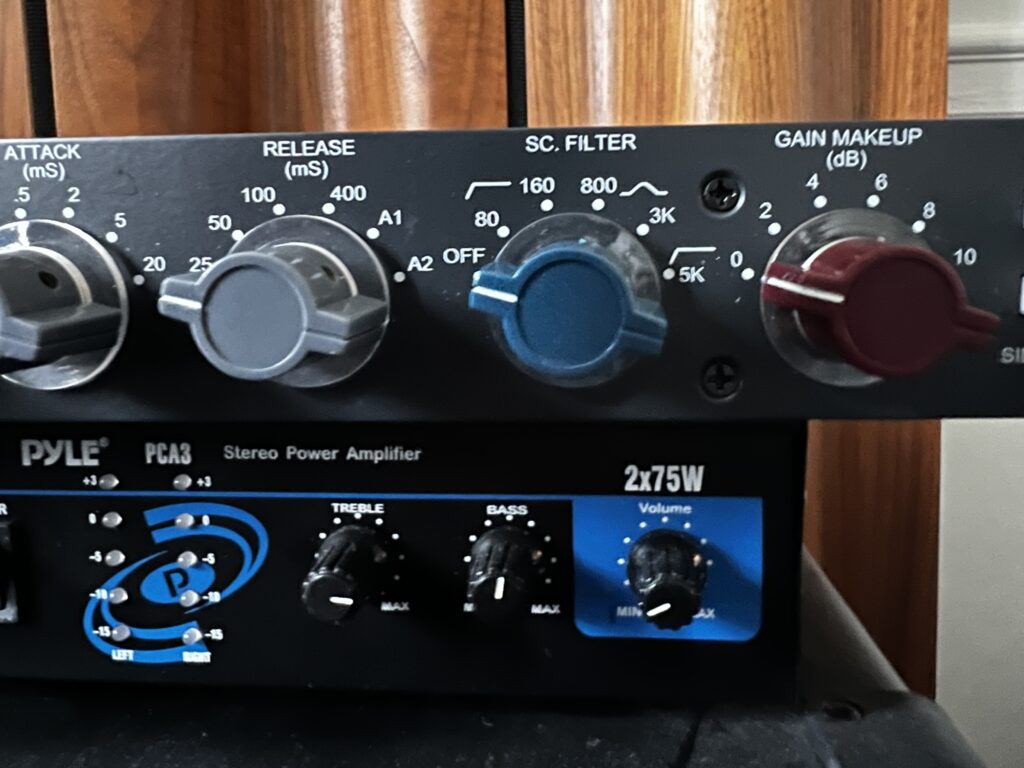
Scanning the DC-101’s gun-metal grey 2U housing, you’re greeted with a matching top and bottom set of Bakelite-inspired chicken-head knobs, in/out toggles, and a pair of utility push buttons for power and stereo-linking that seem to have fallen off of an SSL delivery truck. Oh, and a bookmatched pair of nice big, backlit gain reduction ‘eyebrow’ VU meters for those of us who like our eyes to back up our ears. 

Tune in, Tokyo.

The controls are stepped where they need to be, and continuous where they don’t (but I wouldn’t complain if they were). The independent input pots go from a non-descript zero to ten, which absent a threshold pot you use to set the amount of compression or limiting. Speaking of, that’s the next stop to the right, where you select either ‘out’, ‘comp’, or ‘limit’. The first is for simply giving your uninspired audio a trip through the D-Comp’s input and output stages, soaking up the magnetism of the Cinemag balancing transformers. 

Select “comp” for a gentler ratio which, though not indicated in the admittedly sparse documentation, sounds about like a 2:1 or 3:1 ratio under normal use. And, as you probably had guessed, thwacking that dial over to ‘limit’ tightens the leash up to a much more spanky ratio in the 20:1 range.  

Next stop along the way is a six-position control for inserting a sidechain hipass filter with points at 0 (off), 40, 80, 120, 200, and 320hz. This gives you tremendous agency to keep kick (or even snare) drums, bass fundamentals, or those basement-dwelling 808 notes out of the comparator, letting the D-Comp tighten up the octaves the listener hears, while leaving the part the listener feels rumble on. 

There’s no one-size-fits-all here, and often toggling one click to the left or the right, even if you think you’ve set it correctly, reveals a different sound that might just be a wee bit better. I try (try) to not mix mathematically, even in this latter-day era of being able to key in frequencies to the fraction. This is a box that is far more rewarding for those who are working with their ears.

You’ve got output levels on a continuous (not stepped, mad face emoji…) control. If you’re looking to simply bake your tracks with the D-Comp’s internals, this comes in tremendously handy – letting you drive the inputs into deep red without crushing your converter or console return on the way back. Keep a grease pencil handy – unfortunately that’s how a unit like this manages user settings. Welcome to analog, kids. 

To the right of the output stage is an 11-step control for attack times. Again, the D-Comp is light on the actual values in both use and documentation. My grizzled old ears would offer that those clicks go clockwise from “mere picoseconds” to “lazy Sunday drive”. 

And finally, oddly, the release times are continuous and not indicated in any tangible way in terms of value. So close your eyes, push the unit into audible pumping, find the time that works, then back off the inputs. Voila. Just like grandpappy used to do.

Each channel offers its own in/out toggle, using two hands to do both at once would be kind of maddening if I wasn’t controlling the bypass from my DAW (but makes plenty of sense for dual mono operation). The aforementioned “link” and power buttons and those big eyebrow vertical VU’s round out the package.

Wait… what do these funny gauges mean, again?

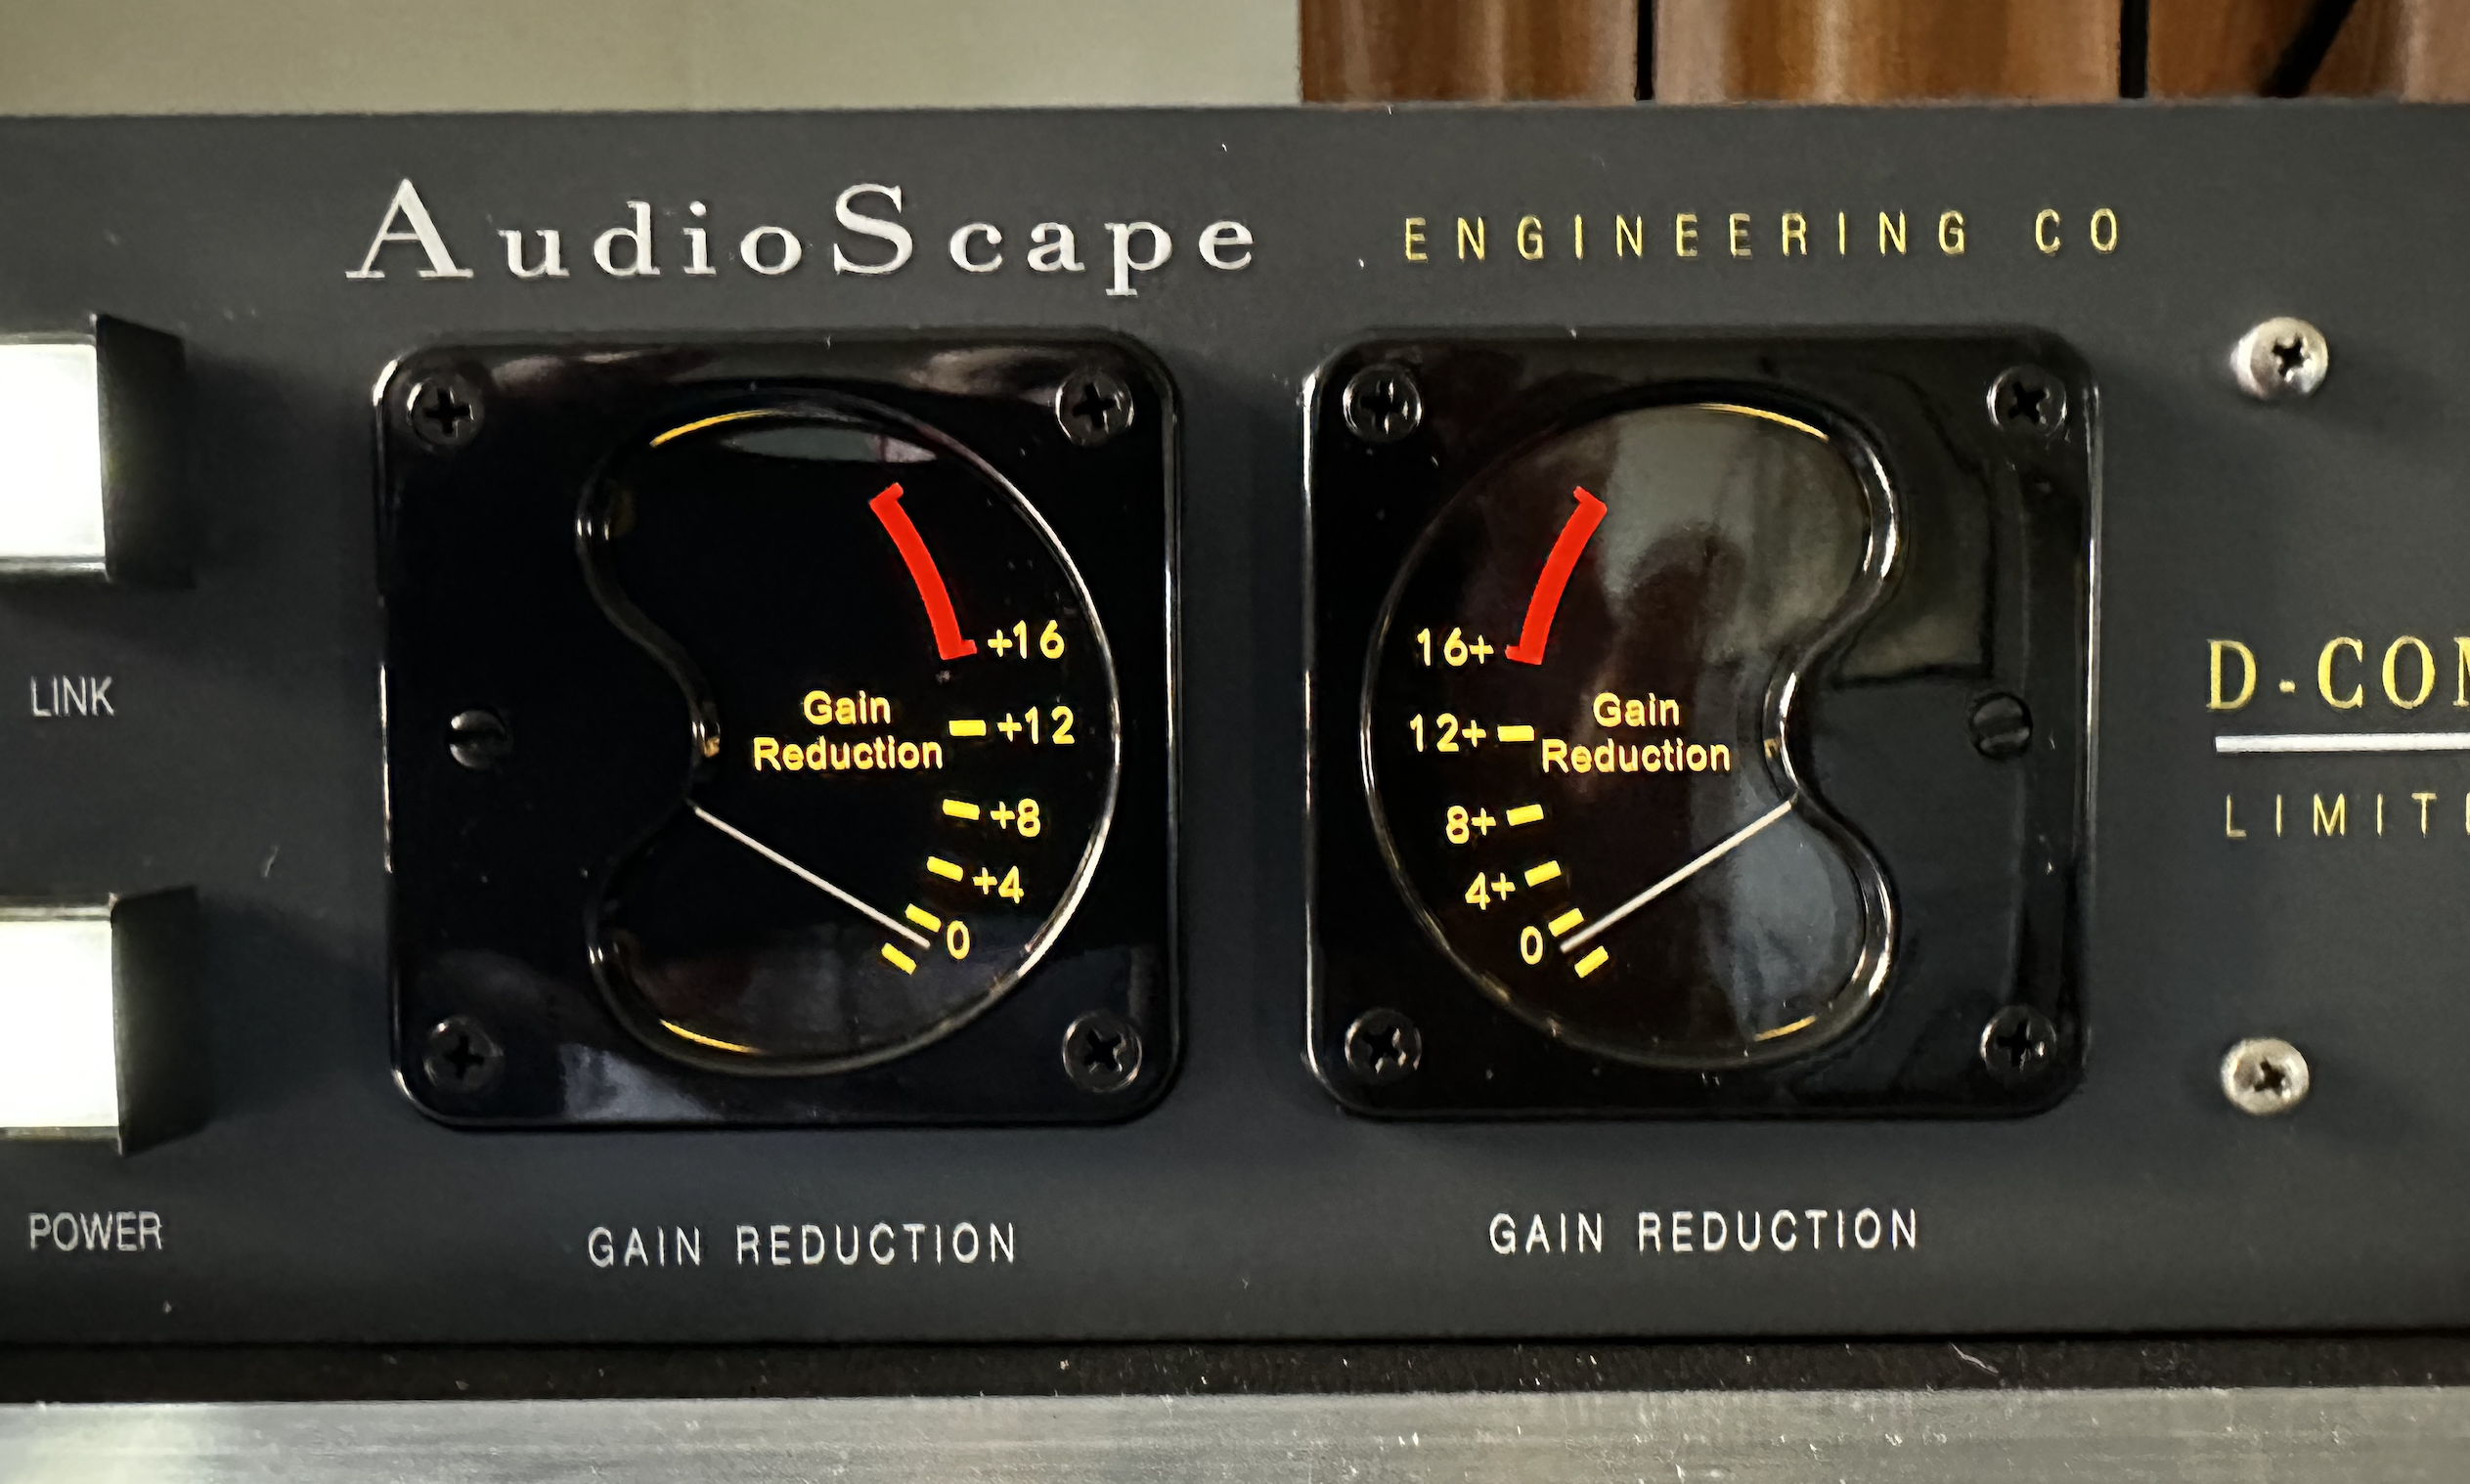
I do have to point out the irony that, though things like db, ratio, and milliseconds are completely absent anywhere on the DC-101’s faceplate, both VU’s have “Gain Reduction” written on them, right above where it says “Gain Reduction” under each one. A cum laude graduate of The School of Redundancy School. Does this matter? No. Describing what the knobs and blinking lights do is not the fun part of a piece of gear like this, anyways. We’re moving on.

FIRST STOP: POUNDTOWN

Let me just get this out of the way: if you never even so much as put the AudioScape D-Comp on anything OTHER than drums, you’d still be getting your money’s worth. And that’s not just due to its market-savvy $1499 price tag, either. The DC-101 takes to drums and percussion like a fat kid to birthday cake, with metaphorically similar results. 

Applied sparingly, the spaces between the notes are teased back towards the front of the soundstage, letting your ears bathe in overtones and decays you thought the recording process had passed over. Shades of EMI Studios’ storied history begin to flicker in your head with every passing beat and bar. Those famously awesome drum sounds on Radiohead’s “OK Computer” are now available in a rack-mount configuration.

Just like Abbey Road (sort of), but you don’t have to wear a tie. And you get more than 8 tracks!

Not content with re-recreating the work of Geoff Emerick or Nigel Godrich? The D-Comp understands. Go ahead and push those input levels a little harder, let the needles plunge a little deeper, and your drum mix (or overheads, room mics, whatever…) become damn-near impenetrable. Even loops or programmed drums that once sounded like microwaved leftovers seem to find new life – bits of new sonic information that was written off long ago. As stated above, the D-Comp is more like chasing sound with a vintage Moog than the menu-driven Yamaha DX-7’s that supplanted it. Its rewards come more easily to those who twiddle, not program their way to the sweet spot. 

You could be led to think that the AudioScape D-Comp is designed to be a “vintage flavor” based on its lineage. “Vintage” is one of those words that is truly in the ears of its beholder, however. But you needn’t be in a Lenny Kravitz Cover Band Cover Band to reap the benefits. I had just received my 10th anniversary vinyl repress of Basement’s massively overlooked “Colourmeinkindness” LP and was lost in the nuances of its pedalboard-gazing epic mix, thanks in no small part to an absolute beefcake drum sound. Very now. Very modern. And very much the sort of thing this compressor can dole out effortlessly.

With diode bridge compressors’ tendency to get ‘pumpy’, the sidechain HPF is a godsend – letting bass drums have as much or as little influence on the overall picture as you please. At its highest 320hz setting, most snare fundamentals will also avoid tripping the alarm as well. The fastest attack time seems to be almost ahead of the notes – though that’s scientifically impossible given the whole time-continuum thing, I could swear there was a crystal ball hidden somewhere inside. 

You really can throw this at any source or sources and find a new sonic footprint. The D-Comp is transformative on both close mics and stereo pairs. I personally couldn’t take it OFF my stereo drum bus duties. Even with the meters matched to within 1db, bypassing the unit seemed to yank the very bones out of my mix. A pair of Coles 4038 ribbons that were about 20 feet out from the kit in a particularly live space run through this thing conjured images of Godzilla laying waste to Tokyo, breathing fire through its nostrils. 

BASS. HOW LOW CAN IT GO?

Though the LA2A and dbx160 continue to be many the discerning ear’s ‘go-to’ for bass guitar, the AudioScape DC-101 can do some pretty amazing things here. 

I was working on remixing a lesser-known poppy-ish, emo-sh, garage-ish band’s 2012 LP for a 10th anniversary release. It was literally brought to me on one of those antiquated all-in-one mixer/hard disk recorder things that replaced the personal four-track around the turn of the century (albeit with sixteen whole tracks and, luckily, an optical output). Having had nothing to do with the original recording, I wanted to preserve the unintentionally no-fi aesthetic that comes along with recording with $1000 of gear in a makeshift rehearsal space while also making the result a bit more tangible. 

The conundrum? The bass guitar was overlooked, despite the playing and parts themselves adding a lot of counter-melody and weaving wonderfully with the drummer. It didn’t help that the entire signal chain was likely no more than the ¼” cable plugged right into the recorder’s input. That sinking feeling you get when you hear “we just DI’d the bass,” before receiving a project? This is what you’re cringing about.

Plenty of iron inside to warm up chilly tracks like hot cocoa.

I sent that wimpy DI’d signal out to a small guitar combo and returned both signals to each side of the D-Comp. Before I could even look at the settings, I was already in love. The secret? I was wailing on the inputs, the gain reduction meters reading “WTF?!?!” Backed off to something a bit more conservative (but still pretty slammed), everything just glued itself together wonderfully. Knowing full well I was going to want the unit back on drum duties, I printed the results to new tracks. 

FULL-THROATED APPROVAL

Vocals through the D-Comp are an absolute joy. Though the law of simplicity would likely see most pulling this compressor in on a vocal submix – which it does wonderfully, gluing voices and notes together like fly paper with a wonderful shimmer  – that’s just a scratch on the surface.

Still working on the aforementioned band’s demo-as-master recording, I was wrestling with making a single, solo vocal part feel both up at the front and situated amongst the rest of the mix (side note: As a card-carrying member of Generation X, I hail from the school of not making things sound “one part vocal, one part everything else”). I can’t imagine the original track was recorded with anything more than an SM57, which in of itself is not a problem. The fact the singer chose to perform the song while drunkenly wandering away from it was. 

The fix? “Pimp My Compressor”. Or, in the less-than-immortal words of 2000’s Detroit rapper-turned-game-show-host Xzibit, “we heard you liked compression, so we put a compressor on the compressor.” Put another way, I patched the output from channel 1 into channel 2 and ‘double-pumped’ the performance much the same way many engineers I look up to use an LA2A into an 1176. Take the hard peaks off aggressively with the first channel, then let the second add a gentle push-pull glide with a long attack and release.

We heard you liked vocal compression…

The fact that this approach brought out every reflection in the room in the process? Well… we call that “freeverb”.

Did it work? Infallibly. I sent off some “are we close yet?” mixes to the artist and they couldn’t believe what they were hearing. The vocals had presence and immediacy for the first time in the decade since the first CD hit the shelves. Oh, they liked the drums and bass quite a bit as well. This box really did put in work. 

BUT CAN IT RIDE THE 2-BUS?

A lot has been written about what makes the perfect mix buss compressor. And there are many separate, oft-warring tribes of thought here. Johnny-In-The-Box might have eight plug-ins stacked up – compressing, then expanding, then saturating, then compressing, eq-ing, limiting, and widening (but seemingly never inserting a phase meter). Others prefer to handle those sorts of things in sub-groups, leaving the master fader to apply just the slightest bit of necessary polish.

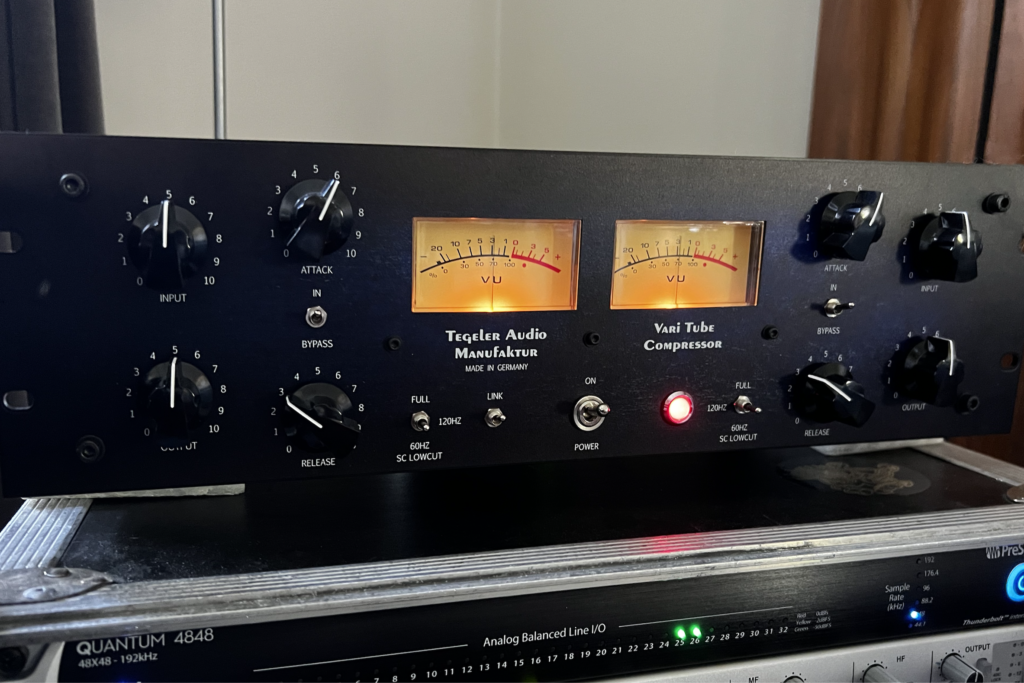
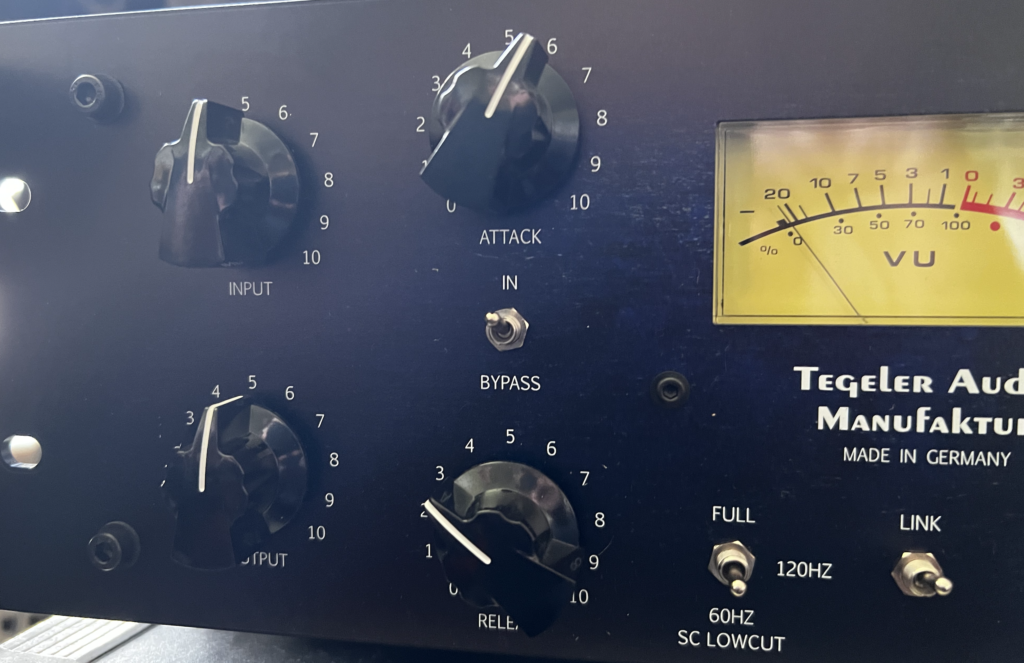
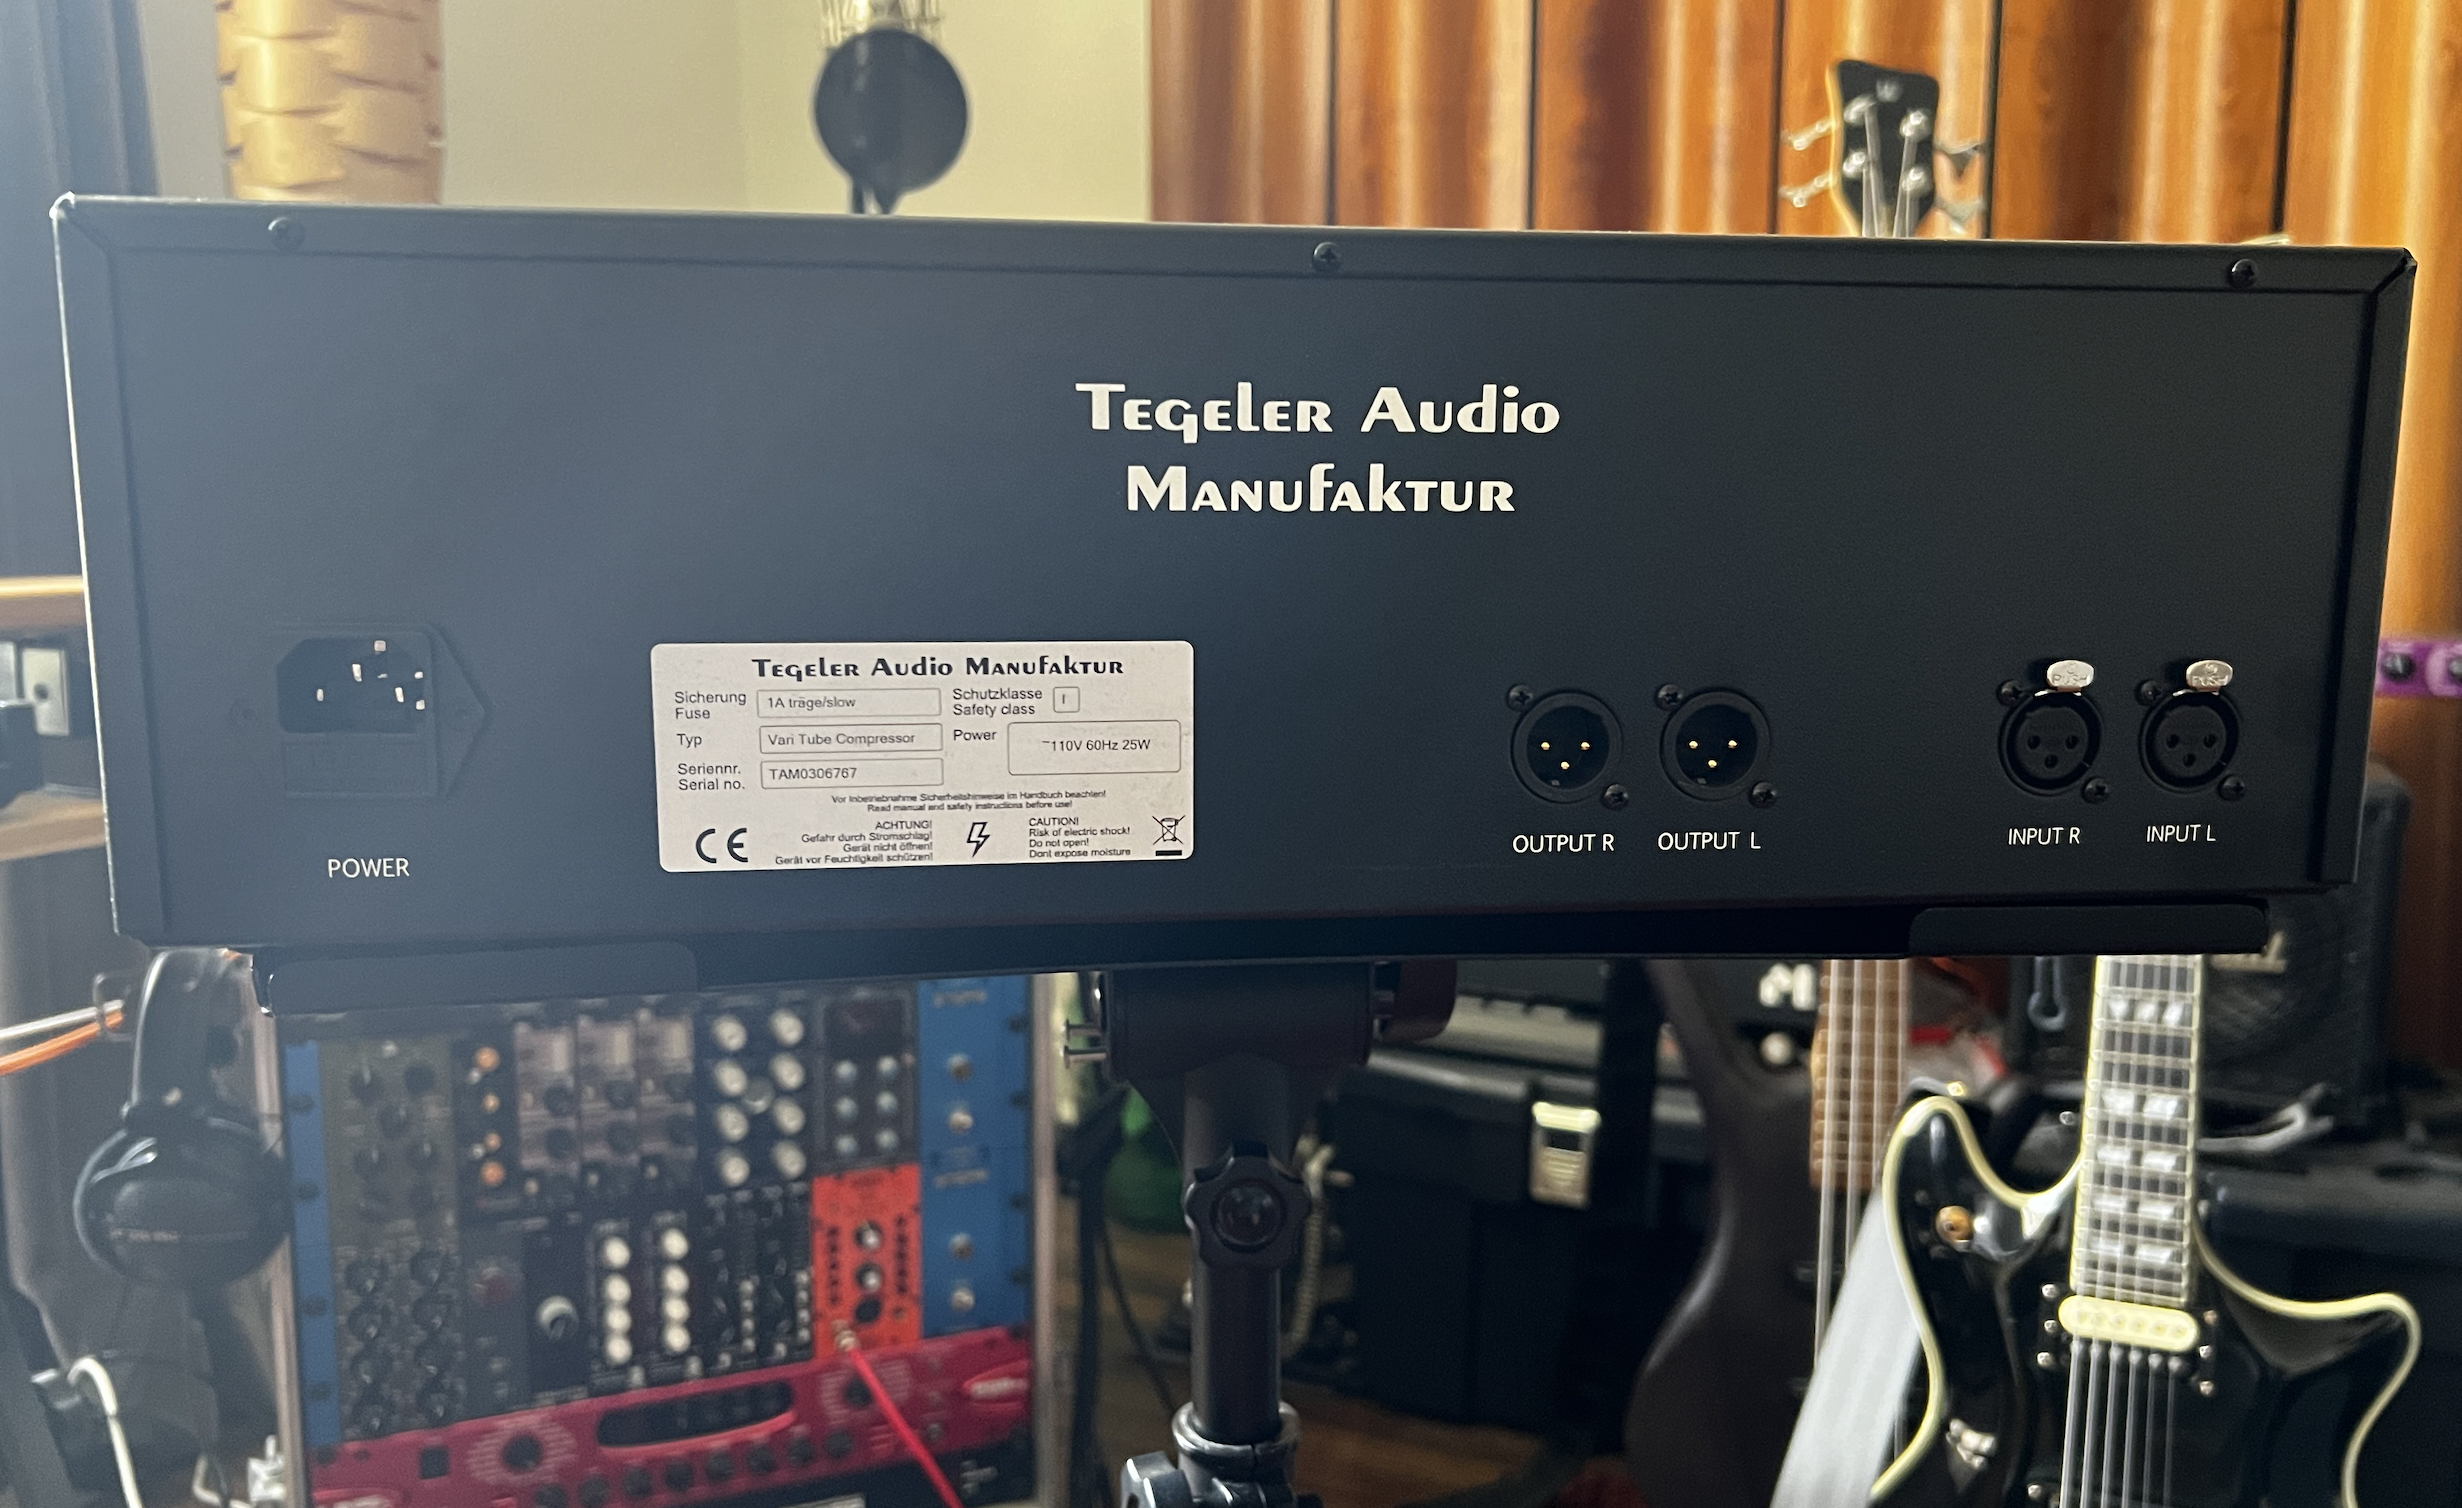
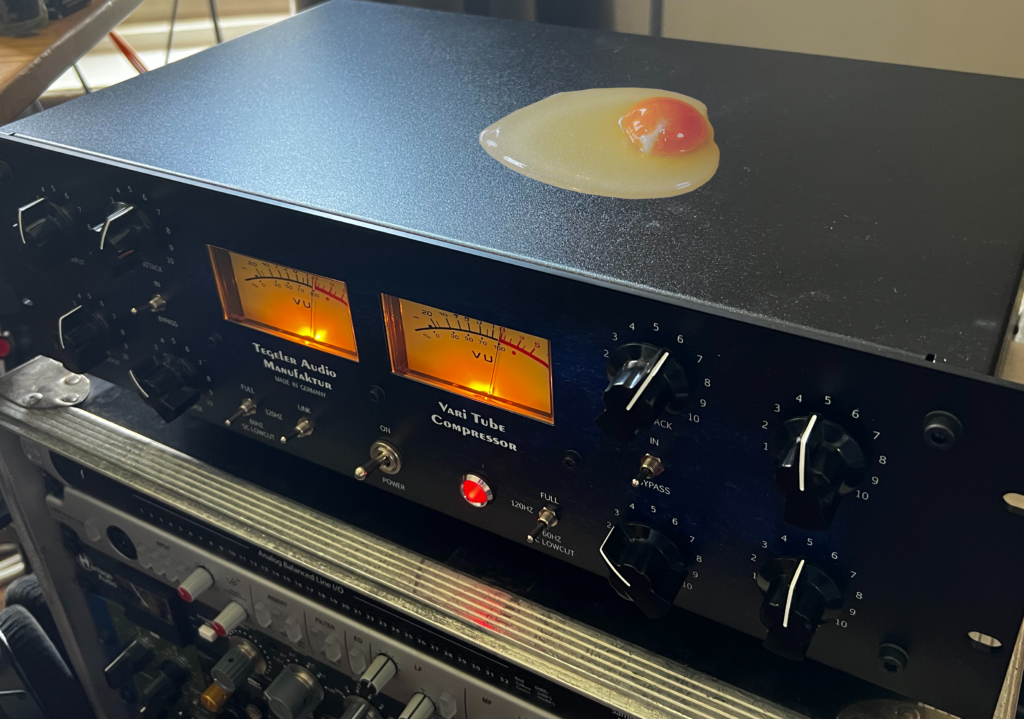
Me? I’m somewhere in the middle. My two favorite hardware compressors for just a bit of gentle level-hugging in the final two channels are the Stam SA-4000-II or the Tegeler VTC (which I fawned over here not too long ago). Now, one is a modern take on a vintage design and the other is… wait, they’re both that, actually. So, with one being based on a VCA and the other on tubes, why not give the D-Comp’s zener network a shot?

The 2 Bus Awaits

To be honest, I never liked using the Neve 33609 (or any of the clones like my Successor) on mix buss duties. Too tubby. Too pokey. It just made things feel mushy and wrapped in a wet blanket. “Warm?” Sure. But dull. 

But the D-Comp is a different animal. Much has been said about the EMI console’s seemingly magical abilities to spin lead into gold. However, all but a select few peoples’ experience in use is a plug-in approximation. And that’s fair, this is hardware that’s esoteric – even the Chandler TG-1 from where the D-Comp draws inspiration commands a fairly hefty price. Maybe not Fairchild 670 prices, but still… you can buy two DC-101’s for less than the Chandler (which doesn’t even come with a power supply) and still have plenty left over for more rack space and cables.

Anyways, my experience on 2-bus work was mostly good. Source dependent. Modern rap and metal mixes tend to be inorganically slammed to the tits with all kinds of digital look-ahead gazillion-band limiting where the sound of software being pushed to the 65th bit is de rigueur. And that is most certainly not what you use a unit like this for. BUT (and I like big buts, I cannot lie), that’s not to say the D-Comp can’t be part of the fun. Before (or after) you crush the last breath of life out of your precious dynamics, the AudioScape can warm up the chilling effect that all that digitosis imparts. 

You needn’t even switch the compression in, just spike the the inputs a bit and let those transformers do the work. Or back off DigiCrushMaxMasterPro a few (or a few more) db and let the DC-101’s limiter snatch the back end of those big peaks. Point is, yes, it definitely does that. It may not be designed to do what the mastering-chains-of-the-damned can, but as part of this complete breakfast? I’d sooner send a piece of analog hardware in to add a bit of warmth and polish. Put another way, when somebody gets around to creating a plug-in version of the AudioScape D-Comp, I’m betting that the actual unit still wins in the final lap.

THE SATURATION FASCINATION

Just a quick aside here about using the DC-101 as a saturation unit. Yes, it totally does that. In fact, it can deliver the wooly goodness outstandingly well. But to my mind, it’s kind of like driving a Lambo to the grocery store. Drive those inputs like sled dogs, back your outputs off, and the D-Comp will give you full run of the transformers all you like. But, just so you’re aware, it’s got two lonely channels of world-class compression in bypass. 

Yeah, because we need more of this…

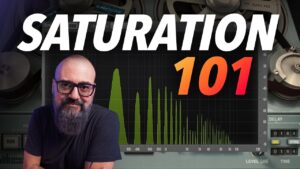
Frankly, the chatter on newbie-encrusted internet forums about saturating the saturated saturations is just the result of too many content-driven YouTube videos. A little bit of those Cinemag transformers can be… uh… transformative to otherwise brittle sources, yes. But I’m also reminded of Prince engineer Chuck Zwicky once showing me his “pigtail transformers”, where he just soldered a discarded Jensen JT-115 between two snipped ends of a spliced XLR cable. Because that works, too. And all for the total cost of a mic cable and a decommissioned piece of iron.

BUGS AND BUGS-AS-FEATURES

I don’t think there’s such a thing as a perfect piece of hardware or software, nor is there ‘one box to control them all’. Don’t get me wrong, there are some really great tools out there that are all but completely indispensable to my workflow. Some are expensive, some aren’t, but they do a certain thing in a best-in-class way for the sound I’m chasing. 

My gripes are pretty minor here, especially when you realize just how much you’re getting and how good the D-Comp sounds. The lack of an external sidechain input is the lone half-star killer here, as a compressor that can pump like Hanz and Franz should be able to heave on command from any external source. And having stepped controls for release times and output level would really add an extra cherry on top of an already great dessert. 

Paradoxically enough, I find the AudioScape D-Comp’s biggest bug to be its best feature. Whether it’s using the input levels to set the threshold or finding the right attack or release, you don’t “enter values” into the DC-101. You earball it with those weird semi-circles affixed to the side of your head. I even found the “gain reduction gain reduction gain reduction” metering a little off – what I was hearing didn’t seem to jive with what I was seeing. 

Mixing tools.

Does that matter? Well to me, no, not much. For the decades I’ve spent using my thumb, forefinger, and ears to suss out the right EQ point, reverb tail, or compression ratio, the D-Comp represents a rewarding return to purity. Back when there were men among us who didn’t have presets. When you used a calculator to figure out delay times and soldered your own patchbays. I couldn’t help but picture myself on a paper towel roll package, chest hair protruding from my flannel shirt as I carried an entire winter’s worth of firewood on one shoulder. That’s right – the D-Comp made me feel (and my mixes sound) like a burly manly man’s man. Sorry, fellas. Even with the new compressor, Mrs. Church still likes me. 

CLOSING THOUGHTS AND A GALAGANALOG

You can get a plug-in that approximates what the AudioScape D-Comp does for next-to-nothing. Hell, Analog Obsession has DSP solutions that are donationware that, to the casual listener, sound pretty close. And I get it, $1499 is considerably more than the change in your coat pocket. 

But somebody in the production process has to be dissatisfied with “pretty close”. And we are that somebody. If you’re unable to hear the difference between the D-Comp and say… the Waves TG plug-in? Well, we can recommend some new monitors for you – or our handy multi-part guide to treating your mixing space. Because there is a difference in the way a circuit behaves and the way software emulates the way a circuit behaves. Maybe you don’t need that final 5% – but you owe it to yourself to hear the difference.

We do kinda miss that Galaga machine…

I’ll leave you with a strange analogy. I am a hardcore Galaga player, to the point of once having the actual circa-1983 cocktail cabinet in my studio’s lounge (I loved it when clients would crow about their prowess and challenge me – then have to negotiate off the hours of studio time while I racked up 2,000,000 points without losing a single ship). Anyways, the way the game is played with the original ROM chipset versus the way it’s emulated on modern consoles and PC’s is the difference between me hitting a world record and bombing out by stage ten. The differences to the outside observer are near-imperceptible, but to the person playing it, they’re vast. 

That’s why there are those, and I count myself among them, who will always find just that extra juicy tidbit of awesome in the way electrical current flows through a circuit like the AudioScape D-Comp. Let Donny DSP and Vinny VST tell you there’s no difference all they want. They’re bringing boxing gloves to a fist fight. 

Ultimately it’s your budget that dictates how much that extra little bit matters. For my money, $1499 of it to be exact (oh, yeah, I totally bought this), the AudioScape D-Comp is beyond a mere bargain. Even racked up against some serious competition, I can’t imagine a single situation where I couldn’t find a seat at the table for this amazing box.

AudioScape D-Comp
4.5 / 5 Reviewer
Pros
• Effortless ability to put meat on a skeletal sound.
• Far more flexible and versatile than its forebears.
• Solidly built by a solid US company from solid components.
Cons
• Exact values are anyone's guess.
• No external sidechain input. Bummer.
• Stepped controls across the board would've been nice.
Summary
AudioScape's D-Comp is a truly special piece of vintage-inspired gear with modern accouterments and applications. Unmistakably analog, with class and character to burn.
Rating


Sam Thomas – The Making of the Kontakt/NKS The Sound of Love Lost Virtual Instrument

The Sound of Love Virtual Instrument

Instead of doing a review for this post, I decided that the Virtual Instrument “The Sound of Love Lost” was unique enough on its own to warrant an article on the making of. Also, instead of me trying to describe it, why not let the creator himself explain. Today we have Sam Thomas showcasing how he made this very innovative and fresh-sounding Kontakt/NKS Virtual Instrument.

Isamaya Ffrench Love Lost

What on Earth is “The Sound” of Love Lost?

I am honoured to have been given the floor by Bryan at ER to write about my debut, labour-of-love sample-instrument for Kontakt/NKS, The Sound of Love Lost. What on earth is ‘the sound’ of love lost? The answer isn’t straightforward and spans most of my 15 year career as a composer/producer and multi-instrumentalist. The simplest answer is that it features in the climax of my new single ‘Love Lost’, released with Isamaya Ffrench, taken from our debut collaborative album ‘Mantle’, mixed by David Wrench and mastered by Heba Kadry (released by Iconoclast).

Sam Thomas Music The Sound of Love Lost

More info, sound/video demos and the order link can all be found at samthomasmusic.com/the-sound-of-love-lost

Since releasing my debut solo album ‘Blind Theatre’, produced by Mark Sutherland of Café Music Studios, I’ve been lucky enough to have run my own studio for around 7 years. As is the case more and more with producers of my generation, I have needed to rely extensively on sample libraries, especially in order to create my signature ‘full-scale’ cinematic sound.

Sam Thomas The Sound of Love Lost

Determined to Do Something Unique

The market is highly saturated with amazing sounds, and my take is that more and more of music production is increasingly about curating sample libraries to taste – being in the know about the best one to select for yourself or the client in any given situation and doing it quickly in order to maintain creative momentum. Because of these contextual factors, for my own instrument I was determined to create something unique. I wanted a sound that wasn’t quite a guitar, synth or organ but that carved out a niche somewhere in the space between all three. Something that, love it or loathe it, couldn’t be found anywhere else.

The name is as much a part of this as the sound. It is ambiguous and, I hope, evokes a feeling, it is more than just a technical description. TSOLL started life from a not-particularly-celebrated guitar pedal, the Boss GT8, it grew from there to become my personal favourite of all the sounds I’ve ever come up with and now I want to share it far and wide.

Sam Thomas The Sound of Love Lost

Happy Accident

When studying music at The University of Westminster, I was primarily concerned with becoming the best guitar player/composer I could be, rather than sonics. For live shows I wanted to be able to flick quickly between different sounds and the GT8 was my solution. As I’ve become increasingly experienced in sound and production I’ve replaced every part of the GT8 on my pedalboard with superior or analogue pedals, but cumbersome as it is, there’s one sound I stumbled across by accident: impossible to accurately recreate with anything else to the best of my knowledge, and believe me I’ve tried. It’s essentially a super high-gain lead sound mixed with GT8 synth, pitch and sometimes wah effects. I’ve always found it to be an endlessly fun, exciting and versatile sound: it has a ginormous, throaty Godzilla-esque growl that glitches and ‘craps out’ in a perfectly imperfect way, such a human sound from such a digital pedal. I started using it mainly as this highly textured and harmonically rich, sludgy bass sound but increasingly realised that the higher I played it the sweeter it became and could therefore be used as a lead tone or layered to become a beautifully ethereal pad.

Sam Thomas The Sound of Love Lost

Over the years I have refined, tweaked and optimised it to be the best it can be. I removed any trace of nasty amp-model to make the source as pure as possible. I have experimented running it through various pedals on my monster-sized pedal board to get just the right amount of warmth and harmonic enhancement. I made sure the chain was as pure and as perfect as it could be with Mulder Audio cabling throughout. I experimented putting it through various amps over the years and settled on a guitar/bass amp combination, with all the highs rolled off on the bass amp, effectively using it like a subwoofer.

You get the picture, essentially, I felt like this sound was like a gift that I had a responsibility to preserve, optimise and share.

Meticulously Sampled

For the sampling itself, I wanted to capture every aspect this one sound really meticulously, as I think it’s versatile enough and doesn’t need layering with other banks. I started with the bass-end and let the notes ring out naturally to get the full evolution of growly movement and texture that comes as the note dies off. This ended up being 20 seconds so I then used an Ebow or sustain pedal to replicate the hold further up in the most natural way possible.

Sam Thomas The Sound of Love Lost

On the GT8 the sound has quite a different character if the wah is or isn’t on and these two sounds became the basis of the ‘Love’ (no wah) and ‘Lost’ (with wah) halves of the instrument. I decided to go for a ‘step wah’ approach sampling each note 11 times for the ‘Lost’ sound (counting from 0), the 11th being the same notch value as 10, but with full sustain across all the notes rather than a natural bass tail, so in the bottom end the note doesn’t relent from the intensity of when it’s first played.

These notches can be triggered by velocity or via a slider and can make for some really interesting dynamic rhythmic staccato effects. Every note passed individually through a Cranborne Audio Camden 500 preamp and an Empirical Labs DocDerr for extra warmth, harmonic enhancement and just the right amount of tape sim. Finally I added some unusual (funnel shaped from top to bottom in the case of ‘Lost’) and sometimes moving panning effects and enhanced the sound as a whole, before sending it to mastering engineer, Anni Abigail Casella to do further enhancement and optimisation with fresh ears.

That “Ah-ha” Moment

Without wanting to get too off topic, I feel that failing to mention what a momentous feeling the inception of the instrument was for me, would be failing to tell the whole story. I do a lot of meditation and due to my obsession with music and sound, when I have really deep meditations I ‘hear’ the experience a lot in my head. I had a particularly deep and sudden meditative experience like this and was totally blindsided by this ginormous energetic feeling inside of me that translated into imagined sound. It shifted something in me and finding a way to recreate this sound as best as I could in the real world instantly became an obsession. Because of the chaotic nature of the sound, playing it polyphonically on guitar isn’t possible, but I realised that if I sampled it across and entire 88 key range and played it as an enormous sustained chord: that would be the closest possible recreation of what I ‘heard’.

Back to its name sake, the Love Lost song, it seemed so serendipitous that I had this experience just in time to get the instrument ready for the release date. Not only did the (guitar version of the) sound feature heavily but I had gone a stage further with it, and blended two instances of it in different tunings to create a sinking-feeling phase effect. The song starts in A440 tuning and gradually slips down to finish in a mix of A440 and A432. I included this effect within the instrument itself, I also liked the A432 meditation and new-age conspiracy connotations being part of the marketing, a bit of a gimmick perhaps but a fun one I thought and there’s no denying that it does create an interesting effect to blend the two tunings together. The panning is also swapped with one tuning and the other so blending the two fills in any gaps and makes the result more symmetrical.

Sam Thomas The Sound of Love Lost

I hope this background on how the instrument came to be is of some interest and that it contextualises it and justifies its reason for being. I also hope people go on to get as much enjoyment and creativity from it as I have had in the past, and continue to get from it in its new incarnation.

For more information and to purchase, please visit. https://www.samthomasmusic.com/the-sound-of-love-lost

The Sound of Love Lost NKS

THE REAL F-BOMB: THE FLOCK AUDIO PATCH

As you may suspect, reviewing gear does have some pitfalls – a handful of drawbacks but usually your run-of-the-mill “good problems”. The latter presents itself as a membership to the “Tone Hoarders Club.” Over the twelve years we’ve been writing reviews, I’ve amassed a modest arsenal of outboard gear – so much so that Everything Recording has adopted the crest “Si mutuari verisimiliter emas” (if you demo, you will probably buy). While Flock Audio’s PATCH can’t teach restraint on your gear “collecting” hobby, it can relieve some of your woes of having too many “I’s” / “O’s.”

OUT WITH THE OLD.

Years ago, I decided to take the path most engineers with a spending problem do – I got to the emotional root of my spending problem  I bought a lovely 96-point TT Bantam patch bay. Very quickly, I realized I hated it. There wasn’t anything wrong with the thing itself – I just didn’t like having to do Rain Man-esque calculations to get a mic from my snake, through my input chain, and then into my interface. Quickly I realized this wasn’t what I wanted in life, so I sold the patch bay and accepted the obvious – I don’t need this much gear I bought the Presonus Quantum 4848 interface.

OUT WITH THE OLD (AGAIN).

At this point, I had Quantum’s 48 inputs and outputs. Life was good. Well, sort of. While I had a point for every piece of gear, I don’t have a 48-channel snake (nor would I want one). I also wanted to use hardware in my DAW, and while I like Studio One for its routing options with Quantum, I still do a lot in Pro Tools, and the technology doesn’t transfer to Avid products. In the end, I exercised restraint and worked with what I had I sold the Quantum and got a Pro Tools Carbon (review here!).

You may wonder why, after all that headache, I ended up with an interface with only eight onboard inputs and outputs. The answer is simple: I’m not Hanz Zimmer and only need about eight inputs at a time. And more importantly, Flock Audio sent over a Patch system to review. I no longer had to stress over spaghetti-laden patch panels or limited inputs.

IN WITH THE NEW.

In 2019, Canada-based Flock Audio kicked the door open of the recording community with quite a claim. The press release for PATCH touted “the world’s most advanced digitally controlled, 100%-analog patch bay routing system.” They had my attention. This unassuming 1RU black box seemingly housed all my routing hopes and dreams. So what’s the catch?

It seems there isn’t one. PATCH promises to take the headache out of routing by linking their hardware not only to your interface, rack goodies, or mixer – but to your computer and utilizing software to control the signal path, all without using traditional patch cables. Simply open the software, create a cascading signal chain, and PATCH does the rest.

PATCH comes in several sizes, starting with the 32-point Patch LT ($2,199.00), moving up to the model we’re reviewing, the  PATCH ($3,299.00 for 64-point), all the way to the monstrous (but oh-so-lavish) 192-point Big Gulp PATCH XT ($13,995.00). The only functional difference between all three is that PATCH XT has an additional Ethernet port for those longer cable runs. At the heart of each model is the same technology; just more of it as the price goes up.

Regardless of the models, if you need more ports, you can host a veritable PATCH party by connecting several units just as you would with a traditional patch bay. The app readily serves as your party planner, with tools to differentiate between units.

IT’S WHAT’S ON THE INSIDE THAT COUNTS.

While the outside is straightforward, the inner workings seem much more complex. Flock Audio is understandably tight-lipped about what goes on inside PATCH, but they do say that it contains a “patented analog matrix” that can be controlled by their software. I’ve asked around, and my conclusion of what’s going on inside the PATCH comes down to three choices:

  • Relays (unlikely due to introduced noise)
  • FET Switching (possibly, but Flock did say no FET switching when I asked)
  • Flock Audio actualized that we do, in fact, live in a simulation, and instead of harnessing this power to cure the world’s ills, use it to route your “sick beatz” through gear.

Although we can’t say for sure exactly what’s going on under the hood, I did pop the top of the demo unit to see what’s inside. I didn’t see Morpheus or Neo, so the simulation theory is blown.

While not a Flock Audio-made power supply, the brand made me chuckle.

“This power supply is fantastic; best power supply ever made. Beautiful Bigly power – we use this at Mar-a-Lago to power the entire estate. Wonderful power supply.” – The power supply’s namesake (probably)

LOOKS CAN BE DECEIVING.

Flock Audio Patch Front

The exterior is inconspicuous in looks. The 1RU box is black with minimal white text, a few LEDs, and many DSUB-25 connections on the back.

About these LEDs, I will say it seems that Flock Audio has somehow harnessed the sun’s power because these LEDs are very bright. You may want to keep the unit out of your eye-line because they could nearly light a room. I wish there were a “dim” feature in the app for these guys because they are a bit much.

Despite winning Everything Recording’s “this is a flashlight too?” award, the status lights serve some crucial roles.

  • The HOST SIGNAL LED tells you if you have a connection to the PATCH app.
  • 48v PHANTOM POWER tells you if you’re supplying any ports with PATCH’s onboard phantom power (LT users, while you have phantom power capability, you’ll have to determine whether it’s on or off via the Patch App).
  • EXTERNAL 48v WARNING detects if any of your gear has phantom power enabled, perfect for those old ribbon mics you don’t want to damage by accidentally pumping 48v to the mic (again, LT doesn’t have this LED.)

On the left side of the front face sit two input and output jacks. This is immensely useful for those impromptu “I need to throw down a quick vocal or guitar track” moments in the control room. For us at Everything Recording, these ports are an absolute godsend. We are constantly demoing hardware for reviews, and a set of stereo inputs and outputs right in front give us faster interfacing for testing and an excuse not to have to dive behind our desk and behold the abomination that is our current cable management situation.

All I wanted to do was quickly patch in the Tegeler VTRC for a demo, and now Jenny from the Block is pulling me out from behind my desk.

Even though I don’t quite understand the phantom power addition as a “need” to the consumer, PATCH again has helped Everything Recording hide our shame. There’s an SSL VHD-4 preamp that we’ve had forever and the phantom power died for some reason.  The rest of the unit works fine as long as I use dynamic mics, so my condensers have been persona non grata for the SSL. Thanks to PATCH, I have my channels (and dignity) back.

PLUG IT IN, PLUG IT IN.

After a bit of planning on your part and connecting your gear to the correct ports, you’re ready to get to the fun part – the software. PATCH even includes a handy sheet to note which ports you connect your gear to during the initial setup. This helps when entering equipment into the PATCH APP, but after you’ve populated the app’s hardware page, you can tuck the sheet away in a drawer. The app takes over from there.

This very sleek interface makes routing a breeze. Check out my Stereo Bus strip with sidechain, along with a reamp chain into the Kemper.

The software setup could not be more straightforward. Install the software, open it up, and verify that the “HOST SIGNAL” icon in the bottom right is blue. Open the “HARDWARE” menu on the bottom left and name your ports. Inputs and Outputs come linked by default, but when you need to separate the ins and outs, click the icon that looks like a padlock to unlock.

Pro Tip! If you’re going to unlink, I strongly suggest appending “input” and “output” to the names, or you will quickly get confused when selecting connection points. How do I know? I made this mistake and kept blaming the PATCH for not routing when it was my ineptitude causing the issue.

Now that everything’s properly configured, you’re off to the races. The center section of the app has 32 of what FLOCK’s “PATH” configurations, ready to be populated, much like the insert section of your DAW. You simply drag the piece of gear to the path, and away you go. A/Bing gear in your path works the same way as your DAW – right-click the item you want out of the chain, bypass, and audio will flow right past your gear. You can even skip spaces; the app handles it with no problems.

Need to run one mic through two different preamps at the same time? PATCH has your back – click the arrow to the right of your path, and PATCH will mult it to the next channel. We use this constantly for demoing multiple preamps at once, reamping guitars, and parallel processing, to name a few. How is this feat accomplished without the typical 4dB drop in gain? Here we defer to Flock Audio creator Darren Nakonechny, “Without going too far down the engineering rabbit hole, there is a level balancing circuit for multing applications. This is why there are no impedance or level issues when splitting (aka multing) a signal as many times as the user has available I/O compared to literally taking a single signal and splitting its audio.”  

Scenes can also be saved and recalled instantly. During tracking, I’ve got specific configurations for multiple scenarios: drums, guitar tracking, gang vocals, etc. You name it, I can recall it. When it comes time to mix, I’m set there as well. I select my mix scene, and my entire mix bus is on one insert in my DAW. I can bypass what I don’t want in the PATCH APP without having to create custom configurations for every combination.

FUTURE PROOF.

We all hate buying something to have it obsolete in a year. Flock Audio understands this and also wants to eliminate e-waste, so they’ve made it simple to apply future updates to existing PATCH systems with firmware updates. When spending this much on a patch bay, you want it to last long, and Flock Audio has that area covered.

Flock Audio also has some software expansion on the horizon with the PATCH APP DX. Although not free like the standard PATCH APP, DX promises features that will be worth the cost. In promotional materials, we see that you can store photos of gear settings for recall, mic positions/measurements, and the ability to run the PATCH APP as a plugin in your DAW. The future looks bright.

FINAL THOUGHTS.

I honestly have nothing specifically negative to say about PATCH. The price is steep for the commoner, but it is worth it. PATCH does precisely what you need a patch bay to do without all the furrowing of the brow and cable nests. Do the internal components color the signal like people pontificate about on popular mastering Facebook groups? Maybe, but I don’t have Bob Katz’s Cocker Spaniel hearing, and I couldn’t tell the difference when I recorded a pass with PATCH and another without it. This begs the philosophical question: is it worth the .001% THD if something makes workflow better? Maybe not for a mastering engineer who can hand draw the frequency curve of their flatulence, but for the rest of us, it’s probably a non-issue.

I’m not going to lie; the day I had to pack the demo unit up to send back was a dark one for Everything Recording HQ – both emotionally because I didn’t want to mix without it and physically because the LEDs illuminated the entire house (last LED joke, promise). Usually, I’m sad when a piece of gear I review leaves the studio, but after a week, I realize I can manage without it. That is not the case with PATCH. I’m not exaggerating when I say it’s tough to muster the strength to do sessions now. Everything is so much more unnecessarily complicated. I can’t, correction; I WON’T go back to working without PATCH. So, I’m not doing SQUAT until you readers either write me a check for one of these or buy enough using my Sweetwater affiliate link. Just kidding – more great content is coming soon.

Price: $3299.00. To buy, please consider our affiliate link (here). It doesn’t cost you any extra and helps keep the lights on.

PATCH Rundown:
5 / 5 Reviewer
Pros
• Eliminates the headache of using patch cables
• Front Panel inputs and outputs make quick patching a mic or gear a cinch
• Could not be easier to use. Software is sleek and straight to the point
Cons
• Price is a bit steep
• LEDs on unit could light a room. Needs a dim feature
Summary
Your workflow will never be the same after using it. Flock Audio has taken all of the guesswork and unnecessary complications out of moving signal around your studio. Finally, the DAW workflow is in your hardware.
Rating

GOD COMPLEX: CRADLE’S THE GOD PARTICLE

Though a little light on control, Cradle’s The God Particle is big on sound. Does TGP deserve a spot in your plug-in folder? B Church puts aside his bias towards celebrity engineer plugins and black box solutions to give you his take.

C’MON, WE ALL DO IT

I liken plug-ins like the Waves’ “One Knob” series or any similar “black box“-type processors to online adult content. Though you’ll never meet anyone who’s an outspoken enthusiast, the fact is it’s clearly popular. You’ll never hear an engineer cop to using one-click mastering plugins – and your Uncle has only heard of PornHub in passing (don’t forget to scrub your browser history, Uncle Dave!).

I’ll casually admit that I’m not immune to the siren song of an easy solution to common problems, particularly getting a rough mix polished up for easy digestion or ‘hearing it finished’. These black boxes aren’t the sort of thing I usually reach for in a final mix – but again, that’s me. And like all that “horny stepsister” action lurking in the web’s dark corners, clearly there’s enough demand for its proliferation to continue. 

Though Cradle’s “The God Particle($79.99USD, AAX, AU, VST3), based on the mix bus processing of studio ubermensch, Jaycen Joshua, may not be ‘my kind of tool’, I’m approaching this from the mindset of today’s project and bedroom studio producer. I am a mix engineer with an emphasis on the term “engineer”. I love to tinker, tweeze, and retool every aspect of every signal. Not just with EQ or compression – I’ll try different op-amps and VCA’s in my analog equipment, chasing every last bit and volt. And I admit, I am both in the minority and need to keep an open mind.

Mr Jaycen Joshua, ladies and gentlemen.

In the month since it’s dropped, the online chatter has been quite active. As you can probably guess, there’s Team DIY and Team DIFM (Do It For Me) and, as tribalism seems to be all the rage these days, differing points of view quickly descend into assailing one another’s looks, families, and abilities as an audio engineer. But I’m willing to set all of this aside for a few hours and try… try… to give this my honest, unvarnished assessment. 

WHAT’S IN THE BOX?

Good question. The modernist, kaleidoscopic UI is light on explanation and controls. That’s not a mistake – the folks at Cradle are intentionally cagey about the inner workings and unlike analog gear, I couldn’t crack open the source code and tell you what’s under the hood.

Simple, elegant, psychedelic.

What you do see on first blush are three cut/boost EQ bands, an “amount” control ranging from 0-200%, and a basic limiter “amount”. Towards the right, the interface shows what I should assume is gain reduction across each band. And yes, input and output level controls are also provided. Good thing, too, because when you turn this thing on…

…THINGS GET LOUD. FAST.

The Waves’ One Knob was, for all intents and purposes, not unlike the original L1 Limiter TDM plug-in for ProTools. While the analog purists sneered on, arms crossed in defiance, DAW-types like me were stinking drunk with new-found power, slamming mixes with such giddy abandon the CD-R would melt.  Of course, it’s been twenty-five years since then and we’ve collectively agreed to back away from such pancaked mixes. But again, like the tawdry online porn metaphor above? People still give in to their desires when they think they can get away with it. Go listen to the latest SoundCloud rap sensation. On second thought, do your ears a favor and just look at the waveform.

“Turn clockwise.” Boy, engineering is HARD.

So yes, your initial impression loading up The God Particle is “Smite Mode“. Old Testament-style locust-plagues are unleashed in the form of the limiter is adding 5db of gain right from the getgo*. A plug-in with a god complex? Now I’ve seen it all. So, while you have any objectivity or useful hearing left, hit bypass and pull everything back. Still more. Back. Back. Back. A little more. There you go. 

(* In talking with the Cradle team, the 5db limiter gain setting mirrors Jaycen Joshua’s default setting)

Okay, now we can engage thrusters and get a more listenable take on what’s going on here. Pushing the interface’s “amount” control forward from null, you can hear three things happening simultaneously – and they’re seemingly commingled by frequency and amplitude. The multiband limiting part was not hard to pick out and, provided you’re not hitting the mix bus too hard to begin with, you can gun it pretty hard before the distortion becomes too obvious. 

But this is not a multiband limiter alone. The deeper you push The God Particle’s ‘amount’ control, more excitement and presence find their way into your mix. And again, we have to guess here, but the stereo image begins to widen on higher frequencies. Not a ridiculous amount, but I’m certainly hearing it as I switch the plug-in in and out of bypass.

To the right, the UI displays the amount of gain reduction across the three fixed frequency bands – matching the three gain controls on the left. Again, there’s not a whole lot of tangible documentation about the trickery inside, but my metering has got my educated guess at 500hz and 10kHz as the fixed crossover points. Would I like The God Particle better if I could control these? Yes. Would a sidechain input be nice here, too? I wouldn’t say no. 

ARE YOU THERE, GOD? IT’S ME, B. CHURCH.

I’m trying to mentally profile the intended user – as an aging chucklehead like me with all his precious knobs and meters might be just a bit outside the target. “Mastering” has taken on a much different meaning even in the past five years, let alone twenty. And I could most certainly see people who choose to not to use professional engineers to master every latest concoction finding a lot to like here. In the context of modern pop, R&B, rap, and EDM, The God Particle definitely adds that tremendous, in-your-ear presence.

The metering does give you a clear picture of your program, peak, and db LUFS levels as it travels through the limiter stage. And I do cringe at the prospect of any loudness units discussions, as it’s probably the most shopworn topic amongst project and bedroom studio producers (except saturation, of course). But it is a good gut-check as you try to be both louder than the other guy now and after streaming services decide if you’ve pushed the needle .1 db too far. 

Make no mistake, if you want to just push things right up to the -.0001 dbFS wall, The God Particle will oblige with abandon. And truthfully, it does it quite transparently – certainly as good or better than many of the ‘mastering’ plug-ins out there today. It’s musical, provided you’re feeding it a good mix to begin with. If not? Well, you’re going to hear what you need to fix much more easily. That’s a good thing. Turn The God Particle off and tighten things up.

RETHINKiNG YOUR FLOW

In use, I found that the two test mixes I did worked a lot better when I pulled all of the other dynamics processing off of busses and mixed into The God Particle “Brauer-style“. Adding The God Particle in the late stages seems to limit its usefulness – but pulling your faders down and working things up bit by bit with the plugin set to 100% yielded better results. Keep dialing the ‘amount’ up and down as you do, as you’ve got 100% in either direction to fine tune.

On that, I found my personal favorite use for The God Particle: Automation. Verses and quiet passages? Keep it on the leash. Heading into that big money shot moment? Automate the amount along with the song’s flow and you will definitely use the studio as an effective Fifth Beatle. 

Remember, just because a product is marketed as one thing does not mean you’ll break it or get your license canceled if you use it for something else. It’s software. And their exalted God didn’t send a plague for trying his precious particle on drum overheads, guitar groups, keys or loops. To be sure, you can throw a lot of excitement at any source, even voices. 

THOUGHTS AND PRAYERS

Big surprise: I’ve got a few gripes here. First of all, if you’re pulling The God Particle in at the end of a resource-intensive DAW session? You better have some room in your hardware buffer. This plug-in will put a spank on your available CPU resources. I do not use a tremendous amount of plug-ins in my mixes – and economize resources (a holdover from the days of additional DSP engines costing an additional five grand).

Is it your 2-bus or your CPU’s resource management?

But even with a modest amount of processing power, pulling The God Particle into duty took my gas gauge from 22% to 48%. That’s the point where screen redraws falter and sputters happen. As I use a computer with shared video memory, the Timothy Leary-inspired interface, with all its dancing lights, is also munching down available resources. To their credit, the Cradle team have reached out and are interested to know my particular setup specs in hopes of catching something on my end or theirs. Try getting that kind of attention from rhymes-with-Avid. No, seriously, try it.

The God Particle requires a proprietary authorization app and, much as I could copypasta this section from many other reviews I’ve done over the years, I’ll start fresh: This is unnecessary bloatware. Full stop. I’ve given a pass to Waves and Arturia over the years, but I’ve got dozens of plug-ins from each. Now, in all fairness to the Cradle team, they have many more plugins in the hopper – so we’ll give this a hall pass… for now.

My last issue here is the level-smashing The God Particle applies by default. Whether it’s Mr. Joshua’s default setting or otherwise, I should imagine the sorts of users who are swayed by the celebrity engineer name and ‘one click mastering’ premise will confuse louder with better. The way to use software like this is to add it in slowly, not start at “Death Magnetic”-inspired crush-ola. We’ve got enough pancaked mixes out there. 

SMASH RESPONSIBLY

As I’ve said a million times before, I really try and give 1.0 releases a little wiggle room to do some house cleaning. I’d strongly urge Cradle to take a look at the default settings for The God Particle – users shouldn’t have to hit bypass the second they turn it on and get it under control. Less-experienced mixers will not want to relinquish their newfound smackwall – but if they were to bring its effect in from 0%, they would probably never push it as far as it is when you fire it up.

Please use responsibly.

If we could add floating frequency cutoff points for the three bands, I’d add a half a star back. And I can think of quite a few similar plug-ins in my folder that would use half the CPU resources to do the same thing. So here’s hoping that there’s a point one update in the future that addresses these issues. 

Much as I loathe the very existence of one-knob black box software, The God Particle is very good at doing that thing and certainly gives you a lot more control than just “turn clockwise”. You can push the effect pretty far before the artifacts and distortion become pervasive. For me personally? I might never even reach the 50% amount on something like this, but I do like the coloration, widening, and impact it can bring to a track.

In the world of electronic music and it’s millions of sub-subgenres, where sausages are fattened and pushed ‘over the top‘, The God Particle offers a far more refined take. Yeah, it’s crushing things. I don’t complain about a vacuum cleaner sucking dirt off the floor – that’s what it’s designed for. Any plug-in that invokes deity in its name is, unsurprisingly, going to try and push your levels to the heavens.

So as long as you can temper your Draconian desire to out-loud everyone else, this is a worthwhile addition to your arsenal. I know I’m the grumpy old man groaning on and on about the state of the industry, but I’m not entirely wrong. Use The God Particle responsibly and it will sweeten your mixes ably. Smash it into a distorted, flat-topped mess? Well… that’s your choice, too.

As of press time, B Church added a second small monitor to keep this plugin active where nobody can see it. Yes, even “Mr. Analog” uses this.

Cradle
3.5 / 5 Reviewer
{{ reviewsOverall }} / 5 Users (0 votes)
Pros
- A nuclear warhead for the loudness war.
- Smart combination of multiple DSP functions.
- Capable of instant-on "big" for your mixes.
Cons
- A nuclear warhead for the loudness war.
- Would love to see floating EQ points.
- Big hit on available CPU resources.
Summary
In the bar brawl of "who's mix is the biggest?", you just got a baseball bat. Use it responsibly and it's tremendous. Heck, you can even overdo it responsibly somehow, too.
Rating
What people say... Login to rate
Order by:

Be the first to leave a review.

User Avatar User Avatar
Verified
{{{ review.rating_title }}}
{{{review.rating_comment | nl2br}}}

This review has no replies yet.

Avatar
Show more
Show more
{{ pageNumber+1 }}

NAMM 2022: ELECTRONIC BOOGALOO

We’ll be honest here, virtual tradeshows are not our thing. That’s why we chose to sit out our annual NAMM wrapup for the past two years of pandemic-based societal collapse. But this year, facemasks and bear spray in hand, we traveled to sunny Anaheim, CA, ready to again report back with the world’s biggest gizmo orgasm. Manufacturers big and small from around the globe, hocking their latest wares over the world’s loudest trade show floor.

We skipped Magic Mountain this year and instead went on a guided tour of the most famous Sunset Strip gentlemen’s clubs from the 1980’s hair metal era. Sticking to the very same bar stool where Vince Neil met his third wife? That’s living history. Anyways, we’ve got a plethora of future ill-advised purchases for you to peruse here. So let’s get to gettin’. 

(* Oh, and we can’t believe we have to say this – but in the interest in keeping some of our advertisers? This is satire.)

API SAYS “SCREW IT” WITH THE INTRODUCTION OF THEIR 312USB AUDIO INTERFACE

We’re as confused as you are: The API 312USB 2×2 Audio Interface

For fifty years, API has defined the sound of American rock and roll,” says managing director Gordon Smart to a somewhat aghast group of pro audio cognoscenti. “And to make sure we survive the next five months, let alone decades, we’re continuing to deliver products that meet the market where it’s going.

Introducing their first ever product aimed at the DAW-based, increasingly budget-conscious consumer, the API 312USB ($99 USD) is a desktop 2×2 USB2 interface, sporting dual XLR/TRS connections. “That classic, punchy rock and roll sound that defined the 1970’s and beyond? It’s in there“, Smart says, showing off the paperback-sized desktop module. “Okay, it’s not ‘in there’ in there… but our logo is definitely on there.”

Though absent the classic 2520 OpAmp design and RE-115 output transformers behind the classic API sound, Smart is quick to point out that the API 312 USB occupies a price point accessible to aspiring producers – and that it includes a 14-day trial of their API 312 preamp emulation DAW plug-in.

We prefer not to look at the 312USB so much as ‘selling out’, as our many users have… but ‘making payroll’,” continues Gordon. “Hey, at least when your precious 2500 conks out in a few years, someone will be there to help.” 

CHRIS LORD-ALGE ANNOUNCES “CLA EDITION” AFFLICTION JEANS

Left: CLA Edition Affliction Jeans, R: CLA Himself

Speaking through a mouthful of a Subway Tuna Club sandwich, legendary audio engineer and unabashed endorsement whore Chris Lord-Alge wipes the crumbs off of his latest co-venture – a clothing partnership with Affliction Jeans.

CLA has done it again, peons!” he proclaimed, standing, lifting his shirt and turning to show off the classic, distressed boot-cut style to a terrorized, rapidly-dispersing group of attendees. “CLA is in the business of putting the CLA name on the coolest stuff in the business. Also, uh… CLA,” he gloated while flaring a “CLA”-bejeweled Rolex on his left wrist.

Famously worn by many of the artists to whom he’s lent his famous ‘compress-it-til-it-bleeds’ production style, Affliction Jeans’ pre-ripped, bedazzled look is, in Lord-Alge’s words, “as timeless as the man CLA himself.” Reached for comment regarding availability, Vintage King’s representative shook his head and pretended to answer a phone call.

Reportedly, CLA is now also in talks with Subway Restaurant Group regarding the limited time only release of “The CLA-Club Footlong Sandwich”.

WARM AUDIO ACCIDENTALLY RELEASES CLONE OF THEIR OWN PRODUCT WITH THE WA-WA-312 PREAMP

Warm Audio’s booth touts their latest re-recreation – the WA-WA312

Wait a second“, pauses Warm Audio founder and CEO Bryce Young from behind their collection of handsomely priced classic circuit recreations. “We already made this, didn’t we? I’m pretty sure… DAMMIT!

For a decade Austin, TX-based Warm Audio have combined smart marketing with modern manufacturing techniques – bringing faithful takes of circuits like the Pultec EQP-1, Neve 1073, and even the Sony C8000B condenser microphone to project and professional studios alike. However, their latest design, an inadvertent clone of their own WA-312 preamp, seemingly adds nothing beyond two more letters.

Staring intently at Tommy Edwards, Warm Audio’s VP of Product Strategy, a visibly irritated Young struggled to contain his embarrassment. “In Texas we have a saying,” Bryce offered Edwards, “‘ya don’t rustle cattle that’s already in the barn’.

Four hours later, new signage was installed in the Warm Audio booth, proclaiming their newest “Wooly Analog Warm Audio Edition” of the WA-312 to confused passersby.

AVID UNVEILS NEW “PAY BUY THE MINUTE” SUBSCRIPTION PLAN FOR PROTOOLS 2022.5

Pay up, suckas.

With their virtual chokehold on the professional DAW market, Avid’s booth for 2022 attracted throngs of both begrudging endorsees and hecklers – all jockeying for a better position to see the unveiling of Avid’s long-awaited ProTools 2022.5.

Though light on new features, Avid’s latest release offers the flagship implementation of their new “Pay Buy The Minute” subscription plan – allowing ProTools users to pre-load subscription time on an RFID-enabled key fob that they can swipe for additional licensing time in increments as small as a single minute ($1.99) – up to an entire day ($34.99). 

Since the dawn of the DAW, Avid has continued to meet our users with solutions that make sense for their work flow and our operating costs,” says Rob D’Amico, Senior Product Manager. “Why pay up to $1000 for a perpetual license when you might only need to open the app for five minutes to bounce out a quick rough mix?

This new pricing model also includes exclusive access to 1-900-PRO-TOOLS, which gives Avid users round-the-clock, hot, wet, and wild technical support access for just $4.99/minute.

BEHRINGER JUMPS INTO THE FAIRCHILD CLONE MARKET WITH THE BEHRCHILD 670

The Behrchild 670. In a word? “Scheisse”.

Inexplicably dressed as Dr. Robotnik (of Sonic the Hedgehog fame), Uli Behringer was giddy with excitement and Jägermeister, announcing Behringer’s latest affordably-priced reincarnation of studio and electronic music’s most classic designs.

Eponomously dubbed “The Behrchild” ($699 USD), Behringer’s clone boasts a similar-looking faceplate to the original Fairchild 670, but uses several production efficiencies like surface-mounted IC’s in place of transformers and two 15W oven bulbs to replace the original’s twenty 6386 Mullard valves. 

With original Fairchild units continuing to fetch upwards of $50,000 or more, the market demand for the 670’s near-mythical sound doesn’t seem to be fading – even with lower priced alternatives like the Behrchild or Heritage Audio’s recently released “Her-Child”.

SSL ANNOUNCES “4K MODE” RETROFIT FOR ALL SSL 4000 SERIES CONSOLES

“I heard y’all like 4K, so we put a 4K inside your 4K” – SSL pimps their famous ride

For over forty years and counting, Solid State Logic has been lighting a path for the future of audio recording,” states Niall Feldman, SSL Director of New Products. “However,” he adds, “with thousands of our timeless 4000 series recording consoles still in use today, we are bridging the gap between our classic designs, our recreations of those classic designs, and, uh… our classic designs.

With their recently released “The Bus+” stereo bus compressor, based upon the master section of the venerable 4K-series console offering an additional “4K Mode”, SSL are offering 4000 Series owners a “4K Mode” retrofit, putting the sound of their classic consoles right back inside their classic consoles. 

Okay, look,” says Feldman, leaning in closely, “I tried to talk them out of that whole ‘4K thing’ from the getgo.” Whispers of Peter Gabriel threatening a forced, company-wide listening party of his 1985 hit “Sledgehammer” on permanent repeat have continued to surface for years since Gabriel’s acquisition of the Solid State Logic brand.

Offers Feldman, “I guess if you do hit the ‘4K’ switch, it would maybe sound like our 8000 series consoles?” “Yeah, let’s go with that,” he added, briskly walking away towards the “Dire Straits: That Album Didn’t Actually Sound That Good” Q&A with engineer Neil Dorfsman. 

B. Church was escorted off the Anaheim Convention Center property for “lack of decorum”. Some things never change. 


TUBES OF GLUE: THE TEGELER VTC

Hailing from the land of Bosch, BMW, and the Bavarian Pretzel, Tegeler Audio Manufaktur are steadily winning hearts, minds, and rack space. B. Church patches in Tegeler’s OG: The VTC. 

COMPRESSORS, COMPRESSORS EVERYWHERE

It’s weird, we hadn’t reviewed a hardware compressor in a while and then, seemingly out of nowhere, a month doesn’t go by where I’m not wiring up a new box of chips, bulbs, and wires to fawn over. You’d think I’d be getting bored of this. Heck, I was starting to wonder if I’d start feeling the crisp by now, too. But talking with Tegeler Audio Manufaktur of Berlin about an upcoming product, I kept mentioning, “hey, but we uh, sure would love to give that tube compressor a try.”

Though the Tegeler VTC (Variable Tube Compressor) has been around for a bit, the Tegeler name has been popping up more and more lately in the US – like a guarded industry secret. It feels like the ‘in the box’ revolution has been coming full circle, with even the most binary-minded diehards adding summing amplifiers and a few choice bits of analog space heaters. At the same time, engineers who’ve come of age long after the DAW revolution took hold are venturing out of their computers’ friendly confines once they get a taste of what a solidly-built piece of outboard adds to their mixes.

Put me in, Coach…

WHAT IT IS, WHAT IT IS NOT

The VTC most definitely IS an all-tube Delta Mu compressor from boutique manufacturer Tegeler. With a US street price of just under $2200 (available excl. through Vintage King), this puts the classic tube compression sound in mix and mastering studios at an extremely modest price. Seriously, go check the competitors, I’ll wait here.  

Boasting two pairs of tubes (2 x E88CC, 2 x 12AX7) and transformers from Vigortronix, the VTC is a 3RU variable tube compressor that chooses to keep things simple. Not to paint with too broad a brush, but the Delta Mu* design leans on you to trust your ears and not numbers. You reach for this kind of compressor for its harmonic-rich saturation, gossamer top end, and amplitude-dependent response. If you’re looking for transparency, you’ve come to the wrong place. But hey, since you’re here…

Hey, you just learned two more Greek letters!

(* “Delta Mu” is not a fraternity. It’s electrical engineer parlance, and they love their Greek lettering. “Delta” merely signifies something being a variable quantity, “Mu” refers to gain. So yeah, fancy as it sounds, it just means “variable gain”. Also the good folks at Manley have taken out a trademark on the term “Vari-Mu”, so we’ve edited accordingly.)

A STUDIO GOLIATH, NOW IN “DAVID-SIZE”

Ask any seasoned engineer to name a compressor that is an absolute legend and I’m willing to bet more than a few namecheck the grand poobah itself: The Fairchild 670. If you’ve never worked on one, all I can really say is that the godlike, bigger-than-huge sound it’s synonymous with? That’s not hyperbole. I’ve been lucky enough to session on several in my so-called ‘career’ and they are as big sounding as they are… well… big.

And since many of us are unable or unwilling to pony up tens of thouands of dollars for a sixty-five pound, six-rack-space behemoth (and aren’t satisfied with another artificially patinated graphical interface)  a few manufacturers have been evolving the design. Manley’s Vari-Mu, for example, can be found in many, many well-appointed mix and mastering rooms. DW Fearn’s VT-7 is another example of a forward-footed tube compressor that is capable of adding tremendous presence and weight.

Look, if you want the Fairchild? They’re out there.Standing upon the shoulders of these Goliath devices, Tegeler’s VTC was among their first forays into the market. Lighter on your lower back and your bank account, this screams “instant classic” (and, ‘hurry up with those patch cables’). Pulling its beefy 3RU chassis from Tegeler’s trademark wooden ‘treasure chest’, I could already tell looking upon its ocean-blue-flashed fascia that this was an heirloom piece of gear. A Fairchild in the making.

The front panel controls are laid out logically and feature nothing that should require a manual (though one is provided in actual printed form). The left and right sides are almost identical, sporting input and output trim levels, attack and release times, a stereo link toggle, and a three way switch to engage a sidechain HPF at 80 or 160hz (right below E2 and E3 on a piano, respectively). Absent a threshold control, you simply drive the inputs until your ears reach Valve-halla. 

The controls are my absolute favorite – straddling the fence between continuous and stepped  with many finite, but easily-recallable clicks. Seeing as how the VTC has equal appeal to mixing and mastering applications, this is the perfect middle-ground. The centered VU’s burn warmly in a “cat eye” orange, providing tactile, ample display of the amount of squeezing that’s taking place.

There’s nothing wrong with keeping it simple. Nothing whatsoever.

If you’re anticipating surgical control over your dynamics, this may not be the ideal fit for you (then again, it might be!). When using the triode tubes as the actual gain cell, there’s no such animal as a threshold or even a ratio. Like the many, many fine automobiles Germany produces, there’s a “power band” to its engine; a certain range of input level where you’re getting the absolute best of what it’s built for. It comes on subtly when the needles begin to dip, but push deeper and the ratio and knee tighten up. This is where the Tegeler’s wisely-included sidechain HPF switch often saves the day, keeping kicks and low basses from blowing the whole thing up. 

You sense the past inspiring the future – from the ginormity of its metering to the large bakelite controls. Powering the unit on with the undeniable ‘thwack!’ of a toggle switch and indicator bulb plucked from the industrial 1950’s, my heart and the VTC’s innards began to glow as it yawned, stretched, and laced up to put in work.

I WAITED AT LEAST MOST OF THE RECOMMENDED THIRTY MINUTES

If tube gear is new to you, you should know that these Edisonian bulbs can be a little cranky in the morning. Let them get a cup of coffee for optimal results (the same is true for new units, they need ‘burn-in’ time). In all fairness, I tried. I think I made it twenty minutes, eight seconds.  

For several days I’ve been agonizing over the same mix. It’s a personal project I’m doing with a friend who, as irony would have it, was one of the artists I first recorded in my crummy Ithaca, NY house as a college student decades ago. Strapped across my stereo bus, I switched the circuit in. Now, as often happens, your compressed return signal is louder – and louder often signifies ‘better’ on first blush, even to those of us who’ve been fooled a million times before.

But what I heard was not louder. It was 2db quieter and 3 times bigger. All of the sudden, the details that had plagued me for revision after revision had woven themselves into a tapestry. The VTC’s tubes and transformers took to the high-end’s cymbals and overtones like a polishing wheel, adding an impossible combination of hazy and bell-clear. The Tegeler doesn’t ‘sizzle’ or ‘sear’ the top like tube devices can – it creates the audio equivalent of a perfect golden sunset. 

The obligatory “round the back shot”. Not much happening here.

In the space between the kick and snare, the VTC puffed out the mix’s chest – almost-but-not-quite to the point of audibly pumping. It effortlessly gelled together the song’s kick, bass drum, and low-B guitar chords – conjoining them into a cohesive sway, much like the breathing of cello bows. The ethereal, wispy (and wet) multi-layered vocals were enveloped into a warm embrace – finding their space inside an absolute mountain of crashing room mics, a meaty Ampeg SVT cabinet, and stacks of guitars.

What had been two weeks of not-quite-right was finished within thirty minutes. I printed off a mix with “_done?” as a file identifier and heard back from my partner in the amount of time it took to download, play the song and respond: “Wow. Who mixed this?” Passive-aggressive joking aside, I did a quick A/B against the last version (using a combination of an IGS S-Type 500 and Oxford Inflator). Now, the old version was good. Maybe even, “pretty good.” But the Tegeler spun our silvery-lead into 24 karat gold.  

MAKING A BOOM… BOOM.

Before I could even reset anything, I knew I had to hear this beast on drums. Whether you’re talking a breakbeat or an entire sixteen-or-more channel multi-mic setup, the VTC is dying to be unleashed on any stereo bus or source. I mean, I guess you could split it up into dual mono duties for tightening individual drums or mics, but for drums I really liked turning up on the big picture, not the tiny details.

Starting with a test session I keep around with just four mics (kick in, snare top, and overheads being pushed pretty hard through a classic Trident 80B console), it took all of maybe twenty seconds to find the magic spot. With the sidechain’s HPF switched out and the meters indicating a good amount of action, the kit had swagger and bombast, charging like an angry bull with tremendous weight.

Now remember, this is a minimal design here – no threshold, no ratio, no adjustable knee, or external sidechaining. So I took the kick drum out of the bus and backed the input down to just maybe 2-3db on the hardest of the hits. The VTC responded with an absolute buttery smoothness, pulling up the room and decays like the drummer himself was manning the faders. The cymbals (recorded through modified Avantone C12 clones) were extremely present, but so well rounded by the unit’s transformers and tubes that I could push them forward without them feeling sharp or fatiguing. Oftentimes it feels like mixes apologize for cymbal work and keep them leashed in the back. But not here.

Downtown Recording’s A Room. Drum nirvana.

I switched sessions over to a session with the drums recorded in Louisville, KY’s amazing Downtown Recording A-room and Neve Melbourne sidecar. Royer 121A ribbons had been placed in the expansive live room’s corners and with no processing, sounded great. But through the Tegeler, it felt like taking out a pair of cheap foam ear-plugs. The track became energized and pounding with excitement. You just feel an electricity, a kind of immediacy that often gets lost somewhere between the source, the mic, and your mix.

This was a great place to vet Tegeler’s claim that you can push up to 6db of gain reduction without obvious pumping. Inch by inch, I raised the input level as the meters crept deeper still. Could you tell the drums were being made louder? Yes, that’s what this was designed to do, after all. Did it sound like a pumping air compressor? Not at all. Using the sidechain HPF here goes a tremendous way towards that 6db claim as, unsurprisingly, transient-heavy LFE  makes harder amounts of compression a wobbly mess. But with the 80hz HPF switch engaged, the transients and swimming room both maintained focus. 

GUIDED BY VOICES

I knew before I even flipped it on that hearing the human voice through the VTC was going to be a treat. I used to track vocals through the Drawmer 1960 all the time, hitting the compressor a bit for character on the way in, even to tape. Rather than send one mic up per side, I placed the Tegeler over the entire subgroup of maybe eight voices total. 

I had a VO session to get done. The VTC did NOT disappoint.

Once the right attack and release were dialed in, the VTC glued the mini-ensemble together into the cohesion and clarity of a single voice. The uppermost overtones shone through without even the faintest hint of harshness. The VU meters swam around 3-4db of gain reduction, maintaining a consistent presence that complemented the song (though I really wanted that back on the mix bus by now).

On a solo female vocal with just a touch of natural room coming through, the VTC made a not-that-great mic sound much nicer than it actually was. The nuance and raspiness in the performance came forward and, though the genre was nothing like the 1960’s, an element of Motown’s tube-tinged vocal style slipped into the track. Again, I have no idea how an EQ or compressor can be bright and soft at the same time, but the VTC is in a class of its own here.

ANYTHING ELSE?

Acoustic guitars? Fantastic. I had a recording of a singer/songwriter with an accompanying cellist through a spaced pair of Neumann KM84’s. The intimacy of the performance and the pleasant reflections of the space were ably accentuated through the Tegeler VTC. I had to test their ‘6db of gain reduction’ claim again and sure enough, I was hard-pressed to hear it on the program material – though string slides, breathing, and the occasional chair movement were basically as loud as the performances themselves. Backed off a smidge, you could really just drink the whole soundscape in… and how this piece of gear seems to effortlessly accent it.

Serious EDM producers would be wise to consider the VTC as a final polishing stage as well. After all of the crippling amounts of OTT-brand, multi-band smasherizing that are table stakes in the electronic music game, this can provide the sort of warmth and finishing that plug-ins try to create, but don’t have the same texture or depth. Turned loose on your bass or drum bus, it’s a great heater-upper – adding presence and girth in the low end (keep that 80hz HPF on, though).

Tube units run hot. But the VTC manages to keep things (relatively) cool.

I wouldn’t hesitate to pull the VTC in on a tracking session either. Drum overheads or room mics? In a heartbeat. Vocals? Oh yes, most definitely. In fact, as a vocal front-end, its ability to somehow be colorful and transparent at the same time would make this a first choice. Even with converters as good as they are, I will always record an effect that I like. Besides, come mixdown time, this unit will be busy on other chores. Tegeler’s portfolio includes a dedicated tube recording channel (the VTRC, or VariTube Recording Channel), so if that’s more what you’re looking for, it might be worth looking at first. But for the quality and workmanship you’re getting at these kinds of prices? You might think about adding both. 

MY BLUE HEAVEN

The immediacy and brilliance of the VTC’s sound is not just “because tubes and transformers”. There’s plenty of not-that-impressive tube gear out there, and I still think there are people who vastly overestimate how much change transformers actually make. What sets the VTC, and by extension Tegeler Audio Manufaktur, apart is the clear passion and attention that’s gone into its design, components, and build. This obsessive design work pays huge dividends every time you switch it in.

Seriously, this is as musical a compressor as my ears have ever heard. Remember, we’re comparing this to Mt. Olympus deities like the Fairchild 670, Manley Vari-Mu, and DW Fearn VT-7. Tube compressor topology may not be the newest kid on the block but the VTC’s design hangs right in there in the context of today’s music. And while you will certainly find other compressors that offer more controls and features, the Tegeler VTC gives you a glide path to the polish your mix has been begging for.

The VTC is a musical instrument for engineers – and the nuance it brings to even the most clinical or boring recordings almost feels like cheating. In a word, what the VTC does is magical. I refuse to admit to myself that there are tools that outpace my techniques and abilities. But after just a few days with the Tegeler VTC, I can’t imagine working without it. Seriously, this is nothing short of magic.

Tegeler Audio Manufaktur is distributed exclusively in the US by Vintage King

As of press time, B Church is currently looking for a buyer for his kidney to fund the purchase of a Tegeler VTC. Interested parties can reach out to [email protected].


Tegeler Audio Manufaktur VTC
5 / 5 Reviewer
{{ reviewsOverall }} / 5 Users (0 votes)
Pros
- Absolutely enchanting, mesmerizing sound
- Priced within reach of any serious studio
- Brick shithouse build, with sonics to match
Cons
- None. Not one.
Summary
Purpose-built to do one thing and do it well, the Tegeler VTC is nothing short of an instant classic. Depth, warmth, and yes, "mojo" to burn. In today's digital world, a touch of analog class like this is a revelation.
Rating
What people say... Login to rate
Order by:

Be the first to leave a review.

User Avatar User Avatar
Verified
{{{ review.rating_title }}}
{{{review.rating_comment | nl2br}}}

This review has no replies yet.

Avatar
Show more
Show more
{{ pageNumber+1 }}

THE HYPE MACHINE: STL TONES CONTROLHUB

It’s always a good day here at EverythingRecording when we hear from our friends over at STL Tones. As somebody who records a lot of guitars – not just for clients but my own projects – their ToneHub guitar amp modeling plug-in is the de facto choice. Not just for ‘let’s use a plug-in’-type situations, either. 

In the three or four years since ToneHub dropped, the folks at STL Tones have been steadily producing additional models and presets – from guitarists and producers like Rob Caggiano and Kurt Ballou to amp and speaker cabinet emulations including the PRS Archeon and the Soldano SLO100. 

So imagine my girly little squeal when I opened the electronic press kit for STL Tones’ newest innovation. Having more-than-conquered the world of guitar, they’re making a bid to take over your entire DAW.

Behold. The ControlHub Interface.

INTRODUCING CONTROL HUB

ControlHub ($199 USD, VST3, AAX, AU) aims to do to your DAW’s workflow what their proprietary tracing technology has done for recording guitars. I know what you’re thinking: You already have several channel strips. Heck, maybe you’re like me and just use the one that’s already in your DAW’s mixer. And by now, every console from a Neve 8048 to the Mackie 8Bus (my god, I wish I were joking) have been clinically analyzed and put right in your VST hole. 

With their guitar amp modeling, STL Tones weren’t fixated on the perfect Marshall JCM or Diezel VH4. They literally said “here’s, like, every amp ever.” Even if you only have a dozen ‘daily driver’ tones, knowing that your Dual Rectifier could become a VOX AC30 in two or three clicks of a mouse is a pretty compelling sales pitch.

Well, that’s what ControlHub has set out to achieve for your mixes. Each instance offers a completely roided-out signal chain that’s just as easily used for individual tracks as it is on busses or effect sends. You’re offered pre- and post- EQ, a color/saturation circuit, dynamics, a workmanlike collection of effects, and a final gain and panning stage with brickwall limiting. Just picturing that sort of functionality on a vertically-oriented analog console strip is making my back hurt. 

ALL FOR ONE? OR ONE FOR ALL?

We’re at an interesting crossroads where there’s dedicated, specialized use-case effects (for example, a dedicated box or plug-in for saturation or the LMC) on the one hand – and a one-size-fits-everything type plug-in or 500 series module on the other, created to tackle any conceivable recording or mixing chore. ControlHub is most assuredly of the latter persuasion – packing what used to be an entire project studio’s outboard rack every time you open it up.

Look at the modern day in-the-box mixdown session and you’ll see signal chains that simply throttle the imagination. When the latest updates to major DAWs started offering upwards of six or eight inserts per track, I wondered out loud who – who, I ask you – could be so bad at recording that they’d need that many ways to change it. That’s my own inner curmudgeon speaking here though, as I look at plugins or outboard as a way to creatively fix or bend sounds, not just throw everything at the wall and see what sticks. 

IT’S ALL WHO YOU KNOW IN THIS BUSINESS

Like their axe-wielding guitar processors, STL Tones are already working with a quite robust cast of characters and locations to offer you, the lowly tinkerer, a chance to put big “name” engineers’ processing chains in your own sessions. At the time of ControlHub’s release, STL Tones already offer a working studio tour with Neal Avron (Linkin Park, Yellowcard, Switchfoot), Mark Lewis (Devil Driver, Cannibal Corpse, Black Dahlia Murder), and Machine (The Producer) (Clutch, Lamb Of God, Every Time I Die), as well as the absurd gear collection housed at Nashville’s Castle Recording Studios. Something tells me by v2.0, your options will have expanded… significantly.

If these are your clients, we’ve got a plugin for you. (credit: TheOrangePeel)

If you’re scratching your head in a “never heard of ’em”- kind of way right now, it’s because STL Tones has either consciously decided to – or simply found a loving home with – the heavy metal cogniscenti. Metal engineers are generally the sort of folk who aren’t going to be too swayed by Waves releasing overhead mic EQ curves from Alan Sides or Jack Joseph-Puig – because 99% of them don’t know who these people are and definitely aren’t trying to nail the intro guitar sound from a 1982 Dire Straits album. We’ll get into the producers’ “guest speaking roles” in a little bit. First things first.

LOAD IT UP

Though I’m working from the future on ControlHub (with version 0.51), there are already native versions for both Intel and M1-based Macs, as well as a single installer for all current (or mostly current) Windows environments. Slap the license in your iLok account (allowing thirty seconds to update the app. Yes. Again.) and have a look.

The first impression was “wow”. And no, I hadn’t hit play yet. The interface on ControlHub is beautiful. It’s well-laid-out. It’s intuitive. And assuming you know what the building blocks in the processing chain are for (not a given these days), you’re taken in by the handsome, silvery futurism of it all. A spectral EQ display along the top shows your incoming and outgoing curves, which switches over to a side-scrolling waveform readout to see how transients are being affected. 

Over in the left tab is a neatly organized file tree system for getting into your “Core Pack” and, should you choose to invite them over, additional producer / studio content packages. Along the top, you can click into a familiar-enough file menu to load up presets for everything from individual instruments and groupings, to familiar bussing chores. The settings popup (using the familiar ‘gear’ icon) is there for granular tweaks and, as is the rage, “light” or “dark” mode. Oh, and an oversampling option is conspicuously missing. But you’re not interested in this right now, are you? Neither am I. Let’s get to the fun stuff.

I’M JUST JENNY FROM THE BLOCK

Below deck are the six inline modules. Or blocks. Let’s call them blocks. These read left to right like today’s modern “everything but the kitchen sink” channel processing. Starting with a “Pre-EQ”, you have both the necessary HPF/LPF “hockey sticks” to cast aside needless top and bottom, and three very robust EQ bands that sweep coast to coast and switch from shelving to peak or notch filtering, all with adjustable width. I’d put “Q” here, but I don’t want this review being reinterpreted by a bunch of lunatic fringe conspiracy theorists. Moving on.

Your next stop is a block for “color” or saturation and, depending on the preset you’re working with, could be emulating everything from a Neve 1073 preamp (I’m assuming the saturation of its transformers) to “API” (I’m assuming the sound of the 2520 Op-Amps) to the Helios 169, Avalon 737, and some less specific ones like “British Console” and “Drive Saturation”. 

Given their current fixation with rubbing transformers on everything, punters will find plenty of earth metals to lavish their signal with. I would love to see STL Tones strike up a deal with experimenteur-supreme Sylvia Massey so we can get our hands on such circuit-benders as “pickle”, “drill”, and “light bulb”. Oh, and if you don’t know what I’m referring to? Here.

Transformers and compressors. Saturate and slam away.

From there, we’re into the central “compression” block and, as you’d probably expect, there is no dearth of options to dive into. Again, you’re going to see a mix of generic signifiers like “Vintage FET” and “Modern VCA”, as well as stalwarts like the 1176, the LA2A, the Great River MV2, and so on. Curiously, the controls beneath offer up a switch between “FET” and “VCA” – just in case you wanted to run a FET SSL? Okay, I am as confused as you are on that one. 

You’re given the necessary controls to dial things right to your liking – from the usual envelope, threshold, and ratio to the very nice-to-haves like sidechain filtering, automatic release and makeup gain, and an input level control (in case the output level of the previous block wasn’t enough, I guess?). I suppose redundancy is never a bad thing, so long as it’s not at the expense of signal integrity or latency – neither of which I heard here.

Okay, we’re rounding the final turn here into the “Master EQ” section. Yes, now that you’ve EQ’d, colored, and shaped your audio, why not run it through another EQ? That way you can put back everything you nicked and shelved out at the beginning. Same controls as before, however you’re now also being offered a palette of different manufacturers’ golden greats. SSL, Pultec, Helios, Neve… you want it? You got it.

By now we’ve already covered an entire 500-rack’s worth of signal processing, but we’re not done yet – as ControlHub’s got a very AMS RMX-looking effects section, complete with vintage LED characters. Two flavors on offer: Reverb and Delay (technically, reverb is delay, and I love having that conversation with anyone who tries to tell me otherwise). Let’s call it “time and space effects” and leave it there. It’s a basic-but-effective set of options for a little bit of wet or wild – or if you’re just too lazy for effect sends these days. 

Finally, and yes, I do mean ‘finally’ this time, we’ve got a master section with level, pan, wet/dry mix and – hey, why not – another limiter. Okay… yes. That’s quite a lot. One glaring omission is that there’s no db lufs level monitoring – an absolute must with streaming services so quick to penalize those who’d dare allow their average levels creep beyond -13.2. This is more the 2001-styled “L2 Ultramaximizer School of Slam It All To Fuck”-kind of limiter, which is pretty long in the tooth. 

IT’S NOT DRY WITH A LITTLE HELP FROM MY FRIENDS

With STL Tones’ guitar-focused products, a big hook is being able to download the tones, amps, cabinets, mics, and (most importantly) techniques created by a celebrated list of professional audio’s brightest. Will Putney? Get in my session. Andy James? Go move that mic for me. Oh, and let’s try the Laney head again. 

That is a compelling advantage, especially given the what of the emulation. Miking up a guitar cabinet is not always as simple as pointing a 57 ‘thattaway’ in today’s hypertight djenting arms race. So it stands to reason that having a little help from the people we’re often comparing our mixes to could pay some serious dividends.

Castle Recording’s insane A room. Get in my folder.

Just like ToneHub, you’re not just buying their techniques or tools, but STL Tones’ tracing technology sussing out the behaviors of one circuit into the next. Each pack adds another heaping ass-ton of creative signal flow options to tighten up whatever it is you need tightening. Given the respective discographies of Machine, Neal, and Mark, you’ll be unsurprised to see a distinct focus on the heavier ends of metal. Does that mean your K-Pop or alt-country record couldn’t benefit? Of course not, and there are some great all-arounder presets to tackle the challenges of a bloaty kick drum or lifeless guitar or vocal.

More interesting, to me at least, is ControlHub’s trip to Castle Recording Studio, whose racks play host to a dizzying kaleidoscope of amazing preamps, eq’s, and dynamics processors. Not just your usual suspects, but some fantastic curios and relics – many of which are represented in their additional content.

NOW YOU’RE IN CONTROL. KIND OF…

Tabbing through the myriad presets for almost every conceivable input (with a nice dollop of master and sub group processing, and a smattering of additional paths for strings, keys, and more), you should have no problem finding a good jumping off point to dial in to your particular instrument, issue, and taste. And the blocks themselves sport all of the necessary parameters to work their respective magic, including lots that you wouldn’t find on the circuits being modeled. 

You’re not boxed into the whole preset, either. ControlHub at least understands you don’t need two EQ’s, or might want to make it part of a bigger chain using other plug-ins. I’m sure that, by its very design, STL Tones would like ControlHub to be the first and last word on every input and output of your session. However, this is where the road divides… if you have no desire to get granular with the patches on offer and just want a ‘push play’ option, this may not concern you – but I can’t imagine I’m the only one for whom the following is an issue. A big one.

Click it all you want. No changes. No backsies.

You open up “Big EDM Brickwall Master” and think to yourself, “hmmm… I’d like to try a different saturation type.” You click where it says “Neve 1073” and the drop-down of options that you’re anticipating doesn’t appear. “What gives?” you wonder, clicking again. Well, that’s by design according to my communications with STL Tones. The signal chains are designed to be a package deal and, by their own words, “you can always try another preset”. Of course, it would be insanely redundant to offer every variation (46,660 per patch – in fact), so you have to make it work with what you have. Better luck next time.

No problemo“, you think aloud. “I’ll just make my own presets from scratch! Besides, I want to put the saturation post compressor.” Ehhhh, no. You can’t do that, either. There’s no such thing as an empty slate with ControlHub. No building up your own sonic dream team from this wonderfully emulated, beautifully packaged collection of studio tools. Reordering your signal path should be a no-brainer, too but alas, that is not in the cards.

Honestly? This is a miscalculation on STL Tones’ part. Sure there are self-described mix engineers out there who are going to absolutely get a leg up from these incredible sounding signal chains. And, once you leash the extreme dynamics processing that happens on many presets, they do sound good – though this plug-in should be treated like edibles. You might think you need one more, but I’d wait another twenty minutes because, well… a lot of us have made that rookie mistake.

Engineers want… no, insist… on finite control of any given piece of the overall sonic puzzle. I immediately thought of Korneff Audio‘s plug-ins (our review here) where the user can change out the resistor tolerance and tube burn-in. And perhaps that’s more granular than many want (or understand), but the point is, it’s very much there. 

Okay, maybe that’s a few
too many variations.

If it’s a synth or maybe a multi-effects processor, I am not immune to surfing preset patches to hopefully catch a glimpse of inspiration. However, the intention is to at least get to the right train stop before walking the rest of the way home. EQ’s and compressors? No. These sorts of controls are extremely source dependent and to assume that processing a bass guitar on one recording one way will work on every recording every way is a miss. This is the fun part of what we do, not a chore. 

CELEBRIGINEERS AND PRESETS.

So the whole idea here, at least in my hours tinkering away, is that this plug-in is intentionally preset-driven by design. You go into your drop-down menu on the left, identify your use case like “Big Kick” or “Rock Bass DI” and ControlHub loads up what is, in the opinion of themselves or their who’s who of mix engineers, the way to make it better. 

Of course, Mark Lewis isn’t actually here with me. If he were, he’d know what the drum’s depth, diameter, shell, beater, and head material were, to say nothing of the style and approach of the drummer hitting it. Oh, and what kind of microphone or microphones, where they were placed, what kind of preamp or console we patched in, if it had any eq or dynamics printed to disk. You know, the minor details. 

Mark might not instantly put two EQ’s, two dynamics processors, and a coloration circuit on things. I don’t think so, at least. Would I love to go kick it with these guys for a day and watch them work? Hell yeah. I’d return to my Starbucks-running, cable-wrapping twenty-two year old self just to hang and ask the fifty stupid questions I’ve memorized should the opportunity arise. But here’s the thing – I want to take what I learn from that day and apply it to my own work. I’m not so underconfident in my abilities that I’m screaming “Superman, save me!” from a burning building. 

A good handful of these presets are what could only be categorized as “drastic”, taking responsible -12dbfs-peaking levels and catapulting them into the red, making you leap for the bypass button while you start pulling things back. We’re not talking “a little hot” here, we’re talking “the flames of hell”, pinning the meters to the top. Not good.

HEY, ORKIN MAN!

I waited to update to the retail release before writing this section, as I was working off of a pre-release version that had some pretty pervasive bugs. Sadly, even after updating, I’ve found there are few pretty major ones that need to be addressed before I could possibly recommend ControlHub.

The first? When all modules are bypassed ControlHub is still adding coloration to the sound. It changes from preset to preset, but it’s undeniably there. Granted, loading a plug-in and leaving the entire chain bypassed is not exactly a use case I could fathom for anyone (unless you’re treating this like a Pultec EQP-1A, which many mix engineers like to patch signals through just for the transformers). It points to coding that needs some more quality control.

Automatic Makeup Gain = Death.

Secondly, using the automatic makeup gain feature in the compressor section absolutely SLAMS the levels beyond the stratosphere. I was mixing at a moderate volume the first time I hit that button and my monitors’ limiter circuits engaged. If your monitors lack such a feature, I’d check the EULA to make sure you’re not indemnifying STL Tones from inadvertent damage caused by their buggy software.

Lastly, ControlHub can be a pretty voracious eater. I may not be running a Derby-winning racehorse of a computer (Six-core Intel i9 @ 3.2mHz, 32GB RAM), but even at modest 192 sample buffers, ControlHub was not only chowing through CPU cycles, but throwing out big spikes, distorting and glitching my whole mix. I’m a good boy. I keep my OS and apps at the most stable current version. So this one’s not on me, either.

UNDERDOING IT: A LOST ART

With the ridiculous amounts of signal processing inside ControlHub, I truly wish there were some sort of warning label. Because simply clicking it into action, you think to yourself, “wow, I didn’t realize my original tracks were so weak”. They very well may not be. There’s a lot of ear candy happening with this plug-in, instantly adding the kinds of perceived loudness that sound all impressive at first, but stacked up across a few instances, mercilessly pancake the shit out of your dynamics and fatigue your tender ears quickly.

Though there are tons of tools that entice you with the instant gratification of “moar louder”,  ControlHub is putting out a new kids’ breakfast cereal that’s just a box of new Sugar-Coated Chocolate Amphetamine Flakes™. It charges up your tracks, yes – but a sugar high is fleeting and comes with a nasty crash. This will take your midrange and curbstomp it into a Sony Smile. Dynamics? Sorry, son. Your dynamics are now living on a nice farm in the country. 

“Gentle Master Comp”. Uh yeah, okay.

One thing I try very hard to do when reviewing any new piece of gear or software is to stay focused on how well it does what it does and not what its existence represents. If a $20 plug-in came out that, strapped on your master bus, made the performances better, the music in tune, the recording perfect, and the mixdown flawless? Of course we’d have to say “what it does is nothing short of amazing”. 

But it doesn’t change the fact that it’s taking all of the fun out of mixing. There’s an irony to a plugin called “ControlHub” that, by design, forces you to relinquish much of it.

I would challenge you with this thought: Do you want to be original? Do you want to make something new? Would you rather succeed at sounding like everything else out there, or are you willing to risk failure in trying to be the person that made something that people have never heard before? Do you want to be play the game or change the game? Don’t answer right away. Think about that one.

THIS WASN’T SUPPOSED TO BE A THINK PIECE ON OVERPROCESSING.

Yeah, but here we are. 

If STL Tones would give you the ability to really change your sound on your terms, not theirs (or their guest engineers and studios)? To build signal chains from the ground up, accessing their deep well of very-well modeled circuits? Well, I’d be smitten. But it can’t, it doesn’t, so I’m not. 

I won’t deny the convenience and power of ControlHub. I just hate the GarageBand mindset it represents: “I don’t want to modify or even understand what I’m doing, just make me sound as crushed, scooped, and bright as every other mix out there.”

Well, the people have spoken. And sadly, STL Tones has delivered. I can’t fault them for seeing a blind spot and marketing to it – but until those of us who actually demand the “control” part of something called “ControlHub”, it’s a little too boxed in to be taken seriously.

B. Church just abruptly retired and is starting a small goat farm somewhere in Northern Italy. No calls.

STL Tones ControlHub
2.5 / 5 Reviewer
{{ reviewsOverall }} / 5 Users (0 votes)
Pros
- Exquisitely modeled circuits and their behavior.
- Vast array of "instant fix" presets.
- Intuitive layout and handsome interface.
Cons
- Very presets-based with glaring lack of chain editing.
- Signal is colored, even with modules bypassed.
- Serious kinks in the coding still need to be worked out.
Summary
A marriage of STLTones' fantastic modeling technology and underbaked implementation. Until this offers more actual control, this one's for one-click punters who're still trying to win the loudness war.
Rating
What people say... Login to rate
Order by:

Be the first to leave a review.

User Avatar User Avatar
Verified
{{{ review.rating_title }}}
{{{review.rating_comment | nl2br}}}

This review has no replies yet.

Avatar
Show more
Show more
{{ pageNumber+1 }}


HERITAGE AUDIO: THE SECRET OF MY SUCCESSOR.

There are GearSlutz – and then there are SpankSkankz. B. Church’s NYC home studio plays home to over a dozen analog compressors. For his thoughts on Heritage Audio’s Neve-inspired Successor Bus Compressor, read on.

JUSTIFY MY LOVE

Let me peel back the curtain here on how things work in the editorial corners of the pro audio world for you for a second. The general gist of it is this: Company develops product. Company releases product. Company markets product. Part of that marketing ecosystem is sending review units or NFR copies out to websites like EverythingRecording.com and hope we’ll say something nice.

Let’s temporarily set aside the bottom-feeders who simply copypasta press releases to sell ad units and clicks. They know who they are and don’t care about their status as lowly barnacles. But anyways…

In the world of hardware, there is often a carrot dangled in the form of a steeply discounted price should the reviewer choose to keep it. And, though unspoken, there’s a subtle urging that in return, you’ll focus on the unit’s high notes and breeze politely past the low ones. And we have certainly returned our fair share of units and iLok serials, saying in our very best Russian accent, “ees not for us.

This is not one of those reviews. Heritage Audio did not contact us, nor we them. 

It’s important to point out that editorializing gear is not our day job. We’re engineers, producers, musicians, and all-around GAS-afflicted studio dwellers who still get emotionally tumescent at the latest whoozits and whatzits. The staff of EverythingRecording have sunk a collective hundred grand-or-more into our home studios, proving the calculus of gear acquisition as, “the amount of you need is the amount you have plus one more.” Oh, and that doesn’t even count our guitar collections.

Well, yesterday I racked up my new Heritage Audio Successor. The one I bought and paid for with my own money, not the one they sent me. And if you just wan’t the TL;DR – it’s awesome. Universally awesome? The awesomest? Well, sorry, then we’ll have to start with…

…MY USUAL LONG-WINDED BACKGROUND

My lifelong search for the perfect 2-bus compressor has seen more stripped rack screws than I’d care to admit. Thirty-or-so years ago, when I first began the pursuit of making my mixes mightier and meatier, a good mixdown compressor would run you thousands. Sure, there were certainly options costing less, even a few that were serviceable (I still have an Aphex Dominator in storage). But rarely ever did they piss in the tall weeds with the big dogs. They didn’t make your mixes sound any better, just louder. 

I keep most of my comps racked here. Yes, I like toys.

In the years (okay, decades) since, my roving home studio has hosted dozens of these things. Remember the TC Electrionic Finalizer? (Ugh, probably not, you whippersnappers). Well, I was among first in line to buy one and it taught me all kinds of things – notably that buying gear on credit is a horrible business plan. I’ve since owned SSL. Neve. Drawmer. Focusrite. VCA. FET. Tube. Optical. Oh, and we’re not even going to attempt listing the plug-ins that have occupied this position other than to say there have been many. 

To me the ultimate bus compressor is one that I can turn on, leave on, and simply mix into it rather than flip it on in the 4th quarter. Nothing crazy, just a little gain smoosh to give the final result a little something something. And I have amassed a fairly handsome collection for a home studio – especially given the space constraints of a NYC spare bedroom. 

But GAS is a pesky, chronic condition. You are forever convinced that there’s something else out there that will do it a few db better. 

AN BRIT AND A SPANIARD WALK INTO A BAR

Hailing from Madrid, Spain, Heritage Audio have dedicated a sizable part of their product line to recreating the classic circuit designs of one Mr. Rupert Neve. Arguably one of the most, if not the most influential engineers and product designers in our field, Mr. Neve’s many inspired creations have been integral to so many incredible releases that it’d probably be easier to list the ones that haven’t been part of the production process. We could list them all and one day probably should*.

The classic circuits that famously bear his name – notably the 1064, 1073 and 1081 preamps and EQ’s and the 2254/33609 diode bridge compressors, have by now been reverse engineered, recreated, and reimagined by scores of companies big and small alike. Yes, Heritage Audio is among them – and offer these circuits in a handsome portfolio of offerings and price points (the Elite Series notably cuts a few of the pointier corners to put this technology within reach of budget-minded engineers).

(* Lest we forget, Rupert Neve was a lot more than Neve. In the 1980’s he turned his attention to building Focusrite – which at the time were uncompromising, Class-A devices that were the pinnacle of ultra-high bandwidth, unbelievably sterling preamps, eq’s, and dynamics processors.)

BUILDING A BIGGER, BETTER BADASS

This all begs the question then, what’s the big deal with another Neve compressor clone? It’s been done, right? Heck, AMS Neve still produce the 2254 to this day. Well, hold up. The Successor is not a clone of an existing design. While the original Neve blueprint is over fifty years old, the Successor is very much its own thing – and once you properly learn its implementation into your flow, what a joy that thing is. 

Heritage Audio have managed to take several nice-to-haves that are found in VCA-based bus compressors these days and augment an “ain’t broke, so don’t fix it” circuit. Packed inside a quite familiar-looking, sturdy Royal Air Force-blue chassis, one can’t help but immediately feel shades of jolly old England, especially with several Marconi knobs festooned on its fascia.

And inside, you’ll find the two most important ingredients of the 2254/33609 design, namely the diagonal diode bridge circuit and two pairs of nice, chunky Carnhills balancing the input and output stages. The original Marinair transformers are long, long out of production – but frankly I would challenge anyone to honestly sit there and pick out the difference. For as much as we talk about the mythical role that these big lumps of iron and wire have on a signal, the variation between brands and core material isn’t exactly profound. Seriously, we are deep, deep into wine country on that one. 

But with the similarities covered, it’s the differences that make the Successor far more than a one-trick pony, even if the trick itself is worth the MSRP. A quick scan of the faceplate reveals the numerous “but wait, there’s more” features that would have made Rupert himself proud. First of all, let’s talk attack times. The original 2254 was able to clamp down on transients in 20 milliseconds, which in its day absolutely pantsed their optical and FET-based contemporaries (remember, this is the Pleistocene era before VCA’s appeared). But Heritage Audio have managed to, through exhaustive design, sheer force of will, or ancient Sumerian magick, managed to get that time down to 50 microseconds. Microseconds. As in “a thousandth of a thousandth”.  (Fun fact: You know how people say “blink and you’ll miss it”? The average blink is about 330ms. Even a Vari-Mu can handle that.)

Warren Huart likes the Successor. Hope you’re doing marvelously.

That’s faster than fast and you’ll hear it clamp down on percussive material so fast the backlit VU meter is limited by the laws of physics to actually display the gain reduction that’s happening. Too fast? Well, let’s move on. 

You’ve got your typical threshold, attack, and release times all, again, selected with classic Neve-styled knobs and detented potentiometers. I can’t overstate how important those clicks are, as easy recall on analog equipment, particularly one that is designed to sit across every mix you do, is a must. The threshold control clicks in 2db steps between its -20 to +20db operating range – left is more, right is less. That’s a good trade-off between big, marked steps and a continuous swing (which would make recall an absolute nightmare). Keep a grease pencil handy or just stick to your precious $29 “sounds almost like” plug-in if this is too much work. 

WAIT, IT DOES THAT?

Here’s where it gets interesting – and the Successor truly earns its place as a unique, new take on the classic circuits of days gone by. By way of Spain, we’ve got a virtual paella of features that aren’t on anything like it. Not only does it offer you an 80 and 160hz high pass filter on the sidechain to let kicks, basses, or any other low end-heavy material stay out of the compressor’s detection circuit, but additionally a bell curve at 500 and 3000hz, AND an LPF at 5kHz. 

Side-chain options that you most definitely haven’t seen before.

What does this mean for you? Well, hi-pass filters on the sidechain are not new, but they certainly are hard to work without at this point. Being able to trigger the comparator with an overzealous snare drum or peaky vocal are a true godsend, especially since these are both things that push an otherwise polite compressor sound into a pumping, wobbling mess. And for those deaf, former drummer engineers who just don’t realize how loud the cymbals are in the mix? The LPF setting makes your mix listenable for the rest of us.

We could dedicate several more paragraphs to what a “well, duh!” innovation this new take on a detection circuit is. Truly. I can’t believe this isn’t on every compressor. It’s the sort of thing that is a true savior on mixes that need it. But we’re not done here yet.

Moving further to the right you’ve got your external “sidechain in” switch and, again, this is something not found on the designs that inspired the Successor. But you’ve also got output attenuation in six stepped points from 0 – 10db. This is not adding gain (which would add to your noise floor), but attenuating it. Good to know. But just to its right, you’ll find the holiest of holies, the blend knob. Yes, a Neve-styled compressor with a switchable dry/wet mix – also with satisfying clicks between each point for easier recall. Switch it out and the signal bypasses this stage entirely, or pop it in and find the perfect parallel blend – an absolute miracle for drum bus duties. 

Obligatory “plug stuff in here” photo.

Flip around back and you’ll find the usual array of XLR inputs and outputs, sidechain input and output on balanced TRS connections, and a five pin connector for the unit’s external power supply. (Oh, boy. Here we go.) Yes, the Successor has a line lump. I should imagine that the trade-off here is that Heritage Audio made the decision to make this unit a single rack space – and in doing so sacrifices had to be made. Remember, there are four – yes, count ’em, four – transformers inside of this thing. And diode bridge topology can be prone to noise compared to its VCA brethren. Big power supplies mean big torroids, which can impart noise if not well-shielded. And with a clown car of wires, trafos, diodes, and transistors inside the Successor already? Well, there you go. 

As a final note on the hardware itself, the build quality is excellent. Just picking it up out of the box, you’ll be surprised at this meatball’s heft. The pots and switches click with authority, while the powder-coat surface and chassis elicit the overbuilt outboard of decades long gone by. And even if this makes no discernible difference on the actual audio quality, it does inspire confidence. Of all the things besides the sound Neve are known for? They are built like tanks – and Heritage Audio seem to be up for the long haul.

RACK ME UP BEFORE YOU GO-GO

The diode bridge “sound”, such as it is, is a different shade of compression than many engineers are typically used to. With exception of digital look-ahead technology, you’ll be hard pressed to find anything that can swoop in faster. As the design intent is bus compression, it’s important to point out that a majority of us rely on that oh-so-well-known “gluey” quad-VCA sound. Going into a listening test expecting the same sound or results is going to leave you scratching your head – and I can’t draw enough lines underneath the fact you’ll need to think differently about how you put the Successor to work.  

Glenn Fricker likes it. Whether that’s a plus or minus is totally up to you.

I pulled up a track that has been, for whatever reason, a particularly treacherous one to mix. A lot of elements going on, from a live drum kit to its augmented samples. All told maybe eight tracks of main guitar with flourishes coming in and out throughout the song’s five minutes. A bass guitar track that’s just too roaring to be subdued and tossed in the corner. Densely layered vocals, a Moog Taurus holding up the rhythm guitars, a wispy OSCar synth lead washing over and around, and a fair amount of reverb to truly make it all cavernous. All told? 47 inputs at mix. For me? That’s a lot. 

My go-to mix bus compressor is the IGS Audio S-Type – a very fine SSL-inspired 500 series unit, as well as a pinch of the Oxford Inflator and Waves L2 just to ensure no digital overs. The IGS was definitely doing its grabby, gluey thing we all know and love. Could you hear it working? Yes, most definitely. Heavy music is not known for pulling punches and that applies just as much to the way it’s recorded and mixed. 

SUCCESS… OR?

Switching the master bus compressor to the Successor was not an immediate parting of the clouds. In fact, with the exact same ratio, threshold, attack and release? It sounded blown out and brown. Murky. Just… bad. But there is no bad gear, only bad engineers. Seriously. Andy Wallace could make a better mix than me with a stock copy of Reaper and nothing else. So I did the smartest, dumbest thing I could: I saved a copy of the session and literally zeroed the thing out. Not just the mix bus – the whole thing. Every last EQ, insert, sub group… all of it. Every fader pulled to null. Every effect send and subgroup deleted. We’re starting over.

Now one philosophy I espouse, and I may be in the minority here, is to ‘mix into’ your compressor (apparently veteran mix engineer Michael Brauer has taken ownership of the practice). This means from the second you begin your mix it’s already strapped across the mix with arms (and diodes) wide open. Like a Creed video, minus the unfortunate realization you’re watching a Creed video. And regardless of what I’m working on that day, I try to leave the settings exactly the same, pretending that the knobs are inaccessible. So if the unit is thwacking and pumping? That means you need to adjust your mix – not your compressor. Oh, and borrowing from the 1176 School of Engineering, you don’t need a threshold knob when you can just lower the level you’re sending it.

I set the Successor at a med. fast attack, slower release, and a (for these days) low 2:1 ratio, then got busy. Getting my drum mix back, I could already hear the circuit going to work. In fact, I opted against patching in my usual weapons of choice on overhead and room mics (the vastly underrated and criminally unknown Aphex CX-1) because the Successor was putting a most marvelous squeeze on the kit as a whole. More on that in a bit. 

Once the bass guitar and sample augmentation on the kick and snare were in, it was definitely time to engage the sidechain HPF. Even with only four-or-so db of gain reduction happening, the Successor sounded overworked on the big downbeats. The 80hz setting still produced a little too many artifacts, but switching to 150hz things neatened up considerably. 

Pushing the guitar subgroup up into the picture, the Successor started painting a beautiful portrait of the entire soundstage that I hadn’t heard before. In a word? Glorious. Vibrant. Harmonious. Between the Carnhill transformers adding a shimmer of light harmonic distortion and the way the Heritage pulled up the music between the notes, the mix immediately started sounding more… well… “mixed”. 

This only left the minor chore of helping a vocal – or in this case – quadruple-stacked vocal – find a place that didn’t feel stapled on top. Now, as a product of Generation X, I have never been one to put the vocals on the tip of your nose. The trick for me has always been to make the words discernable and the emotion behind it intelligible without the mix becoming one part voice, one part “everything else”. Like a guitar that talks (but not the way Peter Frampton did it). Properly leashed with my favorite Elysia xPressor 500, I winced in anticipation and pushed the subgroup up slowly. The result felt like a ray of sunshine after days of rain as they fell right into place. I dare say it was almost too easy, like the Successor was feeding me the answers to the test.

As I continued to automate mix scenes between verses, choruses, bridges, and outros, I noticed just how much a smidgeon of difference between reverb levels could become so apparent. I do a lot of automation, particularly on effect returns. The Heritage truly shines at making a lot out of a little. For all the reverb I might (or might not) use, the last thing in the world I want is for anyone to actually hear it. The best effects, to me, are the ones you only sense.

Get out of my chair. Get into my bus.

DUDE… WHERE’S MY MIX?

To that end, I tried switching out the Successor and it was almost as “WTF” as when I first strapped it across the old mix. Seriously. What happened? I’m only shaving off a few points here. All of the sudden, my hours of work sounded like a bad pastiche of vaguely conjoined elements that just so happened to be playing in the same tuning and tempo. Think “first year community college art student collage”. It was wimpy. Anemic. Lame. And oddly enough, the RMS level was actually 3db hotter. Quickly, I smashed that “Dynamics In” button just a little too hard, like someone drinking their first glass of water after three days in the desert. Thankfully, the build quality is as reliable as the sonics. 

Though I never use parallel compression on the mix bus, I decided to at least try it out. The result? Well, let’s just say “I never mix with parallel compression on the mix bus”. That’s just me though. Not saying you couldn’t, not saying you shouldn’t, just that I was reminded why I don’t. Frankly, the song at this point sounded damn near ‘finished’ after just a few hours after starting again from scratch. I threw a mix on my Google Drive and popped on a far more real world use case, the dreaded AirPods. 

Enjoying my well-deserved afternoon coffee and picturesque walk around Queens (the naked guy who is always eating out of trash cans says ‘hello’), I was enthralled as I A/B’d back and forth between that day’s mix and the one before it. The two were profoundly different, yet both achieved their intended result in their own ways. Usually when mixing through the IGS S-Type’s SSL-on-roids sound, the ‘slammed’ vibe is part of the aesthetic. That’s why so many engineers swear by them, including many who I openly admire and rip off to the best of my ability (Hey, Terry). 

The Successor’s mix was a completely different thing, but a quite rich and nuanced one. Very bright and present, but not at all shrill or brittle. In fact, you could look someone dead in the eye and tell them this was recorded old school, tape to console, and they’d likely believe you. The music’s attitude was tempered with a wooly warmth in the lower registers and silky highs up top. Could you say you heard the Successor “working”? Well… yes, but not in the usual “I can hear it pumping”-sort of way. 

HEADING DOWN TO POUND-TOWN

I knew that I had to hear the Successor as a dedicated drum bus compressor. Instead of going ten steps back on the same track I’d been listening to all day (fatigue!) I pulled up a drum multitrack from some years back. The recording itself was minimal, just a BeyerDynamic 88 mic on the kick’s front head, a Beta 57 top of the snare, and a spaced pair of slightly-modified Avantone c12 clones (don’t sleep on those, even unmodified they’re pretty spectacular), recorded through a Trident 80B to ProTools. During the recording, we were hitting the Trident’s preamps pretty hard, and not by accident.

Side-chain options that you most definitely haven’t seen before.

Once the Successor got its grubby little mitts on it, the only word was “wow”. My drum bus has a lot of options in mixing, and has certainly been run through all of them. Some favorites? The aforementioned CX-1’s, which are just glorious. Other contenders include some slightly modified ART VLA Opto-comps (the very hard-to-find 500 series ones), DEAD(fx)’s boutique GB-1 Gain Brain clones, Analog Obsession’s very excellent 4K-styled BusterSE, and so on. 

Switching the sidechain detector to the quite novel 5kHz LPF, I suddenly heard the drum session I’d heard a million times plus one in a whole different way. The Successor made the drums sound like veritable cannons, every attack followed by a very pleasant, Levee-breaking sustain. And lest the Heritage seem too planted on some sort of Greta Van Fleet retro kick, the rhythms were begging to become next year’s breakbeat loop du jour. 

Taking the attack and release times deeper, I was able to push the ratio up into the limiting range – enjoying a musical “squish” that turned attacks into actual notes. You could practically hear the drummer himself breathe. Switching the blend circuit into action, mixing the dry signal in at about 30% let the attacks themselves push their weight around, keeping the rhythm and direction up front while letting all the room’s resonant glory fill out the backseat. 

I’d hazard to say that while the Successor might not be the right tool for every stereo mix, it definitely still has a seat at the table in every mixdown. Overheads? Absolutely. Vocals? Giddy-up. Bass guitar? Most definitely. 

WHAT’S NOT TO LIKE?

At a $1500-or-so street price, a stereo Neve-inspired compressor with so many modern appointments is a no-brainer for any studio that wants or needs the classic smush of this hallowed sound. The Heritage Successor is unlike any other compressor in your rack or plug-in folder, even if they already contain a 33609/2254 – be it an original or one of the many, many clones or please-don’t-sue-us “re-imaginings”. Is it perfect? Flawless? As it is my job to point out both the highs and the lows, the answer is, “not quite”.

Every compression circuit has an achilles heel and for the diode bridge, that’s noise. Oddly, the Heritage Audio website and manual have no stated signal-to-noise specifications and, looking at the metering in my DAW, I think I might know why. The reality is that yes, it’s a comparatively noisy circuit in its field. With nothing but a bare aux track, my meters read -78dbFS. You’ll really need to crane your ears to hear that. In fact, most home studios would be hard pressed to tell you it was there save for the sliver of signal on the screen. But it should be mentioned here. Not a deal breaker, but it’d be irresponsible of me to tell you it’s whisper quiet. Let’s be real though, this is not a mastering compressor (I guess anything’s a mastering compressor if you master with it), it’s a vintage-inspired “attitude” compressor that doesn’t pretend to be transparent and hospital room clean.

78db s/n ratio… That’s gonna run you half a star.

For me, the range of attack times is a little coarse when you realize how focused they are on fast ones. That barely-perceptible 20 microsecond option is frankly too fast to be usable. An attack that fast means the transient gets through for a razor-thin slice of time before the Successor goes to work. In theory? It sounds great. In practice? Not so much. The plosive or transient is cut off after what could only be referred to as a ‘semi-half tick’. If the goal is to not hear the unit working, well, that’s just not useful. Honestly, it sounds broken. This comes at the sacrifice of two or three times in the far more usable range that you might actually use. 

My final issue concerns the metering on two fronts. The SIFAM-styled VU meter reads all well and good, but is mounted to the chassis in such a way that the backlight leaks from all around it in dimmer situations with a distracting halo. As this isn’t a review unit that I need to return (and I wouldn’t be returning it regardless), I plan on caulking the edges. Carefully. Speaking of metering, the VU only displays gain reduction. Being able to monitor input or output levels on the unit itself is pretty standard issue, even with the majority of users having their DAW providing a far more granular readout. Still… not a ‘need-to-have’, but definitely a ‘it’d-be-a-lot-cooler-if-it-did’.

HOW THE PAST DEFINES THE FUTURE

If you count yourself among the many home or project studios that is nearly (or completely) in-the-box, but want to add one dedicated bus compressor, the Hertiage Audio Successor is most certainly worth your consideration. The competition is stiff, the field is crowded, and we have reviewed some viable contenders. If I could have one, and only one, stereo analog compressor? I’m not sure. What the Successor has in features and unique sonics, it comparatively lacks somewhat in versatility. 

Whereas VCA-based bus compressors will be able to do most things pretty well, the Successor does one thing to absolute perfection. Let’s be clear on this, the Successor is not a unit you can wail on with levels the way you can a 4K-G or 1176 and expect miracles. Like that ex-girlfriend who would tear your head off for asking her if she wanted more ketchup, it’s moody. Seriously, hit it too hard (the compressor, not the girl) and it’s simply too much of a good thing, even with the myriad side-chaining options. I’m the last person you’ll hear using the words “compress” and “responsibly” in the same sentence, but if you want the Successor to be an… ahem… success? You’re not going to see the VU meter thwacking away to the beat.

But if what you’re after is this particular sound – that sound being the inimitable, unmistakable marriage of diodes and iron? You’ve found it. Not only that, you’ve found it in a very feature-rich box with capabilities the Neve 2254/64 simply does not, even with current models. Sonics alone, Heritage Audio has nailed it, and they’ve done so at a very handsome price. Does it sound just like Neve? That’s near impossible to say, as the designs that inspired the Successor have been through tons of revisions – and the vintage units, should you be lucky enough to work on them, have been through fifty years of maintenance. But if you taped a Neve logo over the Heritage one? I’d never suspect a thing.

Can you spend less? Sure, Chinese 4th-shift manufacturer Alctron makes a 2254-clone for CHEAP. SO DOES GOLDEN AGE. But if you’re buying your most mission critical circuit off AliExpress, well… I don’t really even need a snide rejoinder here. And yes, of course, the Neve ‘thing’ here has been RELEASED DOZENS OF TIMES AS A PLUG-IN. But Heritage Audio have been very clever in adding the things that today’s mix engineer need… even if they don’t realize how much they need it.

Remember, I am of unvarnished opinion in this review. I bought the Heritage Audio Successor as a lowly consumer, without the auspices “hey, we sold this to you for half the price… editorialize accordingly”. I don’t have many loyalties to my analog gear either. If something better comes along, I won’t wistfully dab my tears as the Reverb listing for its predecessor goes live. 

I set out looking for a new shade of bus compressor. Something that could not only shape the sound of my mixes, but define them. And to that end, you’ll be hearing my Heritage Audio Successor. A lot. It might not be the right tool for every job, but for the right job, it’s one hell of a power tool. 

Price (at time of review): $1699.00

For more information and to purchase, please consider our affiliate link (HERE). It doesn’t cost extra to you and helps keep the lights on at Everything Recording HQ.

Heritage Successor Rundown:
4.5 / 5 Reviewer
{{ reviewsOverall }} / 5 Users (0 votes)
Pros
* Excellent on-the-nose Neve-inspired sound.
* Packed to the gills with modern features.
* Extremely attractive price point.
Cons
* Ultra-fast attack times sound like a glitch.
* 78db s/n? That's not exactly whisper-quiet.
* No input or output gain metering.
Summary
Compressors come in many shapes, sizes, and colors. If the classic sound of Neve on your mix is what you're after, you've found it - built with features you will not find anywhere else, including from a Neve costing over twice as much.
Rating
What people say... Login to rate
Order by:

Be the first to leave a review.

User Avatar User Avatar
Verified
{{{ review.rating_title }}}
{{{review.rating_comment | nl2br}}}

This review has no replies yet.

Avatar
Show more
Show more
{{ pageNumber+1 }}

Avid’s Pro Tools “Re-Tool” Explained in Plain English

If the new restructuring of Pro Tools has you scratching your head, don’t worry, Everything Recording has you covered. We will break down each new version and pricing in plain English. Instead of making you wade through a thinly veiled sales pitch, let’s get right to the changes and what to expect.

Note: this will not go over any new features of Pro Tools, just the latest options for purchasing. We will cover that in another article.

The Versions

Previously, we had Pro Tools First, Standard, and Ultimate. Pro Tools First was your free offering with minimal options, Pro Tools Standard had features tailored for your intermediate user, and Pro Tools Ultimate contained the kitchen sink.

Pro Tools will still have three versions, but they’ll look slightly different. The new versions are the following:

Pro Tools Artist
Pro Tools Studio
Pro Tools Flex

A picture is worth a thousand words, so I’ll let Avid do the explaining with this graphic below.Avid Pro Tools 2022 Offerings

As you can see, each tier has improvements over its predecessor. We will get into each in a little more detail later but let’s get to the biggest question I see online.

No More Perpetual Licenses

While this may come as a shock, don’t close this tab and immediately go doom scrolling through forums just yet. Immediate outrage is all the rage right now, but it doesn’t always cover the facts. Let’s go ahead and address the perpetual questions swimming in your head.

I have a perpetual license. Do I lose it?

No, your license is still safely nestled in your iLok account and will remain there for eternity (or at least until OS support for your version runs out). If you have a perpetual running on a subscription plan, your Pro Tools Standard License will become a “Studio” license, and your Ultimate will become a “Flex.” Nothing happens if you’re rocking a Perpetual on an expired support plan or Pro Tools 10, 11, or 12 (you may laugh, but I know people who still use it).

Wait, I want to own Pro Tools outright. What do I do?

While Avid is not producing any more new licenses, some still exist. Avid is letting all retailers sell their stock, but once they’re out, they’re gone. At the time of publishing this article, Sweetwater still has some in stock. You can even buy from our handy affiliate link HERE. It doesn’t cost you any more than if you went to the site and bought it yourself, and it helps pay the light bill here at Everything Recording HQ.

Am I stuck with my Perpetual License version forever?

No. Avid has what is called a “Get Current” offering. This will take ANY perpetual license and bring it up to the current version. You also get a year of updates, and at the end of your subscription, your perpetual becomes the last version offered during your term. You can jump on and off of this at any time.

For example, say I own a perpetual for Pro Tools Standard 2018. I can buy the Get Current option, and my perpetual becomes “Pro Tools Studio 2022.4”. At the end of my year subscription, I choose not to renew. My Perpetual becomes whatever version was last offered during my term (let’s say it’s Pro Tools Studio 2023.4). I now can use Pro Tools Studio 2023.4 in perpetuity until either the OS is no longer supported or Pro Tools no longer supports the OS I want to be on.

Now, let’s say I stay on the correct OS that supports Pro Tools Studio 2023.4 for several years but want to update to a new Mac OS or Windows. All you have to do is buy the “Get Current,” and you can update and keep the perpetual like before. You can do this at any time, even if you are years lapsed on your perpetual.

Think of it like the old “Major Upgrade” offering before subscriptions.

Below are the prices.

Avid Pro Tools Off Plan Offerings

So with the big questions answered, let’s take a deeper look into what Avid is offering for the new set of plans.

Streamlined

Let’s all be honest, getting Pro Tools registered, installed, and running hasn’t always been the most straightforward. Up until this point, it has been an experience plagued with browser tabs and hoping. But now, Avid has covered everything from picking the correct version to installing and operating Pro Tools.

Immediately greeting you at Pro Tools’ home page is a “Start Here” button. This gets you right to the comparison page, where you can quickly determine which version you need.

Once you’ve purchased your subscription, Avid has streamlined the registration and installation into a workflow under six steps. Not only is the process easier, but it’s also all done from one browser tab—no more moving around a confusing site.

New Avid Link

At the end of registering, you are directed to download Avid Link, which handles your downloading and installation in the background. All necessary software will be downloaded, installed, and ready to use. If you’re new to Pro Tools or want to expand your knowledge, Avid Link now has short informative training videos right on the homepage.

Finally, no more digging through Youtube thumbnails of influencer faces and yellow text saying “The LAST Pro Tools Tip you’ll EVER need to know!!!!!!!”. Your training now comes from the source, not some click-hungry basement dweller.

Avid Link Update
Training videos now show up right in the home feed.

Lastly, Avid offers a free demo session to show optimal workflows and plugin usage.

The Versions

Pro Tools Artist

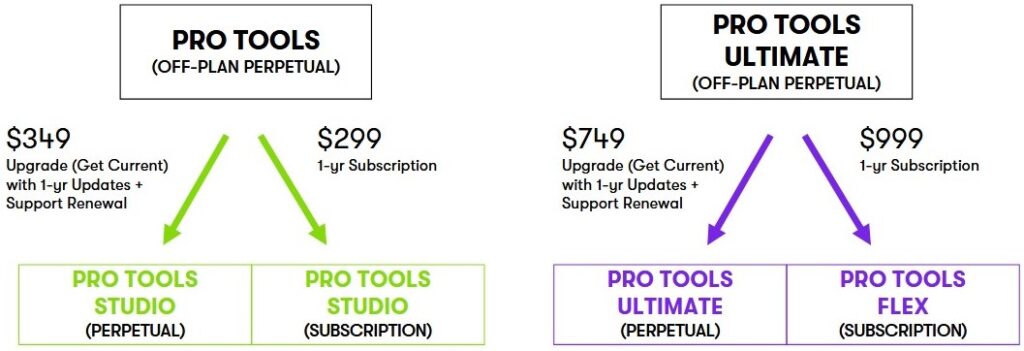
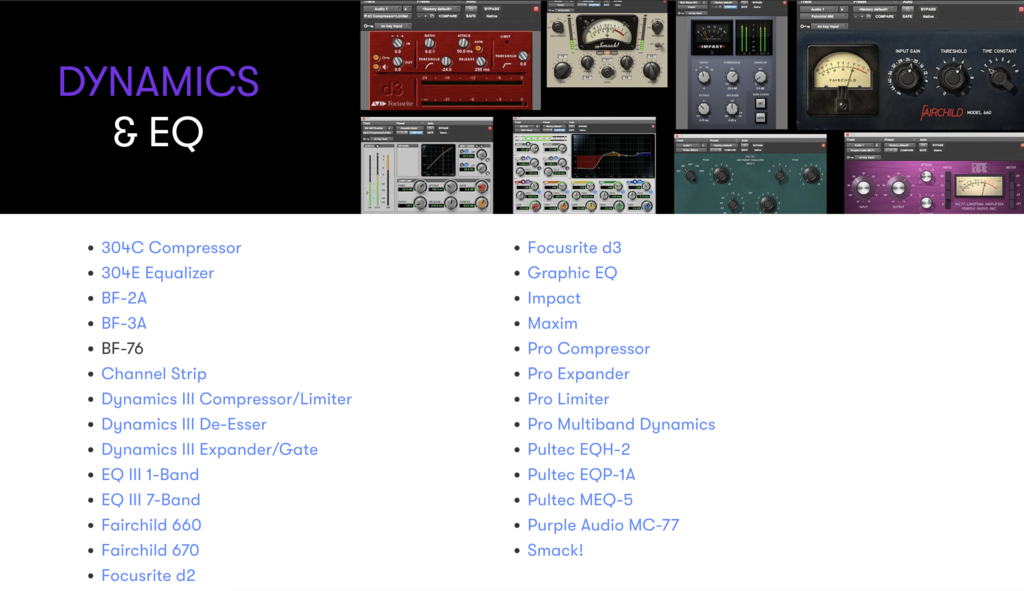
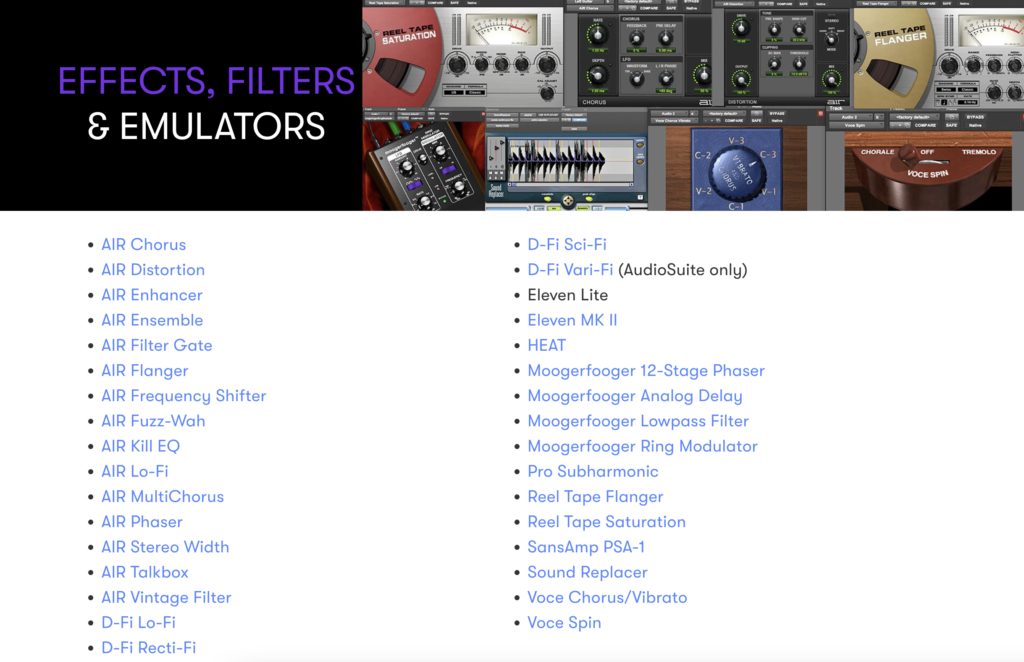
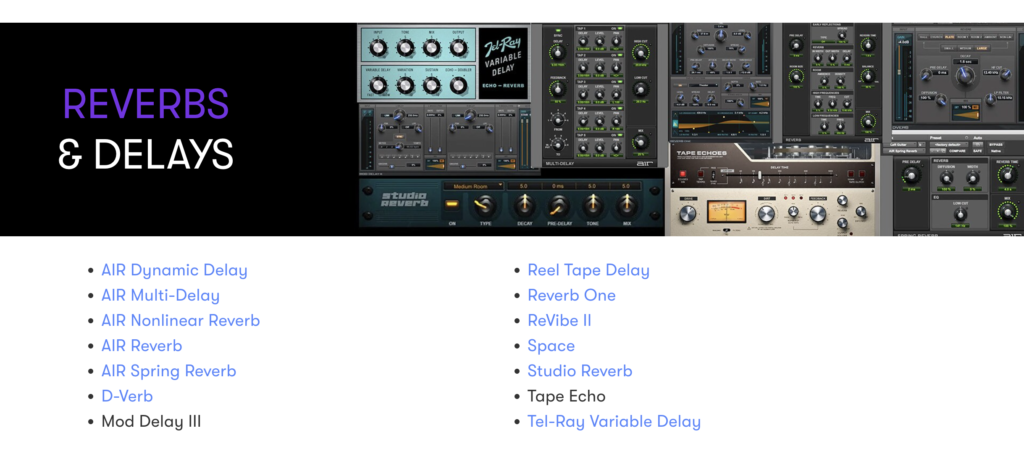
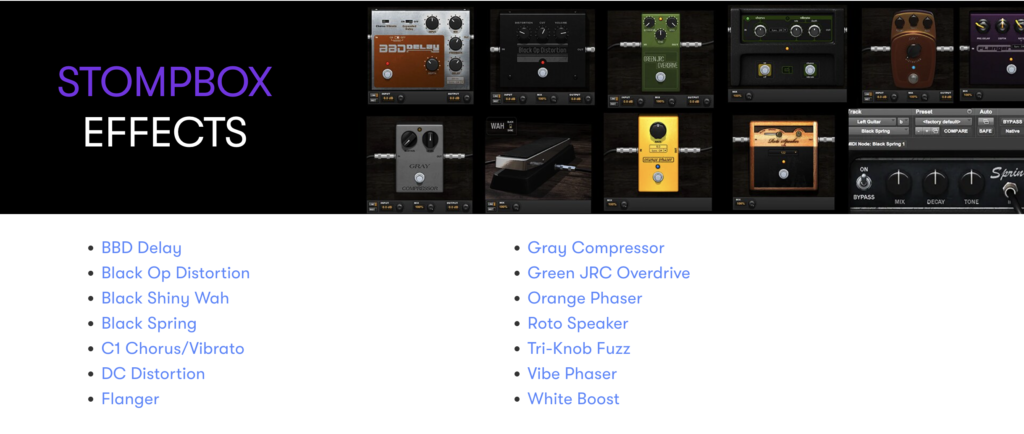
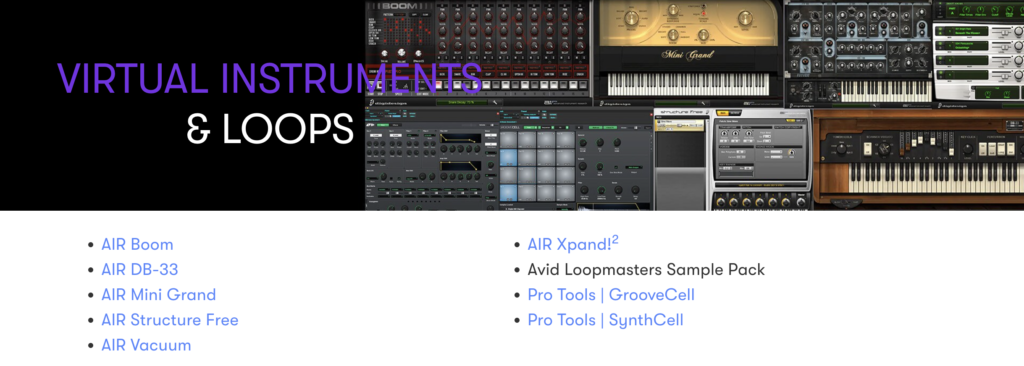
Artist is Pro Tools’ entry-level offering. Clocking in at $99 per year ($9.99 per month), you’re getting a decent amount of features for the cost. For example, you can easily track a full band with an available 16 tracks of simultaneous recording (as long as your interface has the inputs), and a session can house a total of 32 Audio tracks. On top of the 32 Audio tracks, you can utilize another 32 Aux and Instruments tracks and 64 more MIDI tracks.

As far as plugins go, the Artist subscription offers over 100+ plugins and the ability to use other third-party AAX plugins. You also get access to Avid’s new Groovecell and Synthcell virtual instruments.

Pro Tools Studio

Pro Tools Studio Details
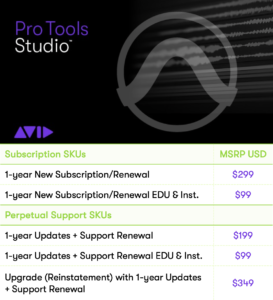
Pro Tools Studio is a considerable jump from Artist, bringing in features that rival previous “HD Versions” of Pro Tools. Adding Surround, Atmos, Ambisonics mixing capabilities, and Clip FX Editing, Studio is ideal for anyone from beginner to seasoned vet.

Pro Tools Studio can record up to 64 Audio tracks simultaneously (as long as your interface has the inputs). The total amount of session tracks moves up to a staggering 512 Audio tracks along with 128 Aux tracks, 512 Instrument tracks, and 1024 MIDI tracks.

This version also works perfectly with Avid’s new Pro Tools Carbon interface (review HERE), bringing in the Hybrid Engine for near-zero latency tracking through AAX DSP plugins. For the majority of us, “normies” Studio covers all bases. The plugin bundle increases to 120+ plugins by including the Pro Series plugins and a few more titles to spice up your mixes.

Pro Tools Flex

Pro Tools Flex Pricing
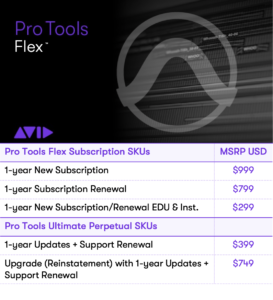
Flex replaces your Pro Tools Ultimate version, but don’t assume that would be the only reason to own it. Flex can record up to 256 Audio tracks at once (hello orchestra) and allows 2048 Audio tracks, 1024 Aux Tracks, 512 Instrument tracks, and 1024 MIDI tracks.

Additionally, since you’ll most likely need it with your HDX or Native interfaces, Flex includes the Digilink License. Also, Flex upgrades your support subscription to Expert Plus, giving you priority with support-related issues or questions.

What does every subscription plan get?

Each subscription comes with Avid’s new Groovecell and Synthcell virtual instruments, bringing new drum sequencing and synth flavors to Pro Tools. If you’re wondering what the absolute minimum plugins come with each version, here is the list.

Avid Plugin Bundle
These plugins come standard with Artist, Studio, and Flex.

If you purchase an Annual Plan, you also get free third-party plugins as part of the Inner Circle. These licenses are yours forever and feature some heavy hitters on plugin manufacturers. More are added regularly, so it’s not just a “one and done” deal.

Pro Tools Annual Subscription
Only comes with Annual Plans and not Monthly Subscriptions.

What do I get extra with Studio and Flex?

Primarily, you get more plugins and virtual instruments. Here’s a list of what comes in the Complete Production Bundle.

Avid Pro Tools Complete Production Bundle


Avid Plugins
So that pretty much sums up the new plans and features. We will go over the new features of Pro Tools in an upcoming “yearly review”.

If you’re going to buy any of these plans, please consider buying from our Sweetwater Affiliate Link HERE. It doesn’t cost you extra, and it supports our content by helping keep the site up and running.

A Lived-in Review: Pro Tools | Carbon

About a year and a half ago, I got the itch. I sold off roughly 60% of my gear and decided it was time for a “do-over.” Part of the gear that got the ax was my Avid HD Native system. There were no real issues with Native; only the desire to move away from a card-based interface and bulky, noisy PCIe chassis. It was time for a change, so I bought a new interface, and for the first time since my MBox 1 in 2002, Avid / Digidesign didn’t make it.

Expedition Unknown

The reason I didn’t buy an Avid interface, you ask? Because other than Avid’s HDX system, they didn’t have much to choose from. Their MBox line was toast, along with the Digi “Double O” models. Avid was uncharacteristically silent. However, right after I purchased my new interface, Carbon did come out, and I quickly felt the “I bought a Macbook Pro 31 days before Apple announced the new models” feeling.

I didn’t necessarily regret buying my other interface – I like it very much (B. Church’s Review Here). But you can’t help but feel you’re missing out. Luckily, Avid asked if I wanted to give Carbon a spin, and I jumped at the opportunity. We’ve hung onto it for the better part of the year and can definitively answer the question most of you have probably been asking: “What exactly IS Carbon?”

So Many Questions

If you were anything like me around release day, you met the announcement with a bit of head-scratching.

  • Are they phasing out HD Native?
  • Is the HDX system a thing of the past?
  • Is this a cash grab by Avid?

As far as I can see, the answer to these questions is mostly a resounding “no.”

  • Avid has swapped the Native PCI card for the thunderbolt interface.
  • There’s no way the HDX ecosystem is going anywhere. Larger studios lean heavily on HDX’s onboard DSP for massive sessions.
  • And I’m not sure any interface at this price point is a guaranteed “cash grab” for a company.

Occam’s razor can only deduce that Avid found itself outside of an untapped market, one that another company has dominated for a very long time.

The DSP Wars

With its years of experience in onboard DSP processing, Avid suited up for battle in an area they had skirted for years – the prosumer DSP-based interface market. Sure, they have the gold standard of DSP systems with HDX, but they never released a non-card-based interface that could take the load off your computer. HD Native was only a means to get an HD I/O in your workflow, but the responsibility of processing was all on you.

Meanwhile, Universal Audio’s Apollo series has been the “belle of the ball” for beginners and pros alike with its entire lineup of interfaces that remove some of the heat off of your CPU. Except for a few other brands, Universal Audio had no contenders and ran off with the lion’s share of users. That is, until now. Avid has entered the fight with Carbon, and they’ve come out swinging.

Tale of the Tape

Carbon directly contends against the most feature-rich Apollo interface, matching blow for blow the x8p’s bells and whistles. In fact, both units are laid out very similarly.

Advantage – Carbon in the looks department. While the Apollo x8p has a decent look, I feel like it still has that “early 2000s” Motu look going.

Let’s look at what they both have:

  • (8) channels of their custom-designed preamps
  • Variable Impedance mic preamps (ports 5-8 on Carbon)
  • Optional ALT D-Sub line inputs (these bypass the preamps and instead let you use your personal outboard gear.
  • (8) channels of D-Sub line output (two pairs of which can be extra monitor outputs).
  • (2) ports for ADAT expansion with Word Clock
  • (1) 1/4′ Monitor / Main out for your speakers
  • Talkback Mic with Dim feature
  • (2) Unbalanced 1/4′ TS ports on the front

Apollo has only two things I wish Carbon had: a pad and a high-pass filter for each preamp.

Carbon’s list of features continues with:

  • Footswitch port for Talkback mic or monitor switching.
  • (4) headphone outputs (instead of Apollo’s two)
  • *More inputs and outputs (possible 25in x 34out) as opposed to Apollo’s (possible 16in x 22out)

The Ins and Outs of… Ins and Outs

When we say Carbon has 25 inputs and 34 outputs, that doesn’t necessarily mean that there is a standard 1/4″ or XLR jack for each. There is a bit more to what is considered an “input or output.”

Starting with Carbon, it does have considerably more inputs and outputs. Here’s the rundown:

Pro Tools Carbon Rear

  • (8) traditional onboard inputs (either by eight preamps or eight d-sub line inputs)
  • (16) ADAT inputs (needs expansion interface with 16 inputs)
  • (1) Talkback Mic (input)
  • (8) traditional onboard outputs (via d-sub on rear panel)
    • Optionally, outputs 1-2 and 3-4 can become extra monitor outputs
  • (16) ADAT outputs (needs expansion interface with 16 d-sub outputs)
  • (2) Monitor / Main (left and right) output
  • (8) Outputs via the 4 Headphone outs.

Yeah, I know what you’re thinking – considering the four headphone output as eight seems a bit like a car company calling cup holders “additional storage,” but if you can route audio through it, it’s an output. Additionally, Pro Tools will let you use each headphone port as its own stereo output, so each band member gets their own custom headphone mix. You can even use one of those headphone outs to route your mix to a set of computer speakers or boombox to check your mix.

The Apollo x8p states it has 16 inputs and 22 outputs, so let’s break down where they go.

Universal Audio Apollo x8p Rear

Technically, Universal Audio doesn’t count the talkback mic, but if we’re on even playing ground with Avid, the x8p has 17 inputs.

  • (8) traditional onboard inputs (either by eight preamps or eight d-sub line inputs)
  • (8) ADAT inputs (needs expansion interface with eight inputs)
  • (1) Talkback Mic
  • (8) traditional onboard outputs (via d-sub on rear panel)
    • Optionally, outputs 1-2 and 3-4 can become extra monitor outputs
  • (8) ADAT outputs (needs expansion interface with eight outputs)
  • (2) Monitor / Main (left and right) output
  • (4) Outputs via the two headphone outputs.

The Apollo can also send individual cue mixes but requires the Universal Audio Console software.

Carbon certainly holds its own, placed head to head with the Apollo x8p. We’ll get back to how Carbon fares vs. the Apollo line overall later, but in the meantime, let’s look at what Carbon is.

What Do you Get in the Box?

Pro Tools | Carbon’s box has the essentials: ethernet cable, power cable, and associated paperwork. Additionally, Avid gives you washers and screws for rack mounting or rubber feet for tabletop mounting.

Pro Tools | Carbon Overview

Since Carbon is billed as a full-blown recording hub with a monitor section and talkback mic, you’ll probably want to keep it within reach. For my configuration, I placed it in the center of the desk, so I had immediate access. Also, I know aesthetics don’t make a mix, but Carbon is quite a looker—a stylish addition to any desk.

Carbon proudly at the helm of Everything Recording’s headquarters

Initial Setup

Pro Tools Carbon Rear

When trying to connect Carbon to your computer, the first thing you’ll notice is there is no USB, Thunderbolt, or USB-C connection. Instead, Carbon uses Avid’s own proprietary version of AVB, an Ethernet-based audio delivery solution. AVB stands for “Audio Video Bridging” and offers a completely lossless audio transfer at sub-millisecond latency. Avid was pretty forward-looking on this one because (a) interfaces have been fighting over USB, USB-C, and Thunderbolt for years. Ethernet is pretty stock standard, and (b) building an interface on a 32-bit sub-millisecond latency path is a rock-solid foundation. Plus, it is effortless to set up. All you need is an AVB-capable ethernet port

You’re already set for most newer Apple computers with onboard ethernet, but if you’re using a newer Apple laptop, you’ll need an AVB-capable adapter. If you have an Apple laptop with Thunderbolt 2, simply pick up Apple’s $30.00 Thunderbolt 2 to Ethernet adapter. BUT, if you’re like me, you have a laptop with only USB-C ports. This requires yet another piece of hardware, an additional $50.00 Thunderbolt 2 to USB-C adapter.

Look at this train of possible disconnections!

If the slew of adapters bothers you, Sonnet makes a $150.00 USB-C to Ethernet Adapter specifically designed for Carbon. I ended up going the $80.00 Apple route since it was half the price of the Sonnet adapter. I am not thrilled about having two connection points that could disconnect, but I am $70.00 richer for it!

Apart from finding the right AVB-capable Ethernet adapter, the setup couldn’t be easier. Simply connect Carbon to the computer via Ethernet, go into Mac OS’s Audio Midi Setup, click “Window > show network device browser,” and ensure Carbon is checked. Once you’ve enabled Carbon, you’ll have two outputs appear in Audio Preferences: one to run in Pro Tools and the other to use as your computer’s audio output.

Giving Carbon the Boot

Upgrading my old HD I/O was a bit of a pain, but Carbon is as easy as powering the unit on, booting up Pro Tools, and setting Carbon as your Playback Engine. If Avid has an update available, it will simply ask to install it. Give it a few minutes are you’re good to go. No more needing additional HD drivers to run Avid hardware with Pro Tools.

The Front Panel

Pro Tools Carbon Front Panel

Metering is laid out right where you need it. In the middle resides each channel’s meter followed by the main output LEDs. The horizontal LEDs on the left side are for your selected channel’s input levels, and the identical bar on the right is for output. The meter’s LEDs change color according to the source, so you know at a glance what input or output you’re using at any time. For input, MIC is green, LINE is yellow, and amber is INST. The same works for output: Main output is green, Monitor 1 is yellow, Monitor 2 is amber, and muted output is red. Additionally, many different buttons and meters all over Carbon respond to different changes in hardware. For instance, the TS inputs and XLR preamps 5-8 have variable impedance. At a glance, you can look at the “Z” button and know what you’re set on by color.

Pro Tools Carbon Impedance

Choosing is Fun

I’ll be honest, I grew up in the age of “a knob for every function” and have been averse to the new mode of “a single control to rule them all.” However, I’m warming up to fewer knobs and buttons. The minimal knobs do make navigating a breeze. A simple push of the rotary knobs will cycle you through settings. If you’re more of a scroller, you can press and hold the rotary knobs while turning to whisk through channels faster.

Carbon Takes the “Hands Off” Approach

Carbon has your back for the “point and click” type. Pro Tools Hardware Setup page hosts many of the controls on the front panel plus a little more.

Your Main Squeeze

The Main tab has your monitoring covered. You can change the D-Sub line outputs of 1-2 and 3-4 from standard outs to monitor outputs in the Monitors section. The exclamation icon next to each output warns you if the outputs are attenuated. So if you’re running those prized new Barefoots through one of the ALT outputs, make sure you check that box!

Pro Tools Carbon - Hardware Setup
Control everything from Monitor Outputs, Headphone Ports, and all talkback settings in one window. With a box check, you can even retain your mic preamp settings for channels.

The Headphone Sources give you the option of routing the Main Output’s audio to the headphone port or creating an individual headphone out with the “HP” option. The “HP” option adds an extra output to your I/O so you can route specific tracks for custom cue mixes. Each Headphone Source can be individually configured.

The footswitch also has additional control in the Hardware Setup. Here you can change what the footswitch does (either cycling between monitor outputs or triggering the Talkback Mic.) Any momentary or AB footswitch will work. I tried a basic keyboard sustain pedal and my amp’s AB switch, and both worked great. Note: if you use a sustain pedal, keep pressing the pedal while talking. Rounding out the Main tab is the gain control for the Talkback Mic, along with how much you want the monitor volume to attenuate (dim) when talkback is engaged.

Line ’em Up

The Line I/O tab has the controls for the onboard inputs and outputs. Enabling the preamps for each channel is controlled by selecting “On.” The Bypass control will disable the preamps and is used when you want to use an external preamp or a line-level source. This can be set on a per-channel basis for mixing onboard preamps with external pres. Note: choosing bypass does not automatically disable the preamp and enable the line input. The line input still needs to be selected if using external preamps. 

In the Line Out Reference Level, you can set the reference level of each channel to either +4 dBu or -10 dBv.

Pro Tools Carbon Line IO

Optically Yours

Rounding out the Hardware Setup is the Optical I/O section. Pretty straightforward. Select what you need to link your external source.

Pro Tools Hardware Setup Optical Tab

Real Ultimate Power

Although controlling settings for inputs, outputs, and talkback mic is useful, Carbon wasn’t finished adding features. In a recent update, Avid added complete control of most of Carbon’s buttons and knobs right inside Pro Tools. These options work right inside of both the Mix and Edit window. To enable Carbon controls in the Edit Window, navigate to View > Edit Window Views > Mic Preamps.

Edit Window Preamp Controls

To enable in the Mix Window, navigate to View > Mix Window Views > Preamp

Mix Window Preamp Control

From either Mix or Edit view, you can change everything from channel selection, linking stereo channels, impedance, phase, gain, and phantom power. This is even more useful by utilizing Pro Tools “Mix Template” to create set configurations for all input, gain settings, and impedance. Do you leave your drums permanently set up and miked? Instead, you can create a template that has each channel’s gain already set up, complete with phase, panning, and impedance already assigned. No more wasting time before each session tweaking – just pull up your “drum tracking” template.

It’s What’s Inside That Counts

Photo courtesy of Sweetwater Sound

As far as onboard signal processing, Carbon has 8 HDX DSP processors (top center area) running a total of 2.6Ghz aggregated. For comparison, an HDX system has 18 HDX DSP processors running 6.4Ghz aggregated.

Anytime you have processing and FPGAs running inside a unit, things will heat up. Since you’re going to want to keep Carbon nearby when recording, Avid developed a cooling system utilizing an ultra-quiet fan that pushes cool air from the front of the unit to the back. Honestly, the fan was so quiet that I didn’t even know one was in there until I read about it. As a result, you can easily track right in front of Carbon with no noise.

Hybrid Theory

So, if Carbon has onboard DSP, it must be an entry-level HDX system, right? Well, not exactly.  Sporting a little less than half the processors as an HDX card, you’re not going to be offloading any and every AAX DSP plugin during mixing. Instead, avid wanted to tailor DSP use to work case-by-case. They also had their sights on a different stage of music creation: tracking.

For Avid to accomplish this, they had to rethink how DSP offloading works completely. So instead of a bulk approach, Avid created the Hybrid Engine. This new architecture lets your computer run the DAW’s mixing engine and Native plugins, while Carbon’s onboard processors handle specific tracks. The result is Carbon stretching its onboard processing in ways not previously able.

For instance, say you have a vocal track stacked full with power-hungry plugins. If these plugins are AAX DSP compatible, you can enable Hybrid Engine for the track. With Hybrid Engine on the vocal track, your computer’s processing is free to run the Mix Engine more efficiently, thus giving you fewer AAE-9173 errors.

Although the mixing aspect of Carbon and Hybrid Engine is impressive, it’s not the most impressive part of the combo. Where Carbon shines is in tracking. How would you like to be able to use all of those previously power-hungry plugins while tracking? Before, if you didn’t have an HDX System, you had to track with nearly all plugins disabled, or you’d get an unbearable delay that takes your vocalist out of the groove. With Hybrid Engine, you can utilize the AAX DSP plugins during tracking, resulting in a “final mix” sound for the vocalist and, subsequently, a better performance. So how is this accomplished?

Ride the Lightning

DSP Mode determines what tracks use Carbon’s processing power. For example, when Carbon is set as the Playback Engine, a bolt of lightning appears above the grouping and pan knobs in the Mix window.

Pro Tools DSP Mode Mix Window

DSP mode can also be seen in the edit window to the left of the “waveform” control.

Pro Tools DSP Edit Window

DSP Mode works on Audio, Aux, Instrument, Routing Folder, and Master tracks. With the click of a button, Pro Tools automatically switches all Native plugins for an AAX DSP version. When you’re done, click the DSP Mode button again to put the plugins back in Native mode.

While this alone is impressive, DSP mode takes it a step further. If there are any other tracks downstream from the original DSP-enabled track, Hybrid Engine will automatically enable DSP mode on them too. This ensures every DSP plugin that contributes to the sound of a track can take advantage of using Hybrid Engine. However, some channels may not have AAX DSP versions or even need DSP mode. You can easily enable “DSP Mode Safe,” and these will stay Native. The lightning bolt icon will reflect what mode your track is in. Keep in mind that any Native plugins that do not have an AAX-DSP counterpart will be disabled. Hybrid Engine can’t run both Native and AAX DSP on the same track, so you’ll need to plan accordingly when loading up tracks with plugins.

Pro Tools DSP Mode
Here we have the different DSP mode indicators. At a glance, you can see exactly how the Hybrid Engine is handling your tracks.

Plugins Plugins Plugins

But what if you’re not sure your current lineup of plugins has AAX-DSP versions? That’s an easy fix – Avid shows what plugins in your lineup are AAX-DSP by placing a small lightning bolt next to the compatible ones. All stock Avid plugins have AAX DSP versions right from the install, but Avid realizes that sometimes you want a little more.

Just to the right of the plugin name, you’ll see a lightning bolt if the plugin has a DSP-compatible counterpart.

If you’re worried you don’t have any AAX DSP plugins, Carbon comes standard with 115 plugins via the Avid Complete Collection. These plugins span the gamut from Fairchild to Focusrite and everything in between. Although you can comfortably mix with Complete Collection, Avid also understands you may want variety, so Carbon comes with some extras courtesy of McDSP, Plugin Alliance, Arturia, and Native Instruments.

Lastly, Avid knows you’ll probably need an updated version of Pro Tools, so they’ve included options: you can either get a perpetual license of Pro Tools AND Avid Complete Collection, or they’ll upgrade your existing perpetual to the current version and include a year of updates. That’s easily a $600 value in itself.

So there you have it – a full explanation of what Carbon is. Now, let’s break down the entire Carbon system versus its immediate competition.

Carbon Vs. Apollo x8p

So with all of the facts laid out, let’s see how Carbon fares against the industry’s most fierce competitor.

Expansion

We’ve already established you get more expansion with Carbon. At some point, you’re going to want to expand your inputs and outputs for tracking and mixing with hardware. Carbon gives you a possible 24 inputs and outputs; Apollo x8p maxes out at 16 inputs and outputs.

Advantage: Carbon – More Expansion.

Plugins

Not only do you get more expansion, but you also get more DSP-compatible plugins with Carbon. Avid includes 120 plugins with Carbon. The Apollo x8p only comes with 16. I’ll give it to Universal Audio that they have FINALLY made native versions of their plugins and have an incredibly vast library with partnerships with big names. Still, you’re at the mercy of one company’s decision of what developers to include. Avid has given third-party developers the ability to make AAX-DSP plugins. This opens up more possibilities of having some of your favorite developers create plugins that harness the HDX capabilities.

In complete fairness, the AAX DSP model has its share of hurdles. Primarily, some companies have dropped the AAX-DSP format, citing it does not add enough value to justify the coding. This is something Avid will have to find a way to incentivize companies to add the DSP format. Currently, many companies like Plugin Alliance, McDSP, Sonnox, Metric Halo, and Antares still support AAX DSP. So, if you own these plugins, you already have a DSP-compatible version.

Advantage: Carbon – More Plugins by more developers

Control

Now let’s get to control. If you’re going to use the DSP-based version of your plugins with Apollo or change preamp gain or routing, you have to use UAD’s Console, which is one more piece of software to go between you and your DAW. Carbon controls every setting inside of Pro Tools. No extra programs or windows. Advantage: Carbon – Control is built-in to DAW.

Versatility

This is one that I have to give to Apollo. While you can use Carbon with other DAWs as an interface, it loses a lot of its functionality without Pro Tools. Meanwhile, the Apollo series works with many DAWs, including Pro Tools. Unless Avid builds a piece of software to bring AAX DSP to other DAWs, nothing can be changed about that. Carbon is built for the Pro Tools ecosystem. If you’re not willing to utilize Pro Tools software, Carbon may not be for you.

Advantage: Apollo – Features carry over to different DAWs.

The $4000.00 Question

We’ve answered what Carbon is. Now we have a rather large question looming: Does Pro Tools | Carbon justify the $4000.00 price tag. I understand the value of a dollar and understand $4000.00 is a great deal of money. This is a major part of why I took a year to review it. However, I can honestly say this interface is worth every penny of the price tag. Avid regrouped and kicked the door in with an incredible interface. Carbon is an absolute game-changer for the masses – an interface for the people. Before Carbon, you needed five figures to get into an HDX system that you may not even need the full might of. Carbon bridges this gap by giving you exactly what you need when you need it.

Everything Recording Pro Tools Carbon

Not only are you getting an interface, but you’re getting built-in monitor control with talkback. The Hybrid Engine has given Avid a means of scaling HDX into a system any home or professional studio can greatly benefit from. Due to latency, tracking with plugins in Pro Tools was virtually impossible, leaving you stuck with minimalist processing during recording. Now, you can load DSP-Compatible plugins to a track with indiscernible latency.

Carbon: A Year in Review

Roughed Up

When I say I put Carbon through its paces, I mean it. We did not baby this unit. I took this unit to every single session I had. From the moment I took it out of the box, it never went back in. It rode shotgun from studio to studio, even landing on the floorboard after almost hitting a driver who pulled out in front of us (we buckled it up after that near-miss.) We over-tested buttons, knobs, and jacks. The unit is sturdy. It may have a few battle wounds, but it can take a punch and still work perfectly.

Built to Master

Back in the old days, you’d buy a Digidesign unit and immediately send it to a certain company to have them upgrade the preamps and conversion. I am glad to report the preamps and conversion for Carbon are top-notch. We dropped the unit off with Everything Recording’s Mastering Engineer Extraordinaire Harold LaRue, and he had no qualms mastering with the unit’s stock converters. That’s saying a lot because conversion is king with mastering. We threw every genre we had at the preamps and loved the headroom and transparency. The headphone amps were no slouch either. Plenty of volume to go around.

UnDSPutable

Since I’ve never owned an actual TDM or HDX system, I’ve always avoided tracking with plugins. This made tracking a slightly embarrassing ordeal: explaining to clients, they can either get a more processed sound with a delay or a dull, dry sound with no lag. Being able to run plugins at near-zero latency while recording is now non-negotiable. I can’t go back. I got a taste when testing out a client’s Apollo but didn’t like having to run through UAD Console. Being able to click one button to enable DSP saves time, headaches, and apologies to clients.

Every Rose Has its Thorn

Usually, spending at least a year with anything will give you a fairly lengthy list of pros and cons. While I have a lot of pros, I can’t find many cons. I really like having a “mono” button for checking mixes in mono, but that’s not a huge deal. The only legitimate gripe I have involves expanding. I do not mean inputs or outputs. Carbon has plenty of those. I’m meaning DSP. Say I get a taste for using AAX DSP plugins and want to expand closer to an HDX system. I’ve already spent $4000.00 on an interface, but now, to move up, I have to sell the unit and upgrade to HDX. I wish Avid would make a means for expanding more DSP processors, so I can scale the system up to handle more plugins on mixes.

On the other side of the coin, I also understand not everyone can afford $4000.00 for an interface. I’d like to see Avid scale Carbon down with fewer preamps, inputs, outputs, and monitoring in a more affordable version. No doubt a unit with four preamps and one monitor out would sell like hotcakes. Plus, it makes DSP more portable in a small form factor. Name it “Carbonite” and watch them fly off the shelves.

Lastly, I need some AAX-DSP Virtual Instruments. Other than those few gripes, I have only praise for Pro Tools | Carbon.

Final Thoughts

Pound-for-pound, Carbon is easily at the top of the class. Avid has found a way to take what usually is a convoluted affair and completely handle it behind the scenes masterfully. The DSP interface market has been screaming for an alternative to the current options and Pro Tools | Carbon delivers. Avid has finally brought a true hybrid workflow to the masses.


Price: $3999.00

To purchase, please consider our affiliate link HERE. It doesn’t cost you anything and helps keep the lights on at Everything Recording HQ

Pro Tools | Carbon Rundown:
5 / 5 Reviewer
Pros
- Plenty of onboard preamps with more room to grow
- Full monitor section with Talkback Mic
- The Hybrid Engine allows Sub-millisecond latency, even when tracking with AAX DSP plugins.
Cons
- Currently lacks the ability to expand DSP
Summary
Avid has brought DSP to the masses with Pro Tools | Carbon. This unit goes beyond the traditional interface and works as a complete control center for your studio. If you're looking for a true Hybrid workflow, look no further.
Rating

Most Recent Reviews