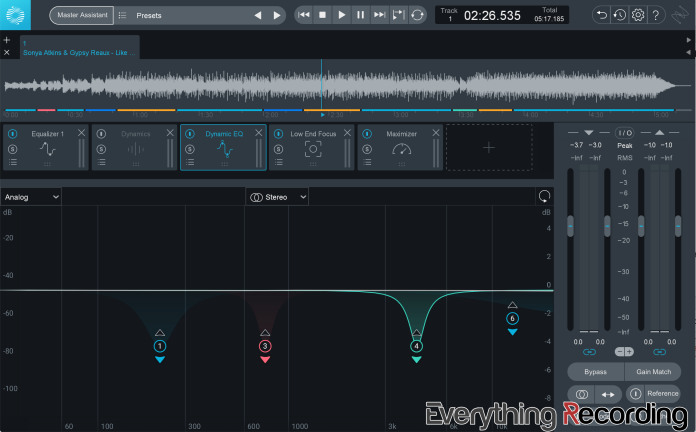
We have watched Ozone grow over the past several years (Ozone 7 Review) (Ozone 8 Review). For Ozone 9, we decided to do something different. This version comes with quite a few new features and updates, so instead of rush delivering a review, we sat with the software for over a year to see how many of the new features stayed in our rotation. Let’s get to it.
Version 9
With the number of new bells and updated whistles, it makes you wonder how they’re going to top themselves for Ozone’s tenth anniversary. A quick overview will show a bevy of under the hood enhancements, additions to existing modules, and two all-new tools to shape your tracks. Ozone 9 still comes in their Elements, Standard, and Advanced, with Advanced packing the most goodies (plus you get to use each module as an individual plugin). Prices start at $129 for Elements, $249 for Standard, with Advanced coming in just under $500. For a breakdown of what features come with each version, visit https://www.izotope.com/en/products/ozone/pricing-options.html
Enhancements
A new version comes with new improvements. One of the great things about iZotope is that they realize their software suites are living breathing bundles. They also realize that the people who use Ozone every day have valuable opinions. They take their user’s feedback seriously and incorporate it into new versions. On top of a slight UI facelift and performance boost, plugin windows can now be resized. With this new addition to screen real estate, metering has been improved with smoother visuals and increased responsiveness.
Master Assistant
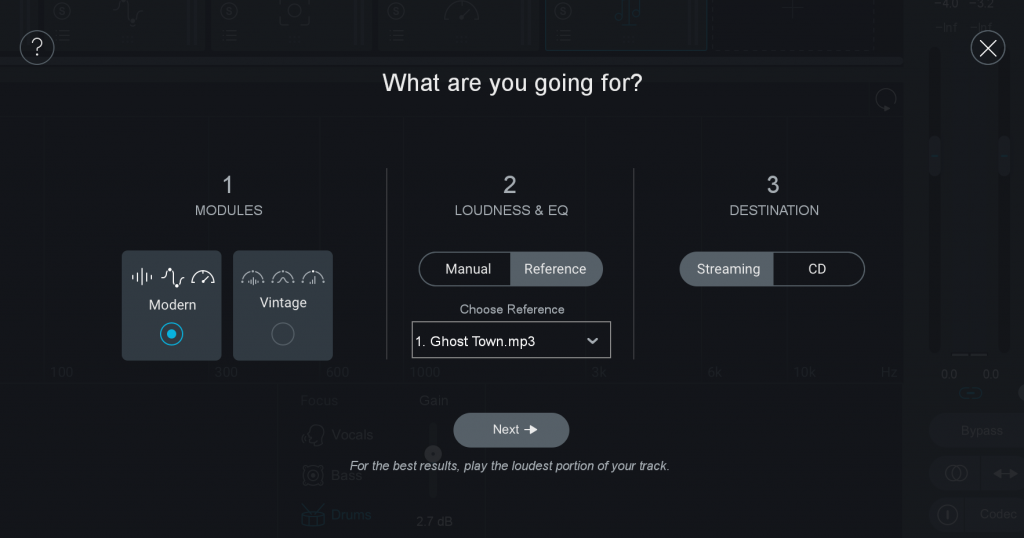
Version 8 brought the Master Assistant, which uses machine learning to dial in a suggested starting point for masters. One of the suggestions made in our Ozone 8 review was to incorporate the Vintage modules in Master Assistant. Now in Version 9, we’re proud to report that Mastering Assistant has a “Vintage Mode” selector to use those great old-school-inspired modules.
Match EQ
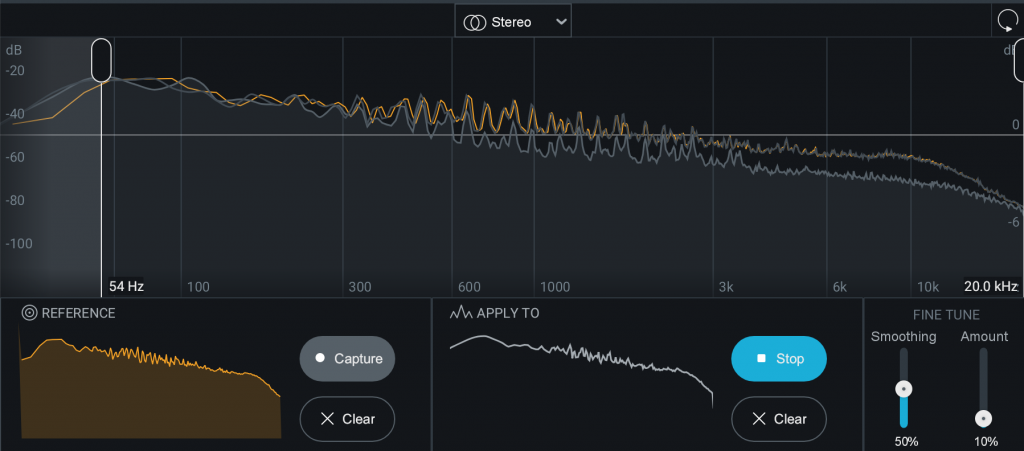
What once was a feature inside of the EQ section is now its own module. Match EQ takes a snapshot from another track and utilizes up to 8,000 separate bands to create an EQ curve you can apply to your mix. The track can either be a part of your session or from the Reference section of Ozone 9. Boundary controls can be set only to alter the frequency of a certain part of the source audio. Once created, your favorite snapshots can be saved as presets. Owners of Advanced can even use Match EQ as a standalone plugin.
Imager
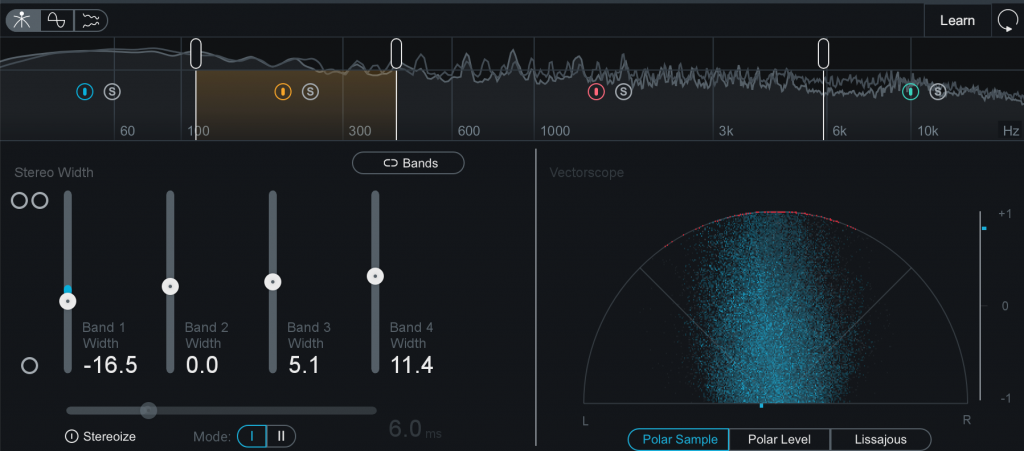
The imager adds two Stereoize modes to either bring mono signals to stereo or widen existing stereo signals. “Stereoize I” creates a classic sounding image, with more color applied to the signal. “Stereoize II” is used for more transparent stereo widening. Imager adds extra bands so you can widen only portions of the spectrum.
Tonal Balance Control 2
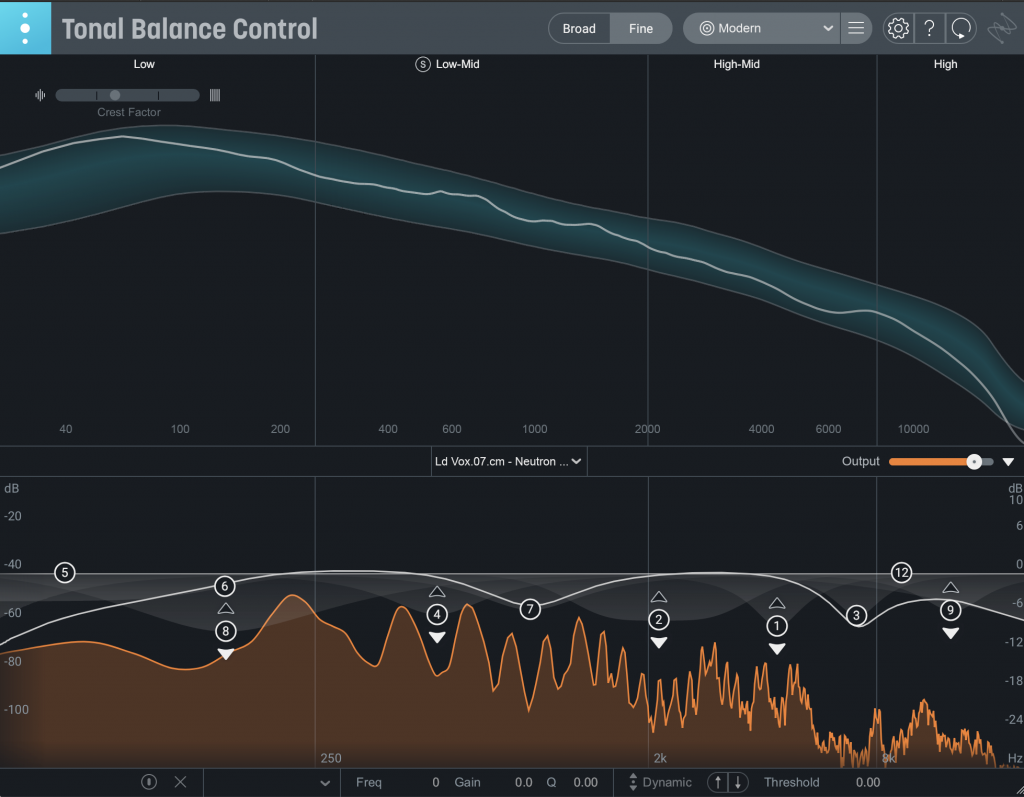
The TBC plugin is the common link for all iZotope plugins. This plugin “hub” goes at the end of your chain on the master or mix bus and analyzes your EQ curve versus standards. This indispensable tool also can be used to control the EQ curve of other tracks. Additionally, each band in the GUI can be soloed, so you can hear how each section of your track fares against a reference. As an upgrade with version 2, 10 more genre target curves have been added to the 3 previous curves in the selection window. In addition to previously controlling Neutron and Ozone track EQs, Tonal Balance Control can now control the EQ and gain from any, Neutron, Nectar, Relay, or Ozone plugin the session.
New Additions
Aside from the various upgrades to existing features, Ozone 9 also comes with all new improvements and modules. NKS support has been added for Native Instrument hardware, complete with easy preset integration and macro controls. As far as modules go, two more have been added with Master Rebalance and Low-End Focus.
Master Rebalance
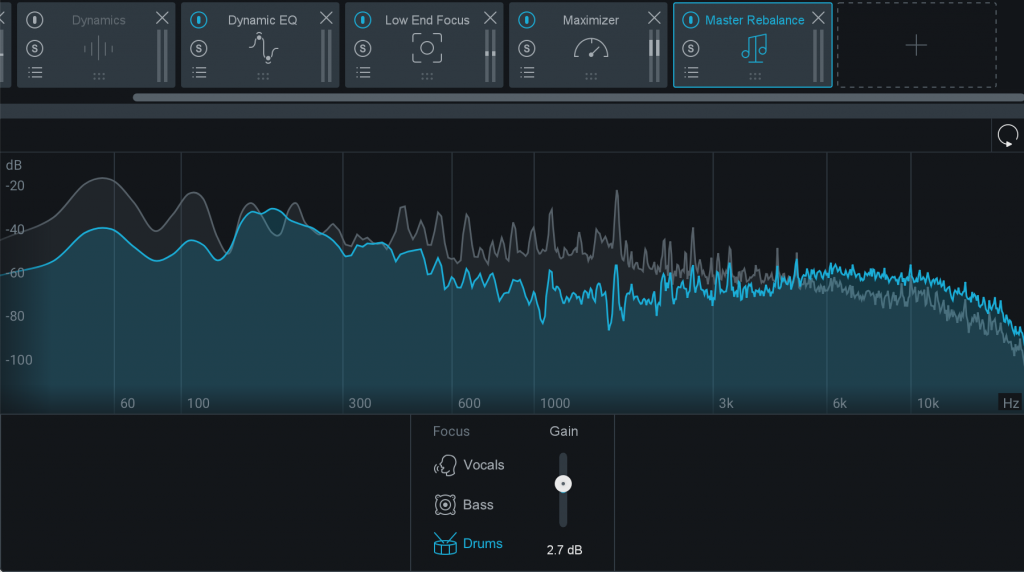
This module uses Source Separation technology to pick specific parts of a track and increase its impact on the overall mix. Master Rebalance accomplishes this in real-time with either a session in your DAW or with bounced stereo files. This is especially ideal for mastering engineers who have a stereo WAV file and would like to change certain aspects of the mix. The module is pretty simple, load it up, select one of the three focus areas (Vocals, Bass, or Drums), and turn the gain up to taste. This control can also be automated in the DAW to push certain Focus points during the mix.
Low-End Focus
The foundation of a solid mix lies in its lower frequencies. Conversely, this area can sometimes be the toughest to establish. Low-End Focus lends a helping hand by allowing specific frequency bands to be selected and tailored to suit the source material. While most plugins that assist with the bottom end of the spectrum only focus on adding more transient response, Low-End Focus goes beyond “one-trick pony” status and works for various issues.
The Contrast control works both positively and negatively, with positive adding the punch and Negative smoothing out lows for a more analog compression vibe. Two modes work in tandem with this control. Punchy is the more aggressive mode by exaggerating low-end impact. Smooth is more subtle and transparent. Think of Punchy being used more for percussive and smooth for a nice push to the whole spectrum. To assist in dialing in the right amount, a Listen control shows the difference between the processed and unprocessed, and Gain allows for better level matching between raw and processed tracks.
What I’ve Liked
The Master Assistant has been a constant go-to, especially when I either need to hear how my mix will roughly sound after the mastering engineer is finished or when I need to send a rough idea to a client. In nearly every case, the results got me right where I needed to be.
The Low-End Focus is a great plugin, especially with bass-heavy tracks. I had an artist who wanted four separate bass tracks on a song, mostly playing simultaneously. Dialing in one bass track is a challenge enough, but tacking on three more was a challenge. The Low-End Focus helped meld all of the lows in
Because inevitably, you will end up putting something from Ozone on mixes, using the iZotope Ozone 9 plugin at the end of your chain is a no-brainer. The Reference section is a great way to check your mixes against multiple reference tracks. You can set specific areas to loop and trim the level to match your source audio, giving you a better picture of how your mix holds up versus similar tracks.
What Has Withstood The Test of Time
So far, Low-End Focus has made a spot on the Mix Bus, and I’ve even found myself using EQ Match when I’m stumped on just exactly what it is that makes my track differ from others. The Imager is in semi-regular rotation, given that you can choose multiple frequencies and widen each differently. As always, the Vintage Tape and Limiter are in heavy rotation, not just on the main bus. Vintage Tape takes a little of the harshness out of a drum bus, and the Vintage Limiter evens and pushes bass tracks a little harder.
Since version 1, Tonal Balance Control has a permanent spot on my mix bus, and the added target curves make dialing in genre-specific music to similar songs. I’m regularly soloing bands from TBC to check against my reference and use both the Broad and Fine graphs. Each has its specific use when checking different aspects of the mix. TBC is one of those plugins I don’t think I would want to go without. Plus, the more you use other iZotope plugins, the faster fixing issues are by expanding TBC’s bottom and adjusting right from the plugin window.
What I’d Like to See Improved
Even though I love Tonal Balance Control, I do have some gripes about how it operates. I want each of the four bands to be sweepable, meaning I can set custom frequency ranges to solo. I get the plugin now has the overall bands covered, but why not let me move them around?
The Reference section needs some updates as well. I feel like this area possesses a lot more potential than its current version. I want to use iZotope’s incredible metering in a grander sense than I can currently with reference mixes. Right now, you’re only able to see a narrow strip and compare frequencies between your track and references. It would help to be able to create several bands and solo both the reference and the track to see differences in frequency content. Maybe even add the reference section to TBC or vise versa. My resolution to this issue is to piecemeal a similar setup using another Ozone multiband compressor after the Ozone plugin and only use the solo bands to check versus the reference. It’s very convoluted, and I have yet to see any current reference plugin get this totally right.
Lastly, Master Rebalance seems to have a bug (or maybe this is how it operates) where when you switch from vocals to a different area to rebalance; it resets the previous setting. It seems you can only rebalance one element.
In Conclusion
Ozone is a staple of audio mastering. iZotope keep pushing the boundaries in every new version. They’ve found a way to link all of their plugins in one ecosystem within a DAW, and that’s no small feat. With so many other plugin manufacturers coming up with new tools daily, it’s great to see iZotope doing similar things, all while staying in the vein of what makes their plugins so great – the interface and the feedback. Given I’ve waited over a year to do this review, it really shows Ozone 9 has made tools that have withstood the test of time. Believe me; I’ve reviewed countless products that seemed indispensable when I initially tried them but fell by the wayside months later. Ozone 9’s new tricks do not fall in that category.
For more information and to purchase, please consider our affiliate link HERE. It doesn’t cost you anything and helps support us!
- Ozone 9 serves to further cement the iZotope ecosystem within any DAW by making their plugins communicate and adjust quicker and easier
- Updates to Tonal Balance Control give more targets for other genres
- Tonal Balance Control 2 needs the ability to move the set solo frequency bands around and maybe even a button to turn on the reference track too.


