89.5 F
Houston
Tuesday, September 24, 2024
AffiliateMusic Software Bundles from Pluginboutique.com
Home Blog Page 59

HELP: Reason Won't Show Up in Pro Tools 11

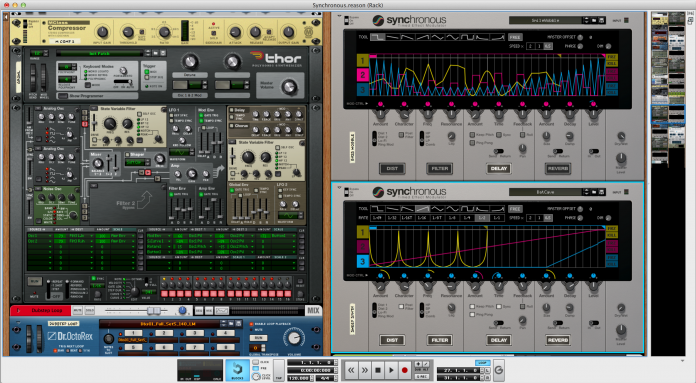
Once again people, my mental anguish is your gain. This time I had issues getting Propellerhead Reason to show up in Pro Tools 11 as a rewire. The fix is actually very easy and can be used with other plugins or rewire software. What you have to do is delete the “installedAAX” file and restart Pro Tools. The file can be quite tricky to find on newer OS X versions but alas I’ve got you covered.

  1. In OS X, click on your desktop to pull up the “Finder” option in your top menubar.

  2. Click “Go” and once you’re in the “Go” menu, press the “alt” key. This will bring up the hidden “Library Folder” which will take you to your: [your user account]/Library/. This folder may not be hidden depending on your version of OS X.

  3. Once in the “Library” folder, go to /Preferences/Avid/Pro Tools

  4. Inside this folder is a file called “InstalledAAXPlugins” file. Delete it, clear your trash, and reboot Pro Tools.

  5. Pro Tools will rescan all plugins (this may take a while) and you will have Reason.

Problem solved.
 

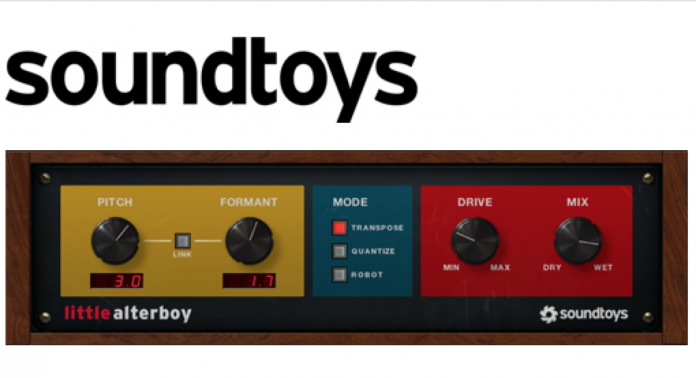
FREE: Soundtoys Little AlterBoy

Soundtoys always makes some of the best “you didn’t know you needed it” plugins. With the success of the Little Primal Tap, they’re giving away the new pitch mod tool, The Little Alterboy. First off, gotta give them creativity points on the name for sure. This tool does what everyone is doing in EDM and HipHop by allowing you to alter the pitch and formants of a vocal track to give it the chipmunk or robot sounds we all seem to love right now. Soundtoys even admits this is an overused effect but still they understand supply and demand and give you their version, complete with a drive knob that borrows from Decapitator.
Once you get a code to download, you are given your own code to share with others. This works as a virtual raffle ticket that puts you in the drawing for every SoundToys plugin ever made and will ever be made. So get out there and share. I have attached a link at the bottom with a code for you to get started! Now go get me some raffle tickets!

Soundtoys gives you an exciting new tool for dramatic voice alteration: Little AlterBoy™: Featuring pitch and formant shifting, the overly popular pitch-quantizing hard tune effect, pitch locked robot voice and much more. We’ve even included one of our classic tube saturation models from Decapitator to add warmth or edge to your new vocal creation and it’s all free. Don’t miss your chance to “get altered” with Little AlterBoy! Limited Time Only.
Plus by sharing with your friends, you also have a chance to get “Plugged-In” for life. This means you will receive every Soundtoys plug-in we’ve ever released in addition to every plug-in we ever release in the future. For life. Wow.
The top runners up will also get prizes like free Soundtoys bundles, plug-ins, free upgrades to AlterBoy™, and cool Soundtoys swag.
Step one – find a code. Got one already? Skip this and go register it below.
Don’t have a code yet? Check the audio forums, check FaceBook, check everywhere ’cause that code gets you the free plug-in and gets you your own sharing code. Then you can give yours to all your friends and they can get it for free, too. Plus, each person you sign up with your code, gets you closer to earning more free stuff. Free bundles, t-shirts and upgrades to AlterBoy (more details coming soon) and, of course the chance to get “Plugged-In” for life.
Check out our Contest Page for complete details.
NOTE: In order to be entered in the contest, you must meet the following criteria:
You have an active iLok.com account.
You have an active Soundtoys.com account.
Must be entered before March 28th when the promotion ends.

To get your very own code, visit https://www.soundtoys.com/sxsw2015/&rc=322-3810-195

Propellerhead: Three New Rig Bundles

 
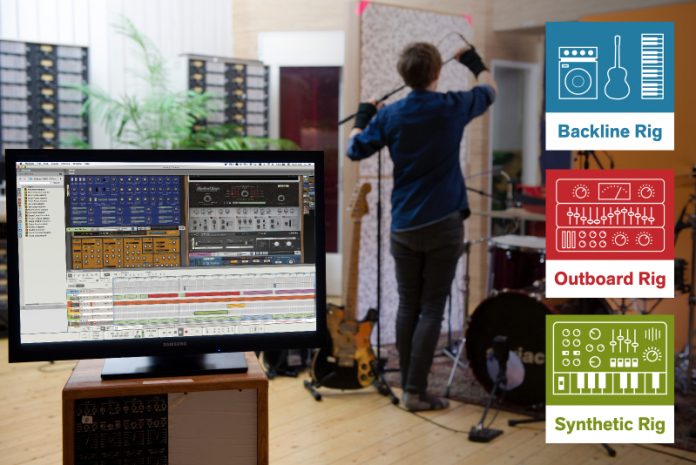
Propellerhead has released some new bundles targeted for different types of musicians. You get a more acoustic sounding bundle, a more electronic bundle and a huge effects bundle. This is almost as good as being able to use your own VST plugins.

Stockholm, Sweden, March 18, 2015 (ictw) – Propellerhead Software today announce three new Rig bundles for Reason 8. Expand your rack with hand-picked bundles of the top instruments, effects, and sample packs, made by leading developers such as Propellerhead, iZotope, Softube, Korg, Rob Papen, and more. Each bundle is designed specifically for the style of music you make and contains over $750 of Rack Extensions and ReFills for the unbeatable price of $199 each.
The new Rig series collection include:

  • Backline Rig: Beef up your instrument collection with the Backline Rig bundle! Aimed at songwriters looking for playable, organic-sounding instruments and effects, the Backline Rig comes packed with guitars, electric bass, vintage keyboards, drums, and vintage effect units, all at a fantastic price.

  • Synthetic Rig: Add an outstanding collection of electronic instruments and effects to your Reason Rack. Tailored for electronic music producers, the Synthetic Rig bundle comes with a variety of synths, beatboxes and effects from leading Rack Extensions developers.

  • Outboard Rig: Perfect your mixes with this super-priced collection of outboard FX gear! With the Outboard Rig bundle, you get a fantastic collection of high quality studio outboard effect Rack Extensions from leading developers.

 
Pricing and availability
All bundles are available as a direct download from Propellerhead’s website for USD $199 / EUR €159.
Reason 8 is available as a direct download from Propellerhead’s website or from an authorized dealer.

Review: Kush Audio Electra DSP

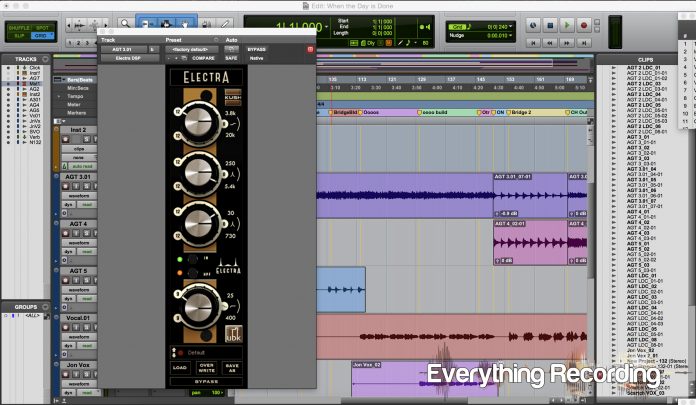
(Insert very well mixed and arranged kitschy Muzak) … Aaaand we’re back with another Kush Audio review. This time audio and podcast mad scientist Gregory Scott of UBK brings us a plugin version of his hardware EQ by the same name. Electra puts a transient spin on normal EQ and like all things Kush, has a personality all its own.
 
What we have here is a 4 band EQ with a controllable High Pass filter all packed into a somehow modern but still retro looking 500 series interface… much like its hardware counterpart. The first thing you will notice is the interface only has frequency values showing the corners frequencies of each band and dB value. There are no visuals showing just which frequency or gain level you are adjusting. This may feel cumbersome and frustrating at first but there is a method to Mr. Scott’s madness. If you’ve had any interaction with the Kush family, this approach to mixing is completely on par with the company’s philosophy. They just want you to make what sounds right, they don’t judge how you get there, and sometimes the very barriers that hinder productivity are in the sheer onslaught of information on your screen. They want you to turn knobs until they sound right. Electra DSP takes the training wheels off.
 
I digress… Back to the bands.
 
All of your bands were scrupulously created with love by UBK himself so you know you’re getting the goods. Your high pass filter is based on a butterworth filter, which has a 12db per octave rolloff with a slight bump of resonance at the corner. This filter can also be bypassed using the HPF button just above the low band and is adjusted using the bottom outer knob. This baby goes from 25Hz all the way to 400Hz and finds a way to cut what needs to be cut while leaving the rest in tact. The low band is a shelf fixed at 90Hz and gives a very tight response without causing your mix to crumble into a flabby mess. The high band is a sweepable shelf that spans 3.8kHz to 20kHz and put all the sheen in all the right places. The real magic lies in the mid bands where you get 2 of these bad boys, one low mid ranging from 30Hz to 730Hz and the other high mid ranging from 250Hz to 5.4 KHz. What makes these EQ’s stand apart is the Q interaction with the gain. Electra has a custom ratio of gain to q interaction. As you boost your frequency, the Q will narrow at the peak, giving you more transient snap. This behaves more like a traditional analog EQ but with more vibe given the way UBK makes the two work together. The result is a focused punch to the area you are boosting. The interaction works the same when cutting frequencies, helping you cut out those odd resonances without having to bother with the Q all together. Subtle when used lightly, powerful when cranked. It’s like autopilot for your mixing.
 
In operation, the EQ is no nonsense and straightforward. Having no numerical values forces change in the mix approach, breaking conventional patterns and forcing the engineer to rely on feel. It’s freeing not to be tied to convention by knowing exactly what frequency you are adjusting. This can be the go to EQ when you’re not sure what you want but know you need something. What makes this achievable is not just in the fact that there’s no numbers, but the way the EQ deals with the content in the background. The EQ plays off of your actions and adds or subtracts exactly what needs to be taken out in a way that gives the content vibe and character, like that golden tint on a low rider car. You don’t just end up with a resonant frequency cut from an acoustic guitar; you end up with a new texture. Even heavy handedly, the EQ still brings something unique to the table without overcompensating. When reaching for an EQ, for a track, you can look at this one and honestly say, “Well, it definitely ain’t gonna hurt it”.
 
Overall Kush has created another tool to add to the arsenal that does to every band what the Clariphonic does to the high frequencies. Electra allows you to get out of your own way by removing any distractions and getting you to the meat and potatoes of your tracks. I could also throw it across a session with no bog on the system. As of the current release, there were no presets but I’m sure this will be fixed on the next update.
 
And with this plugin release, you can finally mix an entire project using Kush DSP plugins!
 
On another related note, you should be listening to the UBK Happy Funtime Hour. If you’ve ever wanted to hear a pro audio podcast with two very well informed, affable people telling you like it is in a room with just a small a gas leak (in a good way), you’ve come to the right place. Seriously, these guys give extremely useful advice in a hilariously entertaining way. The recently rebranded “Nathan Daniel” and already branded Gregory Scott seem to have a great balance. I don’t know if they plan this but it seems on each segment they trade off being the straight man and the funny guy. Best pro audio podcast out there by far. It’s the only podcast I’ve gone through and listened through several times to soak up all the greatness. All hail the Howard Stern of Pro Audio Podcast.
For more info on Kush Audio Electra DSP, visit http://www.thehouseofkush.com/#!the-electra-dsp/cef6
For all things UBK Happy Funtime Hour, visit http://www.UBKHappyFuntimeHour.com

Clarke VC Series Auto Tune

The Eurorack modular system it the 500 series of the analog synth world, and Vince Clarke is the guy to tie it all together with the real world. He has created several modules for the small format system that seem to serve a unique purpose.
BROOKLYN, NY, USA: synth-pop Svengali Vince Clarke is proud to announce that he will be releasing a series of creative and utilitarian modules for the ever-present Eurorack small-format modular system under the namesake Clarke company name, designed and built to exacting standards in close collaboration with British ‘boutique’ analogue synthesiser and accessory designer/manufacturer Analogue Solutions, starting with the now-available Auto Tune — a self-contained, expandable Eurorack-compatible MIDI-to-CV converter/calibration system offering an uncomplicated solution to the problems of tuning and scaling both vintage analogue synthesisers and modern Eurorack VCO (Voltage Controlled Oscillator) modules — as of March 18…
So why simultaneously sidestep into this creative and utilitarian synthesiser module manufacturing (ad)venture alongside superlative synth-pop music compositional creativity? Who better qualified to address this than the Ivor Novello Award-winning songwriter himself… hardly surprising, really, since Vince Clarke can, of course, comfortably find his way around a notable number of synthesisers, too, as attested to by the well-earned songwriting success-funded collection of analogue classics currently residing at his NYC studio, relatively recently relocated from a custom-built cabin in rural Maine to inner-city Brooklyn. But this is no millionaire’s museum piece, but rather a unique personal workspace, where each and every awe-inspiring analogue instrument included in his sizeable collection of vintage and modern synthesisers comfortably housed within regularly earns its keep on a variety of musical projects, be they synth-pop based or otherwise. “For those of you who work with synthesisers using CV and Gate, you will all be aware of the problems of calibration,” notes Vince Clarke, continuing: “Having tried many a cumbersome software-based package over the years, I wondered if there might be a neater solution — a kind of all-in-one MIDI-to-CV convertor with auto-calibration.”

And, as if by musical magic, the collaborative Clarke company concept was born. And with it the first of those creative and utilitarian modules for the ever-present Eurorack small-format modular system that is increasingly popularised (and heavily populated) by an ever-growing band of merry ‘boutique’ manufacturers now numbering hundreds worldwide… welcome into the world Clarke’s clever Auto Tune system! So, let’s learn a little more about what it is, what it does, and how, exactly, it does it…

 
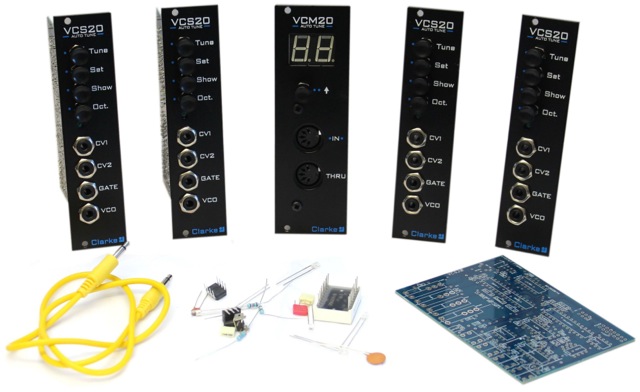
In a nutshell, then, the Auto Tune system consists of a VCM20 master module, which can control up to 16 VCS20 slave modules, each of which provides one channel of CV (Control Voltage) and Gate. With 16-bit voltage resolution and a tune time of 10 seconds, this straightforward system can compensate for VCO alignment issues and environmental factors that cause tuning drift quite literally at the push of a button!
 
The VCM20 master module has an LED (Light Emitting Diode), an increment push button to select the MIDI (Musical Instrument Digital Interface) channel, and MIDI IN and MIDI THRU sockets; the VCS20 slave module has four 3.5mm jack sockets for communicating with the outside analogue synthesiser world, which is where the tuning action really gets going: CV1 connects to the synthesiser’s pitch control voltage and can be set to either V/oct (Volts per octave) or Hz/V (Hertz per Volt); CV2 is mapped to keyboard velocity — typically to control a VCF (Voltage Controlled Filter) or VCA (Voltage Controlled Amplifier); the 11 Volt GATE output can be set to either V-Trig (Voltage Triggers) or S-Trig (Switch Triggers), its use being indicated by the Gate LED; the VCO input connects to the synthesiser’s waveform or audio input and allows the VCS20 slave module to read audio frequencies during the calibration process — a square, sine, or sawtooth waveform without modulation is recommended for doing this. The oscillator output can either be split or an unused waveform connected in the case of modular system setups while with typical hardwired analogue synthesisers it’s a case of splitting the audio output or, in most cases, using the headphone output. Either way, the synthesiser needs to be set to output a single oscillator without filter or modulation with the VCA envelope set to zero attack, zero decay, full sustain, and zero release. For the most accurate calibration of the control voltage the synthesiser’s oscillator range should be set to 8’ or its initial oscillator frequency set midway.
Having correctly connected everything, pressing the VCS20 slave module’s Tune button automatically tunes the analogue synthesiser, compensating for calibration errors between 0.5 and 1.5 V/oct. (During the tuning process, the Gate opens and its associated LED lights up, going out once complete.) Calibration data is duly stored — solving the problem with a neat solution! Still better, the VCS20 slave module retains the calibration data on power down — no need, necessarily, to repeat the process.
Suffice to say, Vince Clarke’s canny vision of an all-in-one MIDI-to-CV convertor with auto-calibration has truly become reality with the Clarke Auto Tune system since it is possible to set the individual MIDI channel for each VCS20 slave module and see which MIDI channel a slave module is set to at any time by simply pressing its Show button. Beauty is in simple things, after all. Equally easy, the VCS20 slave module’s Oct. (octave) button transposes the incoming MIDI signal by one octave with each push, cycling around four octaves — useful if the synthesiser’s range circuit is detuned. Don’t forget, each VCS20 slave module connected can be individually set to work with V/oct or Hz/V synthesisers so a variety of older and newer analogue instruments can be calibrated and automatically tuned by the Clarke Auto Tune system. Start with a VCM20 master module and one VCS20 slave module, maybe? Then simply add more VCS20 slave modules as your analogue instrument collection grows… guaranteed to stay in tune, each and every one of them — just like Vince Clarke’s Brooklyn-based sizeable collection of vintage and modern synthesisers! Synth-pop songwriting success, sadly, cannot be guaranteed.
The Clarke Auto Tune system is priced at £189.00 GBP (plus tax and delivery) for the VCM20 master module and £189.00 GBP (plus tax and delivery) for the VCS20 slave module; all are available to order online from Analogue Solutions here: http://analoguesolutions.com/clarke/
For more detailed information, please visit the Clarke webpage here: http://www.vinceclarkemusic.com/circuits/
Watch Vince Clarke’s instructive introductory Clarke Auto Tune video here: https://vimeo.com/121670830

Review: Tracktion 5

It’s been quite a while since we’ve reviewed any type of DAW or sequencer. The reason behind this is pretty simple, new DAWs require re-learning, and when you are set in the patterns of your workstation, good or bad, you don’t necessarily like breaking from that comfort zone. So when Tracktion graciously gave me a copy to test, initially I wasn’t thrilled about having to start over with new software, but it quickly made me realize that I had been leaning on the system I knew for too long. That was lazy on my part especially if I claim to be a website that reviews “Everything Recording” Plus, for all I knew, the DAW that I had spent years using, was coasting on its former glory. So I took the challenge and got to work.
 
I had actually had a little experience with Tracktion many years ago when I bought a Mackie Spike interface. Mackie had bought Tracktion from the original owner Julian Storer in hopes that it would be the next big DAW, but unfortunately, Mackie didn’t really handle Tracktion in a manner that allowed it to grow; and without any notice, quit supporting the product. After many years of sitting on the shelf, Julian Storer bought the DAW back in hopes of reviving it as the people’s DAW.
 
Tracktion 5 comes in your standard 32 or 64-bit varieties of Windows and Mac, as well as a version for Linux, which I bet is probably the fastest most stable version. Tracktion’s install file clocks in at 10MB which made me do a double take upon looking in my downloads folder. Stock digi EQ plugins are bigger than this. I began to really get skeptical. I thought my download timed out but alas, the file installed and I was off to the races.
 
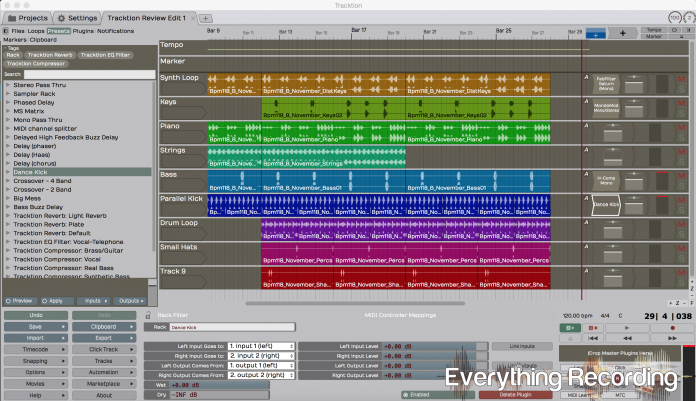
The user interface isn’t much to look at. Very primitive looking, like if Internet Explorer would let you record inside of it. I kept looking for a mix window, no such luck; but once I set my hardware and settings up with the extremely easy-to-use “Settings Tab,” things started coming together. The settings tab really is a one-stop-shop for everything that needs to be changed. Tracktion found all of my VST plugins with a simple click, set my buffer and hardware, and lastly set my “Colour Scheme” to “Nervus” to match my emotional state. After the soft grays washed away all my worries, I soldiered on back into the projects tab.
 
At this point, I was still bothered by no mix window but I had to let that go and start a project. After I created my project, everything started making sense. Tracktion has a feature called “Popup Help” that gives a thorough explanation of each feature as you hover over it. This takes a huge burden off and allows you to “read the manual” while actually playing with the software. Once I started becoming familiar with the interface, I started seeing a correlation between the user interface and the signal flow of audio. The audio comes in from the left side of the screen with the Input Selection. From there it shows up as a waveform in the clip screen, moving to the right to the Filters panel and passing right into the pan and faders from each channel. At the bottom right is audio’s last stop before the speakers in the Transport panel, where you can apply more filters and rack filters to your master mix. As I started adapting this concept into my learning, the heavens opened up and I started catching on quick. Switching between using the Popup Help and my newfound epiphany of the user interface, I started picking up on the more technical stuff more quickly. Don’t get me wrong, there is a little bit of a learning curve and having to overcome what you consider “the norm” with workstations but once you break through that barrier, the clouds open up a little. The interface does seem to cater to whatever task you are working on at hand. The bottom middle Properties panel will adapt to the function you are currently working with and display the information you need. If you’re editing the waveform, the Properties will accommodate your fades, pitch, and clip properties, if you’re working with a filter section, it will display bare bones parameters to get you dialed in quickly. Pretty soon I felt at home with Tracktion.
 
Upon getting the hang of Tracktion, I got a little braver. My eyes kept venturing up to the tabs across the top, namely the little plus sign at the top. This is where the DAW started standing out from all of the others. Tracktion considers sessions “edits” and for good reason at that. You are given the opportunity to create multiple “edits” of a session and leave them open in tabs. This opens up all new avenues to get creative by allowing you to take parts from other edits and make more edits. I don’t really know of any other DAW that allows you to have 2 projects open at once but companies should take note. The file structure in the projects tab is any neat freak’s dream. Everything is logically and clearly laid out. I quickly saved a few edits for testing’s sake and started working between them. The workflow was great. Tracktion’s clips inside of each track can individually have up to five effects (or “filters” as they call them) drug onto them separate from the track’s insert bus. I honestly ran out of patience trying to max out the tracks inserts with plugins. On top of that Tracktion offers “Rack Filters” which are chains of preset plugins that can be called up at the drop of a hat. Tracktion makes quite a few that are extremely useful, but you can also take your own plugins and make your own. This increases workflow immensely. The Rack Filters has a very intuitive and useful interface with some really advanced routing options. It was about this time I felt ready enough to peek under the hood and do some homework. I started digging and found a few astonishingly useful tools.
 
We all like to get heavy handed with the virtual instruments and effects from time to time. How would you like to know which parts of your tracks and using the most DSP? We all would… plus it makes for great quick comparisons for plugin reviews. Tracktion has a Resource Manager at the top right of the screen. Clicking on this will show you a list of plugins in descending order as to how much CPU they are using. Not will it display which plugins are bogging you down, it will tell you what track they’re on too. The Resource Manager will let you group filters by tracks, disable certain filters that are causing a lot of trouble and can show you what you select in the edit window. The visual is all well and good but Tracktion has your back and has put tools in your hands to mitigate these pesky plugins even further.
 
Ever been dialing in a sound and have another DSP laden track causing your system to stall out? Tracktion has a Freeze option, which will disable a nuisance track’s filters to give you a chance to tweak the filters in peace and enable it back without having to print the track if you’re not ready. There is even a setting in your plugins tab called “Freeze Point”. This will allow you to disable only parts of your signal chain by dragging the Freeze Point to the area you’d like to temporarily disable. Anything to the left of the freeze point is disabled; the rest on the right can go free. But what if you don’t want to disable any plugins at all and just want to hear your mix? Tracktion’s got that covered too with the Low Latency Monitoring option in the Resource Manager. Simply click this and Low Latency will temporarily render you session and drop it to the lowest latency for tracking or just for mixing.
 
After the dust settled, I was blown away. This 10MB program can hold its own against any of the DAWs out there. Where it lacks in appearance, it makes up in spades with performance, workflow, and functions. Tracktion is the real deal. I did however have some complaints. I wish the transport panel could accommodate more features. I kept looking for an option to click a point on the audio and be able to stop playback, and the audio start back at the selected point upon playing again. I also wanted to be able to just click a clip of audio and it automatically loop it as well. I felt the plugin section could use more organization even though there is a search bar. The Projects Tab was laid out so well that I assumed the plugins could be as well. Other than those few gripes, I found this to be the best possible experience learning I DAW I’ve come across yet. Even though Tracktion may not replace my go-to DAW, I do see myself creating ideas using multiple edits, then taking it over. This DAW would be absolutely perfect for a person new to recording. The learning curve might be a little tough at first, but with the training videos by Groove3 on Tracktion’s site, anyone can pick up in no time. I still haven’t even mentioned the price. File size isn’t the only thing small, Tracktion starts at $60 and the upgrade is only $30. There’s really no excuse not to try it. They even give you a trial. It eve comes with Melodyne Essentials! That’s almost worth the whole $60 there.
 
I can’t even stress how impressed I am with Tracktion. It may not look like much visually, but who’s looking at audio anyways! Go out there and get it and start making music.
For more information, visit www.Tracktion.com
Also right after this review was complete, Tracktion released version 6, which somehow has included even more features you didn’t know you needed but won’t be able to live without.

Review: Eiosis AirEQ Premium

This one has been in our sites for years. We loved the E2 De-esser (which needs to show back up for AAX) and knew that if Fabrice Gabriel designed Slate Digital’s incredible algorithms, his own non-analog modeled project would be just as impressive. But we’re not going to give AirEQ Premium a pass just because of its maker’s reputation. We wanted to see for ourselves if it was worth the years of hype and a blank “coming soon” website that plagued me for years… Seriously, I checked that page monthly.
 
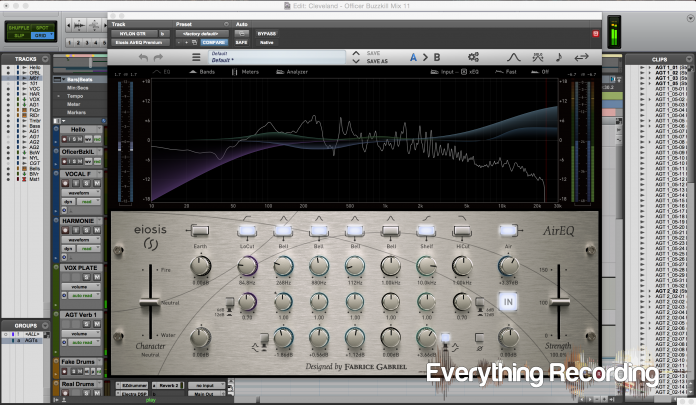
What we have upon first glance is a very sleek and inviting interface, akin to a high-end rack mount EQ, complete with an analyzer and metering. This plugin comes standard in all of the usual 32-bit and 64-bit flavors of AAX, RTAS, VST, and AU for both Windows and Mac, but requires an iLok 2 and iLok account. Installation is straightforward as well.
 
Upon opening AirEQ, it would appear that with the interface, analyzer, and amount of sonic tools at your disposal, this plugin would be a DSP hog. This actually wasn’t the case at all. The plugin can be used across a great number of tracks without bogging the system to any noticeable degree. I couldn’t tell if hiding the analyzer lightened the load, but Pro Tools and Maschine didn’t seem to blink even with it enabled.
 
As far as features go, you do not feel without. You are given an In Gain, Out Gain, Phase button, EQ Slope Selection, choice of shelf of bell filter on the corner bands, and an “In” button which works as a bypass for comparing original with your EQ’ed version. Pretty standard stuff for an EQ and do not set AirEQ apart from the hundreds of other plugins out there; but when your eyes start wandering to the corners of the interface, you start to see some new concepts.
 
At each of the corners of the rack display, you will see faders labeled “Character” and “Strength.” This is where things start getting interesting. Essentially, the Character slider affects the curves of the bands’ filter shape. Seeing “catchwords” like “Fire” and “Water” could easily make someone smirk at the concept; but suspending any notions and letting your ears judge will quickly show you the intent. Initially, I turned off the analyzer to do this and saw pretty noticeable results. Using the Water Character, I was able to get subtle but smooth changes in content. With Fire, the EQ became more targeted and focused, enhancing transient content. Upon shift clicking each of the band’s q knobs, I was able to either have the character affect the single band or globally. This can also be set back to control globally by right clicking the button above each band and selecting to use the global character. As I would change each of the bands, the interface started to change. Each band’s knobs would show a ring around the controls with color depending on how much of each character I was using. This made keeping track of type of filter slope per band easier by placing it at a glance.
 
Over to the right, we see the Strength knob, which works as a blend between the EQ’ed signal and the dry signal. This allows even more control over just how much you want AirEQ to affect your track. Of course, Fabrice realized early on that high and low pass filters should be excluded so he gives a choice to either include or exclude each band from Strength. The same as with the Character, each band’s color will either intensify or dim as you adjust the amount.
 
Right to the inside of the two sliders on either corner you see two more knobs labeled “Earth” and “Air.” These are custom designed filters that allow for boosting the extreme lows and highs. The Earth produces a very solid low end that will enforce just about any type of content without becoming muddy and the Air works to give you that sparkle you look for without being too thin and ringy.
 
After using the EQ only for a while, I decided to open up the Analyzer to see what all of the features looked like. The analyzer is very easy to read at a glance and features a less scientific way of looking at audio data. One of the most useful features is the RMS difference meter. This meter can help you tailor the volume of your original signal versus your EQ’ed signal’s average volume. Out of all of the methods out there to enable you to compare volume levels of EQ’ed / original signal, this one is by far the most useful. Now you can rest assured that you are not perceiving better results based on more volume. The analyzer can allow for just about any type of visual monitoring and the bands are easy to identify. Although there is quite a bit of information in this window, it is easy to absorb what’s going on. Of course, any of this data can be hidden or shown in just about any combination.
 
With all of these features, you have an EQ already at the top of the food chain, but Fabrice added even more features that make this a very formidable go-to plugin. Usually with a standard EQ, the Gain and Q are both controlled separately, but Fabrice has seen in his many hours of modeling analog EQs that there is a very intimate interaction with how these two features work. Due to this interaction, AirEQ works with a direct correlation of Gain and Q. As you turn one of the knobs, the other feature will work in tandem, allowing you to achieve more natural results without just perceiving a volume change in the content. Pairing this with his own Analog Matched Linear Transformer technology, you get the most accurate results no matter the sampling rate.
 
The extra features aren’t just limited to the quality, AirEQ has workflow enhancements that make getting the mix finished as fast as possible. In the effort to eliminate mouse clicks and drags, a frequency can be swept with a narrow q by simply holding shift while adjusting a band’s frequency. The character can even be selected while sweeping. Certain controls can be “kicked” in and out for comparison by holding the ctrl (windows) or command (mac) while turning on and off a band, bypassing, undoing, filter slope, phase, solo, and bell / shelf. This lets you test the water momentarily while still keeping your original setting.
 
Sometimes with EQ’s like this, its easy to just start grabbing bands and adjusting without using any sort of order, on the top right of the ribbon bar, you can arrange your bands by frequency with a click of a button. This will allow you to think more linearly once you need to make small tweaks at a glance. The frequency selection can also be changed to scale notes for those times you know the pitch of the frequency you want to adjust.
 
Combine all of the features, shortcuts, and sound quality, you have an extremely useful swiss-army EQ. Initial operation is very familiar and it is easy to quickly find yourself leaning heavily on the workflow enhancements. Very quickly you will see yourself reaching for this plugin not just for the sound; but for the sheer amount of adaptive features that make a certain plugin shine. I wish I had some critique to balance out the review but this plugin has been very meticulously created.
 
I consider the wait and attempted monthly website check in completely worth it.
For more information, visit www.Eiosis.com

Online Audio School: Mixing Trap Beats


Ken Lewis is a huge name in hip-hop and pop. This is someone who’s been behind the desk on some monster hip-hop records. Even though he’s achieved the music business “hat trick” by engineering, mixing, and producing multiple hits, he opens up his studio and workflow by showing you some of the tricks of his trade.
The latest tutorial is over 2 hours long and guides you through an entire mix of a trap track. He not only goes over mix techniques but shows you how to add the icing on the cake with innovative effects. Since most pop and EDM incorporates concepts from the trap scene, these techniques can be used in more than just rap sessions. PLUS it’s only $14.99! Most online tutorials are twice that much with half the content.
He even lets you watch the first 8 minutes of the video for free.

This video tutorial has an audio session to download to your hard drive for viewing and listening.
This song contains some strong language, please be advised.
After recent work with Drake, Kendrick Lamar, Kanye West, Rick Ross, Future, Lil Wayne, and many others, Ken Lewis presents this deep two hour tutorial on mixing trap and creating common trap effects. Ken takes you through a complete mix, faders… right down to a finished full trap song… beat and vocals. Using both stock and 3rd party plugins, Ken breaks down step by step how to create many of the most common trap effects such as…
– panning snare fills, crisp hi hats, enhanced claps, phase coherency
– monstrous 808’s that cut through small speakers
– mixing rap vocals and ad libs
– multiple effects to create lush ambient sounds, blasts, twinkles and more
– using short delay lines to define drum tracks and spread vocals.
– Several different panning & stereo widening efx are demonstrated on hit hats and background vocals, as well as
– replacing kick drum sounds and beefing up kicks
– balancing multiple pads together
– filter effects
– finishing the mix bus
And finally, a long time big request is covered here, fixing poorly recorded rap vocals and giving them new life. Ken will show you many standard and unorthodox techniques that will put you light years ahead.
Watch the first 8 minutes of the tutorial for free and decide for yourself. The techniques taught can be used on ANY DAW! Your download includes both the 2 hour video tutorial and the full audio session with stems for any DAW as well as a pro tools session. Practice creating your own trap effects and recreate the ones Ken teaches from the same mix session. Mix the song and compare your mix to Ken’s.

The song and session “Big Bank” featured in this tutorial is produced, written, and performed by JaiDon Harrison at CG3 Audio. CG3 Audio creates a ton of amazing Trap Sample packs like the ones found here:
http://www.producerloops.com/CG3Audio
Running Time: 120 minutes
Download size: 1.31 GB
Skill Level: Junior
Genre: Trap / Hip Hop with vocals
Price: $14.99
For more information and to purchase, visit http://audioschoolonline.com/product/?lesson=386
Also take a look at his Kickstarter campaign for an all new school that teaches instruments and theory.
To donate and help out this great cause, visit https://www.kickstarter.com/projects/304278079/help-fund-music-school-online

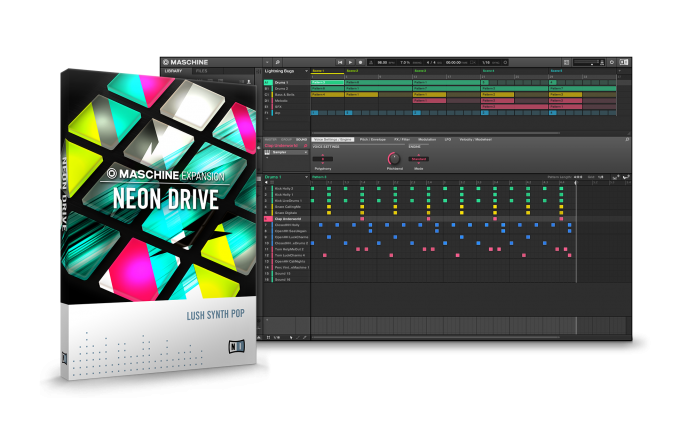
Native Instruments Expasion Neon Drive

80’s synths are coming back in almost every genre of pop lately. Native Instruments gives you the tools of the days of yore in a modern interface with upgraded quality for modern music.

Berlin, February 25, 2015 – Native Instruments today introduced NEON DRIVE – a new MASCHINE Expansion providing a collection of tailored 80s- inspired sounds for producers working in contemporary pop, electronic, and R&B styles. A genre debut for Native Instruments, NEON DRIVE is available now at the NI Online Shop and runs in the MASCHINE 2 software on MASCHINE STUDIO, MASCHINE, or MASCHINE MIKRO. A compact version for iMASCHINE is also available via the in-app store.
NEON DRIVE features a library of sounds drawing heavily on production techniques, instrumentation, and melodic construction native to 80s synth pop. This MASCHINE Expansion includes lush chord and pad sounds, emotive melodies and retro-inspired drums. Exclusive new presets for NI’s wildly popular MASSIVE synth, the organic REAKTOR PRISM, and the MASCHINE 2 Drum Synths are also included for deep sound design. With a broad range of sounds for all synth-pop-inspired music, NEON DRIVE allows producers to focus on creating the strong, catchy melodies with the sound of NI’s acclaimed synthesis expertise.
A compact version of NEON DRIVE is also available as an iMASCHINE Expansion, for creating beats on the go. Tracks can be exported to MASCHINE STUDIO, MASCHINE, and MASCHINE MIKRO for completion.

Pricing and availability
NEON DRIVE is available now at the NI Online Shop for $49 / 49 € / £44 / ¥ 5,680 / AU$ 79 and runs in the MASCHINE 2 software.
The iMASCHINE expansion is available at the iMASCHINE in-app store for $0.99 / 0,89 € / £0.69 / ¥ 100 / AU$ 0.99.

Additional information on NEON DRIVE is available at: www.native-instruments.com/neondrive

Grado GR8e & GR10e

Prado makes some of the best headphones out there. Even though its not recommended practice, people like them so much, they mix on them. Now they’re back with in-ear versions with all of the same quality and sound as the bigger brothers.

We’ve spent 62 years working on our signature sound, and now you can find that packed into our new GR8e and GR10e in-ears. Let’s welcome the two new in-ears to the family.
Grado GR10e
Learning never ends and the GR10e is a result of a constant desire to look at designs and materials and improve upon them. A higher level of precision and new materials allows for the performance of the GR10e to add frequency extension in both the high and low ranges as well as reducing distortion.
Grado GR8e
A proprietary wide bandwidth moving armature design provides the listener with unsurpassed performance. Small size allows earphone to nestle well within the ear canal, maintaining an excellent air seal for improved bass and reduction of outside noise without causing discomfort.

Price: GR10e: $399
Price: GR8e:   $299
For more information, visit http://www.gradolabs.com/headphones/in-ear-series

Most Recent Reviews