


About a year and a half ago, I got the itch. I sold off roughly 60% of my gear and decided it was time for a “do-over.” Part of the gear that got the ax was my Avid HD Native system. There were no real issues with Native; only the desire to move away from a card-based interface and bulky, noisy PCIe chassis. It was time for a change, so I bought a new interface, and for the first time since my MBox 1 in 2002, Avid / Digidesign didn’t make it.
Expedition Unknown
The reason I didn’t buy an Avid interface, you ask? Because other than Avid’s HDX system, they didn’t have much to choose from. Their MBox line was toast, along with the Digi “Double O” models. Avid was uncharacteristically silent. However, right after I purchased my new interface, Carbon did come out, and I quickly felt the “I bought a Macbook Pro 31 days before Apple announced the new models” feeling.
I didn’t necessarily regret buying my other interface – I like it very much (B. Church’s Review Here). But you can’t help but feel you’re missing out. Luckily, Avid asked if I wanted to give Carbon a spin, and I jumped at the opportunity. We’ve hung onto it for the better part of the year and can definitively answer the question most of you have probably been asking: “What exactly IS Carbon?”
So Many Questions
If you were anything like me around release day, you met the announcement with a bit of head-scratching.
- Are they phasing out HD Native?
- Is the HDX system a thing of the past?
- Is this a cash grab by Avid?
As far as I can see, the answer to these questions is mostly a resounding “no.”
- Avid has swapped the Native PCI card for the thunderbolt interface.
- There’s no way the HDX ecosystem is going anywhere. Larger studios lean heavily on HDX’s onboard DSP for massive sessions.
- And I’m not sure any interface at this price point is a guaranteed “cash grab” for a company.
Occam’s razor can only deduce that Avid found itself outside of an untapped market, one that another company has dominated for a very long time.
The DSP Wars
With its years of experience in onboard DSP processing, Avid suited up for battle in an area they had skirted for years – the prosumer DSP-based interface market. Sure, they have the gold standard of DSP systems with HDX, but they never released a non-card-based interface that could take the load off your computer. HD Native was only a means to get an HD I/O in your workflow, but the responsibility of processing was all on you.
Meanwhile, Universal Audio’s Apollo series has been the “belle of the ball” for beginners and pros alike with its entire lineup of interfaces that remove some of the heat off of your CPU. Except for a few other brands, Universal Audio had no contenders and ran off with the lion’s share of users. That is, until now. Avid has entered the fight with Carbon, and they’ve come out swinging.
Tale of the Tape
Carbon directly contends against the most feature-rich Apollo interface, matching blow for blow the x8p’s bells and whistles. In fact, both units are laid out very similarly.
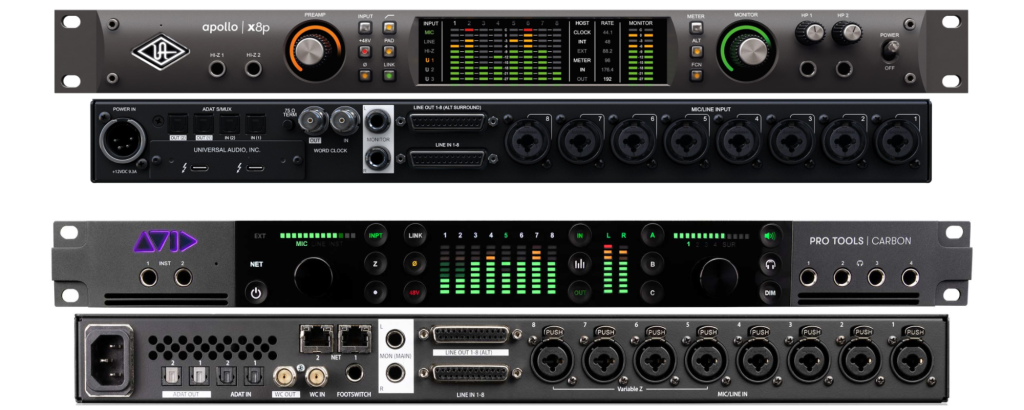
Let’s look at what they both have:
- (8) channels of their custom-designed preamps
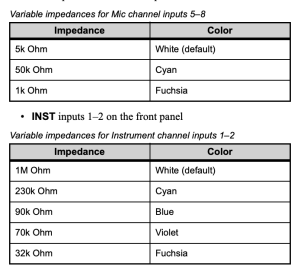
- Variable Impedance mic preamps (ports 5-8 on Carbon)
- Optional ALT D-Sub line inputs (these bypass the preamps and instead let you use your personal outboard gear.
- (8) channels of D-Sub line output (two pairs of which can be extra monitor outputs).
- (2) ports for ADAT expansion with Word Clock
- (1) 1/4′ Monitor / Main out for your speakers
- Talkback Mic with Dim feature
- (2) Unbalanced 1/4′ TS ports on the front
Apollo has only two things I wish Carbon had: a pad and a high-pass filter for each preamp.
Carbon’s list of features continues with:
- Footswitch port for Talkback mic or monitor switching.
- (4) headphone outputs (instead of Apollo’s two)
- *More inputs and outputs (possible 25in x 34out) as opposed to Apollo’s (possible 16in x 22out)
The Ins and Outs of… Ins and Outs
When we say Carbon has 25 inputs and 34 outputs, that doesn’t necessarily mean that there is a standard 1/4″ or XLR jack for each. There is a bit more to what is considered an “input or output.”
Starting with Carbon, it does have considerably more inputs and outputs. Here’s the rundown:

- (8) traditional onboard inputs (either by eight preamps or eight d-sub line inputs)
- (16) ADAT inputs (needs expansion interface with 16 inputs)
- (1) Talkback Mic (input)
- (8) traditional onboard outputs (via d-sub on rear panel)
- Optionally, outputs 1-2 and 3-4 can become extra monitor outputs
- (16) ADAT outputs (needs expansion interface with 16 d-sub outputs)
- (2) Monitor / Main (left and right) output
- (8) Outputs via the 4 Headphone outs.
Yeah, I know what you’re thinking – considering the four headphone output as eight seems a bit like a car company calling cup holders “additional storage,” but if you can route audio through it, it’s an output. Additionally, Pro Tools will let you use each headphone port as its own stereo output, so each band member gets their own custom headphone mix. You can even use one of those headphone outs to route your mix to a set of computer speakers or boombox to check your mix.
The Apollo x8p states it has 16 inputs and 22 outputs, so let’s break down where they go.

Technically, Universal Audio doesn’t count the talkback mic, but if we’re on even playing ground with Avid, the x8p has 17 inputs.
- (8) traditional onboard inputs (either by eight preamps or eight d-sub line inputs)
- (8) ADAT inputs (needs expansion interface with eight inputs)
- (1) Talkback Mic
- (8) traditional onboard outputs (via d-sub on rear panel)
- Optionally, outputs 1-2 and 3-4 can become extra monitor outputs
- (8) ADAT outputs (needs expansion interface with eight outputs)
- (2) Monitor / Main (left and right) output
- (4) Outputs via the two headphone outputs.
The Apollo can also send individual cue mixes but requires the Universal Audio Console software.
Carbon certainly holds its own, placed head to head with the Apollo x8p. We’ll get back to how Carbon fares vs. the Apollo line overall later, but in the meantime, let’s look at what Carbon is.
What Do you Get in the Box?
Pro Tools | Carbon’s box has the essentials: ethernet cable, power cable, and associated paperwork. Additionally, Avid gives you washers and screws for rack mounting or rubber feet for tabletop mounting.
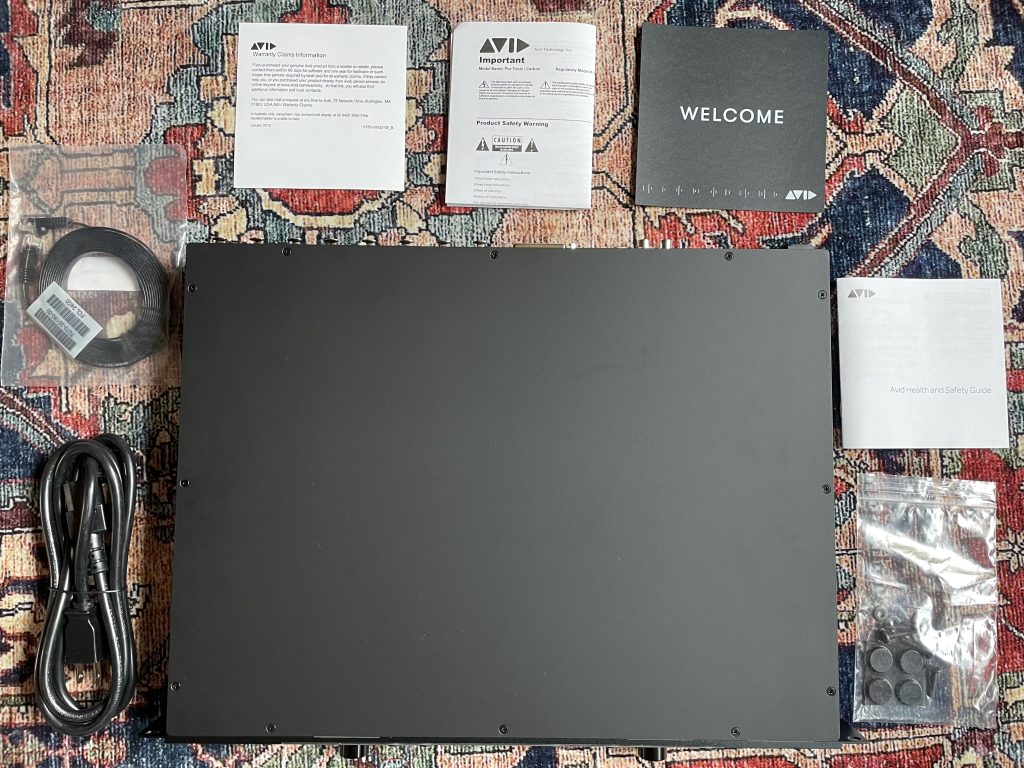
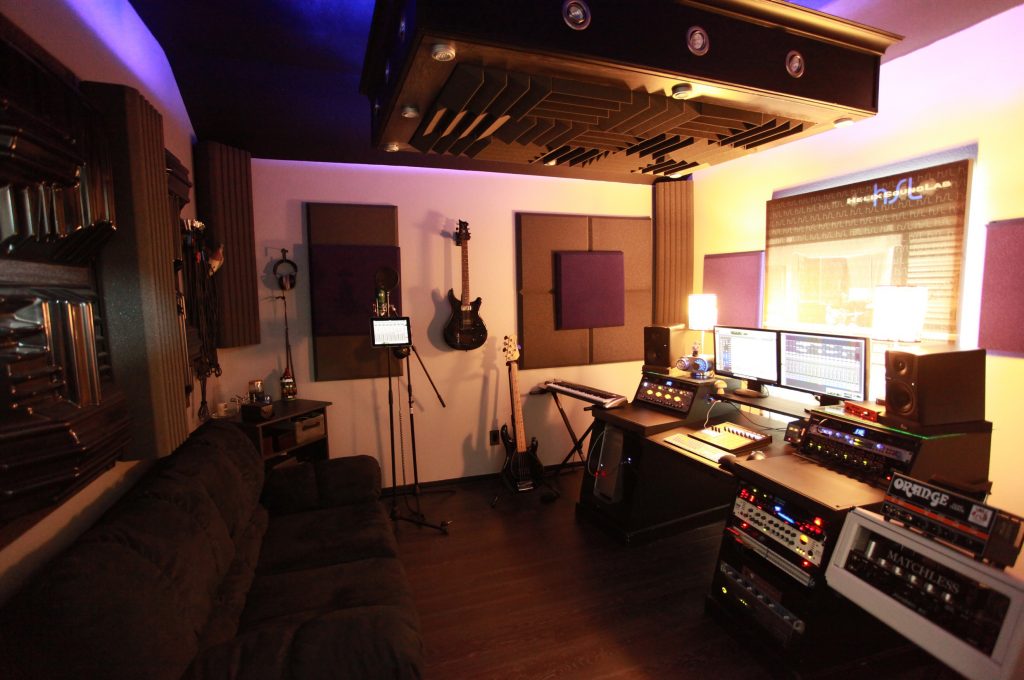
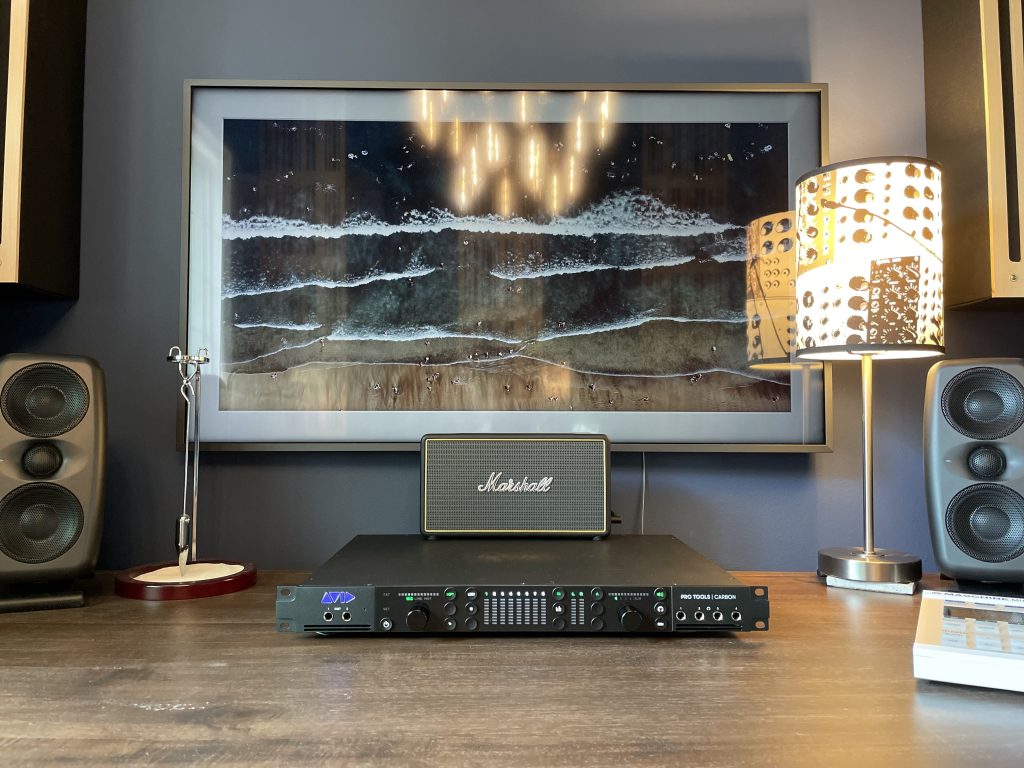
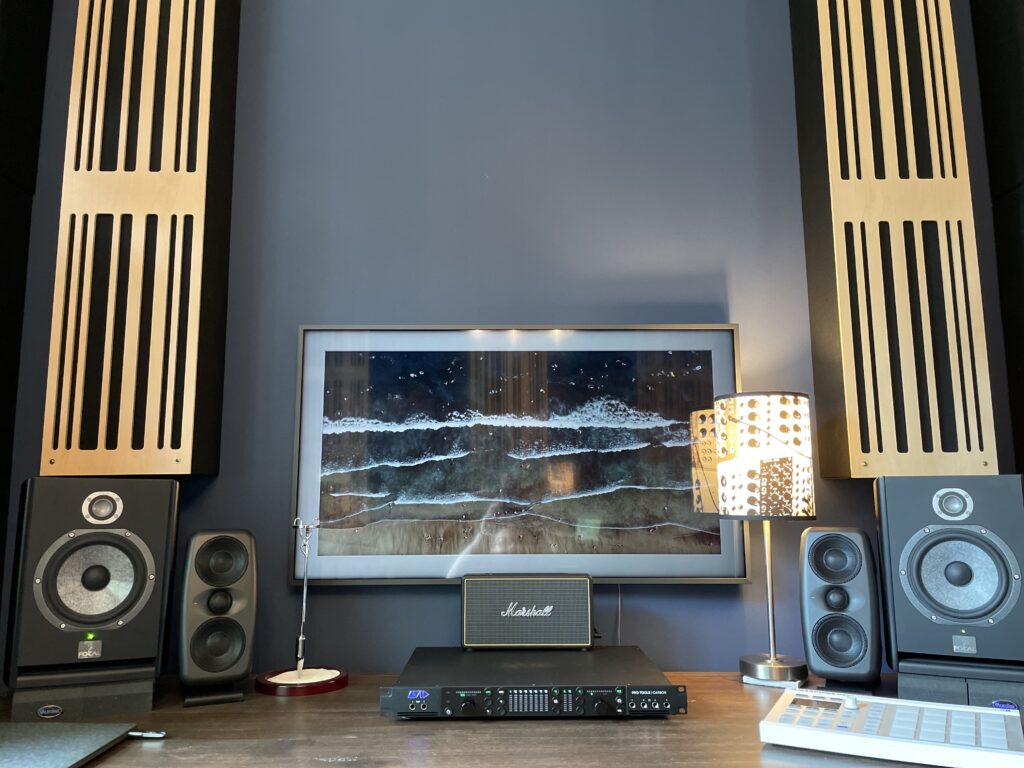
Since Carbon is billed as a full-blown recording hub with a monitor section and talkback mic, you’ll probably want to keep it within reach. For my configuration, I placed it in the center of the desk, so I had immediate access. Also, I know aesthetics don’t make a mix, but Carbon is quite a looker—a stylish addition to any desk.
Initial Setup
When trying to connect Carbon to your computer, the first thing you’ll notice is there is no USB, Thunderbolt, or USB-C connection. Instead, Carbon uses Avid’s own proprietary version of AVB, an Ethernet-based audio delivery solution. AVB stands for “Audio Video Bridging” and offers a completely lossless audio transfer at sub-millisecond latency. Avid was pretty forward-looking on this one because (a) interfaces have been fighting over USB, USB-C, and Thunderbolt for years. Ethernet is pretty stock standard, and (b) building an interface on a 32-bit sub-millisecond latency path is a rock-solid foundation. Plus, it is effortless to set up. All you need is an AVB-capable ethernet port.
You’re already set for most newer Apple computers with onboard ethernet, but if you’re using a newer Apple laptop, you’ll need an AVB-capable adapter. If you have an Apple laptop with Thunderbolt 2, simply pick up Apple’s $30.00 Thunderbolt 2 to Ethernet adapter. BUT, if you’re like me, you have a laptop with only USB-C ports. This requires yet another piece of hardware, an additional $50.00 Thunderbolt 2 to USB-C adapter.
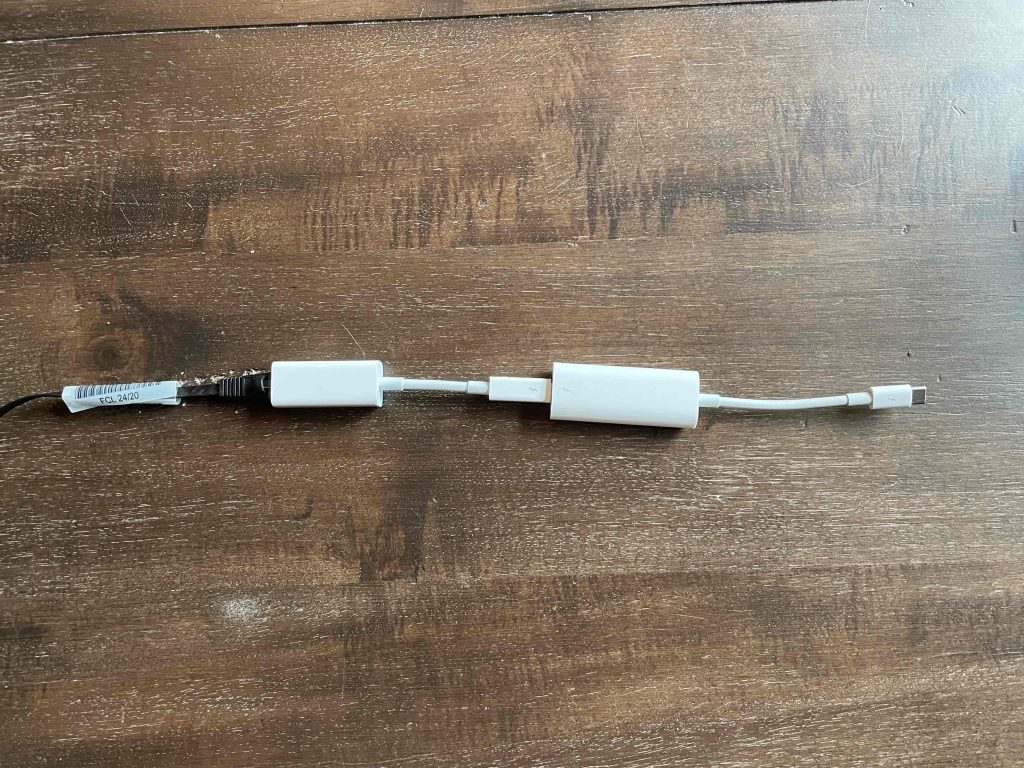
If the slew of adapters bothers you, Sonnet makes a $150.00 USB-C to Ethernet Adapter specifically designed for Carbon. I ended up going the $80.00 Apple route since it was half the price of the Sonnet adapter. I am not thrilled about having two connection points that could disconnect, but I am $70.00 richer for it!
Apart from finding the right AVB-capable Ethernet adapter, the setup couldn’t be easier. Simply connect Carbon to the computer via Ethernet, go into Mac OS’s Audio Midi Setup, click “Window > show network device browser,” and ensure Carbon is checked. Once you’ve enabled Carbon, you’ll have two outputs appear in Audio Preferences: one to run in Pro Tools and the other to use as your computer’s audio output.
Giving Carbon the Boot
Upgrading my old HD I/O was a bit of a pain, but Carbon is as easy as powering the unit on, booting up Pro Tools, and setting Carbon as your Playback Engine. If Avid has an update available, it will simply ask to install it. Give it a few minutes are you’re good to go. No more needing additional HD drivers to run Avid hardware with Pro Tools.
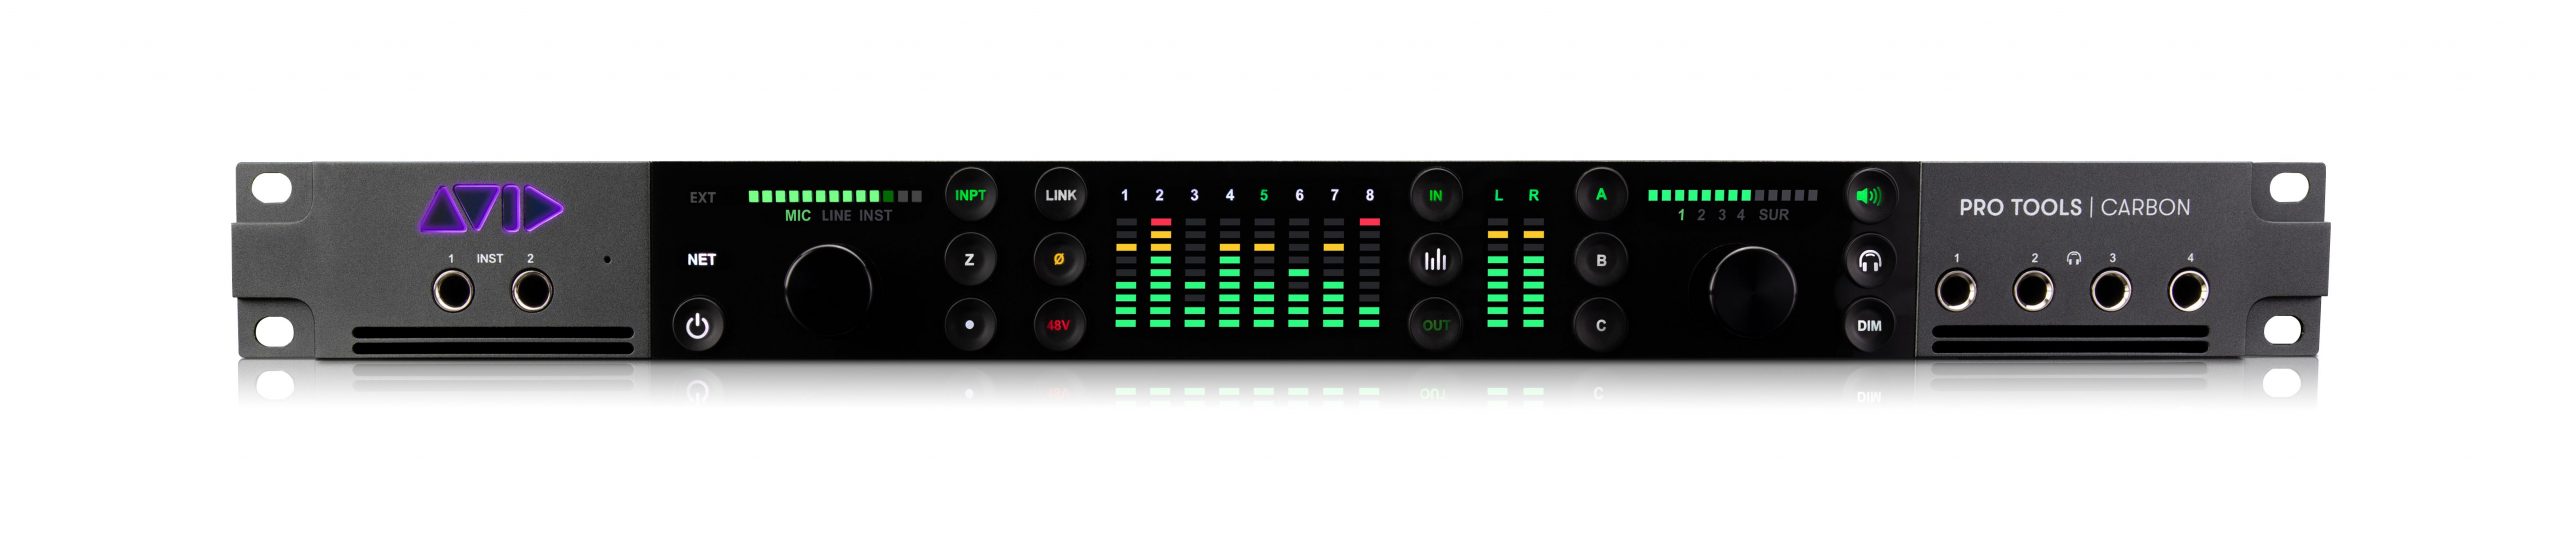
The Front Panel

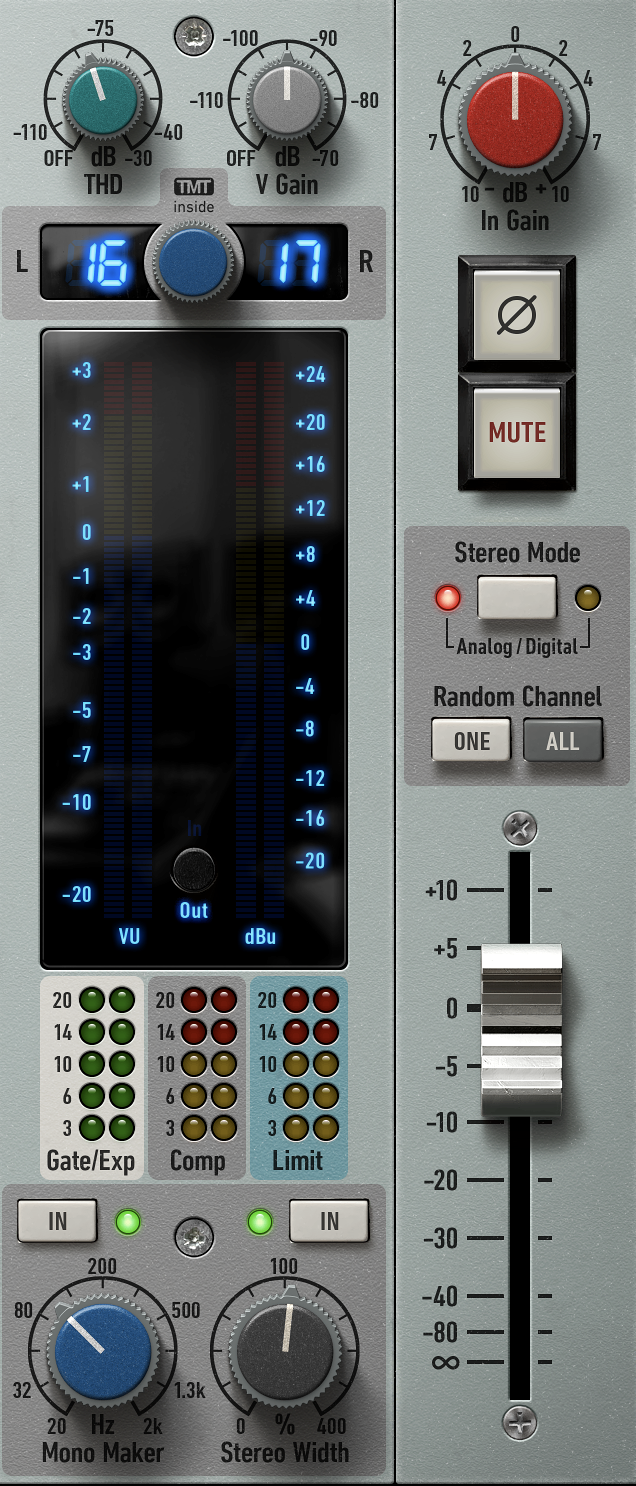
Metering is laid out right where you need it. In the middle resides each channel’s meter followed by the main output LEDs. The horizontal LEDs on the left side are for your selected channel’s input levels, and the identical bar on the right is for output. The meter’s LEDs change color according to the source, so you know at a glance what input or output you’re using at any time. For input, MIC is green, LINE is yellow, and amber is INST. The same works for output: Main output is green, Monitor 1 is yellow, Monitor 2 is amber, and muted output is red. Additionally, many different buttons and meters all over Carbon respond to different changes in hardware. For instance, the TS inputs and XLR preamps 5-8 have variable impedance. At a glance, you can look at the “Z” button and know what you’re set on by color.
Choosing is Fun
I’ll be honest, I grew up in the age of “a knob for every function” and have been averse to the new mode of “a single control to rule them all.” However, I’m warming up to fewer knobs and buttons. The minimal knobs do make navigating a breeze. A simple push of the rotary knobs will cycle you through settings. If you’re more of a scroller, you can press and hold the rotary knobs while turning to whisk through channels faster.
Carbon Takes the “Hands Off” Approach
Carbon has your back for the “point and click” type. Pro Tools Hardware Setup page hosts many of the controls on the front panel plus a little more.
Your Main Squeeze
The Main tab has your monitoring covered. You can change the D-Sub line outputs of 1-2 and 3-4 from standard outs to monitor outputs in the Monitors section. The exclamation icon next to each output warns you if the outputs are attenuated. So if you’re running those prized new Barefoots through one of the ALT outputs, make sure you check that box!
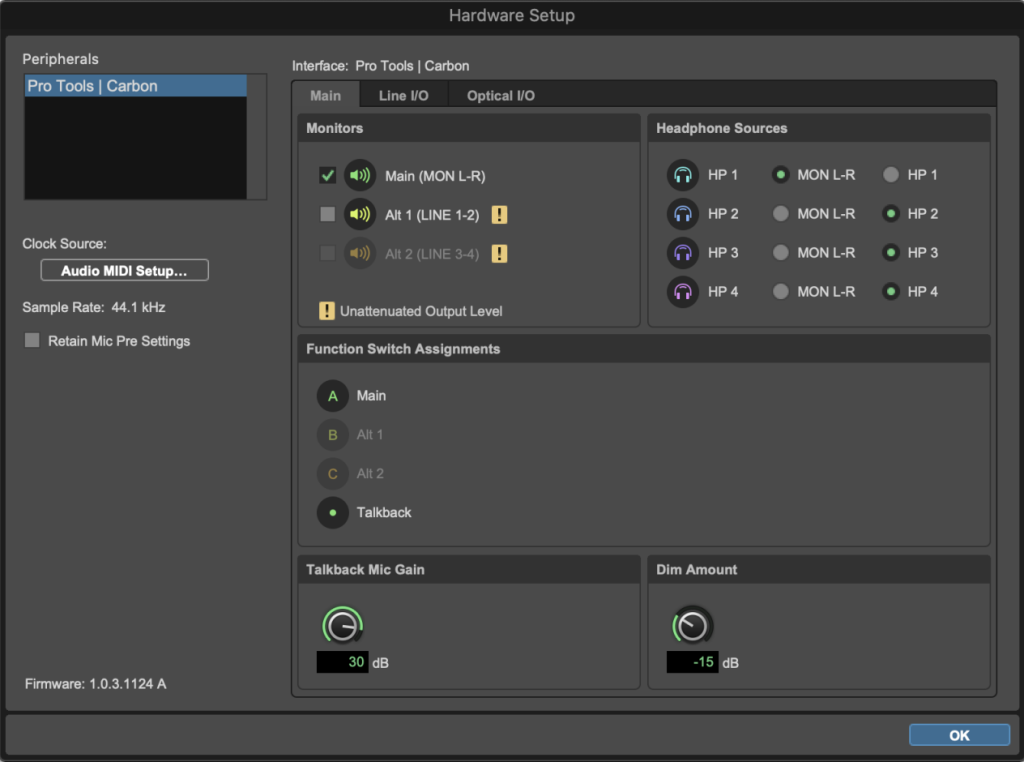
The Headphone Sources give you the option of routing the Main Output’s audio to the headphone port or creating an individual headphone out with the “HP” option. The “HP” option adds an extra output to your I/O so you can route specific tracks for custom cue mixes. Each Headphone Source can be individually configured.
The footswitch also has additional control in the Hardware Setup. Here you can change what the footswitch does (either cycling between monitor outputs or triggering the Talkback Mic.) Any momentary or AB footswitch will work. I tried a basic keyboard sustain pedal and my amp’s AB switch, and both worked great. Note: if you use a sustain pedal, keep pressing the pedal while talking. Rounding out the Main tab is the gain control for the Talkback Mic, along with how much you want the monitor volume to attenuate (dim) when talkback is engaged.
Line ’em Up
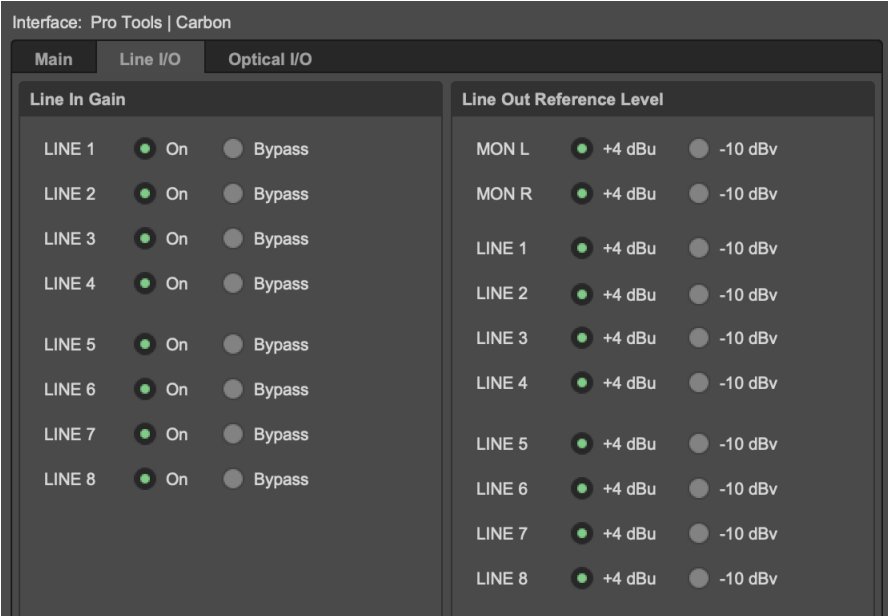
The Line I/O tab has the controls for the onboard inputs and outputs. Enabling the preamps for each channel is controlled by selecting “On.” The Bypass control will disable the preamps and is used when you want to use an external preamp or a line-level source. This can be set on a per-channel basis for mixing onboard preamps with external pres. Note: choosing bypass does not automatically disable the preamp and enable the line input. The line input still needs to be selected if using external preamps.
In the Line Out Reference Level, you can set the reference level of each channel to either +4 dBu or -10 dBv.
Optically Yours
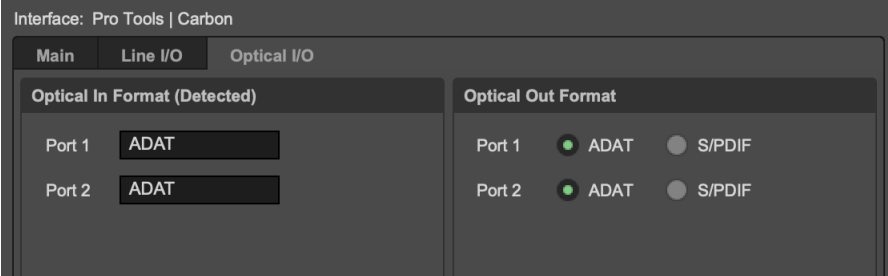
Rounding out the Hardware Setup is the Optical I/O section. Pretty straightforward. Select what you need to link your external source.
Real Ultimate Power
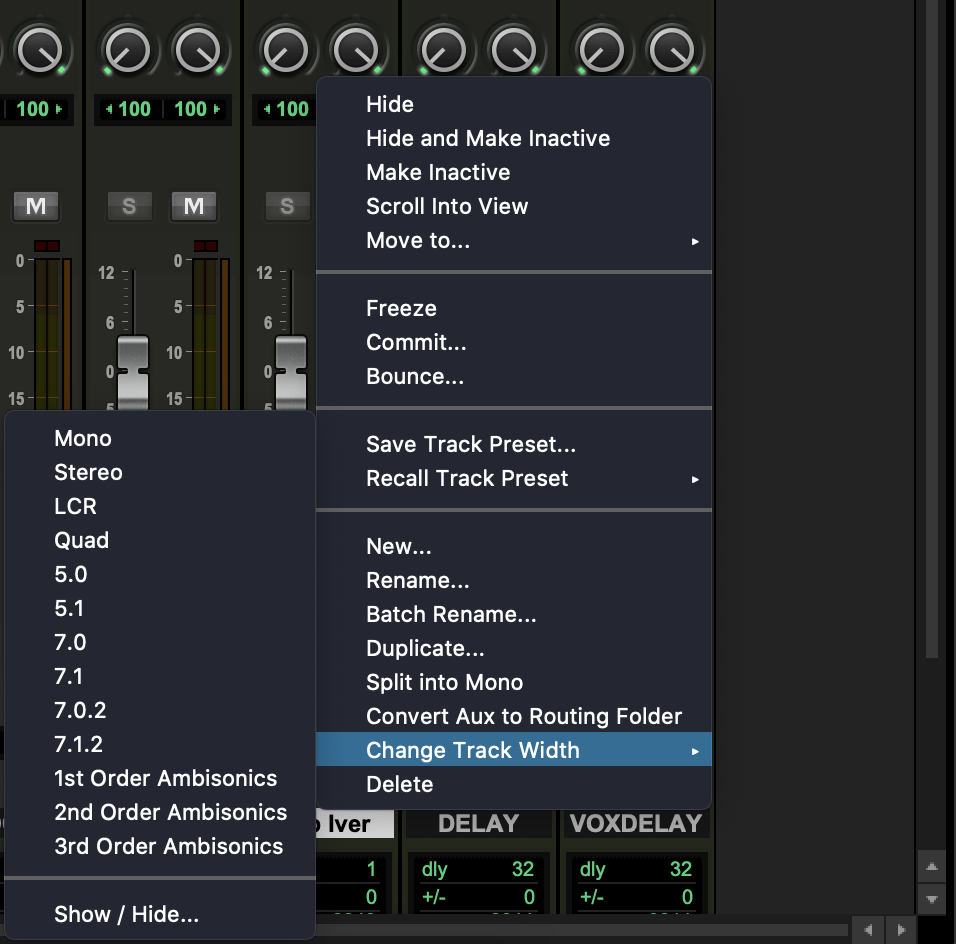
Although controlling settings for inputs, outputs, and talkback mic is useful, Carbon wasn’t finished adding features. In a recent update, Avid added complete control of most of Carbon’s buttons and knobs right inside Pro Tools. These options work right inside of both the Mix and Edit window. To enable Carbon controls in the Edit Window, navigate to View > Edit Window Views > Mic Preamps.
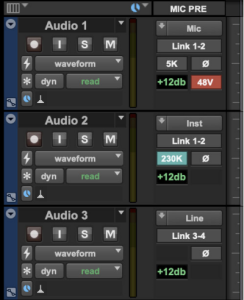
To enable in the Mix Window, navigate to View > Mix Window Views > Preamp
From either Mix or Edit view, you can change everything from channel selection, linking stereo channels, impedance, phase, gain, and phantom power. This is even more useful by utilizing Pro Tools “Mix Template” to create set configurations for all input, gain settings, and impedance. Do you leave your drums permanently set up and miked? Instead, you can create a template that has each channel’s gain already set up, complete with phase, panning, and impedance already assigned. No more wasting time before each session tweaking – just pull up your “drum tracking” template.
It’s What’s Inside That Counts
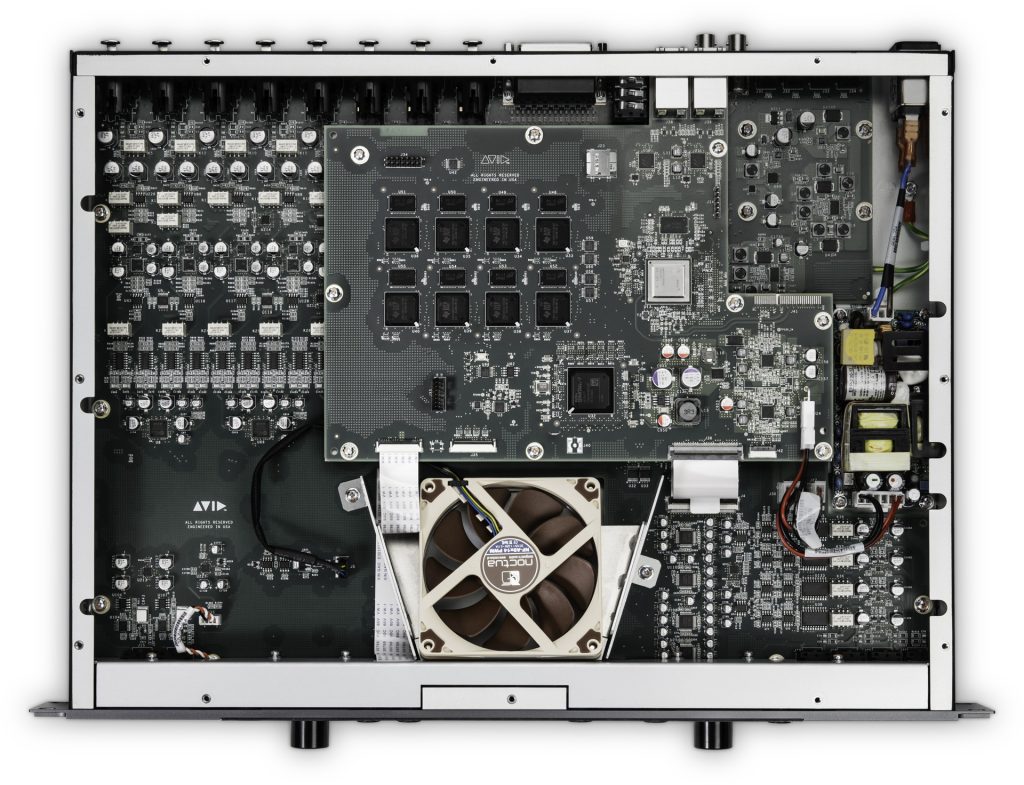
As far as onboard signal processing, Carbon has 8 HDX DSP processors (top center area) running a total of 2.6Ghz aggregated. For comparison, an HDX system has 18 HDX DSP processors running 6.4Ghz aggregated.
Anytime you have processing and FPGAs running inside a unit, things will heat up. Since you’re going to want to keep Carbon nearby when recording, Avid developed a cooling system utilizing an ultra-quiet fan that pushes cool air from the front of the unit to the back. Honestly, the fan was so quiet that I didn’t even know one was in there until I read about it. As a result, you can easily track right in front of Carbon with no noise.
Hybrid Theory
So, if Carbon has onboard DSP, it must be an entry-level HDX system, right? Well, not exactly. Sporting a little less than half the processors as an HDX card, you’re not going to be offloading any and every AAX DSP plugin during mixing. Instead, avid wanted to tailor DSP use to work case-by-case. They also had their sights on a different stage of music creation: tracking.
For Avid to accomplish this, they had to rethink how DSP offloading works completely. So instead of a bulk approach, Avid created the Hybrid Engine. This new architecture lets your computer run the DAW’s mixing engine and Native plugins, while Carbon’s onboard processors handle specific tracks. The result is Carbon stretching its onboard processing in ways not previously able.
For instance, say you have a vocal track stacked full with power-hungry plugins. If these plugins are AAX DSP compatible, you can enable Hybrid Engine for the track. With Hybrid Engine on the vocal track, your computer’s processing is free to run the Mix Engine more efficiently, thus giving you fewer AAE-9173 errors.
Although the mixing aspect of Carbon and Hybrid Engine is impressive, it’s not the most impressive part of the combo. Where Carbon shines is in tracking. How would you like to be able to use all of those previously power-hungry plugins while tracking? Before, if you didn’t have an HDX System, you had to track with nearly all plugins disabled, or you’d get an unbearable delay that takes your vocalist out of the groove. With Hybrid Engine, you can utilize the AAX DSP plugins during tracking, resulting in a “final mix” sound for the vocalist and, subsequently, a better performance. So how is this accomplished?
Ride the Lightning
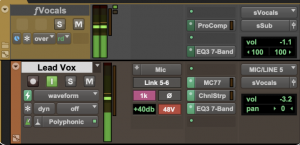
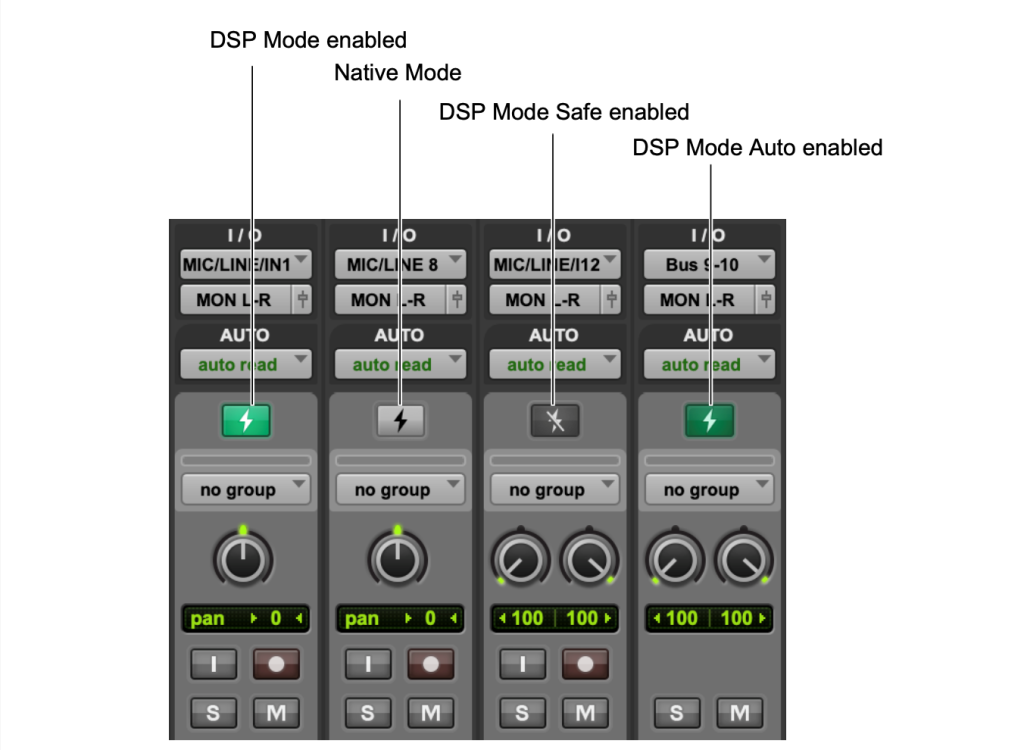
DSP Mode determines what tracks use Carbon’s processing power. For example, when Carbon is set as the Playback Engine, a bolt of lightning appears above the grouping and pan knobs in the Mix window.
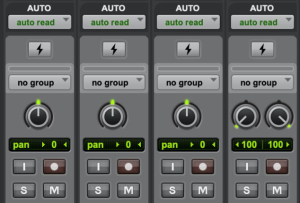
DSP mode can also be seen in the edit window to the left of the “waveform” control.
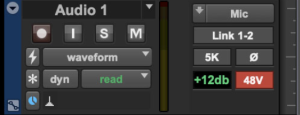
DSP Mode works on Audio, Aux, Instrument, Routing Folder, and Master tracks. With the click of a button, Pro Tools automatically switches all Native plugins for an AAX DSP version. When you’re done, click the DSP Mode button again to put the plugins back in Native mode.
While this alone is impressive, DSP mode takes it a step further. If there are any other tracks downstream from the original DSP-enabled track, Hybrid Engine will automatically enable DSP mode on them too. This ensures every DSP plugin that contributes to the sound of a track can take advantage of using Hybrid Engine. However, some channels may not have AAX DSP versions or even need DSP mode. You can easily enable “DSP Mode Safe,” and these will stay Native. The lightning bolt icon will reflect what mode your track is in. Keep in mind that any Native plugins that do not have an AAX-DSP counterpart will be disabled. Hybrid Engine can’t run both Native and AAX DSP on the same track, so you’ll need to plan accordingly when loading up tracks with plugins.
Plugins Plugins Plugins
But what if you’re not sure your current lineup of plugins has AAX-DSP versions? That’s an easy fix – Avid shows what plugins in your lineup are AAX-DSP by placing a small lightning bolt next to the compatible ones. All stock Avid plugins have AAX DSP versions right from the install, but Avid realizes that sometimes you want a little more.
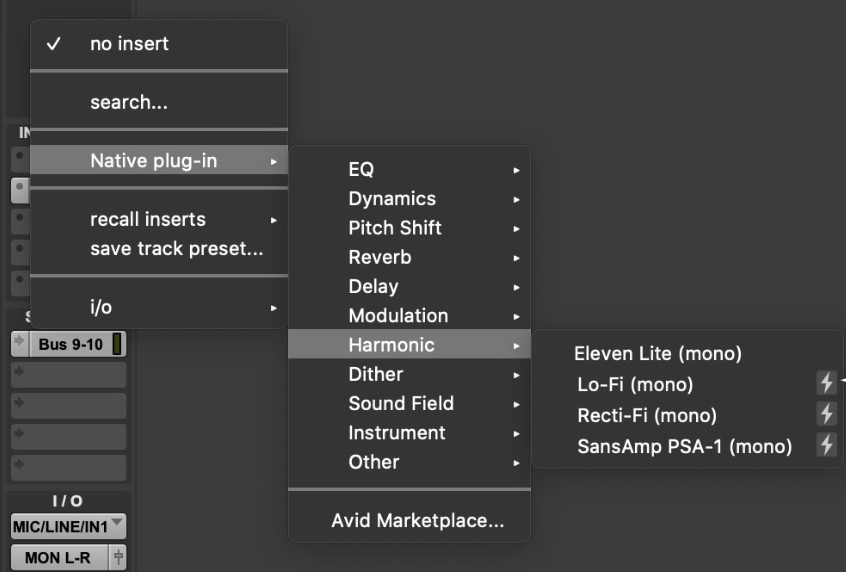
If you’re worried you don’t have any AAX DSP plugins, Carbon comes standard with 115 plugins via the Avid Complete Collection. These plugins span the gamut from Fairchild to Focusrite and everything in between. Although you can comfortably mix with Complete Collection, Avid also understands you may want variety, so Carbon comes with some extras courtesy of McDSP, Plugin Alliance, Arturia, and Native Instruments.
Lastly, Avid knows you’ll probably need an updated version of Pro Tools, so they’ve included options: you can either get a perpetual license of Pro Tools AND Avid Complete Collection, or they’ll upgrade your existing perpetual to the current version and include a year of updates. That’s easily a $600 value in itself.
So there you have it – a full explanation of what Carbon is. Now, let’s break down the entire Carbon system versus its immediate competition.
Carbon Vs. Apollo x8p
So with all of the facts laid out, let’s see how Carbon fares against the industry’s most fierce competitor.
Expansion
We’ve already established you get more expansion with Carbon. At some point, you’re going to want to expand your inputs and outputs for tracking and mixing with hardware. Carbon gives you a possible 24 inputs and outputs; Apollo x8p maxes out at 16 inputs and outputs.
Advantage: Carbon – More Expansion.
Plugins
Not only do you get more expansion, but you also get more DSP-compatible plugins with Carbon. Avid includes 120 plugins with Carbon. The Apollo x8p only comes with 16. I’ll give it to Universal Audio that they have FINALLY made native versions of their plugins and have an incredibly vast library with partnerships with big names. Still, you’re at the mercy of one company’s decision of what developers to include. Avid has given third-party developers the ability to make AAX-DSP plugins. This opens up more possibilities of having some of your favorite developers create plugins that harness the HDX capabilities.
In complete fairness, the AAX DSP model has its share of hurdles. Primarily, some companies have dropped the AAX-DSP format, citing it does not add enough value to justify the coding. This is something Avid will have to find a way to incentivize companies to add the DSP format. Currently, many companies like Plugin Alliance, McDSP, Sonnox, Metric Halo, and Antares still support AAX DSP. So, if you own these plugins, you already have a DSP-compatible version.
Advantage: Carbon – More Plugins by more developers
Control
Now let’s get to control. If you’re going to use the DSP-based version of your plugins with Apollo or change preamp gain or routing, you have to use UAD’s Console, which is one more piece of software to go between you and your DAW. Carbon controls every setting inside of Pro Tools. No extra programs or windows. Advantage: Carbon – Control is built-in to DAW.
Versatility
This is one that I have to give to Apollo. While you can use Carbon with other DAWs as an interface, it loses a lot of its functionality without Pro Tools. Meanwhile, the Apollo series works with many DAWs, including Pro Tools. Unless Avid builds a piece of software to bring AAX DSP to other DAWs, nothing can be changed about that. Carbon is built for the Pro Tools ecosystem. If you’re not willing to utilize Pro Tools software, Carbon may not be for you.
Advantage: Apollo – Features carry over to different DAWs.
The $4000.00 Question
We’ve answered what Carbon is. Now we have a rather large question looming: Does Pro Tools | Carbon justify the $4000.00 price tag. I understand the value of a dollar and understand $4000.00 is a great deal of money. This is a major part of why I took a year to review it. However, I can honestly say this interface is worth every penny of the price tag. Avid regrouped and kicked the door in with an incredible interface. Carbon is an absolute game-changer for the masses – an interface for the people. Before Carbon, you needed five figures to get into an HDX system that you may not even need the full might of. Carbon bridges this gap by giving you exactly what you need when you need it.
Not only are you getting an interface, but you’re getting built-in monitor control with talkback. The Hybrid Engine has given Avid a means of scaling HDX into a system any home or professional studio can greatly benefit from. Due to latency, tracking with plugins in Pro Tools was virtually impossible, leaving you stuck with minimalist processing during recording. Now, you can load DSP-Compatible plugins to a track with indiscernible latency.
Carbon: A Year in Review
Roughed Up
When I say I put Carbon through its paces, I mean it. We did not baby this unit. I took this unit to every single session I had. From the moment I took it out of the box, it never went back in. It rode shotgun from studio to studio, even landing on the floorboard after almost hitting a driver who pulled out in front of us (we buckled it up after that near-miss.) We over-tested buttons, knobs, and jacks. The unit is sturdy. It may have a few battle wounds, but it can take a punch and still work perfectly.
Built to Master
Back in the old days, you’d buy a Digidesign unit and immediately send it to a certain company to have them upgrade the preamps and conversion. I am glad to report the preamps and conversion for Carbon are top-notch. We dropped the unit off with Everything Recording’s Mastering Engineer Extraordinaire Harold LaRue, and he had no qualms mastering with the unit’s stock converters. That’s saying a lot because conversion is king with mastering. We threw every genre we had at the preamps and loved the headroom and transparency. The headphone amps were no slouch either. Plenty of volume to go around.
UnDSPutable
Since I’ve never owned an actual TDM or HDX system, I’ve always avoided tracking with plugins. This made tracking a slightly embarrassing ordeal: explaining to clients, they can either get a more processed sound with a delay or a dull, dry sound with no lag. Being able to run plugins at near-zero latency while recording is now non-negotiable. I can’t go back. I got a taste when testing out a client’s Apollo but didn’t like having to run through UAD Console. Being able to click one button to enable DSP saves time, headaches, and apologies to clients.
Every Rose Has its Thorn
Usually, spending at least a year with anything will give you a fairly lengthy list of pros and cons. While I have a lot of pros, I can’t find many cons. I really like having a “mono” button for checking mixes in mono, but that’s not a huge deal. The only legitimate gripe I have involves expanding. I do not mean inputs or outputs. Carbon has plenty of those. I’m meaning DSP. Say I get a taste for using AAX DSP plugins and want to expand closer to an HDX system. I’ve already spent $4000.00 on an interface, but now, to move up, I have to sell the unit and upgrade to HDX. I wish Avid would make a means for expanding more DSP processors, so I can scale the system up to handle more plugins on mixes.
On the other side of the coin, I also understand not everyone can afford $4000.00 for an interface. I’d like to see Avid scale Carbon down with fewer preamps, inputs, outputs, and monitoring in a more affordable version. No doubt a unit with four preamps and one monitor out would sell like hotcakes. Plus, it makes DSP more portable in a small form factor. Name it “Carbonite” and watch them fly off the shelves.
Lastly, I need some AAX-DSP Virtual Instruments. Other than those few gripes, I have only praise for Pro Tools | Carbon.
Final Thoughts
Pound-for-pound, Carbon is easily at the top of the class. Avid has found a way to take what usually is a convoluted affair and completely handle it behind the scenes masterfully. The DSP interface market has been screaming for an alternative to the current options and Pro Tools | Carbon delivers. Avid has finally brought a true hybrid workflow to the masses.
Price: $3999.00
To purchase, please consider our affiliate link HERE. It doesn’t cost you anything and helps keep the lights on at Everything Recording HQ
- Full monitor section with Talkback Mic
- The Hybrid Engine allows Sub-millisecond latency, even when tracking with AAX DSP plugins.


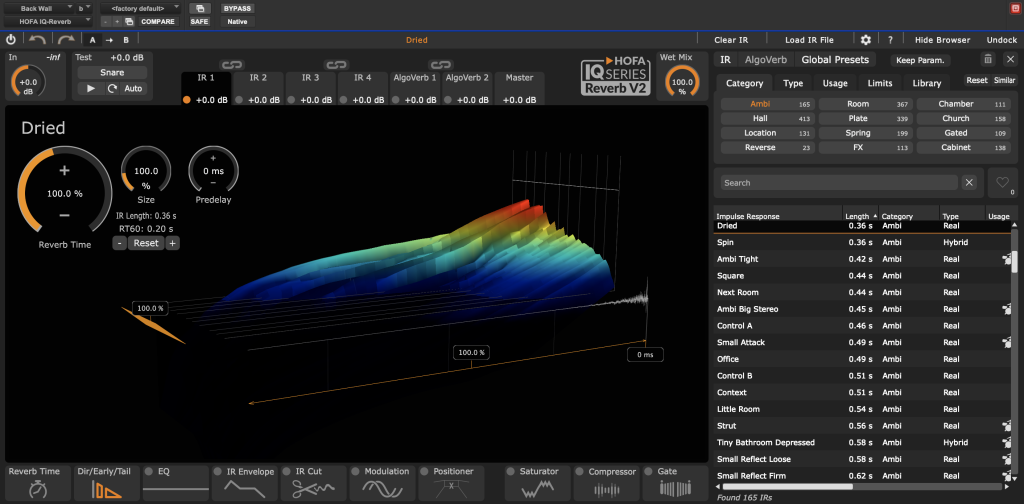
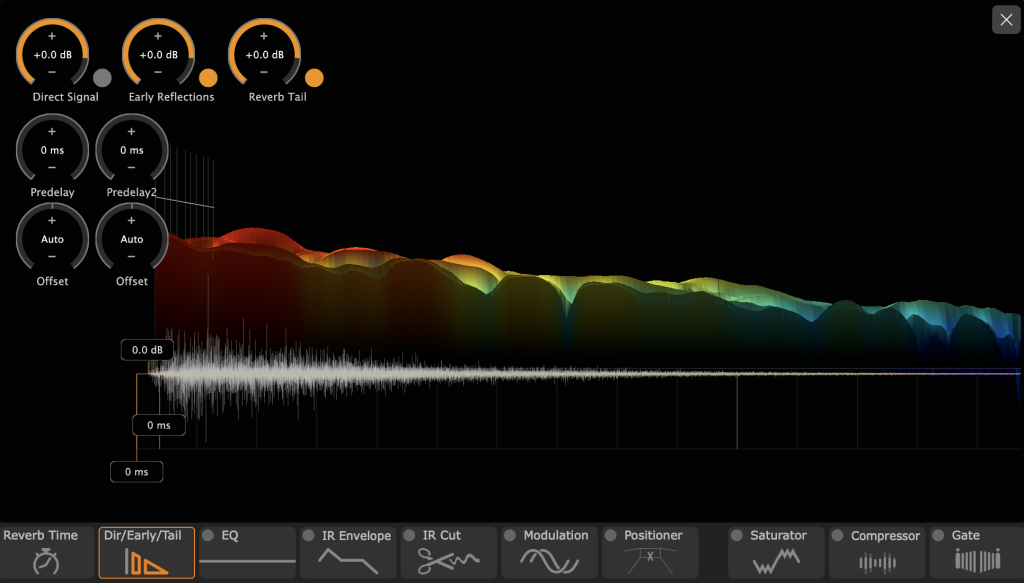
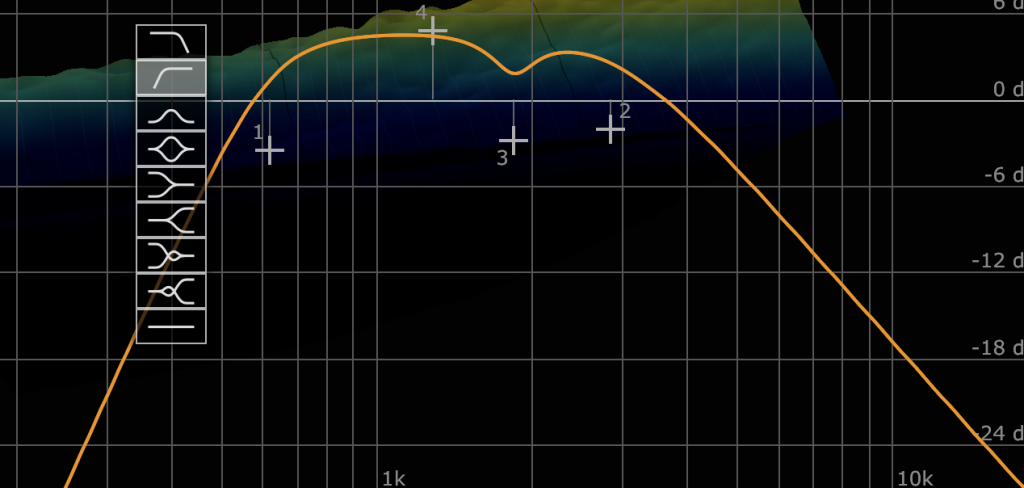
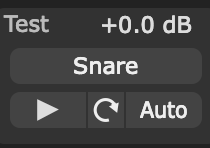 While you’re tinkering with presets, HOFA offers what I think is the best feature ever put on a reverb plugin. At the top left corner is a “Test” section where you can play various samples from instruments within the plugin to hear the reverb. No more looping audio, soloing aux sends, or general DAW tomfoolery to preview reverbs.
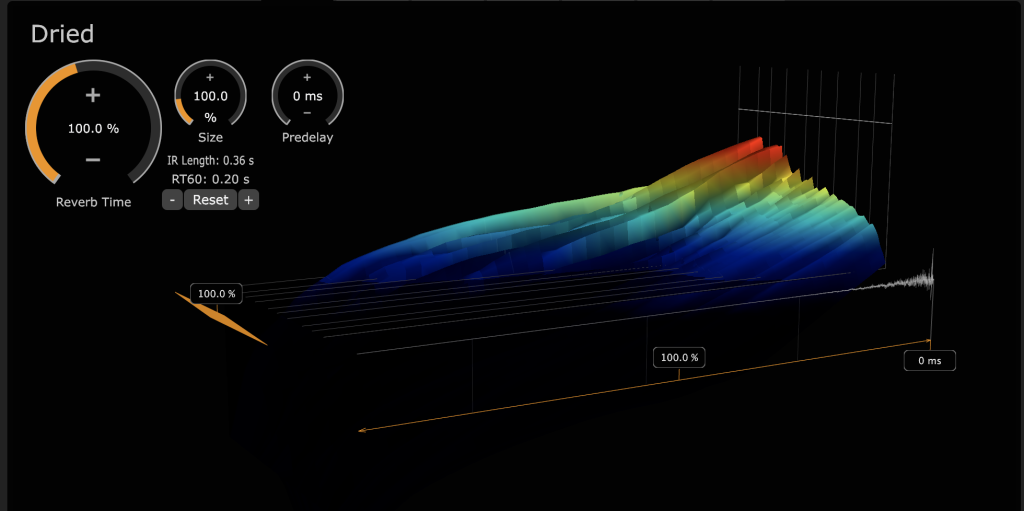
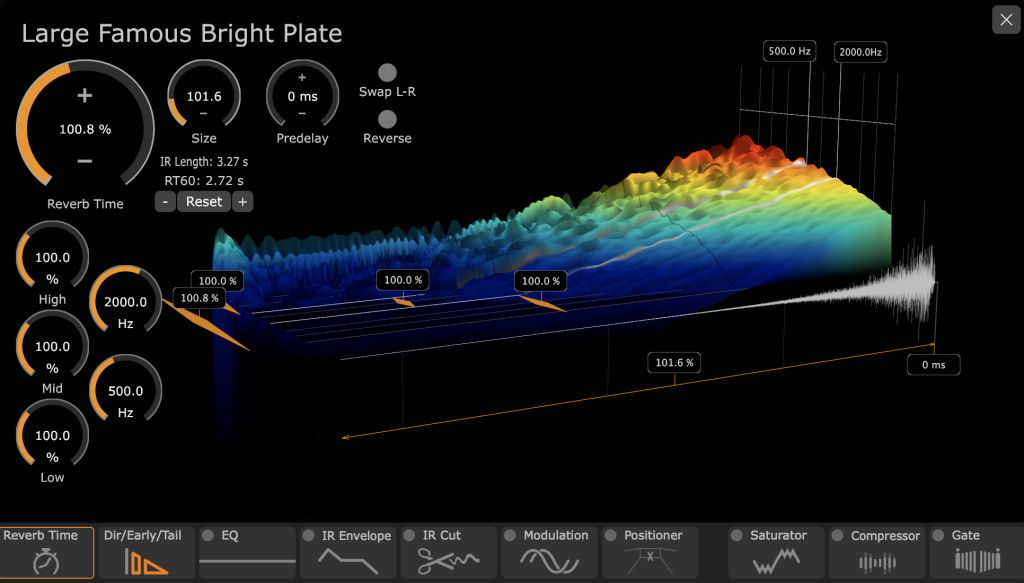
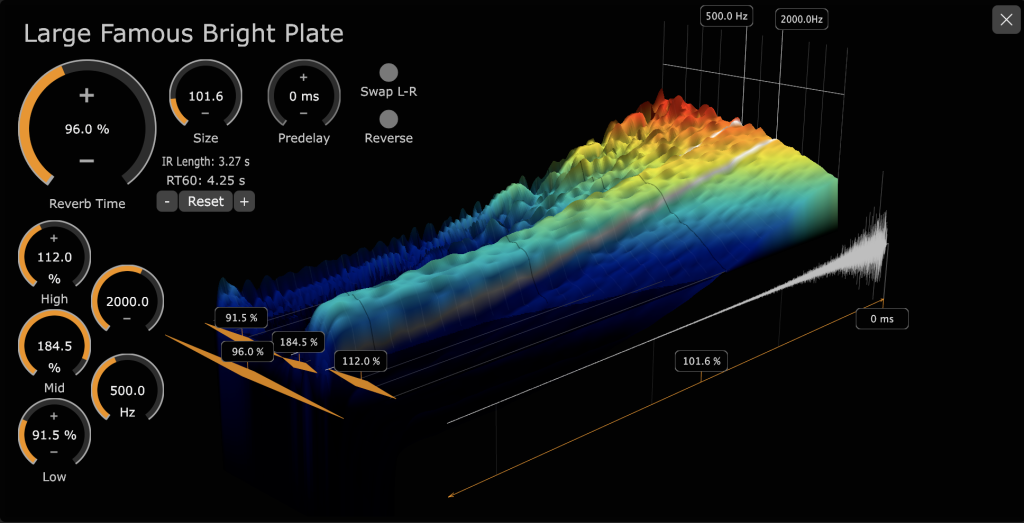
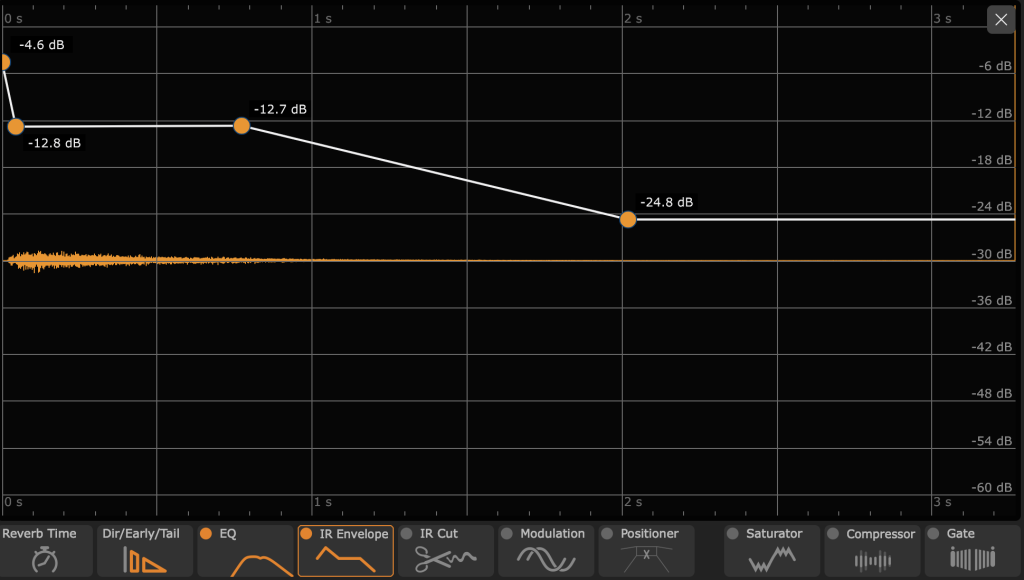
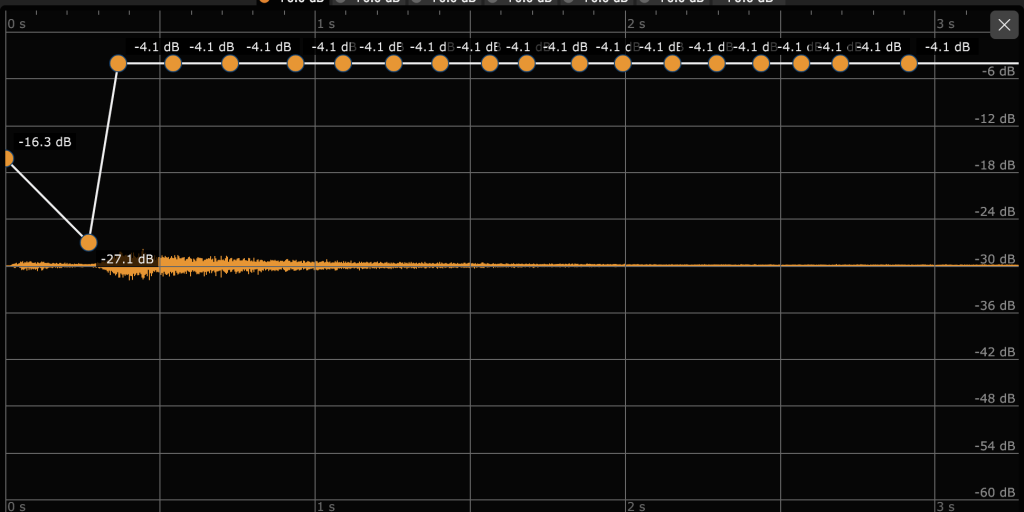
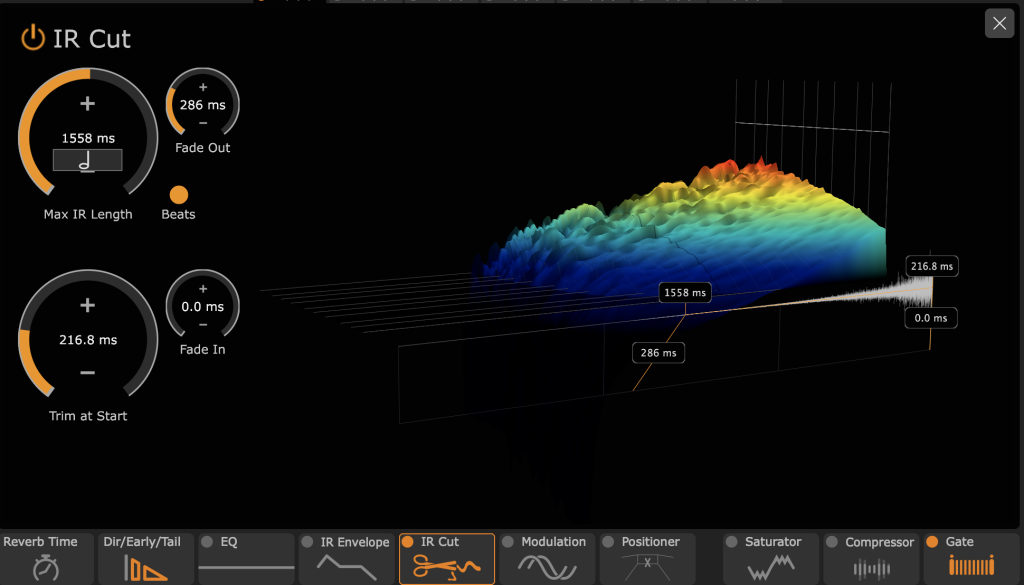
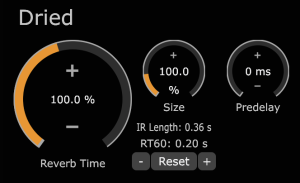 The Reverb Time and Size knobs utilize “damping” and “stretching” to resize the space. These controls work from a percentage of the original impulse, but remember, you can always check your RT60 to see the new decay time. The “+” and “-” controls sandwiched between the “Reset” button work to suggest settings for the Damping and Stretching of the IR. Just note: using the “-” after adjusting the “+” will not set the reverb back to the previous setting. This is due to how the plugin recalculates after each adjustment. To revert, use the undo or simply reset if you’re too far in the weeds. Lastly, for quick access, you’re given a pre-delay control next to the Size knob.