Give your tracks a well-traveled sound with UVI’s World Suite 2. From everything from Gregorian chanting to the Digeridoo, your trap beats will flourish with a little inspiration from another corner of the world.
Paris, August 26th, 2020 – UVI releases World Suite 2, a significant update to their world music instrument collection, delivering 369 instruments, 10,000+ loops and phrases, vocals, and more, from every corner of the globe. Version 2 adds 48 new instruments, new Georgian vocals phrases (including male and female voices), and a brand new and exclusive Oriental String Ensemble with dozens of Arabic, Turkish, and Persian multi-sampled phrases recorded in 12 keys with percussions, and 3 new Traveler instruments.
Browsable by both instrument category and geographic region, World Suite 2 represents a massive undertaking. Comprised of over 65,000 samples, World Suite 2 was designed to provide today’s musicians with the ultimate ethnic instrument collection, delivering an unmatched selection of professionally recorded instruments in an inspiring and easy to use package.
Instruments in World Suite 2 were carefully recorded to preserve their natural sound, using traditional playing styles and the highest-quality recording equipment and processing available. With custom controls based on instrument type, and built-in keyswitches, World Suite 2 helps you achieve complex voice articulations and dynamic performances with ease. In addition to performance controls, World Suite 2 instruments include a standard selection of sound shaping tools, including velocity envelope, ADSR amplitude envelope, a 3-band EQ with sweepable mid frequency, and a high-quality IR reverb, allowing you to easily and precisely sculpt your mix.
World Suite 2’s 10,000+ loops and phrases can be drag-and-dropped into your DAW of choice or played with special ‘Traveler’ instruments. Provided by region, World Suite Travelers allow for 6 discrete tracks to be populated with your choice of loops and phrases. Each track comes with a suite of customization options including gain, pan, solo, mute, low-pass and high-pass filters, pitch shifting and Sparkverb. Explore preset configurations, design your own, or find inspiration with the one-touch randomizer. In additional to the regional Travelers, two special Vocal Travelers are included, allowing you to easily layer vocal loops and phrases to create rich emotive textures and ambiances.
World Suite 2 offers native 64-bit standalone operation by way of Falcon or the free UVI Workstation, providing comprehensive support for all modern DAWs and simultaneous authorization on up to 3 computers or iLok keys.
PRICING AND AVAILABILITY:
World Suite 2 is available immediately at uvi.net for an introductory price of $199 / 199€, with upgrades available for $59 / 59€ for existing owners. Intro and upgrade pricing valid through September 6th, 2020 (regularly $299 / 299€).
It’s become more and more common to see producers and engineers lend their name and signature sonics to plug-ins. Chris Lord-Alge still leads the pack – and we’re not going to be surprised the day we find a bottle of CLA Edition Windex in our mailbox. But notable other non-Lord-Alges have gotten in on the game, too – be it for their take on signal processing, drum samples or amp tones.
Producer and engineer (and fellow New Yorker), Dan Korneff (Breaking Benjamin, My Chemical Romance, Paramore and dozens more) recently took things a step further by not only releasing two “secret weapon” compressor plug-ins, but doing so from his own company, Korneff Audio. With their new Talkback Limiter and new-and-improved Pawn Shop Compressor 2.0 plugins loaded up, let’s see how good the “lovin’, touchin’ and squeezin’” gets.
(And yes, I just referenced Journey lyrics. Have your mom explain them to you.)
COMPRESSORS, COMPRESSORS EVERYWHERE
Installing a new soft-compressor in my studio doesn’t conjure the excitement it once did. Hardware? Yes, all day long. But here at ER, we’ve reviewed a LOT of the compression plugins out there. Like… a lot a lot.. And where my VST folder once had just about every single one under the sun, I’ve since dialed it back to a much shorter list. Choosing a compressor used to mean losing momentum to surfing 100 compressor options. I one day realized that, despite all of their different graphics and supposed emulations, most of them sounded pretty much the same. I cleaned house and my workflow improved considerably.
So anything that’s going to be sticking around either needs to be a solidly reliable option that does its reliably solid thing – OR – it has to offer something ‘special’, something truly unique – much the way I love having a hardware version of a Shure Level-Loc or a Valley People Dynamite. There’s just something that those “do” that I can’t tug out of any other compressors – software, hardware or otherwise.
ONE PRACTICAL. ONE RADICAL.
Engineers tend to engage compressors for two entirely different reasons. The “traditional way” is to smooth irksome peaks in the dynamics, letting you bring up the overall RMS level between them. More and more, engineers these days use them to add some grit, punch and energy to a track. Obviously the process is the same, but the TYPE of compressor you use and your approach to using it lends itself to certain results. For example, if you wanted to gently roll of some peaks and bring out the space between the notes, you would likely reach for something a tad more polite, say, a Focusrite Red 3 or a GML 8900. Both are incredible pieces of engineering, but lean very “proper”. The way I’m hearing compressors used now is more “destructive”. It’s more common to see an 1176 compressor pushed hard and with all buttons in, yielding a barking thwack with a healthy dollop of harmonic distortion.
The Pawn Shop Compressor 2.0 is conceivably able to do both – although again, I anticipate most will use it more for the latter. In terms of sheer options and flexibility, this might just be the most tricked-out and customizable comp I’ve ever seen. Not only does it combine several of the high points from several different vintage circuits, but gives you insane amounts of control over what’s going on (literally) under the hood. The Pawn Shop is truly the tone-tweaker’s paradise, providing options upon options to customize the individual pieces, letting you unlock hundreds of potential uses. Look, it’s like Bisquick. You can make pancakes, muffins, biscuits, quiche, and about a million other kinds of breakfast.
Meanwhile, The Talkback Limiter gives you easy access to the sound of classic “Listen Mic Compressor” originally found aboard the Solid State Logic 4000 console. This circuit was never intended to become a classic, it was a simple ∞:1 ratio design to allow a talkback microphone to be heard from any corner of the live room. The story of its accidental discovery is fairly well published (but would involve mentioning Phil Collins – which is an automatic 7 years of bad luck) – and since its original 1980’s reign, it still reappears now and again with it’s unique, smashed dynamics. And it definitely bears the “compressor as an effect” designation.
DOWN HERE AT THE PAWN-SHOP
Tune in, Tokyo.
Unlike many vintage-styled plug-ins, the Pawn Shop Compressor is more of a Frankenstein of Dan Korneff’s own imagination and not an attempt to recreate a piece of vintage outboard. That makes reviewing it a tad different than the latest emulation as we’re not simply asking “How much does it sound like the AudioCorp ThingyDo 3920”? The Pawn Shop Comp is a unique beast unto itself. And what a beast it is.
First of all, let’s look at the block diagram here. You’ve got a tube-modeled preamp and two-band eq (separated into “weight” at 63 or 171hz and “focus” at 1.6 or 2.4kHz) on the front feeding the FET-modeled compressor circuit. Post-compressor you’re given the choice between iron, nickel or steel transformers (we’ll let Peterson from DIYRE explain) and a wet/dry control. But between the way in and the way out there’s quite a lot of component-level customization. It’s the first plug-in to come with a soldering iron and a Mouser account, basically.
Components are there for the tweaking. Solder not required.
A lot of the options you’ll see under the hood of the Pawn Shop Comp assume a fair bit of “traditional” audio engineering knowledge. Before the turn of the millennium, it was expected that an audio engineer would not only be able to handle miking, recording, mixing and so on… but also tackle the troubleshooting and maintenance of the studio’s console, wiring, and outboard. But we’re also working off the DIY mindset here – where builders and engineers know the subtle differences between say… a MAT-12 or SSM2019 transistor. Or differences between the material and tolerances of resistors. And lest anyone cry “Gimmickry!”, this plug-in’s creator is a guy who really likes building his own gear (I’ve not used one personally, but I’m told his 1176 clone is very, very well-made).
It’s truly a lost art and I will never stop encouraging even the most in-the-box of engineers to learn the basic principles of electrical engineering, join GroupDIY (it’s like GearSlutz for DIY audio, minus the cult mentality) or even maybe design and build themselves a piece of gear someday. But I also acknowledge that times have most certainly changed and nowadays I’m impressed when people can solder their own cables. With that said, it doesn’t mean those not possessing this arcane knowledge can’t use or enjoy the options herein – in fact, it might just be the sort of thing that piques your interest to learn more about the actual circuits and their behavior.
The Pawn Shop Compressor 2.0 offers so many different component-level choices, letting you substitute not only “the big stuff” like tube types (with adjustable biasing) and transformer core material, but types of resistors and transistors in the compressor circuit. If you’re looking for a way to join polite conversation at the next AES cocktail hour, this might just be your ticket. And if you’re self-aware enough to say, “okay, look, I have NO idea what any of this crap means”? Well, start switching stuff back and forth and learn a thing or two.
SONICS > GADGETS
It doesn’t matter if you know how or why to swap Panasonic capacitors for WIMAs – or the benefits of using a half-wave rectifier diode. A plug-in is only as good as it sounds and Pawn Shop Compressor 2.0 sounds quite good. Really good. It’s the toaster that gets you the perfect done-ness between golden-brown edges and burnt-to-a-damn-crisp. What’s even better is that, with so many presets and settings to use different parts of its signal flow – it’s extremely versatile. Even with the compressor itself switched out, the tube preamp and EQ can add some Ron Jeremy-esque girth – or you can simply engage the output transformers for some nice subtle harmonic sweetening.
Using the tube preamp stage to light up the upper bands of a ho-hum drum mix, I was struck by how well the cymbals and room mics were now “sitting right”. Pushing the compressor deeper and deeper into the mix, their presence managed to delicately straddle the line between “too loud” and “right there”. Okay, good on drums, check. Clicking it in on a submix of backup vocals (that I had been agonizingly doing pass after pass of automation for), I instantly fell in love with the way it seemed to glue eight different voices into a single element. Plosives were neatly tamed and the overall presence of the group became much more apparent.
I’ve whipped up a couple of settings (stored as ‘Beef Machine’, ‘Beef Machine II’ and ‘Beef Supreme’) that really, really seem to like my bass guitar playing. I used the Pawn Shop’s “focus” setting on the preamp to goose out the harmonics and let the compressor clamp down on dynamics with a fairly slow attack and quick release, aggressive ratio (8:1) and threshold taking out maybe 8db on hard peaks. The result with the distortion out evokes the classic sounds of Tool’s first couple of records. Step on the virtual distortion pedal of your choosing though and every pick scrape on the notes’ attacks carved out a perfect little “sha-shonk” before the compressor got to it, and the weight of the lows collapsing back in on themselves post-attack gave the bass tremendous space in the mix without ever feeling too present or brash.
Sonically I’m reminded of a few different pieces of analog gear here, depending on usage. Though I suspect the 1176 was a big influence, I heard shades of both the Drawmer 1969 and Empirical Labs Distressor with the compressor working. Neither of those are bad crayons to color with! You can get the compressor pushed pretty far (about 9db of GR) before its grunting and pumping become too apparent. Obviously this is source dependent, your mileage may vary, etc. etc. etc.
But this is where I wanted to really see what taking my virtual soldering iron to the insides would do. With three types of tubes and output transformers, I could definitely sense the different dimensions that each of these offer (to the lesser-initiated, these are subtle. Switching from iron to steel transformer cores is not a huge revelation. Again… it’s subtle…). Better yet, a little fussing with the transistors in the compressor’s block really opens up different shades, tones and colors. Even if you’re not totally sure what you’re swapping or why, chances are if you try enough combinations you’re going to find “that sound”. Make sure to save the preset.
I’m impressed with the Pawn Shop Compressor’s ability to do a little or a lot. As a utility infielder, you can sprinkle just a bit of analog-modeled magic dust onto tracks or groups that are otherwise just coming up “meh”. But shift gears into “spank it” territory and your once-tamed animal now seethes with rabid aggression. You want to get gnarly with it? Happy to. One thing I appreciate about the Pawn Shop is that their switchable innards gives you something you simply can’t do with hardware (unless you somehow devised a robotic lazy susan that would swap in all the different pieces).
My standard “I can’t believe I have to say this, but apparently I do” caveat here: As with ALL compression, it’s important to temper your results against the whole mix and not just the soloed track. And try not to get a god complex with your ability to make everything loud. Compression is not an ingredient, it’s a spice. Use accordingly.
I CAN HEAR IT IN THE AIR TONIGHT
C’mon, you’re singing it, aren’t you?
Switching over to the Talkback Limiter, I had high expectations and preconceived notions. Having not only done “that actual trick” on “that actual console”, but coming dangerously close to purchasing the 500 Series circuit from SSL themselves multiple times, I know and love what the SSL “LMC+” (Listen Mic Compressor) does to just about anything you want to throw at it. A word of caution, using this plug-in is kind of like “the teen movie slow clap” – there’s a time and a place for it, choose wisely.
It’s hard for mankind to conceive of something “beyond infinity”, but that’s the compressor ratio here. In a fully quiet room with the monitors up, it can hear your thoughts (and frankly, it’s a little concerned). The ability to make the quietest whisper as loud as the end of times is a compression effect that can be deployed to create suspense or surprise in a mix – again, provided it’s used properly.
YOUR NEW SONIC CRUSH
What’s really going on here is just that – a bazillion-to-one compressor with 30db of gain and a devil-may-care attitude towards actual fidelity. Sonically it’s not dissimilar to the classic Shure Level-Loc – any voltage that dares cross its threshold is savagely beaten into a flattened pulp (kind of like when engineers first got their hands on Ozone). And if Dan & Co. never thought to allow you the opportunity to peel back the faceplate and tweak the innards, it’d still be a very worthwhile plugin to have at the ready.
Bring your virtual Phillips-head
But as a well-regarded analog circuit designer himself, Dan Korneff wants you to get your hands dirty. Flip the lid and now you have an array of customizations that all impart a slightly different characteristic upon the results. Below deck, the Talkback Limiter allows you to apply a low-pass filter or tweak the amount of distortion to modify the compressor’s output – letting you really make things snarl if that’s the sound you’re going for. Again, let’s not try and paint the Talkback Limiter as a versatile, transparent, gentle sort of thing here. It’s downright brash on its good days, but if that’s the effect you’re looking for, you’ve found it.
As far as its ability to ‘do that thing’, yes it most ably does. Dynamic drum mixes are squashed like bugs. Vocals are put nose-to-nose with the listener. It’s fantastic as a send effect for brief “a-ha” (no, not this a-ha) moments in the mix, or to provide an extra layer of sonic aggression to really drive the point home. If you’re remastering an old orchestral performance for the old lady down the street, leave this one alone. (Also, don’t forget to click the 11v LED to simulate that power rail being out. Nice touch.)
A favorite use of mine is to use something like this as a parallel effect on its own fader instead of twiddling the wet/dry blend internally. Across a drum bus, you can automate levels in during less high-volume parts of a song where it provides just the right amount of nuance. Of course, that effect also works in reverse when you fade it up on fills or loud sections to help that part of the track really charge ahead.
Green is clean. Red is affec-ted. The Talkback Limiter really goes to work after peaks
HIGH MARKS AND A COUPLE OF LOW NOTES
We haven’t had an opportunity yet to discuss just how excellent the actual interface of these plugins are. They are well-realized and intuitive – making you really want to get in there and play around with all the parameters. What’s more, they’re resizable, which (are you hearing me, everyone else?) makes working with them alongside everything else on your cluttered screen possible (instead of Command-~-ing your way through window after window after window.
Another thing we haven’t discussed yet is the clever inclusion for both plugins to adjust the oversampling. Goosing the Nyquist multiplier can help ensure smooth output, lessen signal-to-noise and avoid phase smearing or distortion. But that can and does come at the cost of CPU-cycles. Both plugins allow you to bring that number down if your available resources are dwindling – or if you just want to throw caution to the wind and invite more demons into your 1’s and 0’s.
Kudos again for the wet/dry knobs. It seems that just now even analog devices are coming around to the idea of using one box to do a parallel mix without taking up real estate. Yes, you can always do the effect as a send and blend that way (plus easy automation of the two to make your mix dynamic), but that’s not always necessary. Just twist one knob and you’re done.
Two sticking points of note for me. For one, no sidechaining (either internal HPF or externally-sourced) is a bummer. With compressors, bass drums and low notes can create a pumping effect on the overall result that makes the compression obvious, and not in a good way. Hi-passing those kicks and subs out of the detection circuit will leave the lows the space they need without the rest of the mix being pushed out and falling back in on every note. Same goes for external sidechaining. With plugins that can get this grungy, being able to engage them with other sources as the trigger opens a whole new vista of creative options*. I just find it odd that these plugins are built to be customizable with such finite precision in one regard, but lack these two important features.
(*You can always create duplicate outputs for whatever you want to use this on, set up your own crossover frequencies so there’s a low and high fader then apply the plug-in to the high channel only – then sum them both back into a new output. It’s not hard, but it does take some extra fiddling.)
The second – on the Talkback Limiter – was how difficult it was to nail the sweet spot with gain values. Even though range would go from a scale of 30db, the actual range between creating “none” and “way too much” would be between fractions of a single number. For example, 10.2db of input gain would be next-to-nothing, but 10.5db would leave your audio bleeding out on the side of the road. You’ll definitely be using your scrollwheel to enter these values. It’s too bad, because a compressor’s make-or-break is finding that perfect value – and it’s tough to lock down the spot between these tiny increments to always get it “just right”.
(UPDATE: Speaking to Dan himself, he’s working this into future versions of the software with a PAD option. See, B Church handles shit, son!)
THE FINAL WORD
With their extremely attractive price points ($99.99 for Pawn Shop Compressor 2.0, $39.99 for the Talkback Limiter), it’s hard to say no to the sonic possibilities that these two compressors provide, especially given that you can drill down into such specificity. The Pawn Shop is such a versatile and incredibly well-realized piece of software. You can use a little (or a lot) and tweak its innards into hundreds of different configurations. It can give you anything from an ever-so-slight pair of comfy sweatpants to a full-on double-fisted spankmaster (and all points in between). Having component-level choices like the types of resistor or FET transistor may not be appreciated by everyone but us dinosaurs, DIY’ers and old-school tech-types – but it’s remarkably cool and (gasp) sounds faithful.
Meanwhile, an effect like the Talkback Limiter should be in every adventurous engineer’s toolbox. It’s just a very unique processor effect that’s been faithfully recreated for the DAW world at a very humble price. A less-fiddly response curve for its gain settings and the addition of sidechaining options are two very important features we’d like to see in subsequent updates. But frankly, I’m even more excited to see what Korneff Audio is going to come up with next. We root for the Bartles & Jaymes type upstarts here at Everything Recording, especially when they’re scratching a new itch with a different way to scratch. Nice guys, cool company, great products. What’s not to love here?
KORNEFF AUDIO PAWN SHOP COMPRESSOR 2.0
$99.99USD (AAX, VST, AU) iLok Required
OVERALL: There are so many compressors out there. Vintage ones. New ones. Simple and less-simple-ones. Even in this saturated marketplace, Korneff Audio deserves a serious look.
4/5
PROS:
One of the nicest GUI’s I’ve seen on a compressor plug-in.
Oodles of sonic possibilities you won’t see anywhere else.
Three fantastic tools that work great individually or as one behemoth.
CONS:
Lack of internal HPF or external sidechain.
You can get ‘option anxiety’. This is why Waves’ “One Knob” exists.
Those less-aware of the actual circuitry might be turned off.
KORNEFF AUDIO TALKBACK LIMITER
$39.99USD (AAX, VST, AU) iLok Required
4/5
PROS:
You want “that thing”? You got it.
Huge gain range and wet/dry control for lots of sonicl options.
Internal settings for distortion and filtering are a nice touch.
CONS:
Again, a sidechain here would get that half a star back.
The coarse operating values make finding the sweet spot hard.
Kemper has released a new OS with a lot more creative tools at your disposal. Additionally, they have also given Rig Manager a much-needed update. A while back, we reviewed the Kemper and had a few issues with the Rig Manager. Hopefully, this new version works the kinks out.
KEMPER announces the immediate availability of theKEMPER PROFILER OS 7.5 adding Acoustic Simulator, Phase Widener, Delay Widener, and Autoswell to the PROFILER’s arsenal of FX. The KEMPER Rig Manager Version 3.0 brings next level Library management and detailed Rig editing features. Both are free downloads for PROFILER players.
Acoustic Simulator This is a simple Stomp that turns an electric guitar signal into a pretty authentic acoustic sounding tone. This is designed for the in-between strumming or fingerpicking parts during a live performance: The exact situation where guitarists would step up to an acoustic guitar mounted on a stand. PROFILER players from now on just switch their rig.
For the right seasoning and setting it up for the various guitar and pick up models, the Acoustic Simulator offers the parameters Pickup, Body, Bronze, and Sparkle.
Don‘t expect perfect results, as the mechanics of an acoustic guitar are quite different. The Acoustic Simulator though will simulate the characteristic body resonance and crispness of an acoustic guitar so closely that you might feel able to leave your acoustic guitar at home when you only need it for two or three songs that night.
Phase Widener
The Phase Widener is an effect invented by KEMPER. It creates a wide stereo signal from a mono signal without coloring the result at all. Even when summed back to mono, no coloring will occur.
Delay Widener
This is the condensed version of the well-known stereo-widening trick of delaying one side of a stereo signal by several milliseconds. In contrast to the Phase Widener, the Delay Widener is not mono-compatible and should be checked for coloration when used on a recording. Additionally, the Delay Widener will tend to emphasize the non- delayed side – this is a psychoacoustic artifact. Setting the Delay Widener to about 30 ms should lead to a pleasing result. For all Widener effects, it is mandatory to place them after the Stack section, where the effects are processed in stereo.
Auto Swell
Auto Swell mimics a volume pedal swell with every new strike of the strings. The parameter Swell Rate controls the time of the swell, up to a maximum of 4 seconds. While the Swell Rate controls the attack, a complimentary compressor is also included, to shape the decay of the instrument once it has faded in. The Compressor parameter controls the intensity of the compression.
And then some …
Output Filters – Low Cut and High Cut filters are available. These will affect all outputs.
S/PDIF Slave Mode
Recent models of the classic PROFILER units (Head, Rack, PowerHead, and PowerRack) now provide the option to run as a slave to an external clock, as all PROFILER Stage units do. This is based on a hardware modification introduced during 2018 and enabled by this OS revision. Units with this capability will show an additional option “Auto/Internal” in the Output Section — this can be found on the same page as SPDIF Volume and SPDIF Clock.
Audio and clock signals are sharing one S/PDIF cable per direction. To avoid crackles and other artifacts two SPDIF cables need to be connected if your PROFILER follows an external clock and sends an audio signal for recording. Two cables need to be connected, too, if the PROFILER is configured as clock master and receiving an audio signal via SPDIF. We recommend affording two SPDIF cables and leaving them plugged in.
- Saves precious mouse clicks and routing for compression and saturation
- So simple a four-year-old can use it (and has)
- Great sounding compression and saturation
Cons
- Needs ability to solo multiple faders at once
- Presets need organization by creator and application
Summary
So far, we're four plugins deep with BABY Audio and they just keep getting better. Parallel Aggressor takes pieces from previous creations and pushes them to all-new heights.
Rating
Be Aggressive – B- E- Aggressor!!!
Come on, everyone chant with me. BE AGGRESS…! Nope? Alright, I’ll force Everything Recording’s own B. Church to do it with me. He just told me I couldn’t do that unless I actually pay him for his work. Welp, better whip out the modern-day equivalent of the wallet (aka Venmo). Wait, nevermind. He wants too much much money to put on a BABY Audio cheerleader’s outfit. Sorry everyone – not going to happen unless the folks at BABY Audio chip in a few dollars.
BABY Audio has returned with yet another powerful tool that my four-year-old niece could operate (and has). Behold, Parallel Aggressor, a plugin that saves you precious mouse clicks by splitting audio for parallel processing. Once broken up into two new paths, audio is routed into compression and distortion sections and blended into the dry signal. You may be wondering, don’t they already have this? Well, yes, but they’ve picked up where I Heart NY left off. This plugin pushes the concept to new heights with multiple modes of compression and an added Heat control similar to the Heat knob in SUPER VHS.
The Interface
Continuing on Comeback Kid’s aesthetic, the top menu gives you a choice between dark mode, not so dark mode, and my personal favorite, white mode. Even though I’m probably full of it, I’m going to say that this mode is due to my “Everything Recording” Edition design I proposed in the Comeback Kid review. Just give me a second to pat myself on the back. In all seriousness, it’s a sleek-looking plugin.
The controls are simple too. The left side controls the compression with the SPANK controls, and the right controls the distortion with HEAT. Right up the center is Dry signal controls and Output.
Operations are as simple as dialing the SPANK and HEAT knobs until the orbs on either side display a little orange. I would suggest doing this on a more dynamic portion of your track as well. Once both controls are dialed in, adjust each LVL fader until it sounds like you want. Additionally, each section has Style control buttons you can figuratively smash as well. This plugin exudes aggression, so why not get a little rough with it?
If You’re Going to Crank it, You Better Spank It – TLA.
SPANK takes I Heart NY’s compression algorithm and expands the controls for versatility. The bottom left section houses SPANK’s Style controls. These are extra goodies to further shape your dynamics.
Starting from the left is the PUNCH control. Aptly represented with a boxing glove, PUNCH gives audio a little more impact by letting a few more milliseconds of material to pass unscathed. The EXTRA SMACK control pushes things farther with a faster release time to get things pumping while dialing back the attack time similar to PUNCH. Rounding out the compression section is a high-pass filter for the side-chain and a very novel Mono control to only place compression in the middle of the field.
Packing HEAT
Nowadays, some source audio never leaves the DAW. Something mysterious happens in that transaction from numbers to voltage that takes the windows from transparent to tinted. Heat takes the saturation control from SUPER VHS and gives it the spotlight.
The EXTRA HOT control throws a second distortion into the mix while the TONE control pushes more mid frequencies for a more musical overdrive. For further tone shaping, high and low-pass filters tame the lows an highs for the perfect balance. The low-pass slopes at 150Hz while the high-pass falls at 7.5kHz.
Output Section
With three faders, things can get loud quick. To combat the pushing the levels to oblivion, Parallel Aggressor has a dedicated output section. Auto Gain takes an approximated guess at how much the volume has increased and level matches. For fine-tuned trimming, the OUTPUT knob is available. Lastly, a Peak detection meter shows you the outgoing level. Conversely, if you’d like to see RMS, click the meter and the display changes.
In Use
I found Parallel Aggressor to be a fantastically simple to plugin to use. The only challenge is deciding just how you want to shape your audio. The added functionality to the compression and saturation sections of I Heart NY and SUPER VHS push these concepts to new limits. While on the surface, it could appear that these are recycled bits of other plugins, but they’re not. BABY Audio has taken features from each and expanded them into all-new tools with individual personality and flavor. I found myself pushing this plugin beyond parallel processing and straight into FX territory. The utility alone in housing two auxiliary busses saves mouse clicks and babysitting another fader. Parallel Agressor is vibe for days.
Aggressor Transgressions
Although I have no complaints about how Parallel Aggressor sounds, there are a few functionality issues I’ve come up against. I’d like to see one of two things changed: either a bypass button for each fader or the ability to solo more than one fader at a time. Sometimes I need to A/B between my processors, and right now, it’s a little complicated. Lastly, I’d like to see the presets menu sorted a little more. When you have curated presets by big names, it’s nice to see what they bring to the table. I’m not sure which preset was made by each person, and sometimes, that helps in genre-specific mixing. Also, get a few more people to curate more presets for an update. I tend to pay attention to preset folders with names I know. Yes, this is me using a review to throw my hat in the ring for Everything Recording presets.
In Conclusion
Another day, another great plugin by BABY Audio. Would you expect anything different? As subtle as you want or ripping a hole in the time-space continuum, Parallel Aggressor has you covered. I’ll take an original plugin over another piece of rack gear any day, and BABY Audio has not disappointed. Here’s to workflow!
For more information, and to buy visit our affiliate link HERE.
- Future Proof
- Can fit from 7" to 12.9" tablets
- Lightweight and durable
Cons
- Installing and removing horizontal feels a little worrisome and you have to hold the tablet and pull the clamp apart at the same time.
Summary
Almost ten years later, IK has taken its crown as THE company for anything tablet-based for music creation. iKlip is a stellar example of a company evolving with a fast-growing market.
Rating
In Everything Recording’s humble beginnings, we reviewed the very first iKlip (review HERE). Overall, it was a great start, but there was one that made it a bit cumbersome and another that I didn’t think about at the time. Almost ten years later (and a new iPad), we’re going to run the new iKlip 3 through its paces to see if IK has addressed some of iKlip’s small hassles. Let’s dig in.
Behold, The Beginning
It was early 2011, and the iPad 1 was beginning to become a formidable tool for musicians and producers. IK Multimedia had released the iRig (old and slightly embarrassing review HERE), and Neyrinck entered the mixing game in full force with V Control (review HERE). Nonetheless, the iPad needed something to hold it up. Thus, the iKlip came out, pushing IK Multimedia to the front of the pack in the “i-space.”
The iKlip came in a molded plastic three-sided mount that nestled the iPad 1. The design was very sturdy but came with limitations. One shortcoming was that the iKlip 1 could only work with the first-gen iPad. This issue was in no way IK’s fault, but it was still a little disappointing. Don’t get me wrong, it did not keep using it with my iPad Mini, but I did have to gingerly position it in three-quarters of the mount. The only other point of contention we’ve had was how the iKlip rotated – you had to completely unscrew the mount from the base to spin the mount.
Almost Ten Years Later
It’s 2020, and we’re a staggering twenty-seven iPad versions in (not to mention the myriad of other brands of tablets out there). They come in every shape and size, and obviously, it would be crazy to make a custom molded version of each, so IK Multimedia adapted. iKlip 3 kept some of the handy parts of the first version but made a few adjustments.
First, they designed version 3 “future proof.” The mount expands out from the center to accommodate tablets up to 12.9 inches. Second, they left the areas available where buttons and ports usually reside. Third, they fixed the one problem I had with the original – positioning. The pivot no longer has to be unscrewed with a screwdriver to rotate. iKlip 3 has a spring-loaded pull socket for fast changes.
Additionally, instead of a single tilt mechanism, the updated iKlip incorporates a ball joint with a massive range of movement. The new design gives you multiple mounting options: horizontally, vertically, to the left or right of the stand, and even on top of the mic stand with the iKlip Deluxe mount.
Lastly, they ditched the slide clasp for a thermoplastic screw and bracket. This mounting system can handle poles up to 1.2 inches in diameter.
The Cat’s out of the Bag
The iKlip 3 comes in attractive packaging with minimal assembly. All you need to do is:
Fit the ball joint into the mounting bracket
Tighten the clasp around the ball
It’s off to the races.
Kicking the Tires
Luckily when iKlip 3 arrived, I had purchased a new iPad Mini 5, the wife got a new iPad Air, and I had several sessions with a few clients. I wanted to go out of my way to test out the durability, so multiple tablet changes, rotations, and positions needed to be abundant. To make this happen, I decided to incorporate iKlip 3 into all aspects of making the track.
Practice Time
Because I do a little session work on the side, I was in dire need of some practice time. I got right to work setting up my practice kit and found a perfect use for iKlip. The bracket mounted right to the horizontal section of the rack, allowing me to untether from the studio rig and just play the master tracks through the iPad
Tracking Session
I had to lay down some acoustic guitars for an artist I’m working with and was stuck at home alone, so I needed to control the session and track myself. Additionally, my studio is in a state of untreated flux, and I needed to record in a less “echo-ey” environment. To help with this issue, I took my small interface upstairs into a room with some curtains to help tame the room a little.
Using the Avid Eucon app, I could run my session, and the iKlip was right there, allowing me to position the tablet exactly where I needed it.
Vocal Tracking
The next day, the artist came over to track vocals. Although it took considerably longer to set up all of the mics for comparison, within minutes, I had the tablet rotated and ready for her lyrics to be prominently displayed. Just for the sake of review, every time I repositioned or rotated the iKlip 3, I intentionally performed each action ten times to test durability. Although I was initially concerned a little about how the ball joint mated to the mic stand mount, the unit hasn’t shown any signs of giving up the ghost.
The iKlip held up like a champ during the session, at no point did it lose position or start to sag. More impressively was what happened during teardown. I swung around, forgetting the stand was behind me, knocked it over pretty hard into the window sill, then to the ground. Luckily nothing was hurt, but more impressively, the iKlip didn’t lose its position from before.
Mixing
With a laundry list of mix revision notes, I return to my desk to get to work. This time, utilizing a boom stand, I try to find a position with the boom arm that keeps the iKlip from being able to sit right where I want it. The pivot in iKlip 3 doesn’t just rotate in 90-degree increments. I virtually couldn’t find a position with the boom arm that iKlip couldn’t use.
Aaaand boom goes the dynamite
Then, I got really creative and tried to see if I could mount to something smaller than a mic stand. iKlip didn’t even flinch but my lamp did. I had to improvise and counterweight with a tape measure.
These kids today and their jargon…
Thoughts
So, how far have we come? Well, the iPad can create full albums from start to finish. Plugins are available in AUv3, and virtual instruments from many big manufacturers abound. As far as IK Multimedia, they still lead the pack in options for Android and iOS tablets. Just about any piece of hardware you need for recording mobile, IK Multimedia has it.
As far as quality goes, iKlip is top-notch. Although lightweight, this mount can take some abuse. I have not gone easy with iKlip. I even let my niece play around with it and held its own. I’ve over expanded the clasp that keeps the iPad, flexed the plastic, and even thrown it around a little. Still, every time I mount the tablet and position, it stays in place. As far as value-for-money, iKlip is a steal at $49.00 ($69.00 for the Deluxe with threaded mic stand mount). It even can mount with existing tablet cases installed.
Improvements
IK Multimedia have addressed every issue I had with the first model. They’ve made a mount that can be used with multiple tablets and most likely any to come. I only have one small issue with the new version – actually mounting the iPad. It takes two hands to pull the clasp apart to install the tablet, and sometimes I worry I’m going to drop the tablet if the mount is horizontal. The fix is pretty simple though – rotate the iKlip vertical to mount then spin it back once installed. Other than that, iKlip is a home run.
Conclusion
IK Multimedia keeps cranking out the hits and improving on each subsequent model. I may have to buy another because the wife has found it very useful for her remote teaching. iKlip 3 goes beyond just music application and will find its way pretty much anywhere you use a tablet. Do yourself a favor and pick up one of these. No more hunching over a desk to control your DAW. Put the control right where you need it with iKlip.
For more information and to go grab an iKlip 3, visit our affiliate link HERE.
- A seismic step forward for virtual drum technology
- Versatile selection of drums and acoustic environments
- First-of-its-kind ability to edit virtually every acoustic parameter
- Breathtakingly accurate
- Intuitive and user-friendly interface
Cons
- No “low processor drag” option
- Cymbal editing and selection not quite up to par with the drums themselves
- Mixer, multiple mics and routing are unrefined
- No brushes or mallets at this time
Summary
MODO is a “man on the moon” breakthrough in the virtual drum universe. IK Multimedia is about a “point one” or so away from truly nailing it. But make no mistake: this is tomorrow’s software today.
Rating
THE BIG BANG
Released in 2003, FXPansion’sBFD virtual drum software was truly a monumental innovation – a sample-based, customizable and expandable software instrument that put the sound of true drums at the fingertips of producers and “virtual drummers” around the world. Before BFD, those looking for the sound of true live drums in their productions had two choices: Spend several days and thousands of dollars miking, tuning, playing, editing and mixing a live drummer -OR- deal with the blatantly-obvious-sounding and labor-intensive sample libraries (or even worse, sounds from PCM ROM libraries).
(The shape of things to come: The OG BFD v1)
Now you could not only “build” the studio kit you wanted from a library of kicks, snares, toms, and cymbals, but route their individual tracks into DAW channels and mix them like real drums. Those unable or unwilling to program parts could tap into a vast collection of pre-played bars. But those who could, could put the extra time necessary to program in the nuances that made the results far more than just “passable”. The results were sometimes better than what you could get from a rushed or compromised studio recording, to be honest.
In the many years since BFD’s introduction, a litany of similar products has come to the fore. EZDrummer, Superior Drummer, Virtual Drummer, Steven Slate Drums and a dozen others continue to play “hand over bat” with more features, drums, microphone and room emulations, deeper layers of multi-samples, “famous” studio album recreations and literal terabytes of expansion packs. But at the very core, the technology has remained the same: Record a drum three hundred times, layer each piece by velocity with “alternates”, and load it up.
DOMO ARIGATO, MODO
IK Multimedia have begun a tectonic shift in the way the sounds, and idiosyncratic responses of acoustic drums are recreated with the introduction of MODO DRUM. Whereas their competition labors to cram as many possible sonic variations of one piece of wood or metal under each key, MODO is the first to implement physical acoustic modeling – giving you simply unprecedented control of every drum’s resonance, material, head type, tension… even bearing edge shape.
Physical modeling technology was first introduced in the 1990’s original “rave craze” when all those discarded old Roland Jupiters and Moog Prodigies suddenly quintupled in value and musicians fetishized the classic squeal and squelch of classic oscillators and filters. But the digital world wasn’t taking this trend lying down and introduced “virtual analog” DSP technology like the original Clavia Nord Lead and Propellerhead’s Rebirth. These recreated analog’s quirky nuances – not by sampling waveforms, but by digitally emulating the way those ancient transistors made them. As someone who had a few actual analog synths at the time, I was hooked on the Nord by the third preset.
Twenty years later, computing power has exponentially increased more than ten-fold, making the possibility of real-time manipulation of something as complex as acoustic drums an actual, if not daunting possibility. The difference in creating a physical model of a couple of sawtooth waveforms versus an actual drum (much less several at once) takes an insane amount of programming and CPU cycles, making even the very idea very aspirational – even with the multi-core, hyperthreading goliaths packed into today’s machines.
IBM’s “Deep Blue” Supercomputer (1987) – Still probably not enough horsepower by today’s standards.
Of course, IK Multimedia are no strangers to modeling – their AmpliTube virtual amp and cabinet software releases are well-established mainstays in the category. But now they’re not simulating tubes and transistors, but the instruments themselves. MODO DRUM is actually the second salvo from IK in the modeled instrument world. MODO BASS, released two years previous, is a very impressive recreation of extremely lifelike electric bass tones, sounds and the natural variations that come from human hands (imagine if Thor‘s “engineer” had MODO BASS – this may have never happened). Again – these are not samples, but an actual DSP model that recreates the genesis of the sound, not sound itself.
Think of just hitting a snare drum set up in front of you and listening to the differences as you hit it. The differences between the strike of the left-versus-right hand. The difference in overtones as the stick strikes closer to the center or the rim, the tension of the head, the sympathetic vibration of the bottom head and the snares strapped across. Now multiply that by variations in shell and head material, the weight and material of the sticks, the tension of the snares and you’re beginning to see just what a monumental task this is to recreate digitally. But conversely, think of just how many individual samples this would take to be true to life (to say nothing of creating software that could manage thousands of samples, per hit, that quickly).
USED IN THIS REVIEW:
2018 Mac Mini
6-Core Intel i7 @ 3.2gHz
32 GB RAM
External 2TB RAID 1 Array (2 x 2TB WD SSD Drives)
Cubase Pro 10.5
Mac OS Mojave
FROM INSTALLATION TO PERSPIRATION
If you’re currently a user of any recent virtual drum instruments, you might think the 7.1GB download seems a little… light. Drum sample libraries have been known to eat up tens, if not hundreds of available gigabytes (and hopefully you remembered to save to an external SSD this time!)
But wait… if this is just software, doesn’t several gigs of data seem a little… much? Well, that’s where MODO’s first “half measure” is exposed. MODO may use physical modeling, but it’s still using multi-samples as the raw material in some places (ahem: the cymbals). The “nuances”, the head tension and snare rattle and so on are where the modeling kicks in. The shells lean much more on the modeling algorithms while the cymbals are still much more sample-based – at least for now.
Anyways, getting MODO up and running is a fairly up-and-down affair and, once authorized, you’re ready to boot your DAW of choice and get to the fun stuff.
CAREFUL, M-O-D-O ALSO SPELLS “DOOM”
Make sure to check your system specs!
A note of caution here: MODO requires later iterations of Intel architecture, found on Sandy Duncan or London Bridge or whatever the later models are called these days. Your old pre-air-freshener Mac Pro, though still a handsome and capable piece of computing technology, lacks this pesky little thing called AVX (short for Advanced Vector Extensions). Without AVX, you’re SOL. Luckily this is an easy thing to check on your computer before purchasing. Word around the campfire is that more and more pro audio instruments and processors are going to be taking advantage of this in the future.
The stated minimums from IK Multimedia are an Intel Core i5 or higher (or AMD Quad-Core for Windows) and 8GB RAM. Just like every other plug-in out there, you may not be able to run this plug-in wide open at 32 sample buffers with lower cores or thread counts.
FIRST IMPRESSIONS
Your first blush at MODO is going to be a very simplified take on what this software is actually capable of. An elegant interface pops up with a visual carousel of MODO’s ten pre-built kits (that also include an acoustic space and a certain amount of eq and processing in the software’s virtual mixer). Everything’s mapped by default to the GM standard, so getting right to making some noises is a very short skip and jump.
“Welcome To MODO DRUM! May I Take Your Order Please?”
These preset kits range from modern studio affairs (the bass drum logos are not exactly subtle about what brand of drums are in use) to Ringo’s black oyster Ludwigs, to be-bop to genre-specific nods like “DJENTLEMAN” and “GRUNGY”. The graphic on-screen representations are accompanied by some of the most over-written copy outside of a Sweetwater catalog. For example, instead of simply saying “Modern Kit”, you’re treated to a love poem that states it’s “…marked as a philosophical shift in drum-set construction, this classic, timeless kit represents a major advance in design…” It’s got everything but the “Add To Cart!” button beneath. I guess nobody told IK Multimedia’s UX team that drummers aren’t big readers*.
(* As a drummer of 36 years, I am allowed to make drummer jokes. You aren’t.)
Anyways, if you’re one of those ‘Preset Petes’ and just want to pepper up some General MIDI spec files, this is probably where your ride ends. One preset, one DAW fader, hello, goodbye, bing, bang, boom. And if you ARE one of those people, this is an incredible piece of software for doing just that. It certainly will wipe the floor with the “Rock Kit 2” preset on your mothership keyboard. Of course, if you are one of those people, I’m not sure what you’re doing on this site. Read on anyway, we’re getting to the fun stuff.
THE CUSTOMIZE BUTTON BECKONS
Once you’ve found a kit that is in the general direction of the pieces, sound, and vibe that you’re after – it’s time to get under the hood and really see what gives MODO its mojo.
You’ll feel BFD deja vu in the main “customize the kit” area, where you can swap pieces from all ten kits into the Frankenstein of your design, as well as assigning one of several acoustic environments from controlled to cavernous. A quick caveat though, these preset kits do not allow additional pieces, so if you’re going to be using lots of cymbals or toms, go for the “Wet Dream Theater” Reference Kit and start disabling all the unneeded parts – ironically you can only dis-able pieces. A “start from scratch” option would be, to say the least, a welcome addition.
But the real “holy-crap-on-a-pita-it-does-that?” happens when you start editing of the individual pieces. Whereas MODO’s contemporaries offer little more than tuning and a simulated amount of mic bleed, MODO gives you an absolutely insane amount of control. Take for example the snare drum. You are presented with options for head type (clear, coated, hopefully, vents and number of plies soon) for both the top and bottom head. The depth and diameter of the drum. The size and tightness of the snare wires. The damping of both heads. And, in a pure stroke of genius, the primary contact area on the head for both sticks.
The bass drum allows you the options of not only head type and tension, depth, and diameter – but options for leaving the front resonant head on, off or ported and the material of the beater itself. Toms are a similar affair again with the added benefit of editing all of them as a group (if you want), and giving you a knob for virtually every possible facet of what creates the resulting sound.
Given all these available edit points and parameters, you could easily be lulled into hearing things that aren’t really changing that much – for the better, worse or otherwise. But here’s the thing: The realism on the drum shells is subtle, tangible and flat out amazing. I say this not as someone agape at the slick UI, but as a drummer and an engineer. I have both played and recorded hundreds of my own and others’ kits while meticulously tending to these countless details. After all, these details are the difference between good and great drum recordings.
Find your space with nine different acoustic environments.
As stated before, the cymbal selection – though not as handsome as the drums themselves – is still enough to keep you from booting a second instrument with a better selection. The “brands” are subgrouped into three major slots and telltale logos to match. You’ll at least be able to control damping, hi-hat distance, etc. “Sound-wise” there’s a group of K Zildjian, earth-toned Bosphorus and “vintage-y” sounding lids, as well as some outliers like an “o-zone” crash and a painfully-accurate $39 Wuhan china that makes one remember that the Coronavirus is only the second-worst thing to come out of that part of the world.
MODO’S MIDI MODE
One of my favorite parts of MODO’s very well-thought-out interface is the keymap editing. With so many pad and kit controllers out there, building custom keymaps easily is a crucial layer that sometimes feels like a cumbersome afterthought from MODO’s contemporaries. Loading the keymap editor instantly shows you just how deep the capabilities of MODO truly run, with the ability to assign a key or continuous controller to a dizzying array of articulations.
Without so much as glancing at the manual, I was able to quickly create several different setups for my handy AKAI MPD32. The first was a quick “main drums and cymbals” affair across all sixteen pads, the second had a half dozen snare articulations separated to the left and right and the third let me “play” the cymbals with pads assigned to, for example, bow hit, stick hit, swim hit and bell hit for each crash. The “MIDI learn” function is contextual and there’s a low risk of “upsetting the apple cart” by accidentally reassigning a key or pad.
Keymapping even multi-layered instruments like hi-hat are a snap.
Being able to quickly build, edit, save and load different keymap setups far better than my experience with MODO’s competition was a very solid feather in their cap. Normally this is the part of setting up drum instrument software that is tedious and dreadful – but I’m confident that any controller brought into the studio could be up and running in no time.
One thing our jazzier hep cat friends will be quick to notice is there are no brushed or mallet options for any of the ten kits. I’ll just go ahead and say it: Jazz drummers are unapologetic purists and would sooner swallow their tongue than use a virtual drum kit (I noticed MODO BASS doesn’t have standup or acoustic bass either…) But composers who need tonal versatility might balk at the lack of these options. Not sure if that’s in the cards for subsequent versions, but if that’s on your list of “must-haves”, this is an unfortunate non-starter.
MY MIXER OR YOURS?
The mixer section will likely feel familiar to anyone using “[ADJECTIVE HERE] DRUMS” as their current drum instrument. Individual instrument channel faders from big to small are lined up left-to-right where you can assign some EQ and compression, as well as routing bussed tracks like overheads and room mics. Thanks to nice-to-haves like classic compressor emulation and extensive EQ-ing options, you could easily do all of the mixing inside-the-box-inside-the-box, leaving the output on your DAW mixer as a stereo output pair.
The internal mix environment.
I’ve never been one to do this personally. I want all of the individual outputs up on faders just as if I were mixing actual drums. This is where IK steps in it unfortunately. First of all, there are no mono outs. Something like a kick or snare is a mono track by its very, single-source-point nature. You would never sit down at a console and see “Rack Tom L” and “Rack Tom R” because we don’t mic toms in stereo. So only being able to bring these up on stereo tracks hits your studio resources one way or another. You have to process twice as much material. Every channel eats up twice the amount of horsepower. Never mind those of us who use analog outboard to process these individual drums – meaning I’ll now need to use both of my SSL channel compressors to process one snare drum. (Yes, you can create auxes and mono returns – but why should you have to?)
Additionally, you have no way to split the source. Most serious drum recordings multitrack two or three microphones each for the kick and snare drum, letting you manage the attack versus the resonance of the bass drum or the pang versus the rattle of the snare. This is a pretty big turn-off for those of us who like to ride the individual mics’ levels from section to section of a track.
Many of the preset kits you start from already have processing going on the mixer as well, which means starting completely clean requires manually going through and unclicking numerous internal effects (though it does take the hit on your processor down). Again, a “blank slate” option for building and miking/mixing/routing would really let the imagination of this instrument become more accessible.
These are the sorts of things that tend to get sorted out in later releases – and I certainly hope that IK hears users like me that a “streamlined interface” should also be streamlined for those of us who like to mix drums traditionally. I’m forced into two channels for a snare mic, but they’re the exact same signal? Yeah, no. The word back from IK Multimedia is that they’re going to be making a lot of refinements as they eye the next sequential release. Hopefully this makes their list.
PATTERNED BEHAVIOR
If you’re not as comfortable programming or playing in your parts, MODO DRUM has you covered. Just click “GROOVES” and you’ll be introduced to a comprehensive, searchable database of onboard bars, patterns, fills, and so on. These provide an excellent jumping-off point for those who need a little help – or simply need something to save time. The playing itself is true to the genres and styles listed and more than enough to let you get on with composing the rest of your song.
A drummer that shows up on time and plays to a click? It couldn’t be.
I’ll be honest, this is not a feature I use – not on MODO or any other virtual drum instrument. As such, I’m not an authority on whether MODO is better, worse, more or less versatile, etc. A quick tour of the available bars would seem to satisfy the needs of those who choose to tell the drummer to “just shut up and play a beat.” Best part? The virtual drummer never shows up late, needs help moving stands or brings its girlfriend to the gig.
DRUMS A LA MODO
All the new technology and perks and bells and whistles don’t mean a thing if the results aren’t as promised. After dispensing with a lot of the things I did NOT want of MODO’s features and building up a few kits, I dropped it into use where I was previously using one of their competitors. I even pitted my new MODO DRUM kit up against one of my Steven Slate ones so I could quickly A/B the two.
I personally think that many “canned” drum instruments suffer from what I call “the realism gap”. The instruments are so well sampled that you can likely fool 90% of the listeners. But that last 10% is a much bigger river to cross. Some of that is on the software and its ability to address the weaknesses of only having so many layers and alternative layers. The rest is on the person programming the parts – ensuring those little “humanisms” come through. I almost NEVER quantize virtual performances, instead playing parts in just as I would in the studio – then making slight, necessary edits after the fact. Humans are not stopwatches, and great drummers know how to play with subtle tempo and dynamic variations to keep the performance from plodding along.
When we say “extreme control”, we mean it. You can determine the type of sticks and strike areas for each hand.
The drums themselves come through the mix with immediacy, punch, and realism. The subtle nuances that get programmed in to humanize performances pay off in spades with MODO DRUM, giving sounds that are dimensional and frankly, very difficult to distinguish from “the real thing”. Tweaking individual drums’ parameters to suit the mix was effortless – and it really felt like MODO has a strong advantage over their competition. Look at us, ma! We’re halfway across the “realism gap” already!
As any drummer will tell you, it starts with the kick and you can tell that IK chose to really focus on giving MODO DRUM not just a great palette of drums and tones – but the way they cut through even dense mixes feels like a hot knife to butter. And genres be damned, I noted the “EXTREME” kick actually worked quite well on a more AOR-rock type mix. Don’t let those goofy Guy Fieri flames on the drums fool you (and hey, IK? No self-respecting drummer outside of a Poison Cover Band Cover Band would play something that looks like that – so cut it out).
Snares were MOSTLY excellent with a few that just outclassed the rest. In particular, the piccolo could actually be given some additional shell depth and tuned down just a bit to create a “holy grail” type tone – just enough weight to thump but with enough pang to slice through. The “Reference” snare and toms also showed great versatility in tones to my ears, especially after you take the time to really dive into editing the area of the stick hits.
One particular place the shells shone brightly was with repeated tom or kick strikes, like several eighth notes in a row. You could really believe that the resonance and decay of the drum were sympathetic to the additional hits before the one before had “settled”. In other words, it sounded and behaved like an actual drum. The decays in particular really lent a profound realism. And the crossing of the gap continues until…
…the cymbals. Cymbals were more of a mixed bag with MODO. Choices are a bit more limited. The obviousness of the sampling takes a bit more work to get around. Hi-hats and rides were a sore spot – requiring more velocity editing than might be required elsewhere. And this really is the first place I listen if I’m trying to suss out if a drum performance is “real or Memorex”. Rock-type patterns where the drums tend to just lay into a clanging open pair of hi-hats could get very fake-sounding, very fast. Setting a MIDI CC to the hi-hat cymbal spacing was a big help, just putting slight variations (from say 115 to 127) helped. I could still tell… but I was operating on inside information. Would the average listener know? Probably not.
My suggestion – and one that doesn’t seem to be addressed in this release, is giving users an option of a “low CPU stress mode” for tracking – letting the people in session hear enough to keep it moving without tinkering with buffer settings or disabling tons of plug-ins. Then, come mix-down time, kick the buffer way up, flip MODO back into “cycle-munching hyper-perfect-instrument mode” and let it do its thing (then freeze or print the results). It’s the addition of those considerations that make good software great. Granted, I am not using the most powerful computer on earth, I’d say it’s right in the middle of what people are recording with these days. Would a shiny new, porked-out Bosch Toaster Mac Pro™ handle this better? Yes, of course. And if you’re the lucky owner of one – or any newer 12-core-or-higher processors, this likely won’t apply to you.
Unreal control. Just unreal. Parameters galore.
But again, it all comes down to one thing more than anything else: How does it sound? Where are we with that “realism gap”? With good performances and deft editing? I’d say you could make it almost all of the way across. Once the cymbals get the benefit of the same physical modeling detail there will simply be MODO… and then everything else. And to be sure, MODO sounds GOOD. Kicks can be chesty, breathy, pounding, scooped, round or rumbling. Snares are extremely versatile and laden with vast amounts of subtlety. Toms can be worked all the way from tonal jazzy patchwork to the #MetalAF intro to “Raining Blood”
The available cymbals are still…. let’s go with “workable” for right now. Pretty good. Not great. Still have some water to cover there. But the acoustic environments? Yes, I believe them just as much as I would any reverb preset (I’m a product of the 90’s studio scene, I don’t use a lot of it). The way the drums react with them – with kicks pushing cymbal decays out of the way with natural compression – feels tangible and dimensional.
PACKING UP YOUR KIT
Despite being a very new entry into an increasingly crowded market, let me just say this up front: MODO is impressive. Damn impressive. Using physical modeling over samples is a major leap forward in the way we recreate acoustic instruments – and the importance of this being “the new way” can NOT be understated. The computing horsepower to make this kind of thing even possible on desktop computers is only a very recent reality – but as Intel is no doubt working on their 35th generation, i17, 64-core monster, more and more project studios will have the necessary heft to run it without compromise.
To be fair, MODO DRUM is spanking new (version 1.1.1 as of press time). And as new software tends to go, subsequent revisions, point ones and so on address the real-world pain tests of their users. My criticisms are fair: Mono outputs for mono sources is a must. Individual outs for multiple drum mics? Yes. Please. And by continuing to apply their physical modeling breakthrough just as much to the cymbals as they do the shells? It’s going to make the power of this new software an absolute game-changer by v2, if not v1.3.
You’ll hear a lot of differing views on what “the best” virtual drum instrument out there is. These differing opinions are often coupled online with brash assertions about your mother and/or sexuality. But like everything else in the recording world, your ears are the ultimate judge. The deeper I wandered into its capabilities and editing features, the more I could see just how much MODO DRUM is shaping the future. Once you’ve mastered how to harness its raw power, it leaves its contemporaries in the dust.
We’ll one day look back at multi-sampled, 50GB drum libraries the same way we do using ROM samples on a Korg Triton. IK Multimedia has planted their flag with MODO Drum. It’s not quite all of the way to “perfect” as of v1.1, but they’re really, really, really close. You can either switch now or wait while a few nits are ironed out – but you will be switching. Just think of the hard drive space you’ll be freeing up.
Make no mistake – the future of virtual drum instruments is here.
For more information and to purchase visit our affiliate link HERE
By this point in my wholly unremarkable career I’ve miked up thousands of amps and cabinets in thousands of ways. And while the pursuit of that holy grail tone can be one of the more enjoyable parts of the tracking process, it definitely comes with its own limitations and issues.
Behold… “the old way” (Photo: Sweetwater Sound)
First of all, you can literally spend days swapping and positioning cabinets, mics and moving blankets and still be scratching your head between the monitors saying, “there’s just something not quite there, man.” Move the mic. Now move the other mic. Move the first mic back. Tweak the EQ. Add some compression no, wait, turn that off, we’ll do it later. Did we move the first mic back? After a few hours of this your ears don’t even know if you’re listening to a guitar or a very rhythmic vacuum cleaner (Photo: Sweetwater has a quite intuitive guide for miking guitar amps for those who want to try).
Then there’s the issue of keeping it that way. Boom stands have a dastardly way of ever-so-slowly shifting over time… and that fraction of an inch can make the resulting sounds feel miles apart. And somehow, even with all the caution tape and gobos in the world, somebody always manages to bump the stand (always blame the intern, even if you don’t have an intern).
Finally, lest we forget, “finished” never really means actually finished in today’s DAW-based world. Many times you’ll need to punch in a part down the road or the guitarist wants to come back and re-track “just that one part real quick”. It doesn’t matter how copious your notes and settings are: Once you’ve struck the setup, it’s extremely difficult (if not impossible) to recreate it. And once you’ve printed those guitar takes, the sound that’s there is the sound it will always be.
THEN CAME THE POD PEOPLE.
The introduction of the Line6 POD and AmpFarm software a quarter-century ago simply can not be overstated. For the first time, an engineer or guitarist could just plug into a record-ready selection of amps, cabinets and effects. With it also came a bit of a culture war between analog purists and digital pragmatists. But in the end, one required a lot of gear, space and privacy and the other did not. What’s more, you no longer had to commit to the sound going to the track. You could simply print the raw guitar from a DI box and leave your options open at mix.*
Since the release of that bizarre red kidney bean, the industry has seen hundreds of options come down the pike in both hardware and software forms – giving the user access to more heads, cabinet and mic combinations than they could ever conceive. Kemper’s highly-revered AxeFX took things a step even further, letting the user create models of their own setups which were now just the press of a button away.
(* There are those, and I count myself among them, who still just print the guitar tone and take it to the mix. If it’s right, it’s right. But hey, with 512+ available tracks in the modern DAW, why not print both?)
THE PICKY PRODUCER’S PARADISE.
Creating your virtual guitar ‘rig’ these days will find you inundated with choices. Dozens of manufacturers offering hardware, software and combinations of the two. You can create and download thousands of different amplifier models in ten seconds and have literally any sound ever made at the end of an instrument cable. Want a 1993 Soldano SLO-100 through a 1960 cabinet loaded with 30W Greenbacks? Got it. How about a VHT Pittbull Classic combo or a Peavey ValveKing with a Boss MetalZone on the front? Sure thing. Any amp, cabinet, mic choice or distance, any room… anything.
If your home studio offers this sort of setup, more power to you. (Photo: Velveteen Guitar)
And while the sheer dearth of options is certainly a positive for the picky – it can also slow sessions, decisions and creative inspiration to a crawl. In the golden days of yore, you had one amp, one speaker cabinet and a couple pedals. Put another way, you turned on, you plugged in, you rocked out.
SIMPLE-MINDED, BUT FAR FROM STUPID.
Simplicity seems to be at the core of STLTones’ philosophy with their Tonality plug-in (PC / Mac. VST/AAX/AU $129.99 USD). Rather than bombard you with an impenetrable jungle of ten gazillion options, Tonality keeps it refreshingly, well… simple. With a focus on making the creation of your guitar tone intuitive and yes, of course, fantastic sounding – you get from point A to point B quickly and without an OCD-beleaguered amount of options getting in the way. Meticulously modeled from the session notes and amp collections of esteemed producers and engineers Howard Benson (My Chemical Romance, Kelly Clarkson, 3 Doors Down and countless others) and Mike Plotnikoff (All That Remains, Otep, Buckcherry), your basic palette of tones comes from six classic heads and cabinets and three pedals.
Go right for the first amp if you like terrifying the neighbors’ children.
The amplifier head selection covers everything from vintage torn-tolex Brits to modern treadplate-faced gain monsters, with the inclusion of two bass amplifier heads (that can work just as well for that Josh Homme brand of desert rock fuzz). Each head offers the standard controls from the amplifiers that “inspired” them and are very, very faithful to the originals.
The cabinet selection is quite similar – featuring an array of big and small, new and old, tweed and tolex – while also allowing the user to load their own IR (Impulse Response) models for an even wider selection. Lastly, the three pedals offer an unbranded-ode to the TS9 Tube Screamer, widely used not as a main distortion but a nice big swig of additional gain – as well as a fairly basic reverb and a delay.
Six different cabinets and no… not all at once.
Navigating the interface requires nothing more than just a basic knowledge of the guitar recording chain, though some users might need to sneak an occasional peek at the well-written documentation. The amplifiers, cabinets and pedals all occupy their own tab and the UX is laid out to let you quickly switch through your choices. Rounding it out is an excellently simple tuner, input and output trims and a quite-intelligent acting noise gate.
If you’ve never actually grabbed the bakelite knobs on some of these classic amplifiers, Tonality isn’t here to judge. The plug-in comes with a very impressive selection of presets from Howard and Mike – many based on their actual setups from countless artists and sessions over the years. You can just start firing through presets until reaching that “voila!” moment – or start tweaking until you find something that works for your needs and start creating your own folder of greats.
ERTÖNIN ÜBER ALLES.
Whether your virtual rig keeps it more simple like this (guitar in, tone out) or goes all the way down the rabbit hole with twelve choices for the mic cables’ gauge and material, what matters is more than any bell or whistle is what comes out the other side. There have been many a plug-in where the interface might trick your ears into psychosomatically thinking you’re hearing a real Mesa Boogie or HiWatt – but there’s just something inherently ‘off’ about it. Around here we call that “the microwave burrito effect”.
Don’t forget a little TS9-esque overdrive to make the dog bark.
Yes, the thing on your plate might look like a burrito, might smell like a burrito and might be made from the same ingredients – but what you’re actually getting is just… “off”. Layer that falsehood up a few times in the mix and the guitars quickly become two-dimensional with no depth or excitement.
It’s that “realism” that sets Tonality apart. Crank the monitors up (responsibly), plug in, turn up and you actually get the sense that there’s a real half stack at the other end of your guitar cable. Chunked low power chords give the sense of actual woofer excursion and cabinet resonance. Leads and tenor parts have an extremely life-like voicing. Even the way the signal noise and interference picks up from your pickups and cable feels real.
In your more “traditional” rock and roll-geared tones, Tonality does not disappoint. You can very quickly find yourself with a ready-to-mix amp sound that would convince even the most die-hard of the analog purists that they’re hearing “the real thing”. Same goes for bass guitar – where Tonality gives adds heaps of rumble to your jungle. Lows are well-represented and round while the mids and highs can cut through the mix with a perfect bit of yip and growl.
Pushed into the darker arts of modern metal, Tonality really shows its teeth. Gainiacs will no doubt find enough unabashed DJENT to scare even the most progressive of suburban high school principals. The amps and cabinets faithfully take on even the most detuned, long-scaled, near-subsonic girth of today’s metal guitars and players, even as they tune to what we used to just call “the bass”. It’s that “djug” of a palm muted, drop F power chord that separates the men from the boys in these sorts of situations, and Tonality faithfully recreates these tones for the faithless.
ALGE BLOOMS.
We’ve saved the real important news for last here. STLTones is now working in partnership with industry stalwart and loveably outspoken curmudgeon, Chris Lord-Alge. You know Chris. Everyone knows Chris. Just listing the guy’s production credits would crash our humble server here so we’ll just say that, between tweaking the controls for U2, Green Day, Rolling Stones, Bruce Springsteen and about 23,905 others… CLA’s graduated from “engineer” to “enigma”
Priced as an additional $39.99 USD as an add-on to the existing Tonality suite, the CLA Pack gives the software an added feature and a whole different potential workflow. To be clear, the CLA Pack does not add additional components, amps or models to the suite – rather it provides modeling and presets from Chris’ ‘go-to’ processing hardware and methods – making your guitar tracks already scooped, polished, smashed and crafted to sit perfectly in any mix.
CLA somehow “makes do” with his limited options for mixing and outboard. (Photo: MixWithTheMasters)
For the lesser-initiated, that “sound” is the alchemy of someone who knows which rules to break and how to break them properly. You could call it “simplistic extremity”. Chris is not afraid of the overload lights on his trusty SSL 4000 console and I’m sure his tech replaces just as many red bulbs as he does green. Input levels are pushed to the breaking point and beyond, where the once polite-and-proper British console sound has now had a few pints and wants to throw hands.
Similarly, the channel dynamics of these consoles are driven into extremes with both expansion and compression. His SSL console’s 242 EQ is often pushed up in the nosebleed frequencies (8-10k) to create an aggressive shear. Combined with his famed arsenal of vintage outboard compressors, the sound is glossy but not cheesy. Shiny… but not shrill. In your face… but it doesn’t spit when it talks.
The difference between working with and without the CLA Pack as part of Tonality really comes down to workflow. If you’re re-amping DI’d guitar or bass, Tonality gives you just the right suite of features and presets that you can then continue to work with in the mix just like you would a “traditionally recorded” guitar track. If you’re looking to get there and get there quickly, the CLA Pack will take those extra several steps and put Chris’ golden ears to work with a simple point and click.
THE HIGH NOTES. THE LOW NOTES.
How do you NOT go for a preset called “Pole Dancer w/ Pumps”?
Everyone is looking for a guitar rig plug-in that speaks to the level of finesse and control they want over their tone. There are those of us who desire, if not need, to swap and tweak not just amps and cabinets, but to get granular with the microphones, placements, environments and everything else in the chain. And for those, Tonality might come up just a bit short on options. If that’s a deal-breaker for you, STLTones ToneHub is a tone tweaker’s theme park with hundreds of virtual amps and artist/engineer presets (they also sell many of these for your Kemper AxeFX if that’s your cup of chai). That’s not to say Tonality can’t or won’t get a killer tone out of the box, but that you might want to skip the cabinets section and use something like Two Notes’ Wall Of Sound to control those details.
But there are also those who don’t work with guitars as much – or might not be as comfortable creating an amplifier tone from scratch – or might simply want something that’s truly plug-and-play. Having a one-step process where you can simply plug in, set a couple of levels and have a truly realistic and multi-dimensional virtual amp is indispensable for everyone on that list. Add the CLA Pack and you’ve got a breadth of tones that are designed to be final mix ready – crafted by the man who’s been winning Grammys doing it for decades.
Whether you’re looking for a quick tone to get tracking or sleep more soundly with lots of options in your arsenal, every producer can find something to love about Tonality. Again, it’s not about having access to thousands of amp and cabinet combinations – it’s about putting the right amp and cabinet in front of you so you can get to making music. It’s core strength is letting sessions move at the speed of creativity. So many classic guitar riffs were spontaneous moments, and those moments don’t like to wait around for the engineer to futz around with mics, preamps and settings.
Criticisms? For me, the lack of a mic choice / distance / placement on the cabinets is a bit of a turn-off. I know that the plug-in’s designed to keep you recording and not tweaking, but that’s an important feature that can take “eehhh…. not feeling it” to “yes, that one, that’s perfect” – often just as much as the amp or cabinet itself. Additionally, a few more options on the pedals would make this part of Tonality feel less like an afterthought. In all fairness, you are welcome to use your pedals on the way in or as part of an analog re-amp chain later – but that does defeat the purpose of keeping this plug-in as your one-stop-shop. I’d love to see pedal makers like JHS or Earthquaker hop into the STLTones world. If I could add a Wampler Nirvana or MXR Phase 90 pedal as an option for a few bucks more, I would gleefully pay for the upgrade.
SIX STRINGS IN ONES AND ZEROES.
I feel obligated to mention that, for tracking guitars directly – not all interfaces are created equal. Many all-in-one type front ends do provide an instrument level (hi-z / high impedance) 1/4″ input that is most certainly serviceable, sometimes even excellent. Others don’t. Remember, Tonality (or any plug-in) is only as good as the signal you feed it.
At home with your dear author. I would never plug my ESP M-II into a crappy anything.
In chasing those last little crumbs of making the tone perfect, consider your cable and DI options. The difference between a $10 and $30 guitar cable can be quite audible, especially as this unbalanced TS connection is stretched beyond fifteen feet in a world besieged by RF interference. A dedicated DI box (I’m a Countryman-guy myself) to convert your guitar signal can add some depth and a more even-keeled frequency response, as can using a dedicated hardware preamp or channel strip to shape your incoming signal (I use the instrument input of the SSL Alpha Channel for this for just a touch of it’s VHD preamp and excellent EQ).
Does this mean you can’t record without this kind of hardware? Of course not. It is simply my experience that a little extra attention to the way the instrument itself is brought into the digital world can help you take the most advantage of the options that something like Tonality gives you.
TONALITY = FINALITY?
I really like and appreciate the niche that STLTones Tonality fills and know many others who do, too. It’s the quintessential Baby Bear’s porridge: It offers more than enough models, tones and presets to get the tone you’re looking for, but does it with minimal fuss so you can focus on the playing and recording. It’s priced attractively and most importantly, the sound is as authentic as you’re going to get out without hauling a hundred pounds of equipment into the room (and assuming you have the space and equipment to properly record it).
Tonality is as intuitive and easy to work with as you’ll find anywhere and is coded lean enough that you can track with it at low buffer settings. The CLA Pack is just the thing if you don’t have the time, patience or experience to make your guitar tracks shimmer in the mix – or you want to use it as a great jumping off point to tweak some new presets of your own.
Tonality’s been part of my own guitar plug-ins folder since it was first released in 2018. It’s got some serious competition in my studio, which has not only a few other plug-ins, but a Fryette Valvulator tube preamp and the classic “redface” POD XT Pro that started this whole revolution to begin with. It’s as strong a contender for your desert island virtual guitar rig as anything else out there. At the end of day what matters more than anything else is how it sounds – and STLTones delivers a big mouthful of meatball-sized tone.
Right now STLTones is offering the CLA Pack for FREE with the purchase of Tonality. Use code: STLCLA at checkout.
If you haven’t taken a look, PreSonus has released a new version of Studio One today. Along with the release of version 5, PreSonus introduces Sphere Global Community, a whole new ecosystem for the Studio One brand. While you still have the option to buy Studio One outright at the same price it’s always been, now you can choose to get everything they have to offer at a monthly rate. While some of you are cringing at the thought of another monthly bill, take a look at what they’re offering before you dismiss this service. I have to admit, they’ve made this one of the most tempting subscription services I’ve seen yet.
PreSonus® has launched PreSonus Sphere, a global community of creative enthusiasts and respected professionals brought together by and for the love of music-making. In addition to gaining access to an extensive library of creative software tools, PreSonus Sphere members get Cloud collaboration tools and storage, chat with Studio One® and Notion® experts from around the globe, and access to exclusive promotions, training, and events, with much more added each month—all for a low monthly or annual membership.
PreSonus Sphere membership benefits include licenses for the complete collection of PreSonus’ award-winning software solutions for recording, mixing, scoring, and producing, including Studio One Professional and Notion, plus over 100 libraries of samples, effects, and loops, including the complete Spark Collection sample and loop libraries and Tom Brechtlein Drums. Members also get every plug-in and Studio One Add-on that PreSonus makes, including Ampire, Channel Strip Collection, CTC-1 Pro Console Shaper, Fat Channel XT, Presence XT Editor, and much more.
But PreSonus Sphere is far more than a huge toolbox; it is first and foremost a creative community. Modern musicians work with talented people from all over the world, and PreSonus Sphere makes it easy to share projects with other members using your PreSonus Sphere workspace. A live chat lets members communicate in real time with their global production teams to make sure everyone’s on the same page and striving toward the same goal.
Sphere membership includes 30 GB of cloud storage for backups, stems, collaboration, and more. When you need more space, PreSonus Sphere lets you upgrade to 100 GB of cloud storage space for $3.99/mo. PreSonus Exchange has always been a great way for Studio One users to share presets, loops, and more; PreSonus Sphere users now have access to a new exclusive portal loaded with custom-designed tools and curated content by featured PreSonus artists.
PreSonus Sphere members will be invited to exclusive events and training sessions where they’ll meet like-minded Sphere users and expand their collaboration networks. Need a quick production tip or workflow trick? In addition to the growing Exchange community and active user groups, PreSonus has gathered Studio One power users from around the globe to answer questions in members-only chats.
Each month PreSonus Sphere members can expect something new, whether it’s exclusive content or a special surprise gift to thank them for being members—and there are no additional upgrade costs or hidden fees. PreSonus has also teamed up with partners to give PreSonus Sphere members exclusive offers throughout the year.
PreSonus Sphere memberships are available for $14.95 U.S. per month or $164.95 per year. For more information about PreSonus Sphere, visit www.presonus.com/sphere.
I’ve been excited about this release for quite some time. PreSonus has spent the last 10 years pushing the boundaries of what makes a Digital Audio Workstation great. They’ve heard all of your feedback and added their own to their release of Studio One Version 5. With an updated library of plugins with new looks and functionality to a whole new section that brings your DAW into the performance space, Studio One has something for everyone in this new release.
The biggest updates come in the form of allowing VST, AU, and ReWire support built into Studio One Artist. No more $80 fee! They’ve also allowed the Studio One Remote software for iOS and Android to be used on Artist. These guys are hooking you up!
Speaking of hooking you up, if you’ve purchased Studio One 4 after April 1, 2020, take a look at your email. If you’re qualified, you will receive a very special offer.
The deal is if you bought Studio One 4 Professional on or after April 1, you can get Studio One 5 Professional OR a year of PreSonus Sphere.
If you bought Studio One 4 Artist on or after April 1, you can get Studio One 5 Artist OR four months of PreSonus Sphere.
Let’s take a look at what’s new
PreSonus®’ eagerly anticipated Studio One® 5.0 for macOS® and Windows® is here, and it’s packed with major new features. As usual with PreSonus upgrades and updates, a combination of innovative new features and users’ most requested features top the list of additions and improvements.
Studio One 5 introduces a powerful, fully integrated, live performance environment capable of running complete shows from a single computer. The Show Page combines playback of backing tracks with patch management for virtual and real instrument players inside a single window. Studio One Song channel strips, mixdowns, and virtual instrument patches can be directly exported to the Show, simplifying setup. Setlist items can be rearranged and skipped on the fly. With a dedicated full-screen performance view, adaptive real-time controls and a large meter, running a show is simple and reliable, whether you’re playing with backing tracks, controlling virtual instruments, running plug-ins as a virtual effects rack, or all three at the same time.
Composers and arrangers will appreciate Studio One 5’s new dedicated Score View for the Note Editor. Based on PreSonus’ Notion® music composition and notation software, the new Score View is available on its own or as a companion side-by-side view with the Piano and Drum Views, allowing users to enter, view, and edit notes in standard music notation. The Score View is available per track, so you can edit note data in Score View on one track while using Piano or Drum View on other tracks. Any number of tracks can be viewed simultaneously, so you can work on just one melody line or on chords over an entire orchestral section at once. Notes can be entered manually, in real-time or step recording modes. A basic set of musical symbols is provided, and the symbols directly control playback, allowing you to add tremolos, crescendos, and more and hear it all in real time.
Studio One’s Native Effects plug-in set has a well-earned reputation for exceptional sound quality, and now they’re even better. With version 5, Native Effects have undergone a major revision, adding new features and improvements for many effects, along with a new modern interface with separate dark and light themes. All dynamics effects now have sidechain inputs, and plug-ins with a filter option now have the filter added to the sidechain input as well, enabling more control over the sidechain signal and eliminating the need to add a separate filter up front. Several plug-ins with a Drive parameter now have a State Space Modeled drive stage for natural analog-sounding saturation. The Pro EQ plug-in adds major new features, including a linear-phase low-cut filter, 12th-octave spectrum display, and input and output meters with adjustable range and peak hold. Several other plug-ins have received significant enhancements for sound quality or better handling. The Studio One plug-in suite never looked or sounded this good.
Producers will be delighted with the expanded mixer scenes in Studio One 5. Users can now capture snapshots of the entire mixer at any time and can recall snapshots in a variety of different ways, with an assortment of recall options. In addition to limiting scene recall to specific parameters, recalling a scene may be limited to selected channels only. A dedicated Listen bus is also among the improvements to the Studio One mixer, letting users monitor Solo signals through a separate output channel or tune their room using advanced calibration plug-ins while leaving their main mix unaffected.
Studio One 5 includes many more new features, such as audio Clip Gain Envelopes, which provide an additional layer of gain control applied directly on an audio clip—perfect for repairing sections of audio that are too loud or too soft without using a dynamics processor. Aux inputs now allow external audio sources to be fed directly into the mixer without requiring an associated track, so external instruments can be used like virtual instruments within Studio One. (Quantum 4848 interface owners take note: This is also great for outboard processor returns!) Version 5 also adds support for key switch articulations, chasing external timecode (MTC), MPE and MIDI Poly Pressure support, recording in 64-bit floating-point WAV format, and cross-platform support for hardware-accelerated graphics.
With version 5, Studio One Artist now has built-in support for VST and AU plug-ins, ReWire, and PreSonus’ Studio One Remote control software for iPad® and Android® tablets. These features were formerly available for Studio One Artist only as separate Add-ons.
PreSonus also has expanded the ways you can get Studio One 5. Studio One 5 Professional is available now for an anticipated U.S. street price of $399.95; updates from Studio One 4 Professional are $149.95. Studio One 5 Artist is available now for a U.S. street price of $99.95; updates from version 4 are $49.95.
To purchase, please consider buying from our affiliate link HERE. It won’t cost any more than you would pay anywhere else and sometimes comes with a free gift! It’s a great way to support us without having to really do anything! Win Win.
Studio One 5 Professional is also available as part of PreSonus Sphere. A global community of creative enthusiasts and respected professionals, PreSonus Sphere membership benefits provide access to PreSonus’ entire library of software, including Studio One Professional; award-winning Notion notation software; every Studio One and Notion Add-on; the complete collection of PreSonus-developed plug-ins; over 100 sample and loop libraries; cloud storage; collaboration tools; and much more. PreSonus Sphere membership rates are available either monthly ($14.95 U.S.) or annually ($164.95). Details about PreSonus Sphere are provided in a separate announcement and at www.presonus.com/sphere.
- Fast Workflow
- Create Songs Lightning Fast
- Use Third-Party Virtual Instruments
Cons
- Captain Deep has limited options for basslines
- Captain Beat missing shuffle control
- Plugins sometimes lost their settings
Summary
This is a must-have for any composer, whether novice or pro. They've taken the guesswork out of creating full songs or serving as inspiration for tracks you've never considered. Lastly, the value for money makes this a no brainer.
Rating
Inspiration can be an evasive thing. Maybe you have an idea in your head but can’t translate it. You may find the flow gets lost penciling notes for chords in your DAW. There are many creative barriers in the music world and it’s time for a tool to break through them. There’s a suite of plugins called Captain Plugins available to tackle this issue and today we’ll review them.
Captain Plugins?
Although the name invokes much of my childhood cartoon watching, I pulled myself back from that YouTube tangent and got into each of the plugins that make up the bundle. Captain Plugins is one of many groundbreaking plugins created by Mixed In Key. These guys are no stranger to the world of composition. With artists like Zedd, Diplo, Kaskade, David Guetta, and Armin Van Buren using Mixed in Key’s flagship software, this company has established itself as an expert in understanding what makes music work and flow together. Now they’re taking that technology and translating it into a tool you can use to make your unique creations, whether you can play a single chord or not.
How Does it Work?
The suite works together with each plugin serving a specific purpose.
Captain Chords lays down the framework for your song.
Captain Deep brings the low end with catchy bass parts.
Captain Melody helps to create interesting melodic lines
Captain Beat handles your drum tracks.
Captain Play brings it all together and gets the creativity flowing with tools that instantly create music on the fly.
Captain Chords
Here we have a chord progression I had no hand in creating other than clicking.
I’ll admit it. I’m not the best keyboard player. I found music theory a tough concept to grasp and mostly go with what feels right. This approach can sometimes do more harm than good, but I get by. To mitigate my not listening during piano lessons, I resorted to buying “midi packs.” These are four bars of chord progressions in MIDI form that you can drop into your DAW. Yes, they help get an idea started, but there was no decent way of previewing other than digging through the folders and dragging and dropping each progression. By the time I found something useful, I was bored.
The Captain Chords Concept
Captain Chords has taken this same concept but placed it in a plugin, combining both their library of instruments, as well as the ability to use third-party VST’s. Additionally, Captain Chords allows users to open a selection of popular VST’s inside of Captain Chords. Just follow the included instructions for your DAW.
Pushing the concept even further, Captain Chords comes with many tools to make your progression your very own. Tabs appear across the top with a section for each part of your composition. These tabs make recalling song sections easier than scrolling through the bar and beat markers. After selecting the key and scale you want, preview popular progressions in the Progression section. To spice up your next future hit song, you can choose a different inversion for each chord.
The crown jewel of this plugin bundle is how they’ve mapped the chords to single keys on your keyboard. Instead of needing to know precisely how to play a particular chord, just press the corresponding keys on your keyboard, and you’re off to the races! Just make sure and mention this site and Mixed In Key when you’re accepting your award at the Grammys.
More Tools
With the framework laid down in Captain Chords, you can tweak the rhythm and timing. Timing adds different rhythmic patterns to the progression and can lengthen or shorten the progression. To assist even further with creativity, the plugin has premade rhythm patterns to break the monotony of notes merely playing on the fours. You can record your own patterns by pressing Record in the Rhythm section and using either a MIDI controller or your computer’s keyboard to tap them in.
The three knobs just under the Rhythm section offer fine-tuned controls for each note in your chord. Space lengthens or shortens each note for added sustain or pluck. Strum staggers the notes of each chord to give it an arpeggiated sound. Finally, on the top right, there are additional inversion parameters along with a quick octave and complexity knob.
Choices
Once your sections are all mapped out, the choice is yours to either keep the MIDI in the plugin or move the MIDI into your DAW. To transfer MIDI to your DAW, simply drag the blue rectangle at the bottom right of Captain Chords. To keep the plugin from playing audio when closed, deselect the “Play Audio when Closed” button in the bottom left.
With the framework of the song mapped out, you can move to the next plugin of your choice in the suite. I added Captain Deep next to get the bass tracked out.
Captain Deep
Where did all of the options gone that Captain Chords has in its GUI?
Captain Deep does its primary task by laying down a foundation for bass in a song. There is an Octave control, along with a Shape function. Four basic choices show up where the bass notes can either explicitly follow the chords in Captain Chords, provide opposite movement countering the root note, minimally adjust melody, or stay on the root note entirely. No option for variation between these is available. Captain Deep is the only plugin in the suite that must be connected to Captain Chords to work. Once you create a pattern in Captain Deep, the notes cannot be edited. In Mixed in Key’s defense, the plugin does state that MIDI editing is coming soon.
The Rhythm section bolsters Captain Deep with plenty of options to time out the bass line and Space to shorten notes for either a constant bass or a staccato track. This transition is tough from starting with so many controls in Captain Chords. I’m going to venture a guess to say Mixed in Key is aware that Deep needs more parameters and is working on this in future versions. Overall, its a decent tool for necessary bass parts. If you want a show-stopping bass track, you may want to reach for the next plugin instead.
Captain Melody
Missed Opportunity in Not Calling This Thing “Captain Hook”
Being the most decked out plugin in the suite, Captain Melody kicks the door in with an arsenal of bells and whistles. Some of these controls may feel a little intimidating at first, but it’s effortless once you understand the basics.
Workflow
The way I usually work is to play my track and riff using either a MIDI controller or your computer keyboard then use the tools in the top left of the GUI. If you’ve connected to Captain Chords, the scale and chord progressions are automatically matched. All you have to do is find the initial phrasing and riff on the notes corresponding to the mapped keys and press the Magic Record button to sketch out your idea.
The Idea Box
With the riff in place, click the Idea icon. This section will spice up your created riff with various controls for how far you want to push your idea. To use the Idea Box, first, click the icon, then the section that houses the notes. From there, you can drag the Idea Box to the area you want to select. Tabs will show up above the note section.
Shape adjusts the melody with controls for the Step and Leap. These two controls determine the separation and variation of the melody. Direction has parameters for random, up, down, down and up, and up and down. The Rhythm tab has controls for how many notes exist in your riff along with timing and length. The First Note tab will determine which note(s) of the chord will start your melody. Lastly, with Lanes, you can select the probability percentage that each note in the scale will be in the melody.
If you want Captain Melody to control the sequence of notes, use the dice. Clicking the dice randomizes all of the parameters in each of the tabs. From there, you can magic record or pencil more notes.
Captain Beat
To round out the suite, we have Captain Beat. This rhythm plugin has 16 lanes that can either incorporate its samples or add external one-shots. The same goes for patterns. Captain Beat has a library of pre-made patterns that can be edited by either penciling notes or using your keyboard’s corresponding keys. If you look next to each sample lane, you will see a letter that represents the key on your keyboard.
To make fills easier, Captain Beat can replace the fourth measure with preset fills. When changes are made to the Fill, each Fill can be saved. Above the grid are several tabs that allow users to shape each sample. Controls can adjust the Attack, Hold, Decay, Pitch, Volume, and Panning. Effects add Delay and Reverb to the sample, and lastly, export determines how you want to export the beat. You can select between channel audio, channel midi, master audio, and master MIDI. Finally, at the bottom is a velocity control for each note. Strangely though, no shuffle control or humanize feature. To do this, you have to manually drag notes.
Captain Play
Captain Play works as a sketchbook to quickly knock out chords and melodies. You can choose between either a MIDI or computer keyboard with tabs to play melodies or chords. Once you’ve riffed your idea, you can drag the MIDI into your DAW.
Thoughts
Overall I find Captain Plugins immensely useful. They’ve brought composition to the masses with tools that anyone can use to create full songs quickly and easily. I especially like the bundle because it’s taken your computer’s keyboard and turned it into a MIDI controller, complete with one button chord combinations. I know some DAWs already let you use your computer keyboard as a controller but not to this extent. Third-party VST support brings all of my favorite synths into the interface for preview. Any musician should have this bundle in their arsenal, whether you know every chord in the world or not. It just makes things easier.
Captain Melody works great to spark inspiration for hooks and riffs. This plugin does beyond simply creating melodies. I’ve used it as an alternative to the lack of features in Captain Deep to get more complex bass lines. I lay down my bass riff in Captain Melody and use the Idea Box controls to fine-tune my groove and create more complex basslines.
On the subject of alternatives, Mixed in Key has another plugin that is essential to using Captain Plugins with existing projects. Mixed In Key Studio Edition is a plugin that detects the key of a song in real-time. Place it on your master bus in ‘key’ mode and it will detect the key of your song. You can use the ‘Notes’ mode to determine the notes in a melodic progression. This is a useful plugin for working on remixes or quickly referencing a client’s song key at a glance. If you buy Captain Plugins, go ahead and get Mixed in Key Studio Edition as well.
What Could Improve
Aside from the above-mentioned Captain Deep’s foibles which I suspect Mixed in Key will be fixing, there are only a few small things I’d improve. Initially, I was working in Studio One and Pro Tools, not realizing these versions are fully supported yet and had a few issues. I only mention that just to be aware that although there are versions for these DAWs, you may have a few hiccups. Trust me, the benefits of the suite outweigh the small little bugs you may or may not even experience with Studio One or Pro Tools.
In Captain Chords, I’d really like to see the ability to select the whole progression and globally change the complexity of the chords. So far, the only way I know how to change complexity is by clicking each chord in the progression. I’d also like to see expanded controls for their onboard instruments. The settings are pretty much “what you see is what you get”, and while they’re good starting points, I’d like to have more control. I usually use their sounds as a starting point and move to third-party instruments.
Lastly, I feel like Captain Beat should be connected to Captain Deep or Chords. Instead of penciling or recording my riff, I’d like to see Captain Beats lock my kick to the chord changes or the bassline.
In Conclusion
I really think everyone can benefit from Captain Plugins, whether to learn more about theory or just speed up workflow. On top of speed and efficiency, Captain Plugins serves as a writing partner. With so many of us working solo right now, collaboration is essential to growing. At only $79 for the Captain Plugins suite, or $99 for Captain Plugins + Captain Beat, these plugins provide great value.


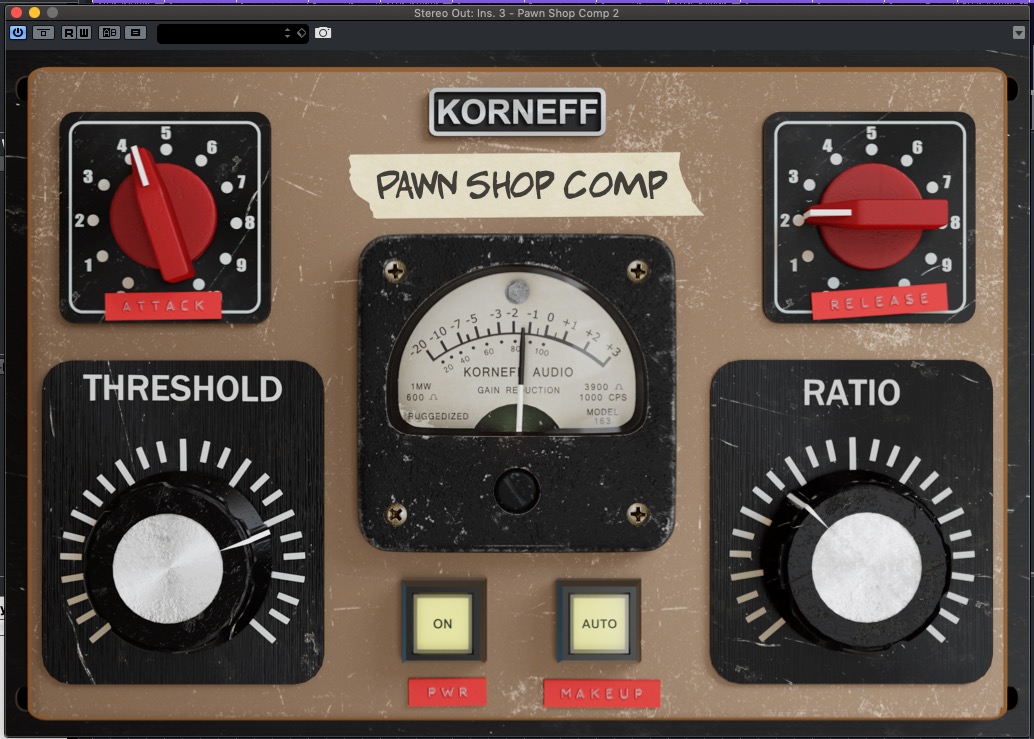
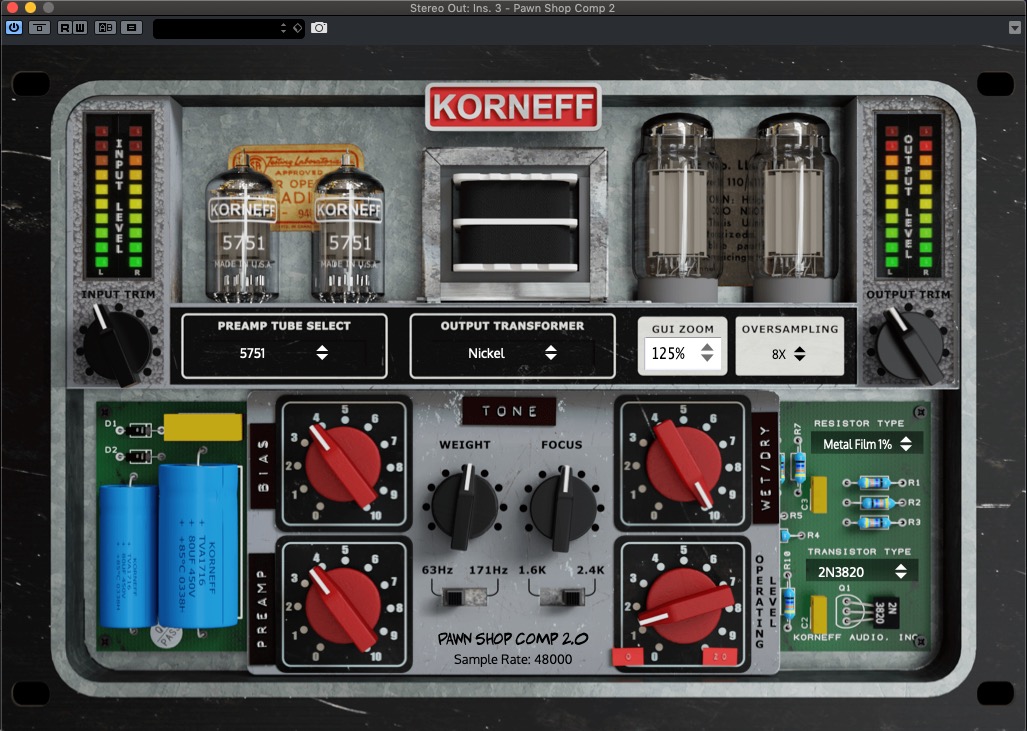
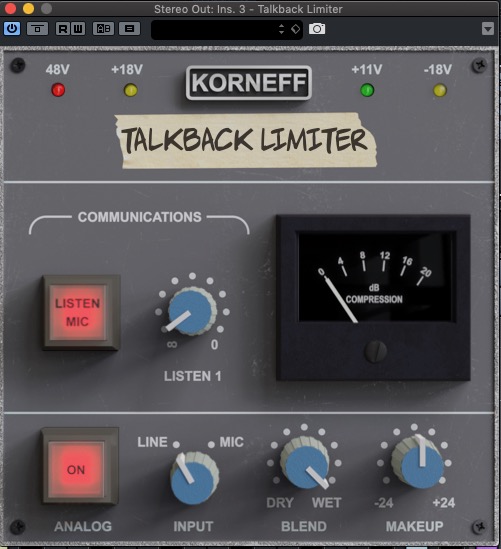
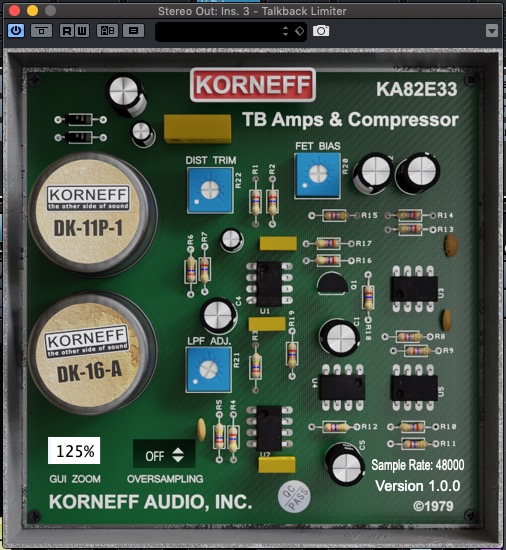
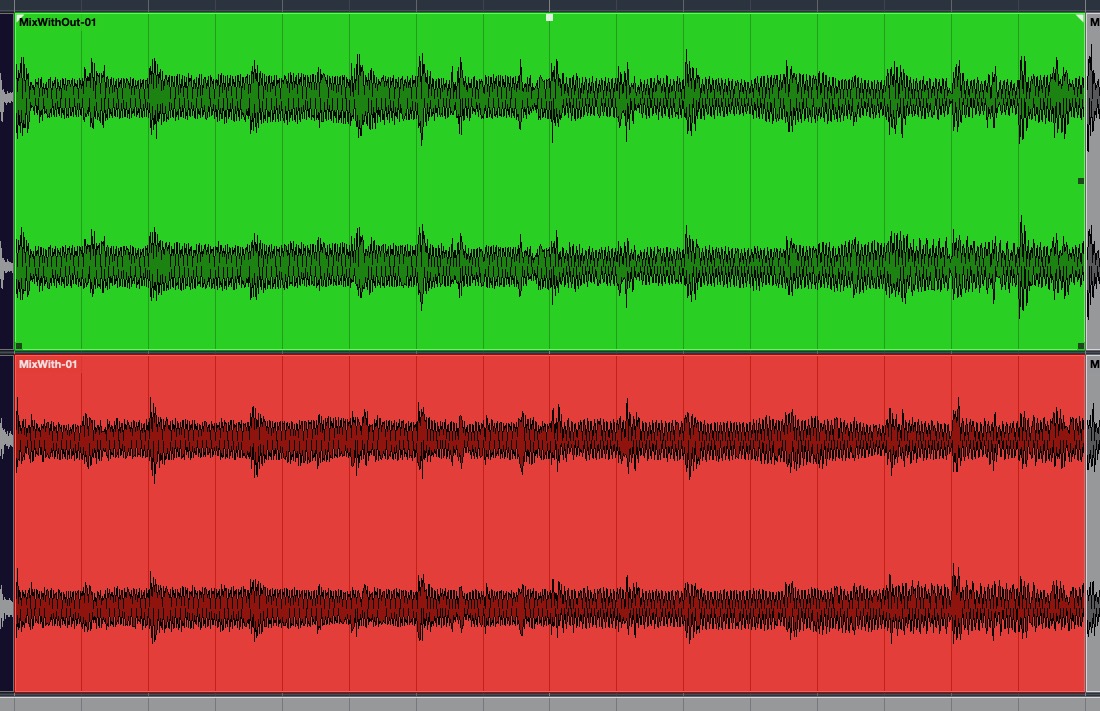


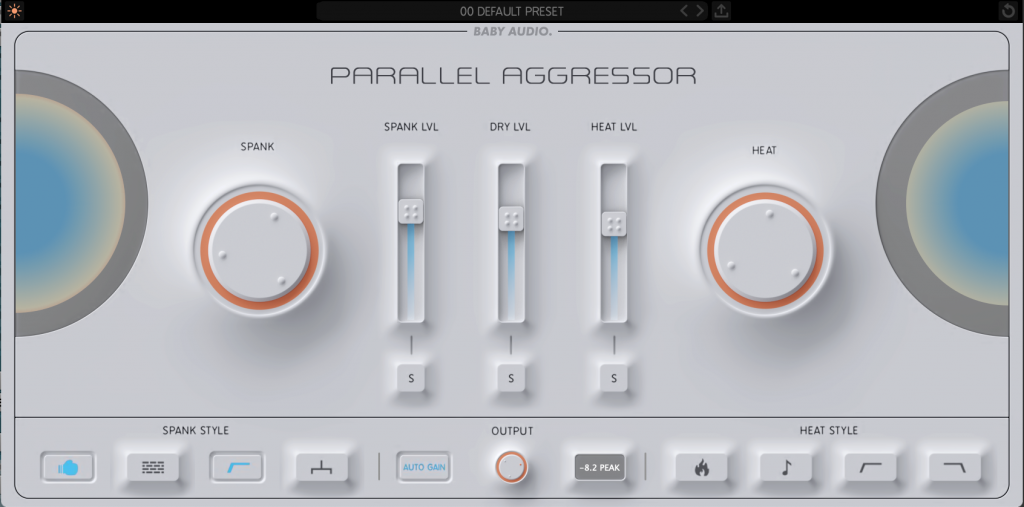
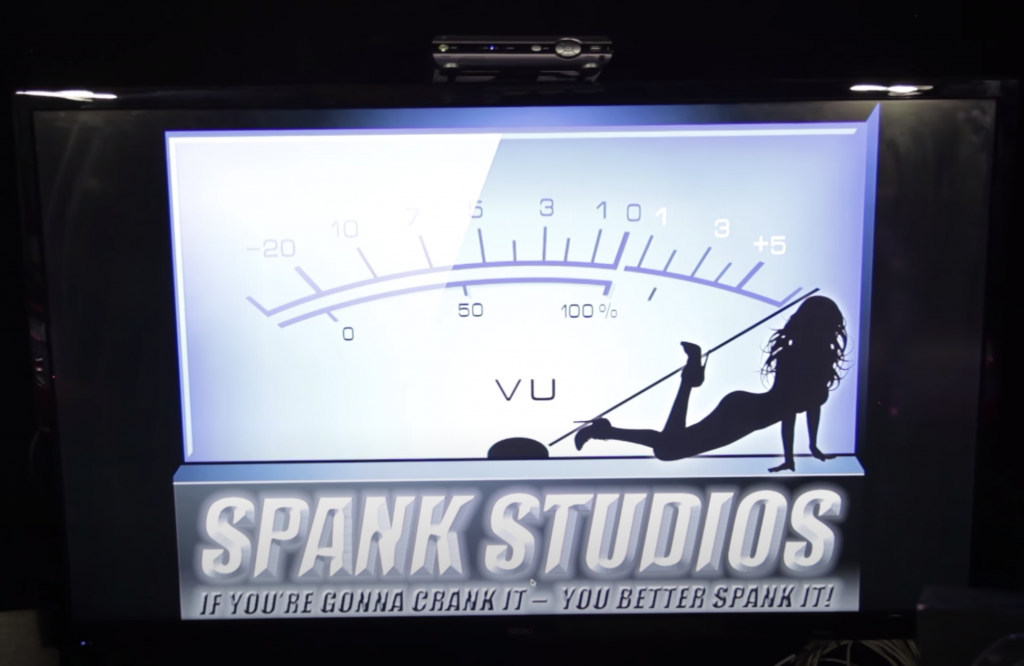


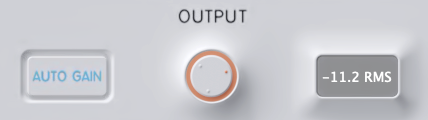

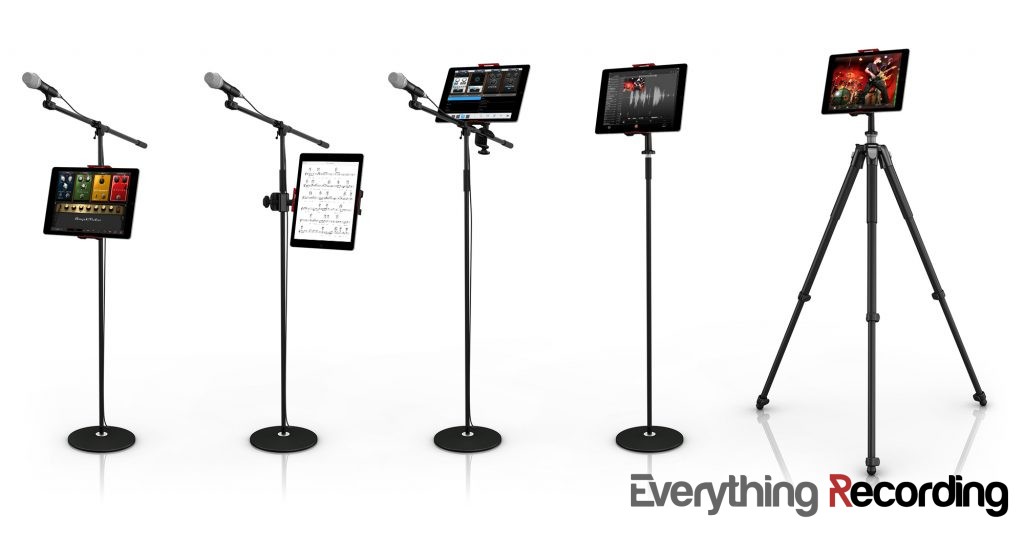
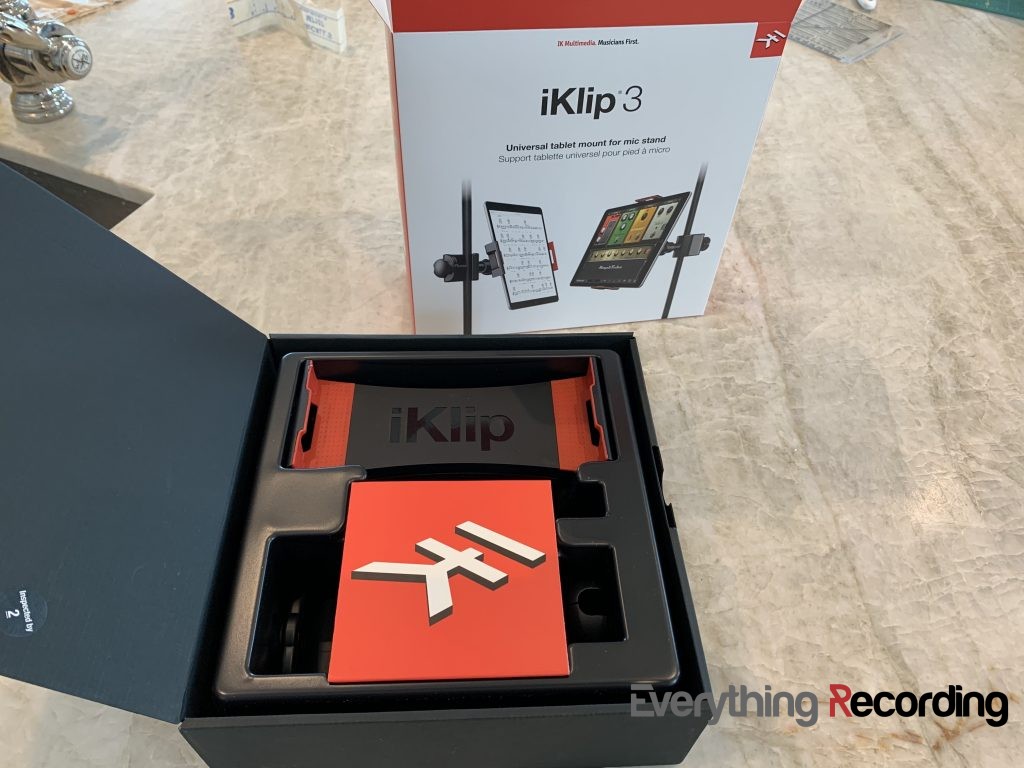
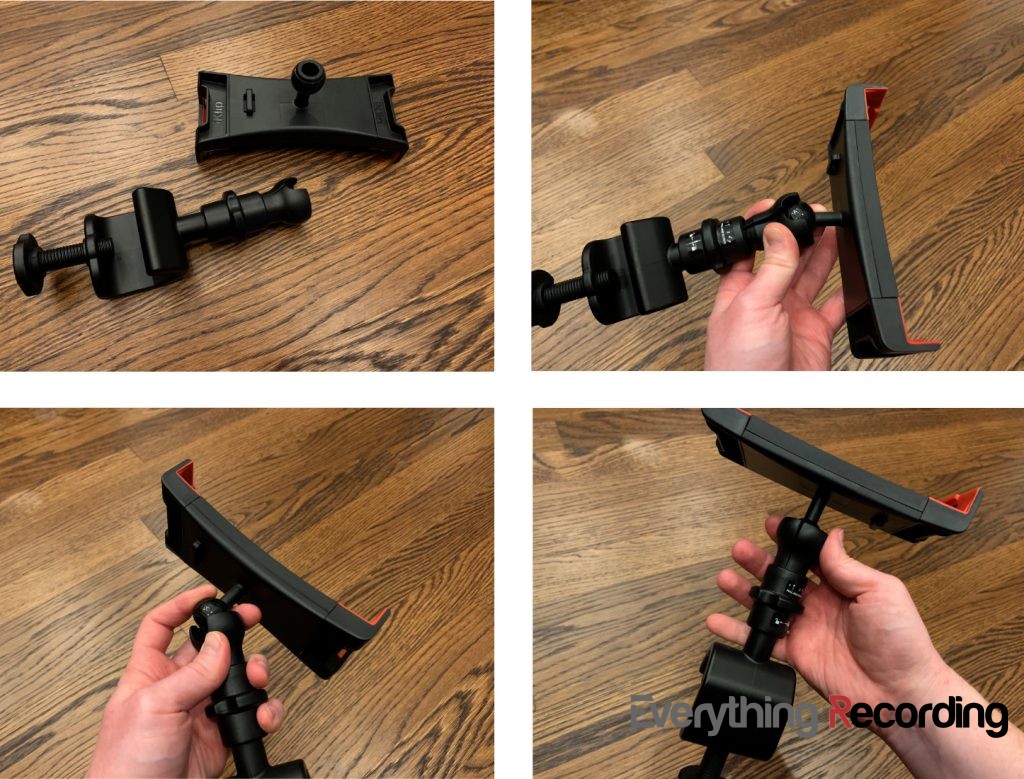
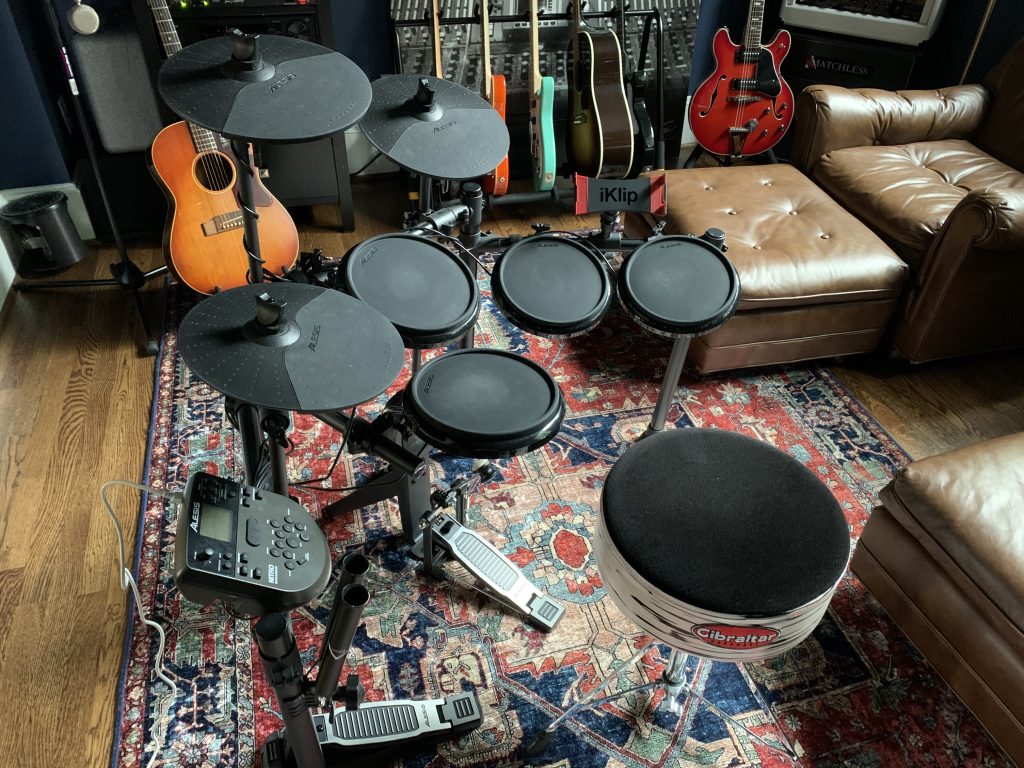
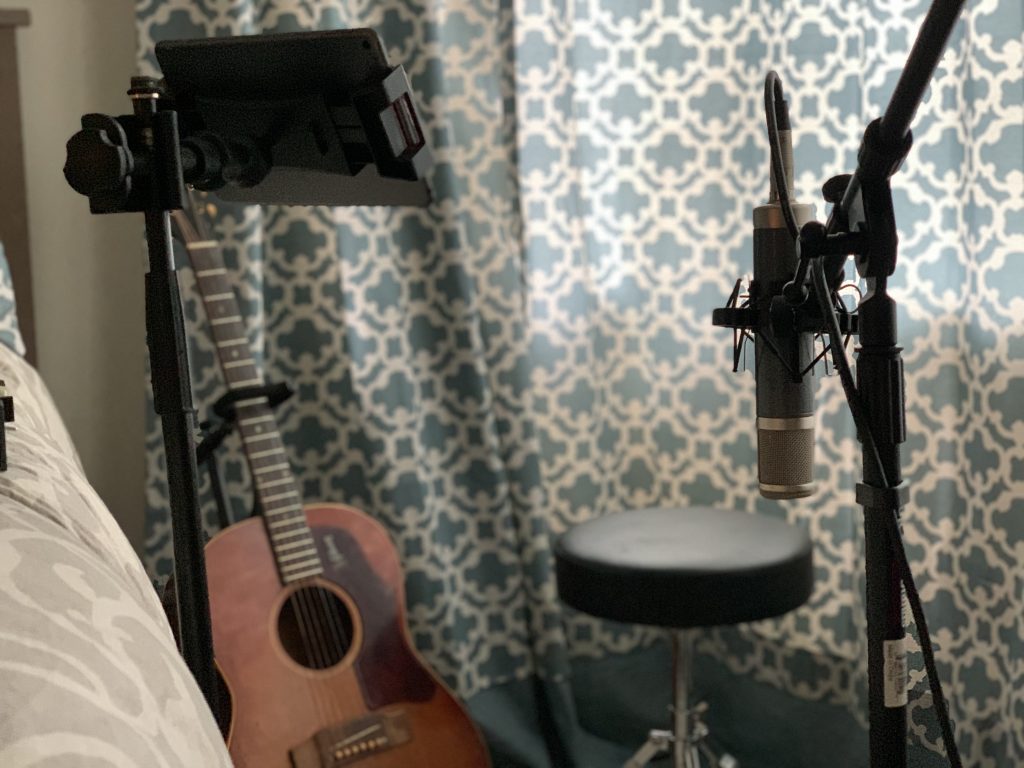
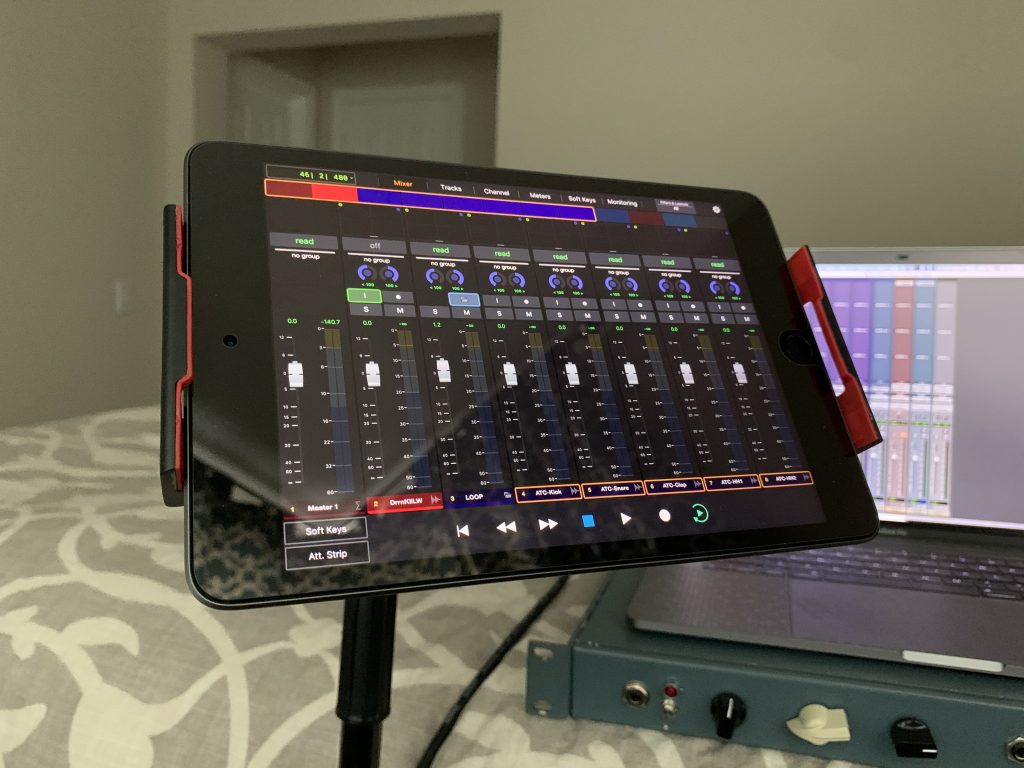
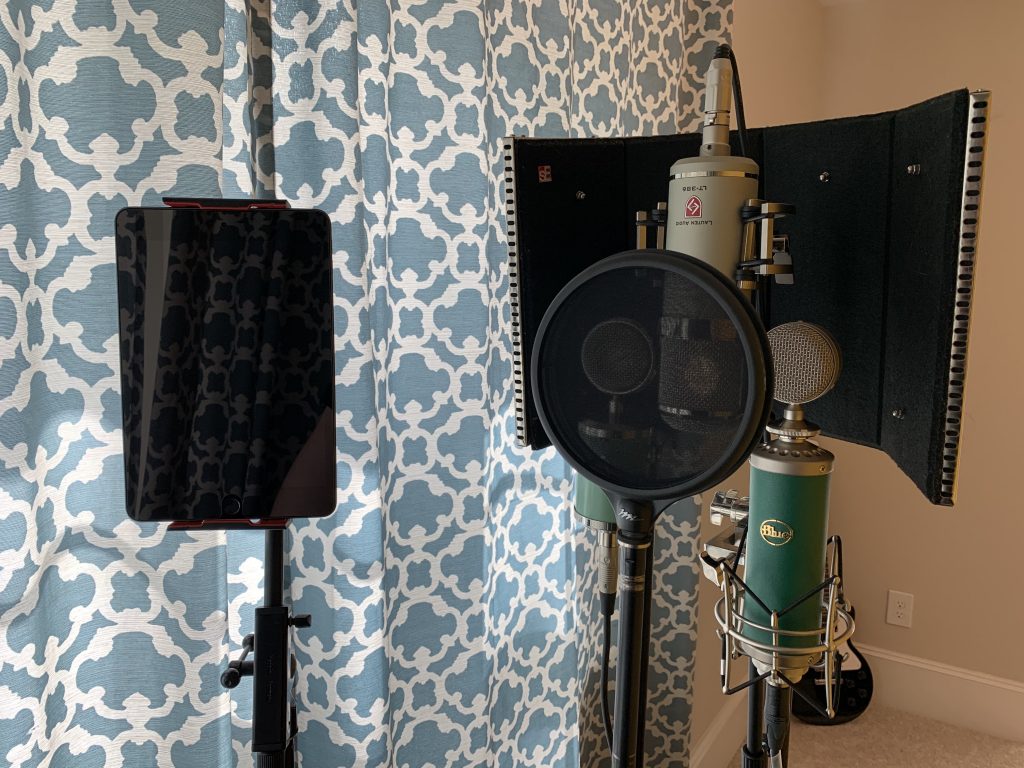
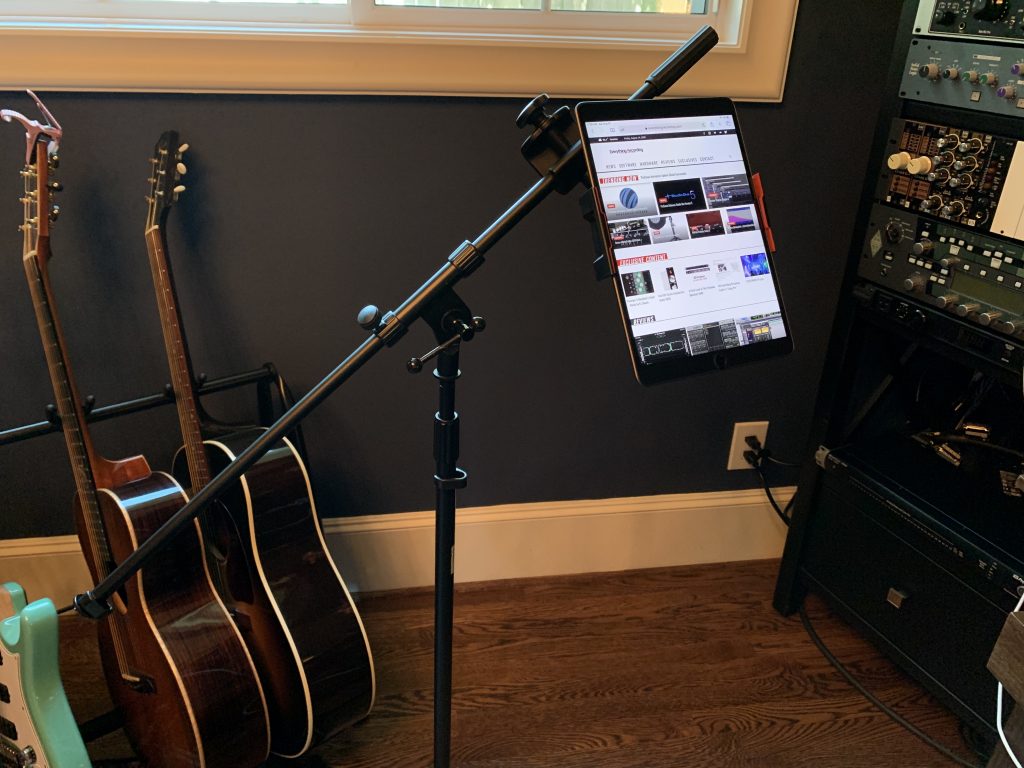
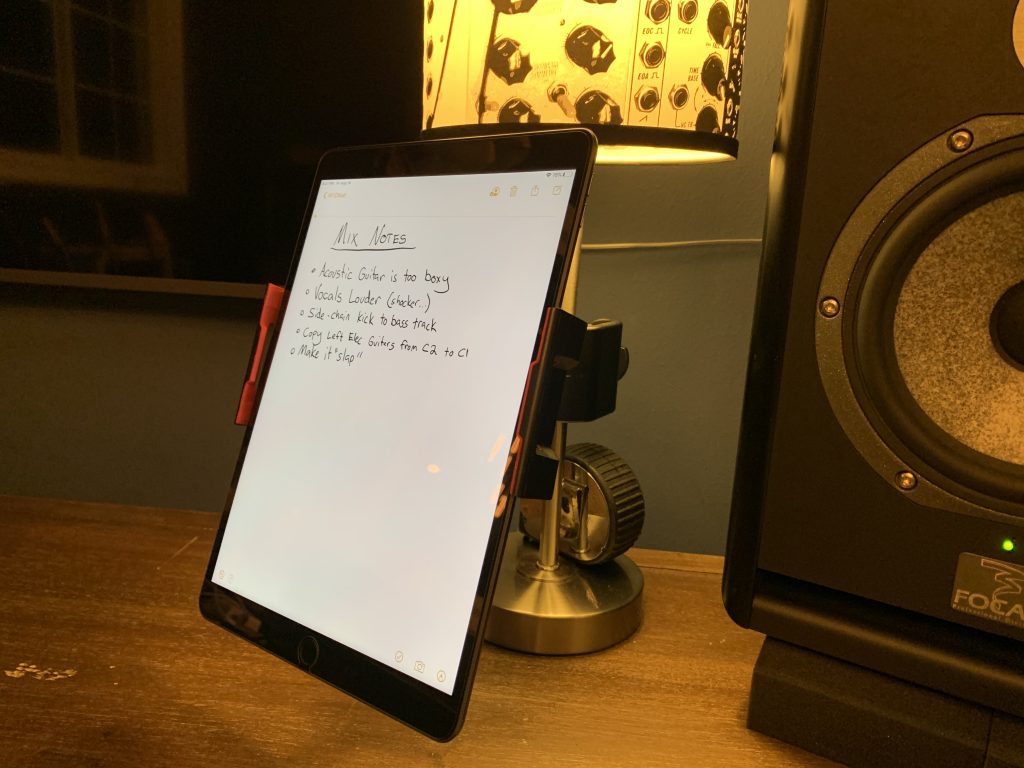

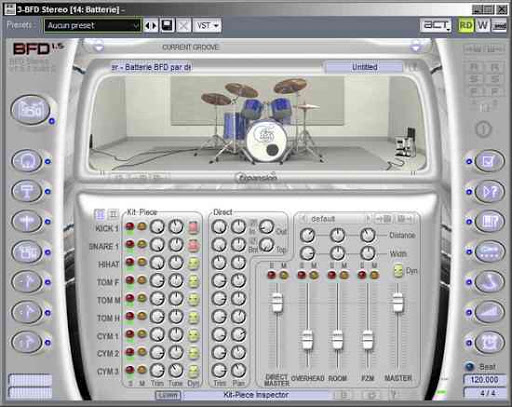
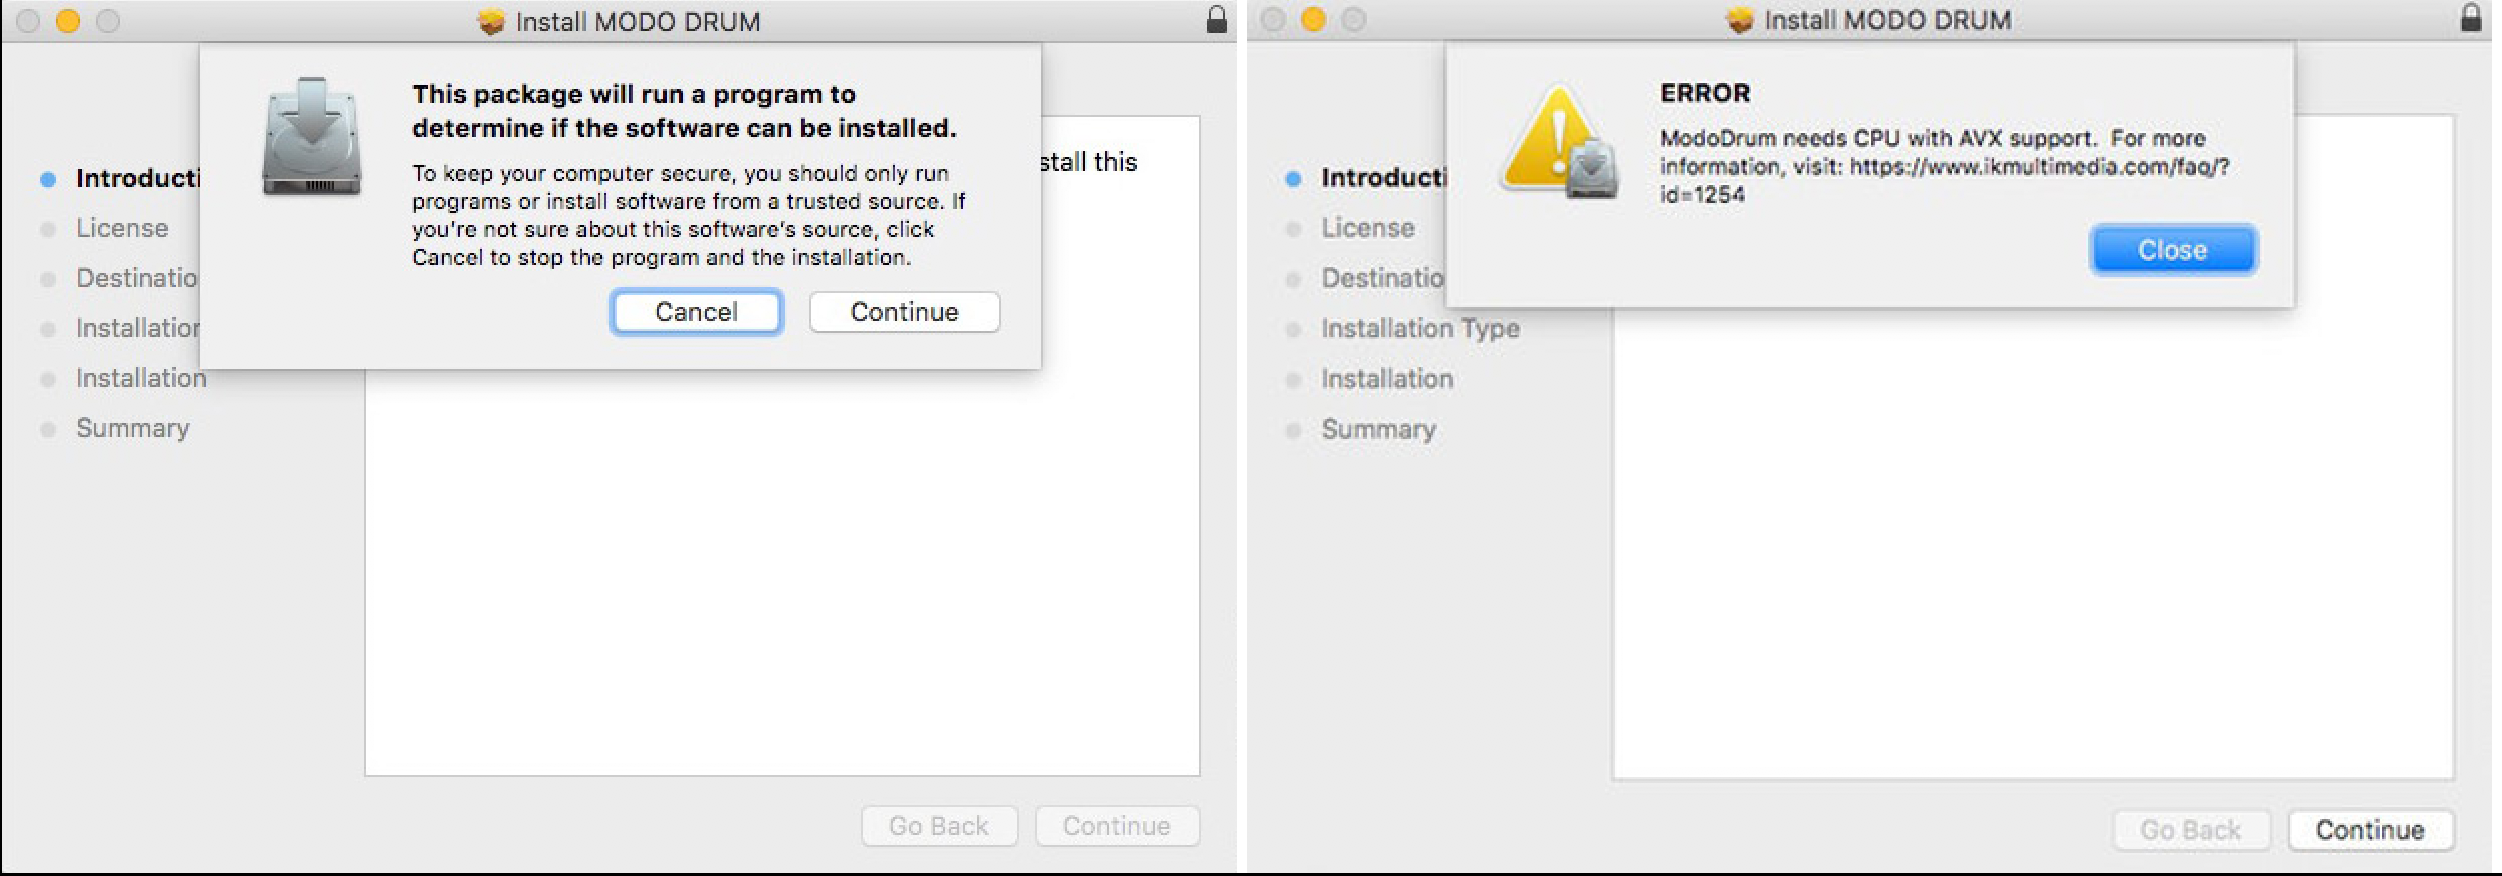
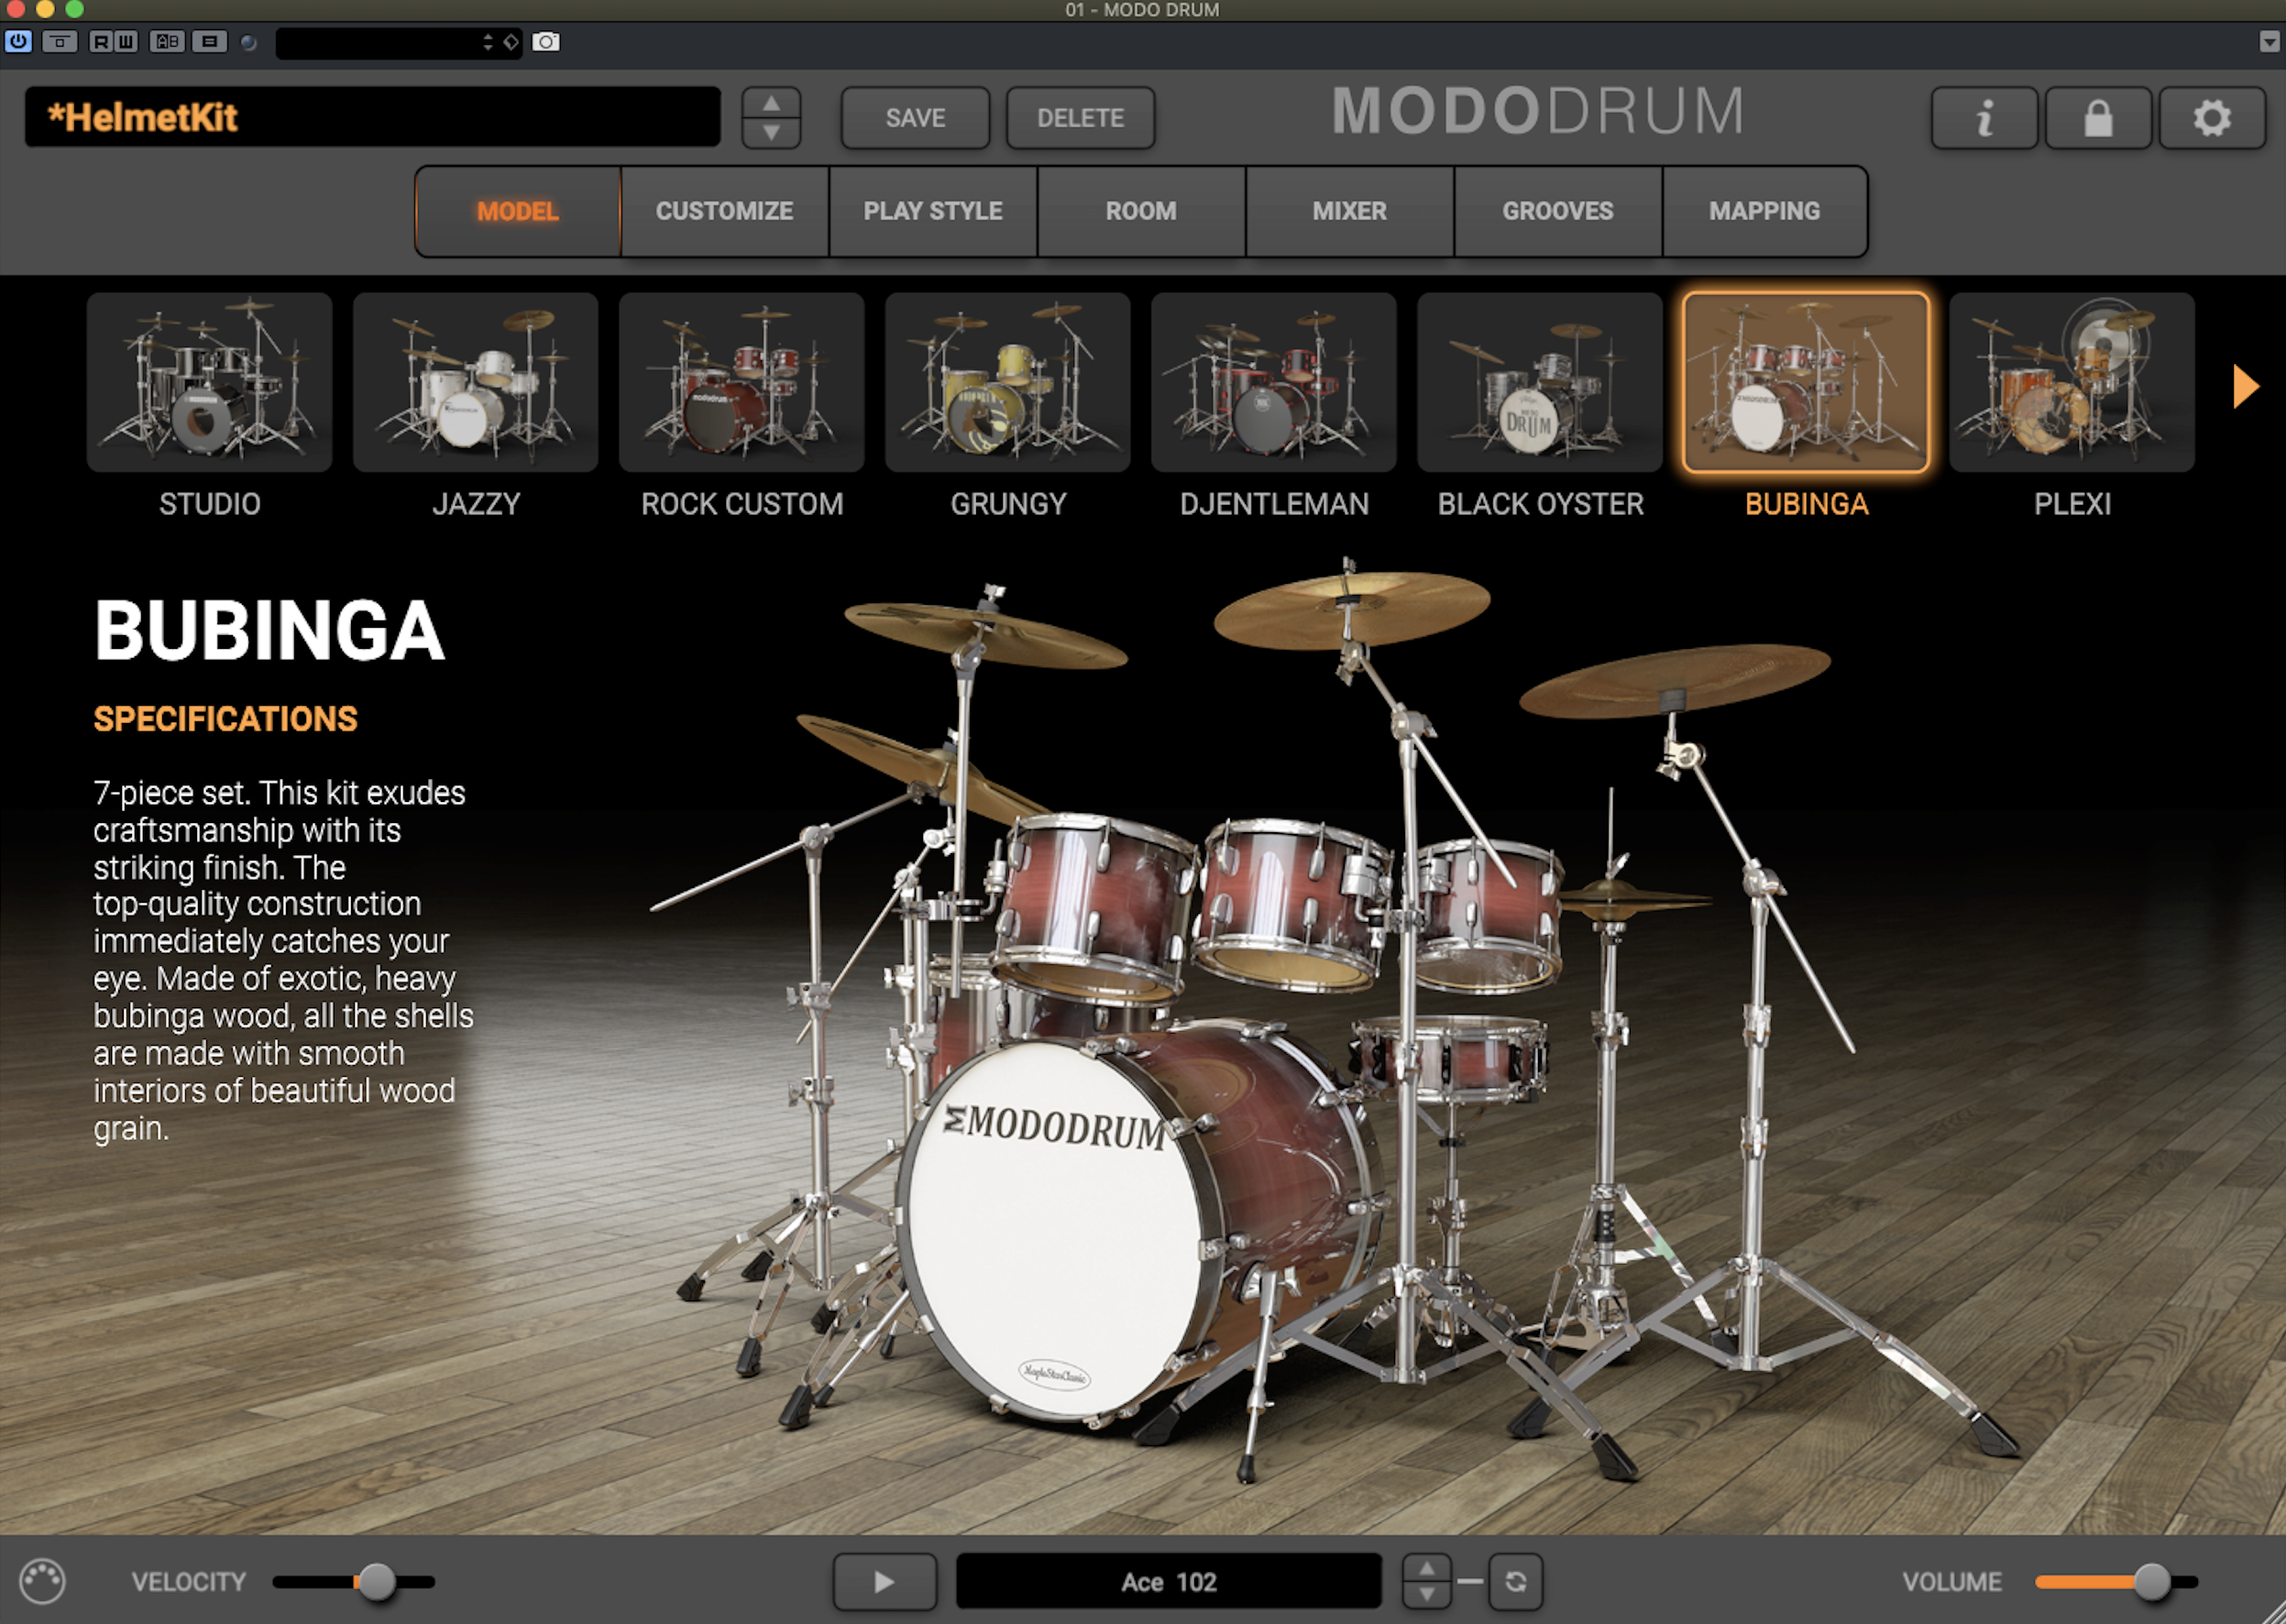
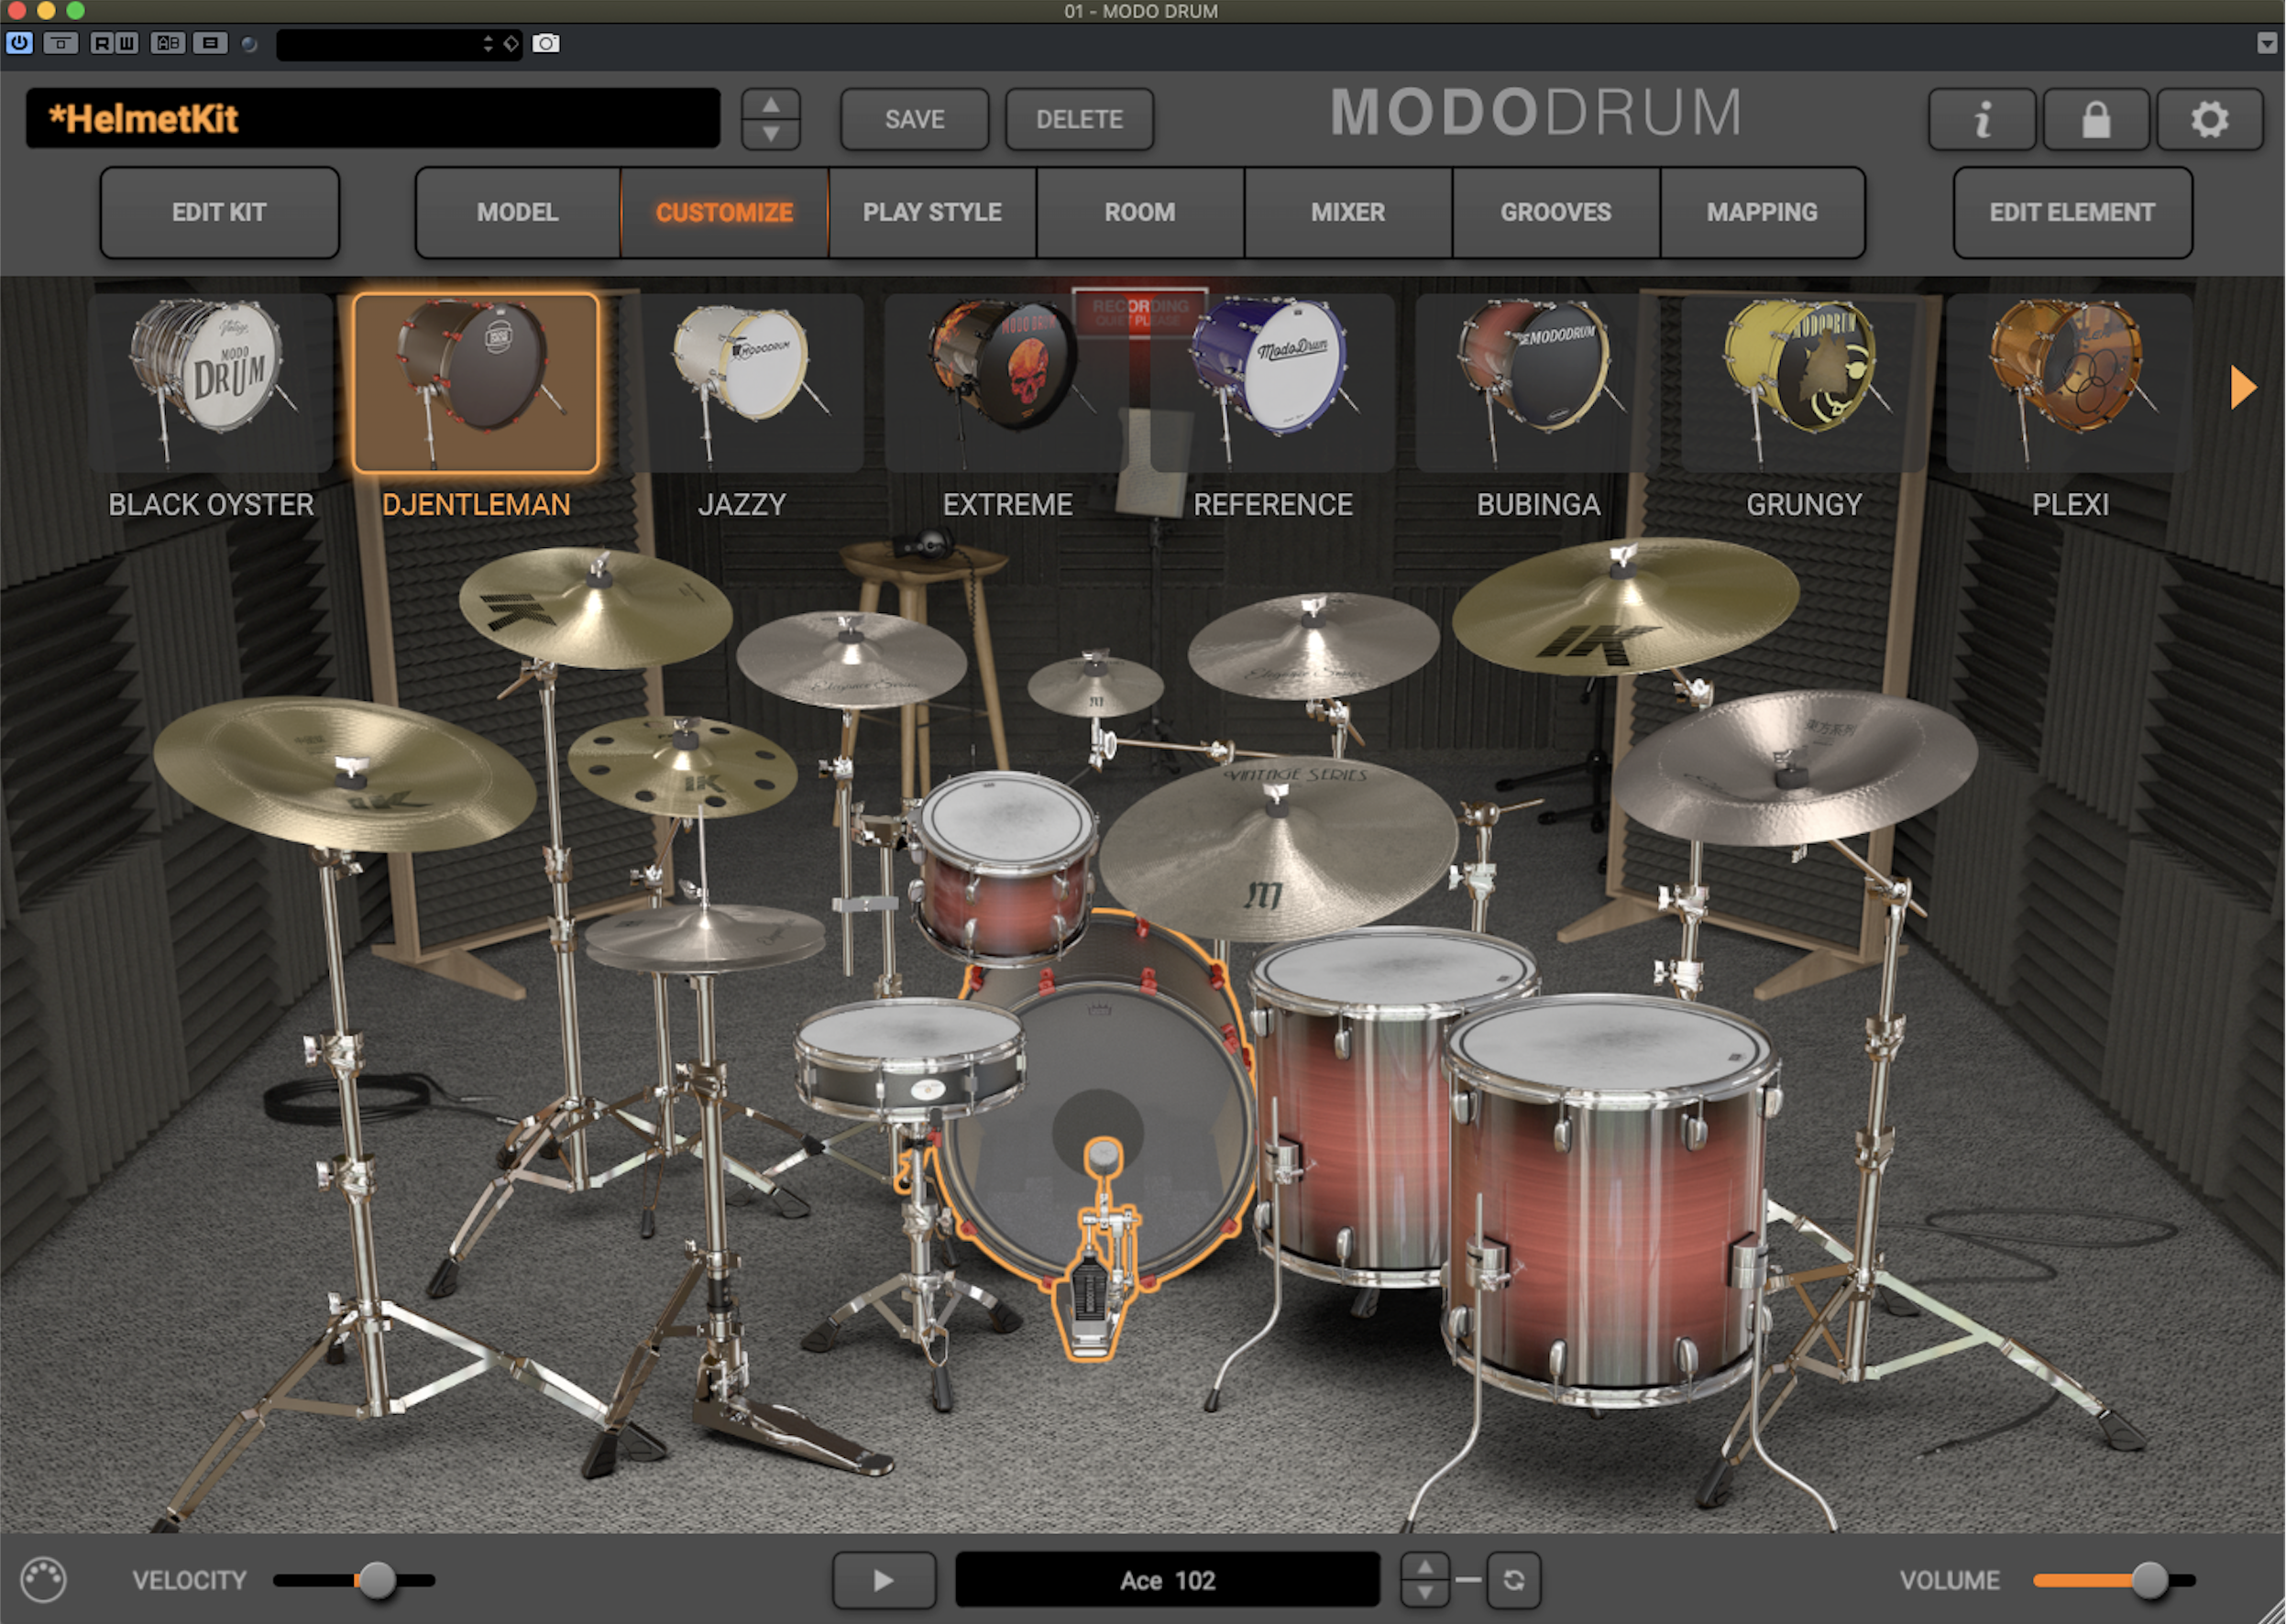
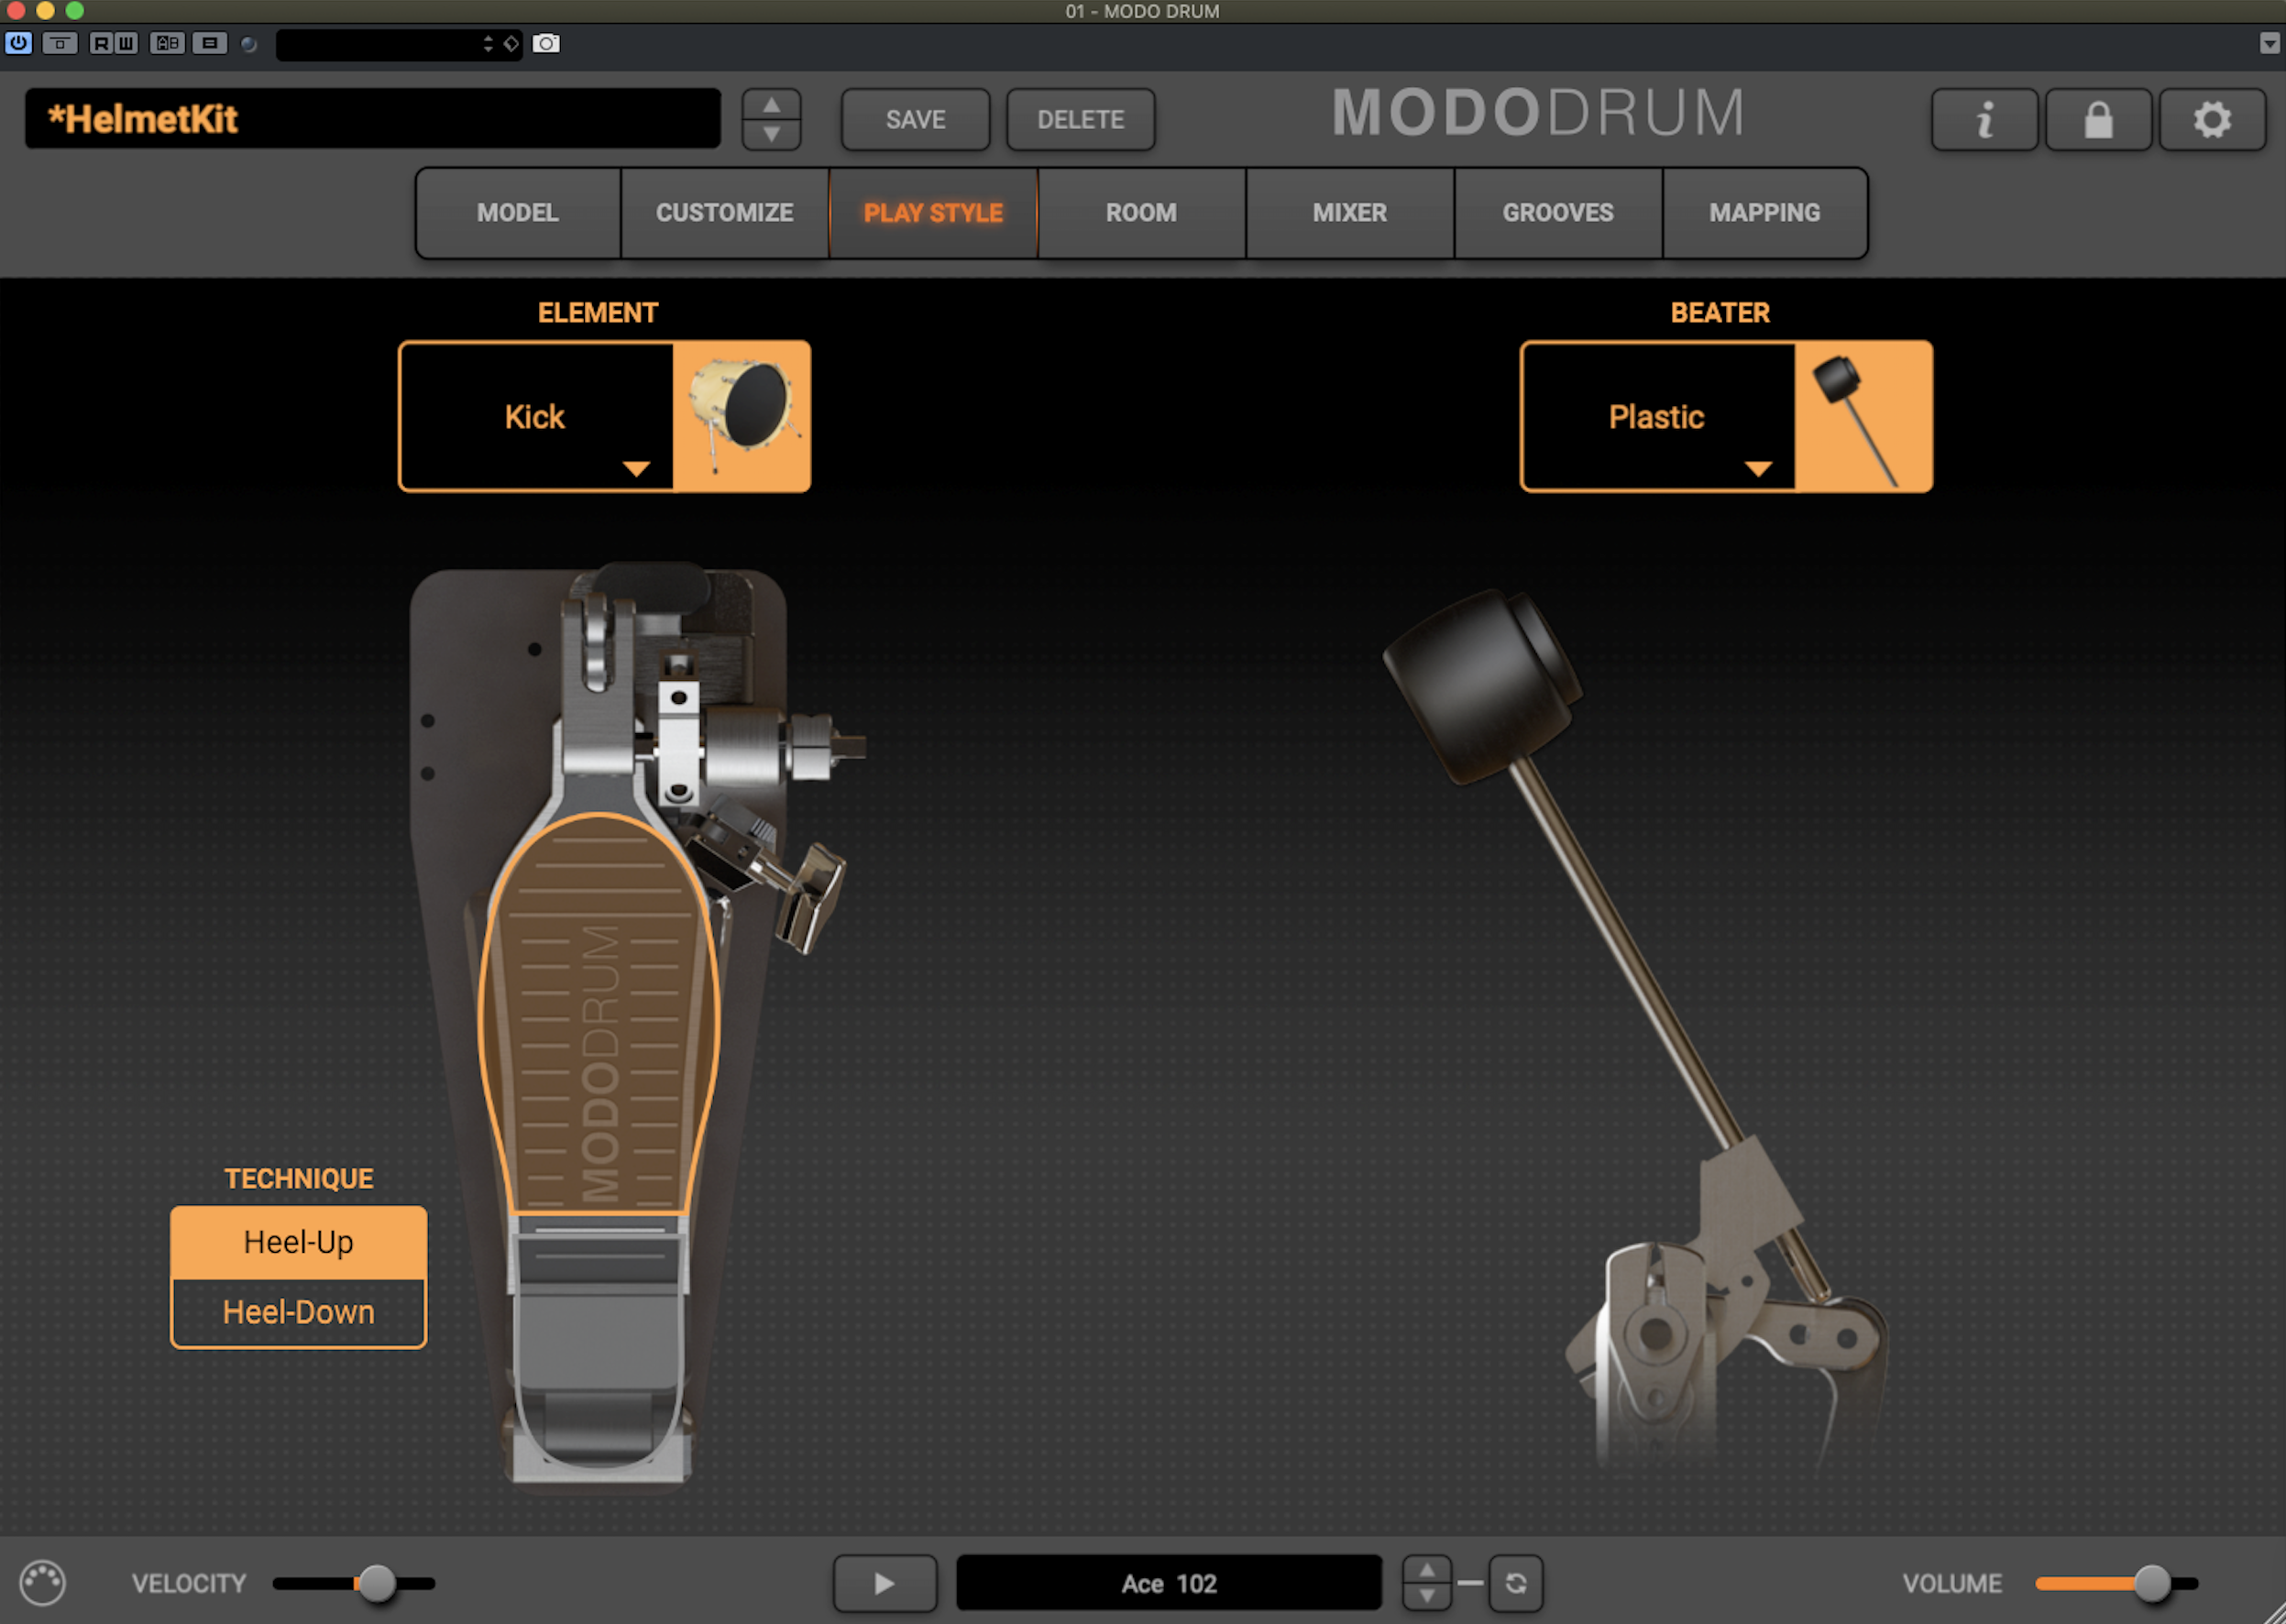
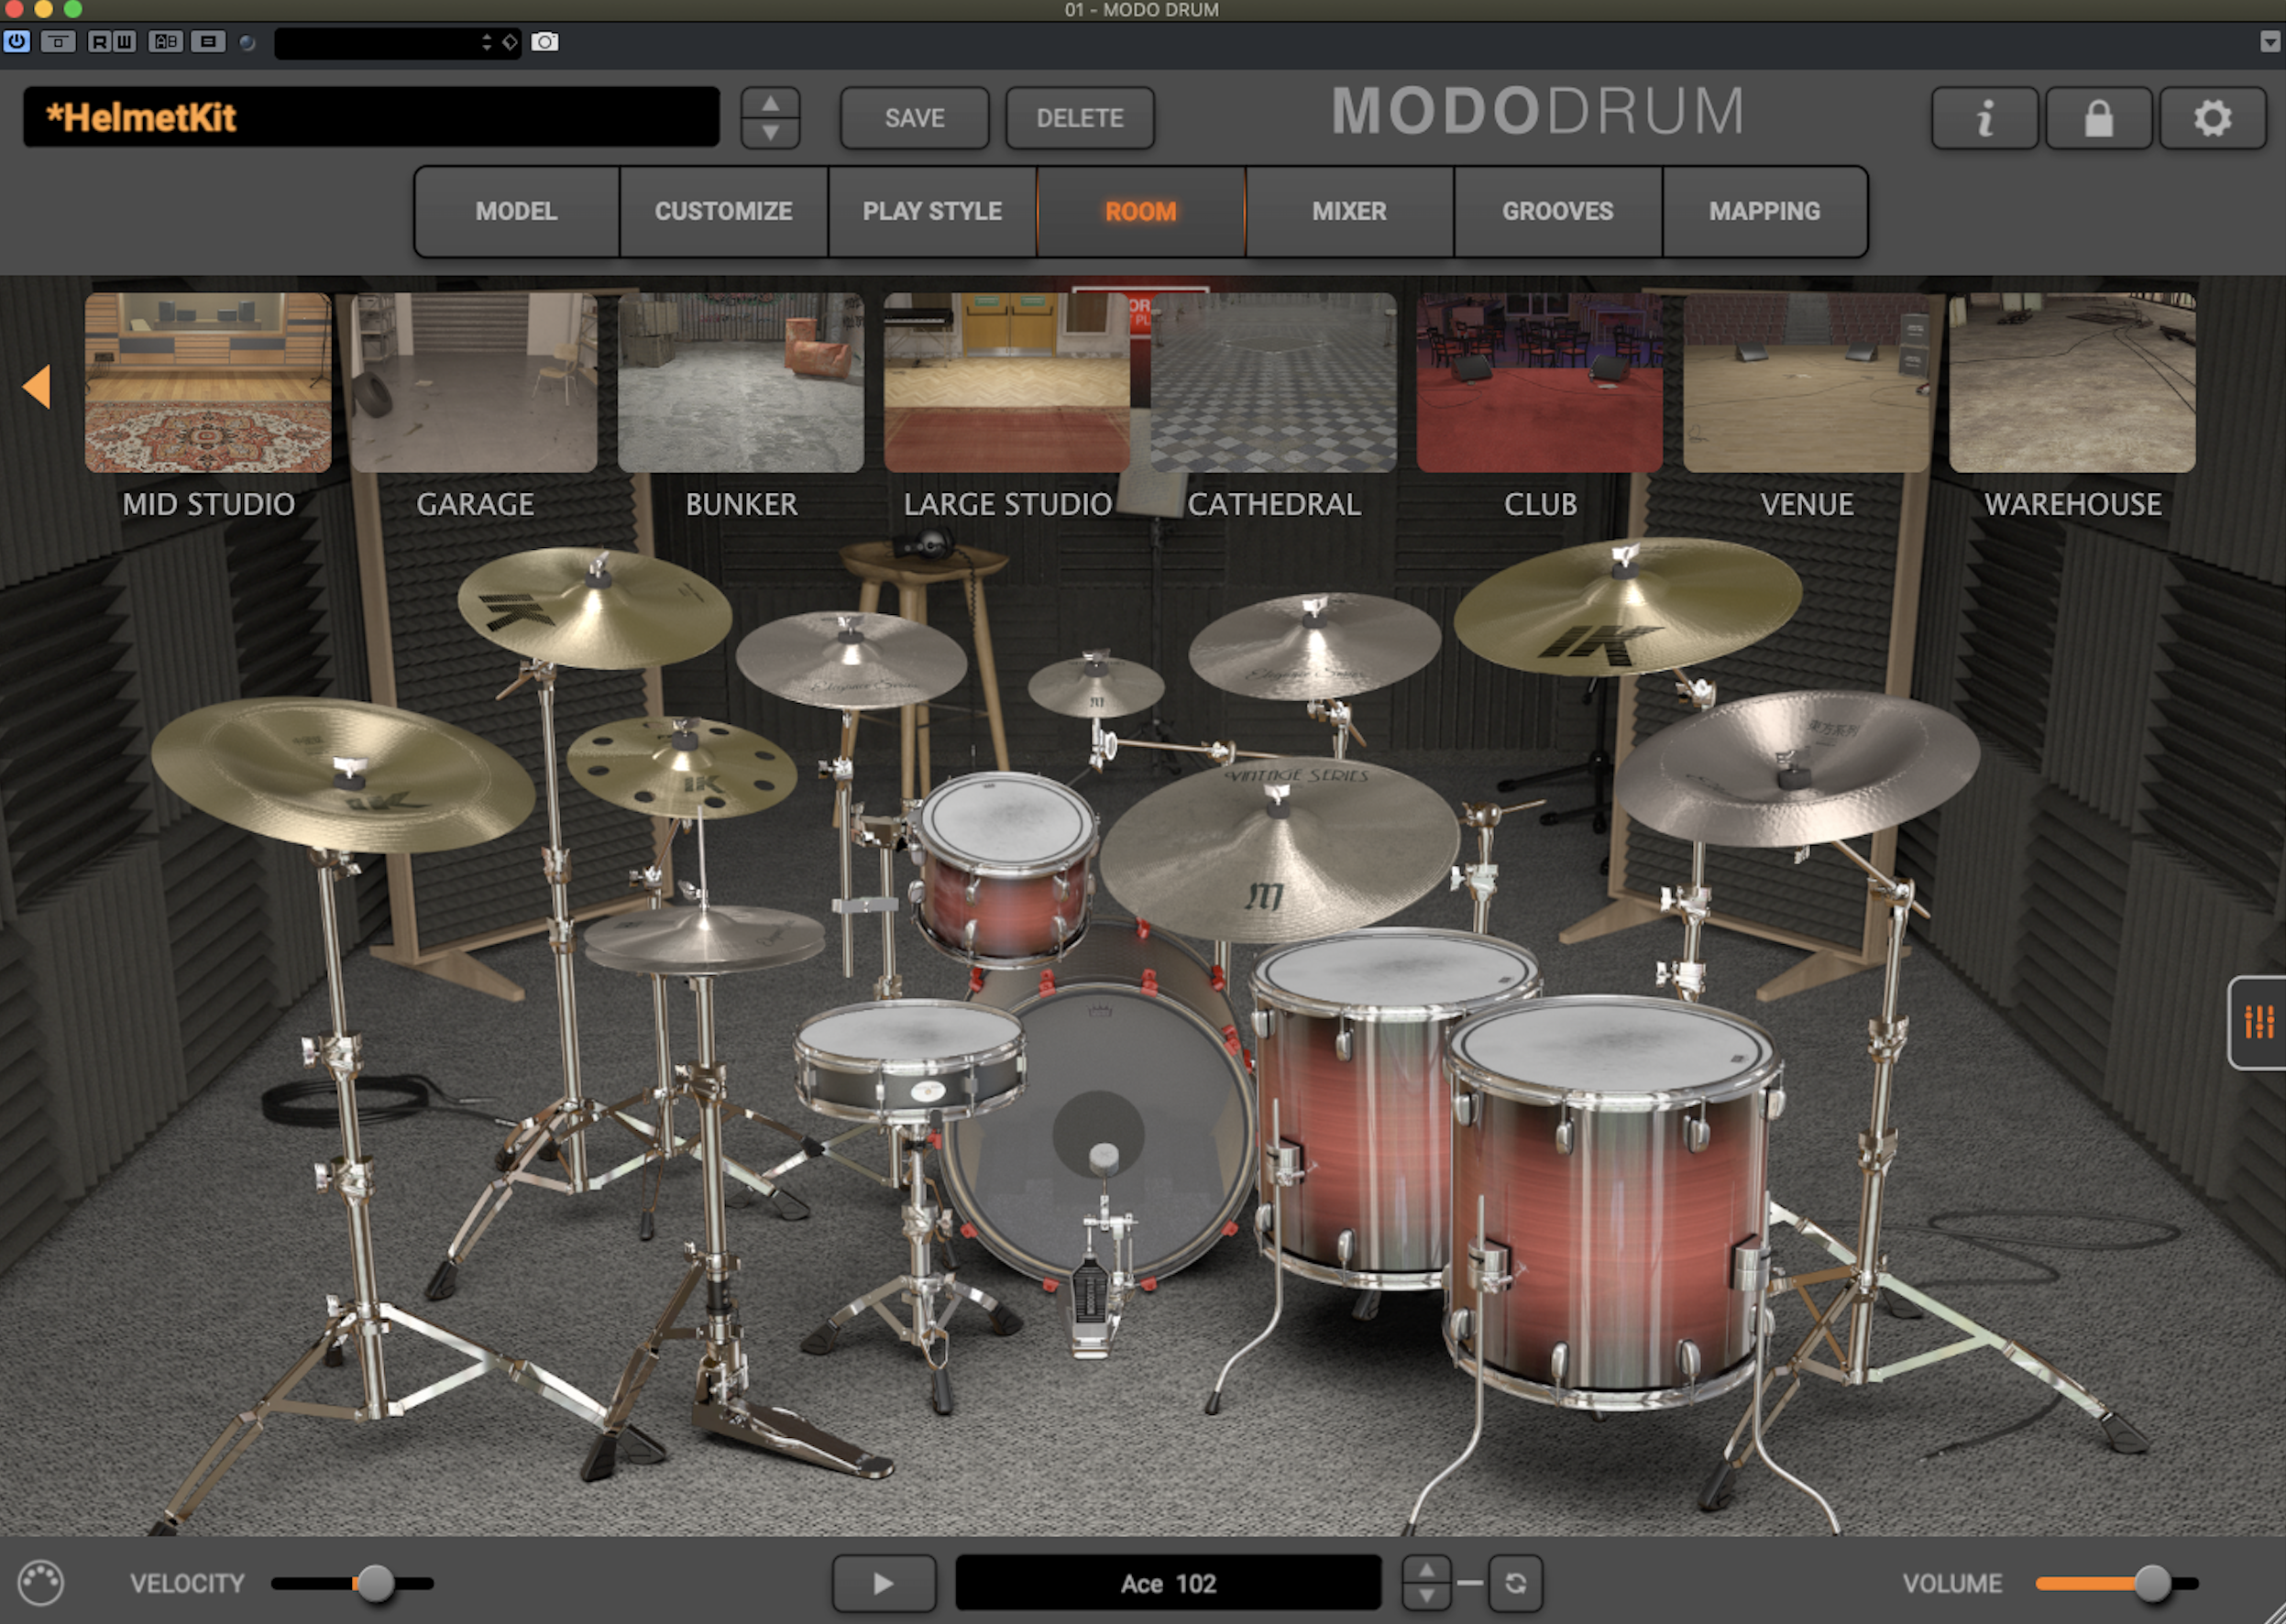
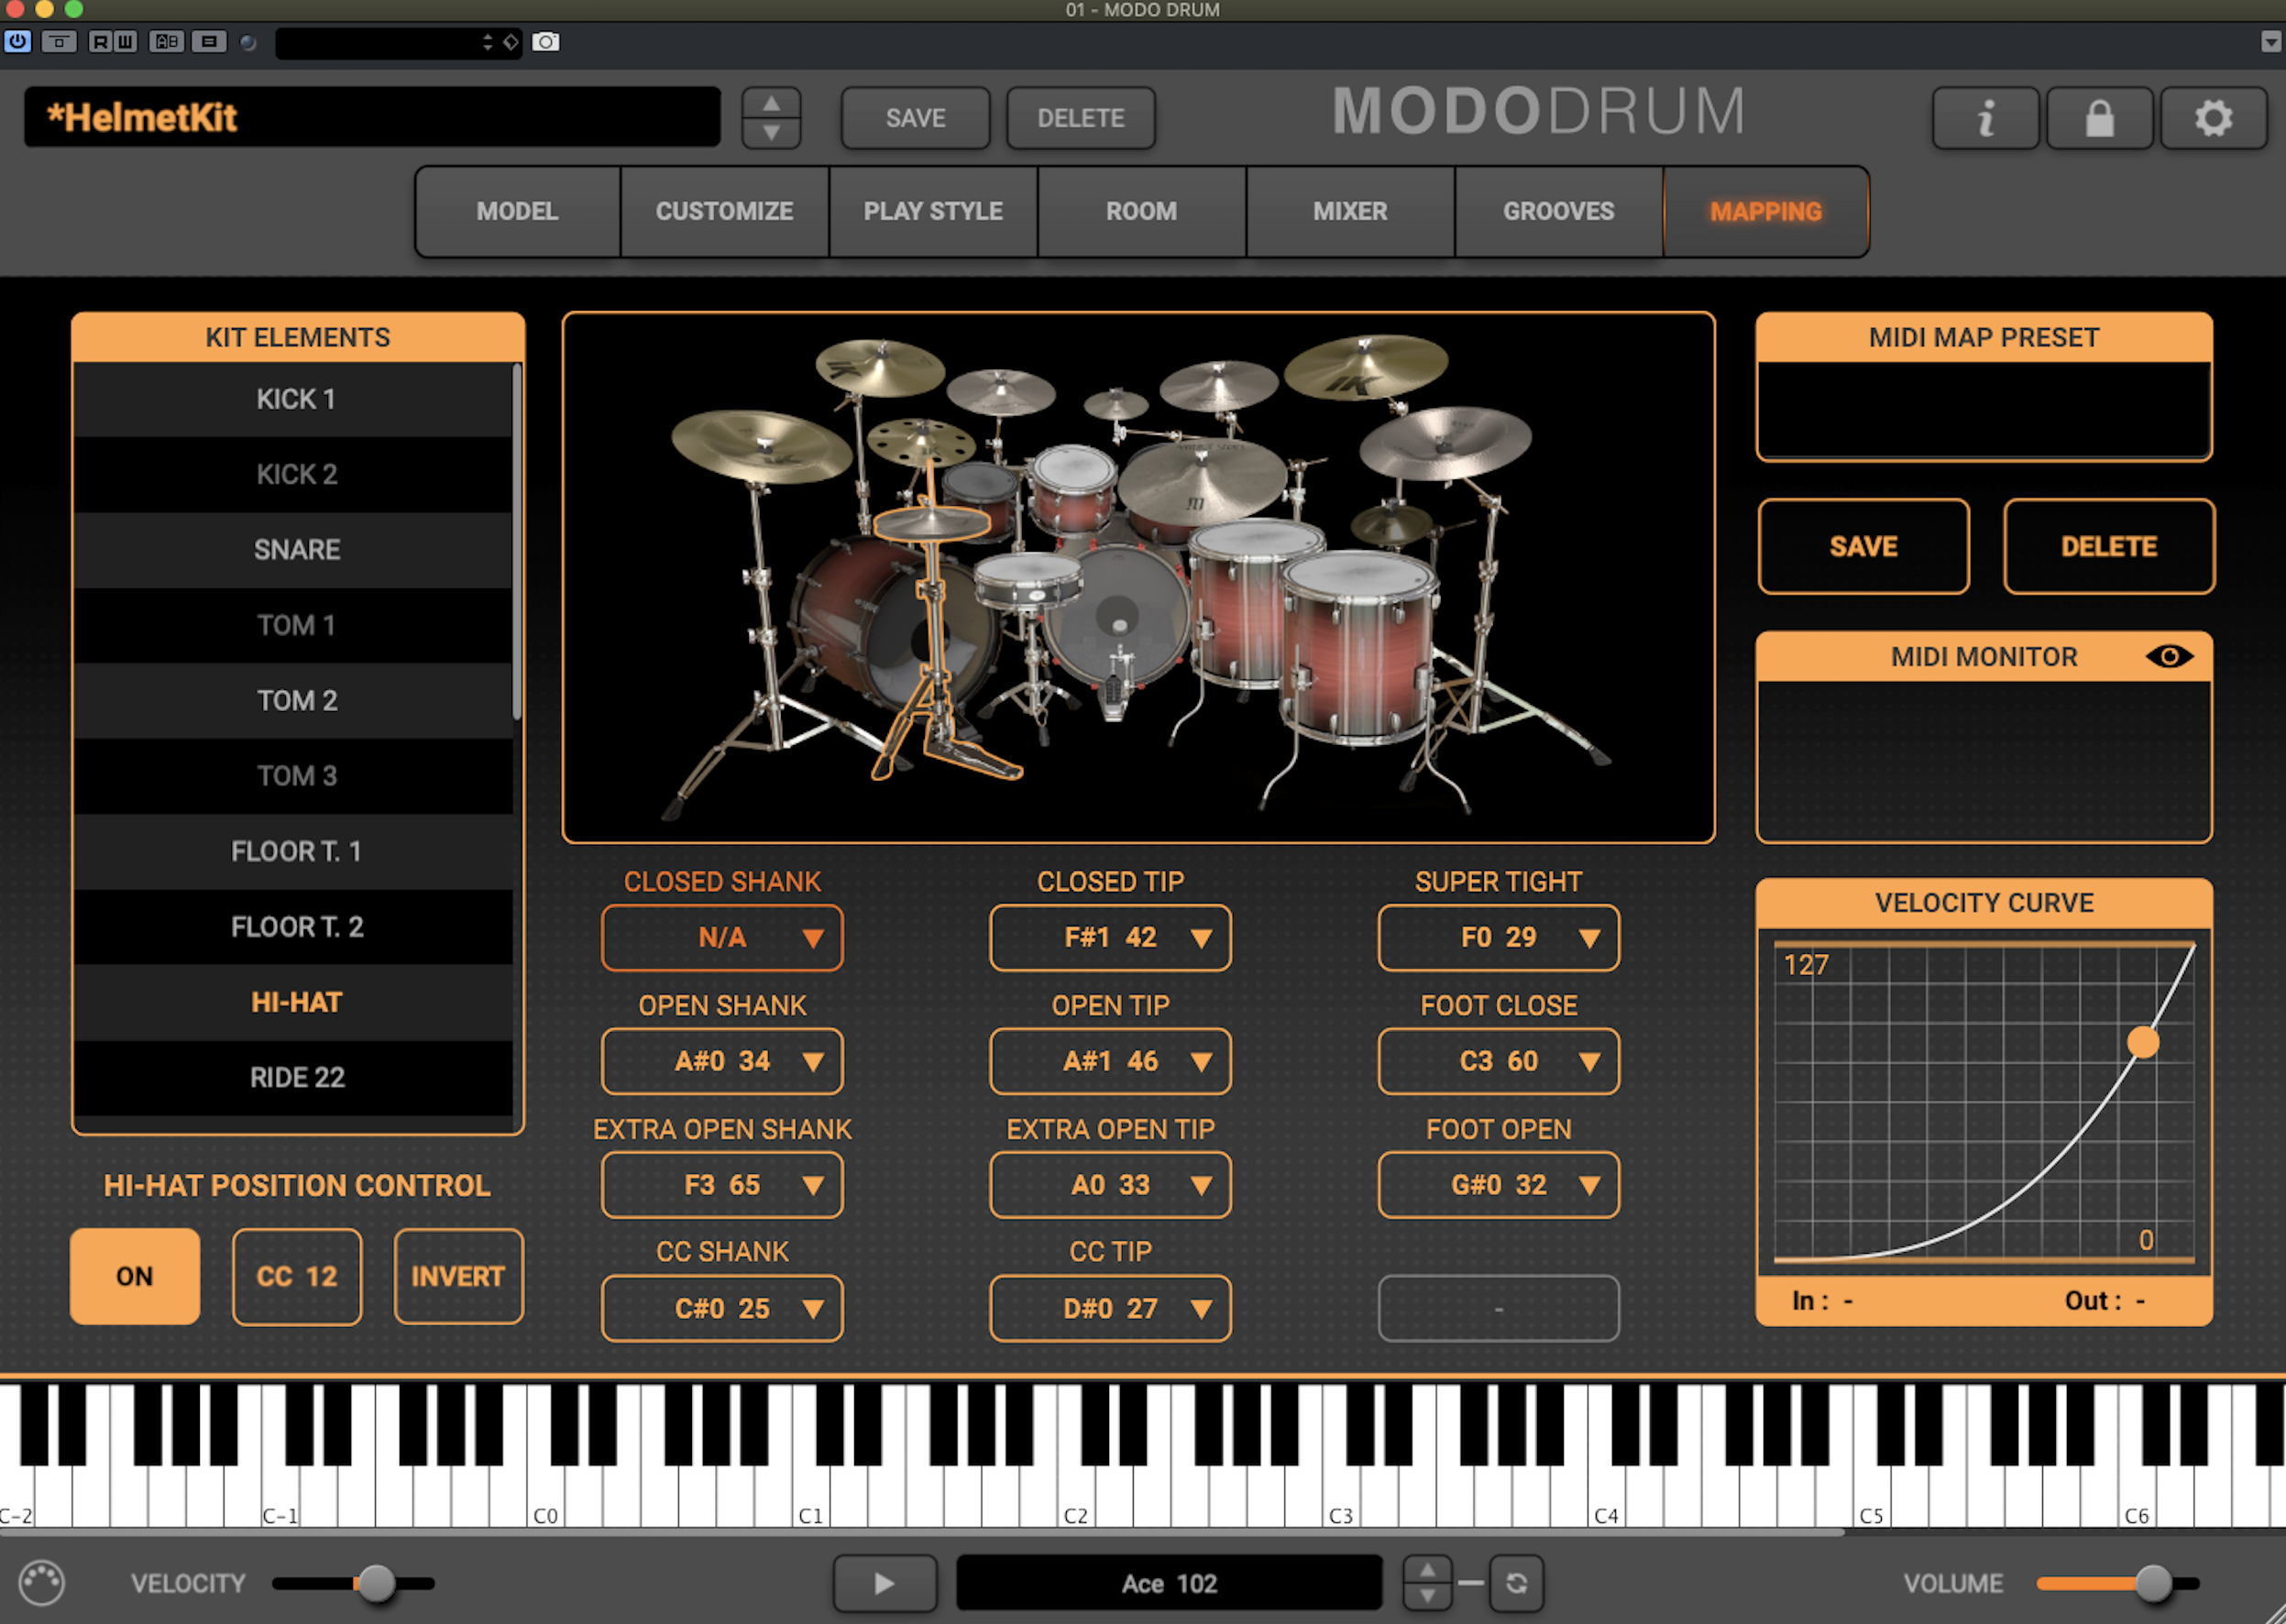
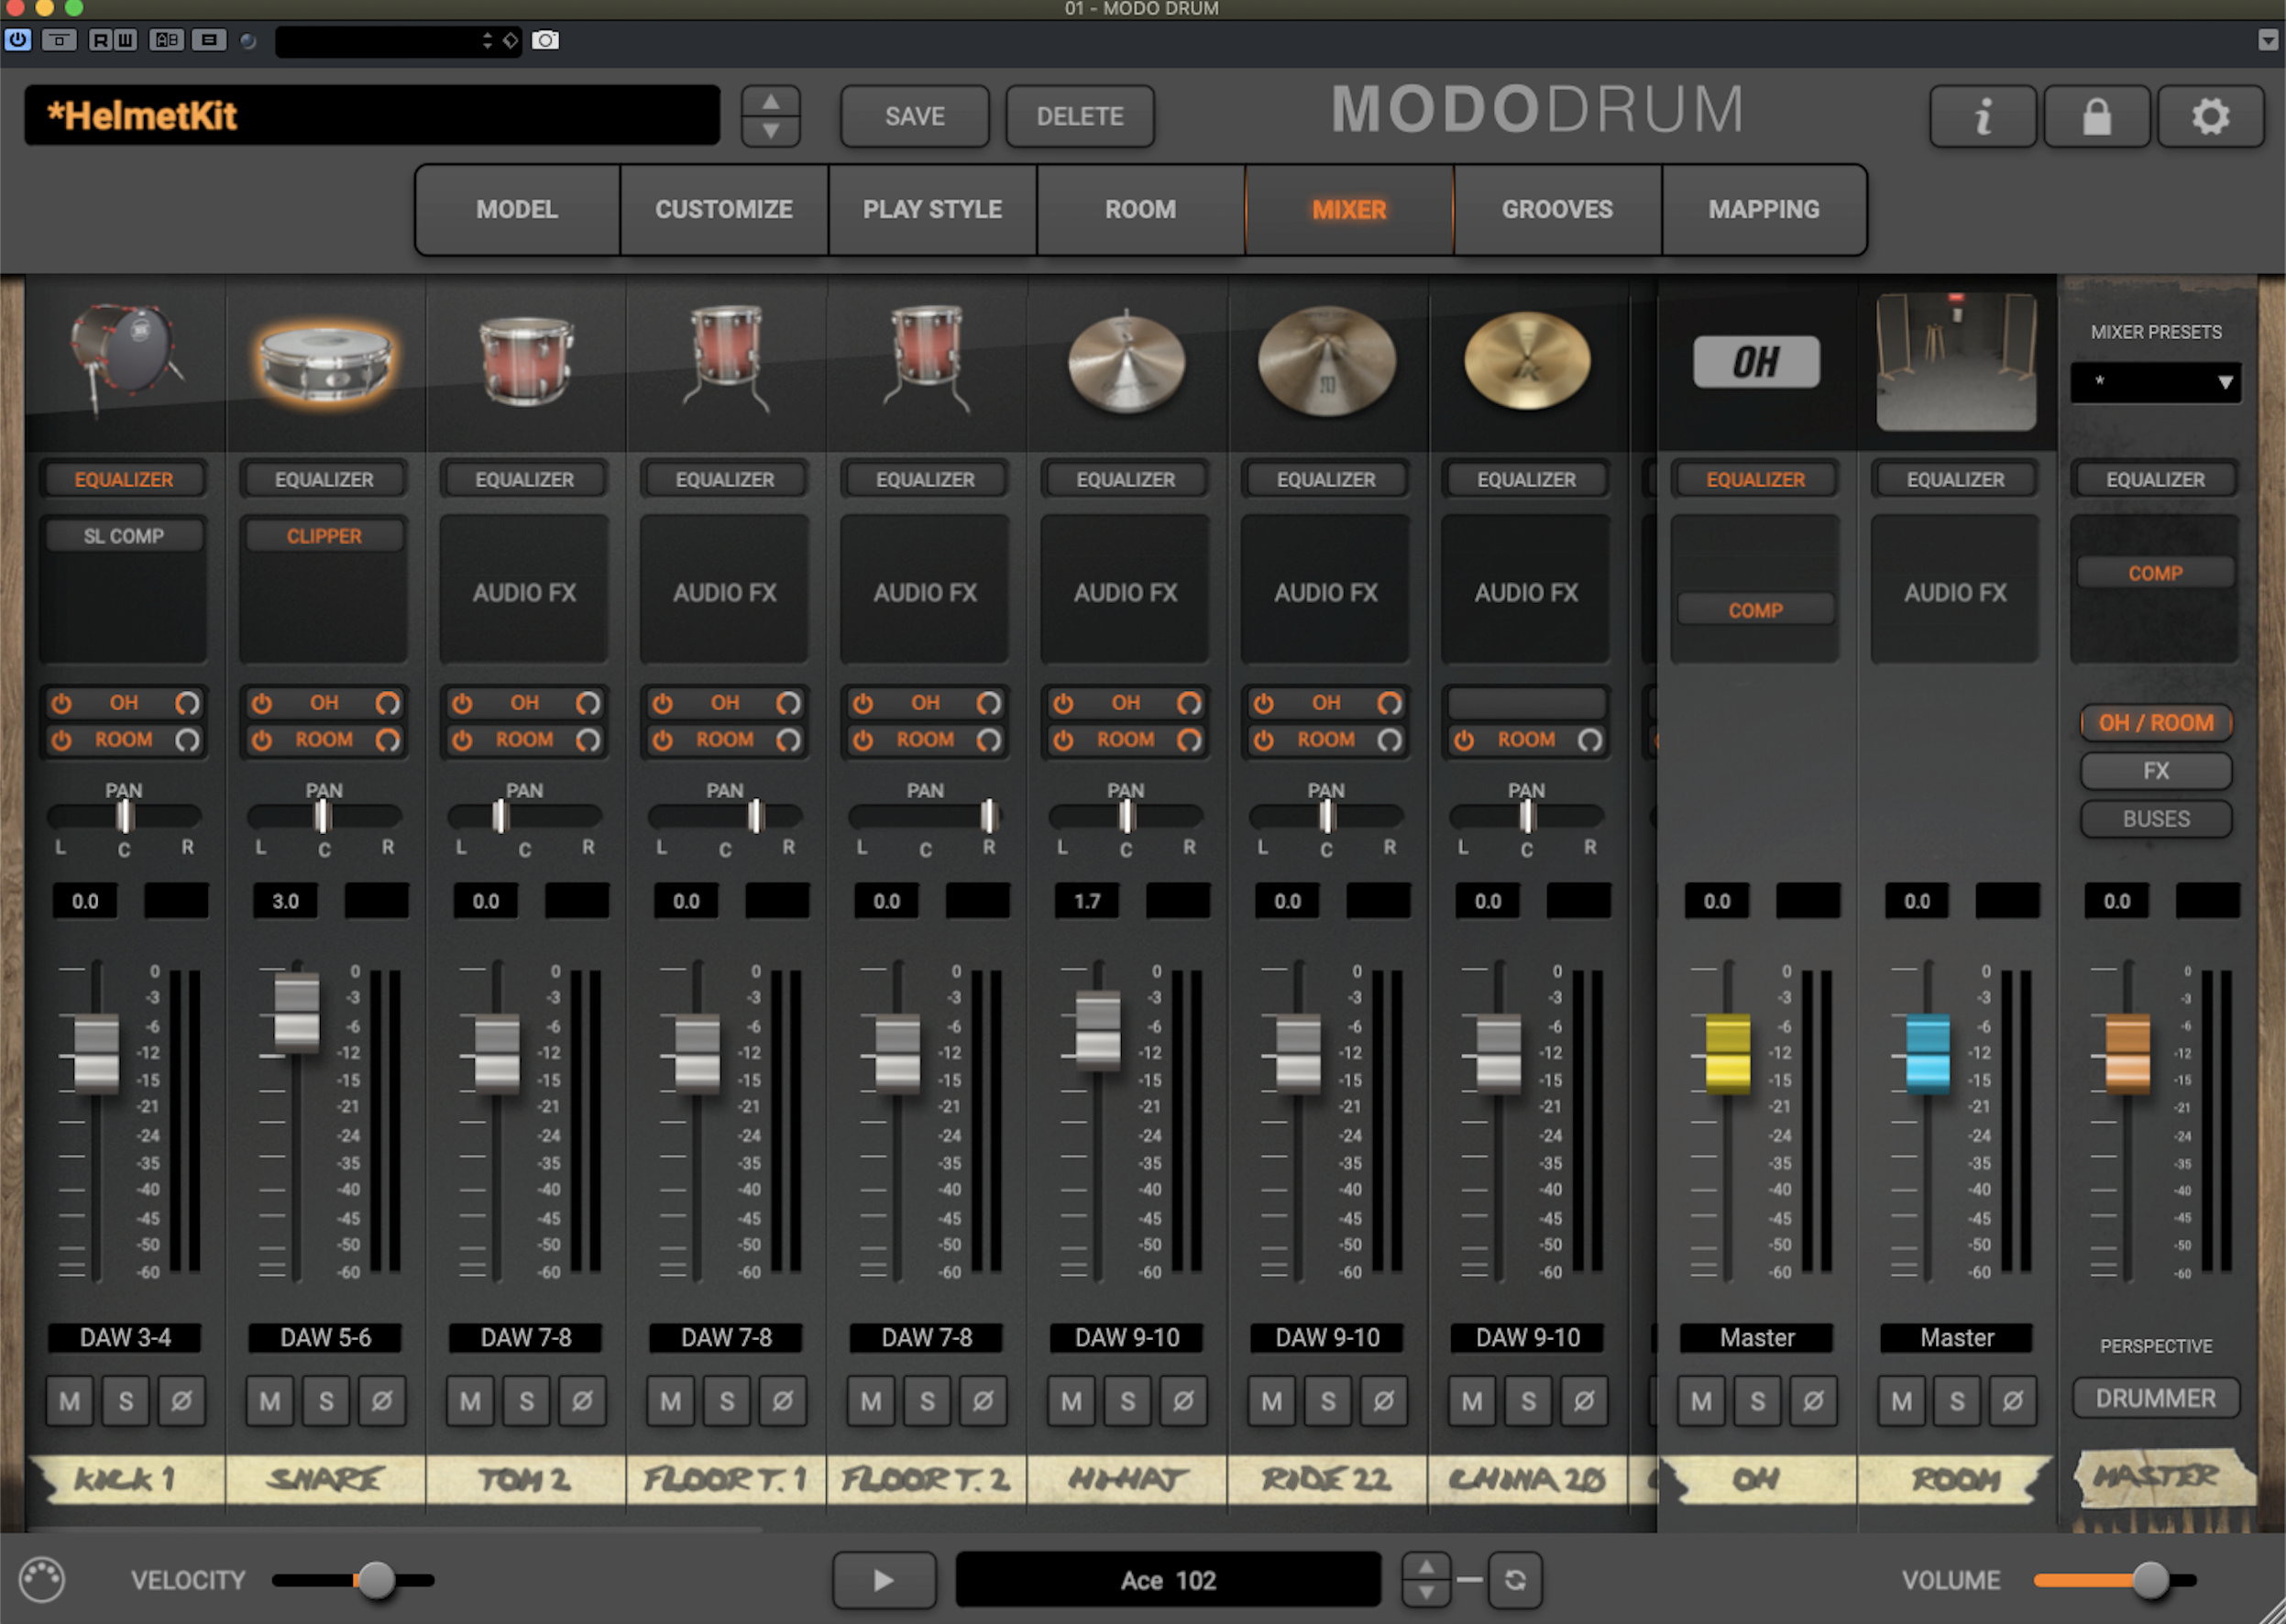
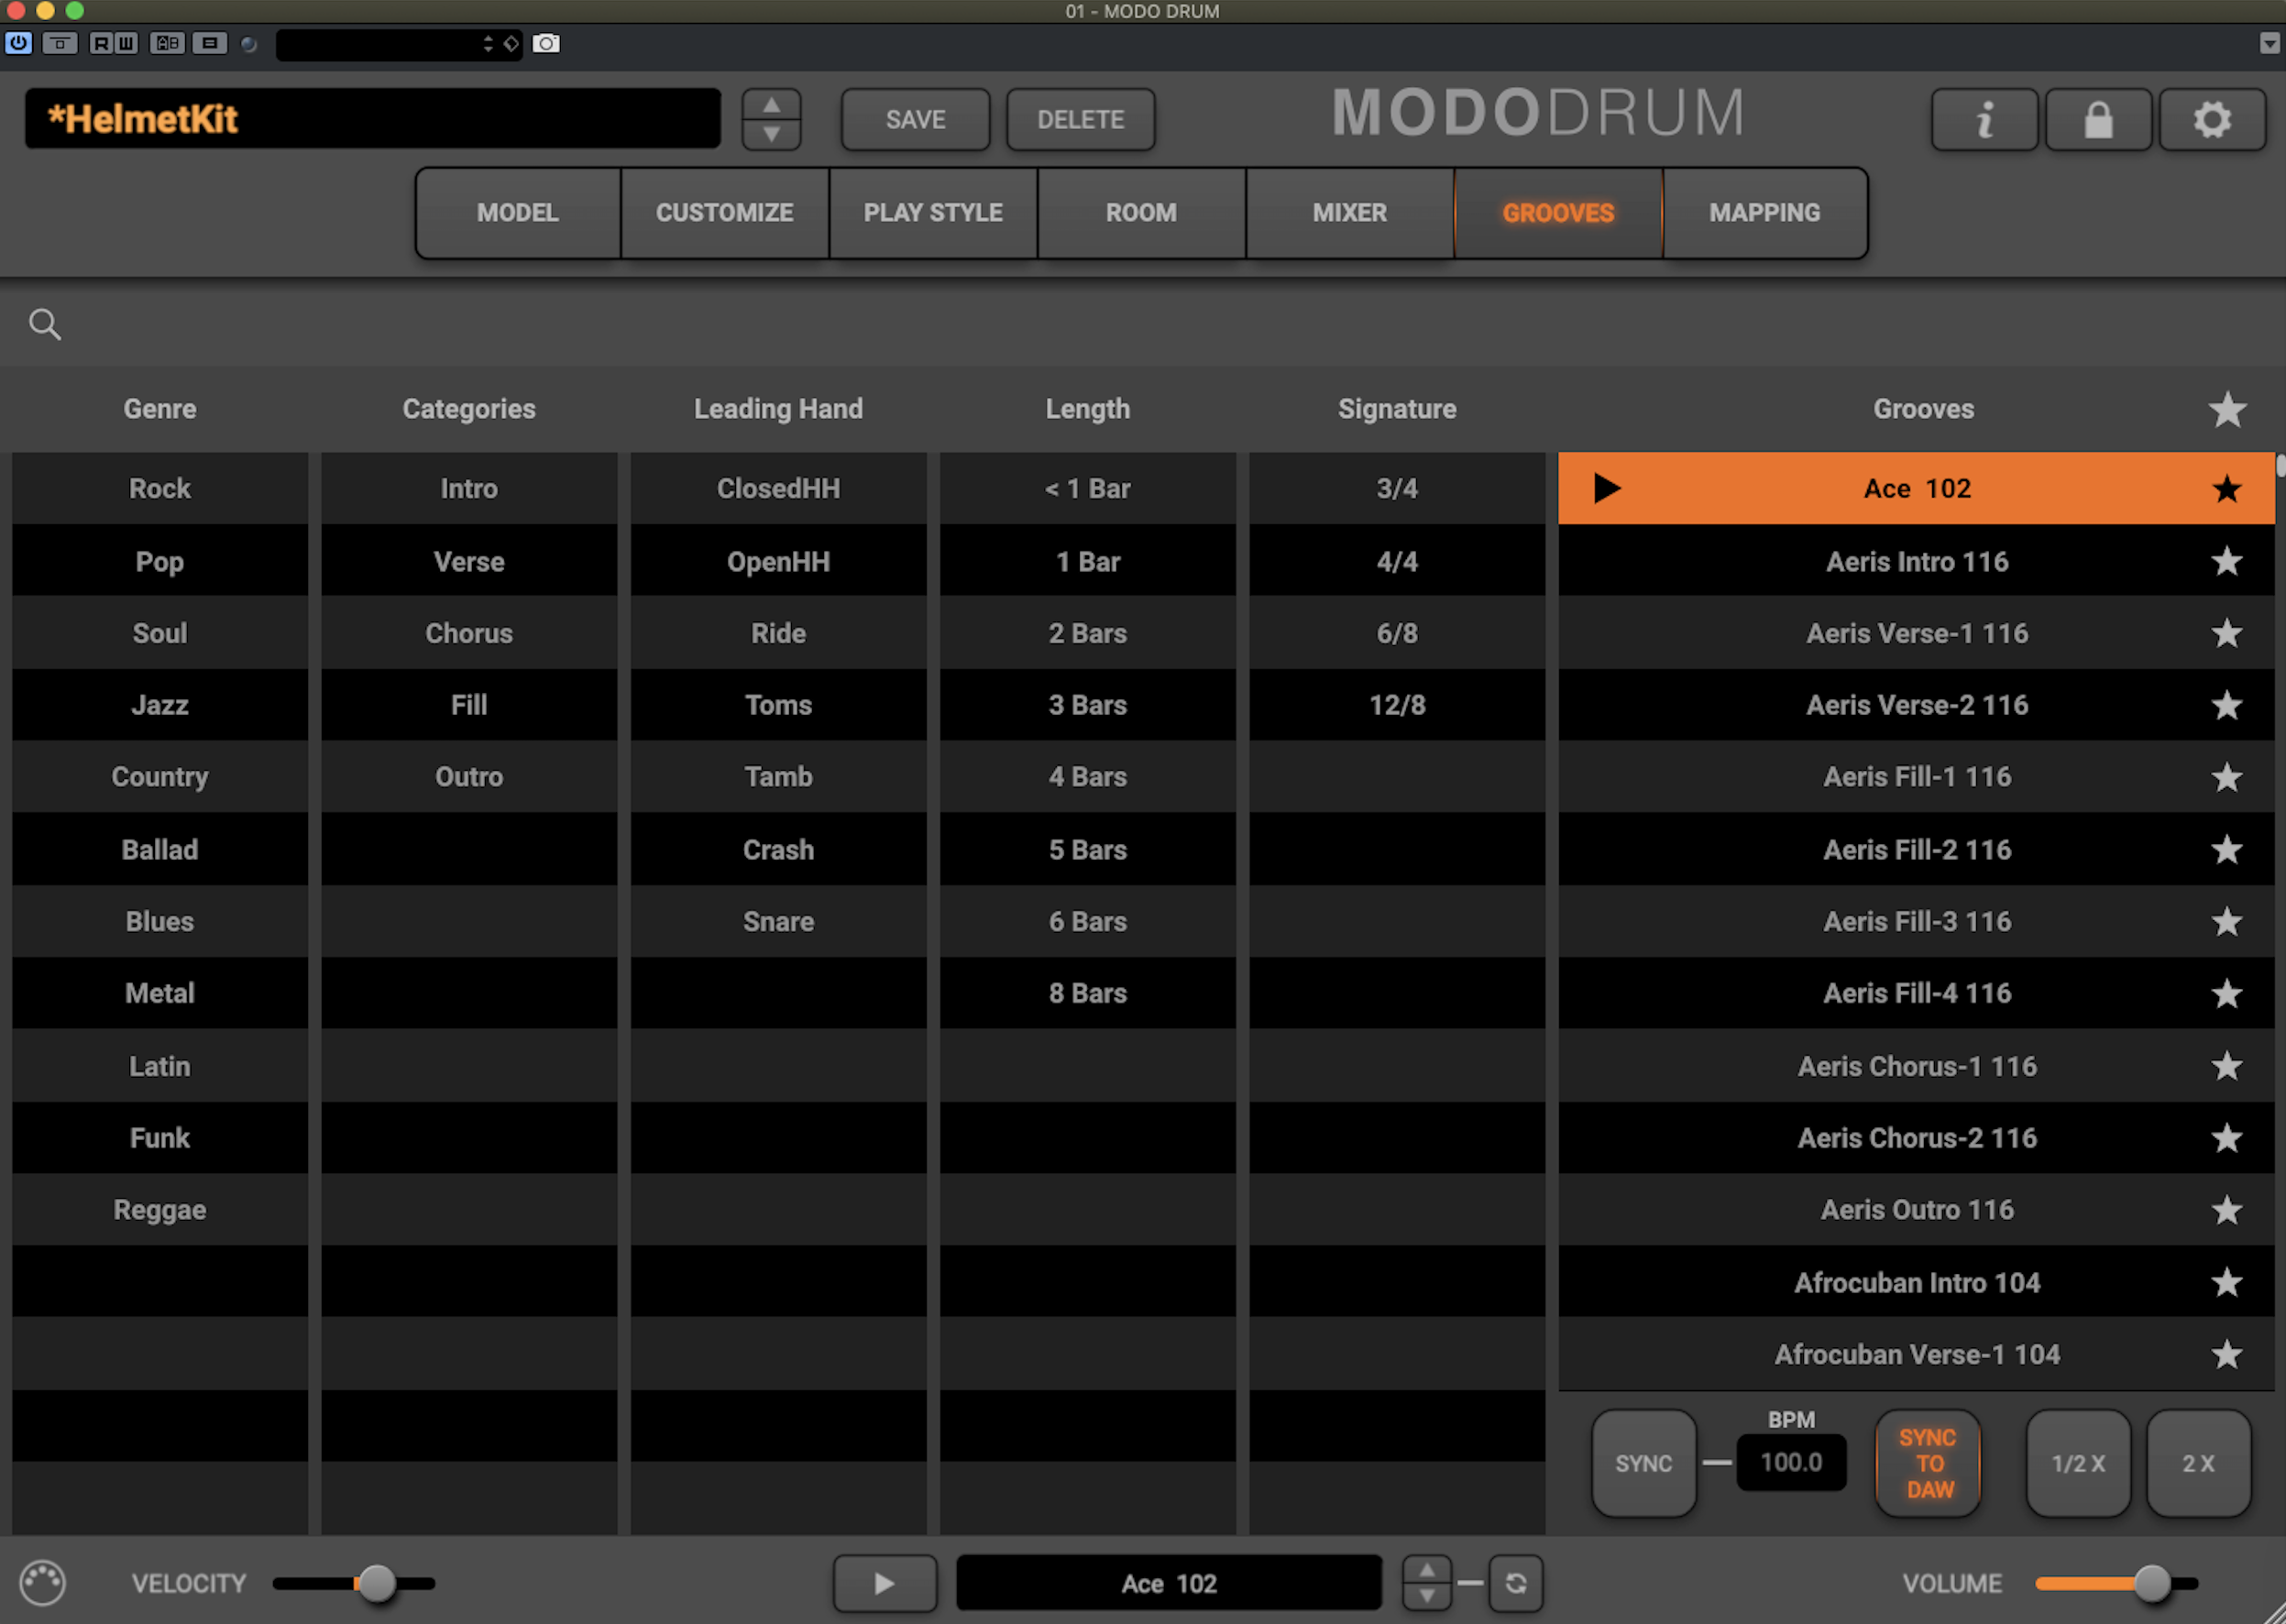
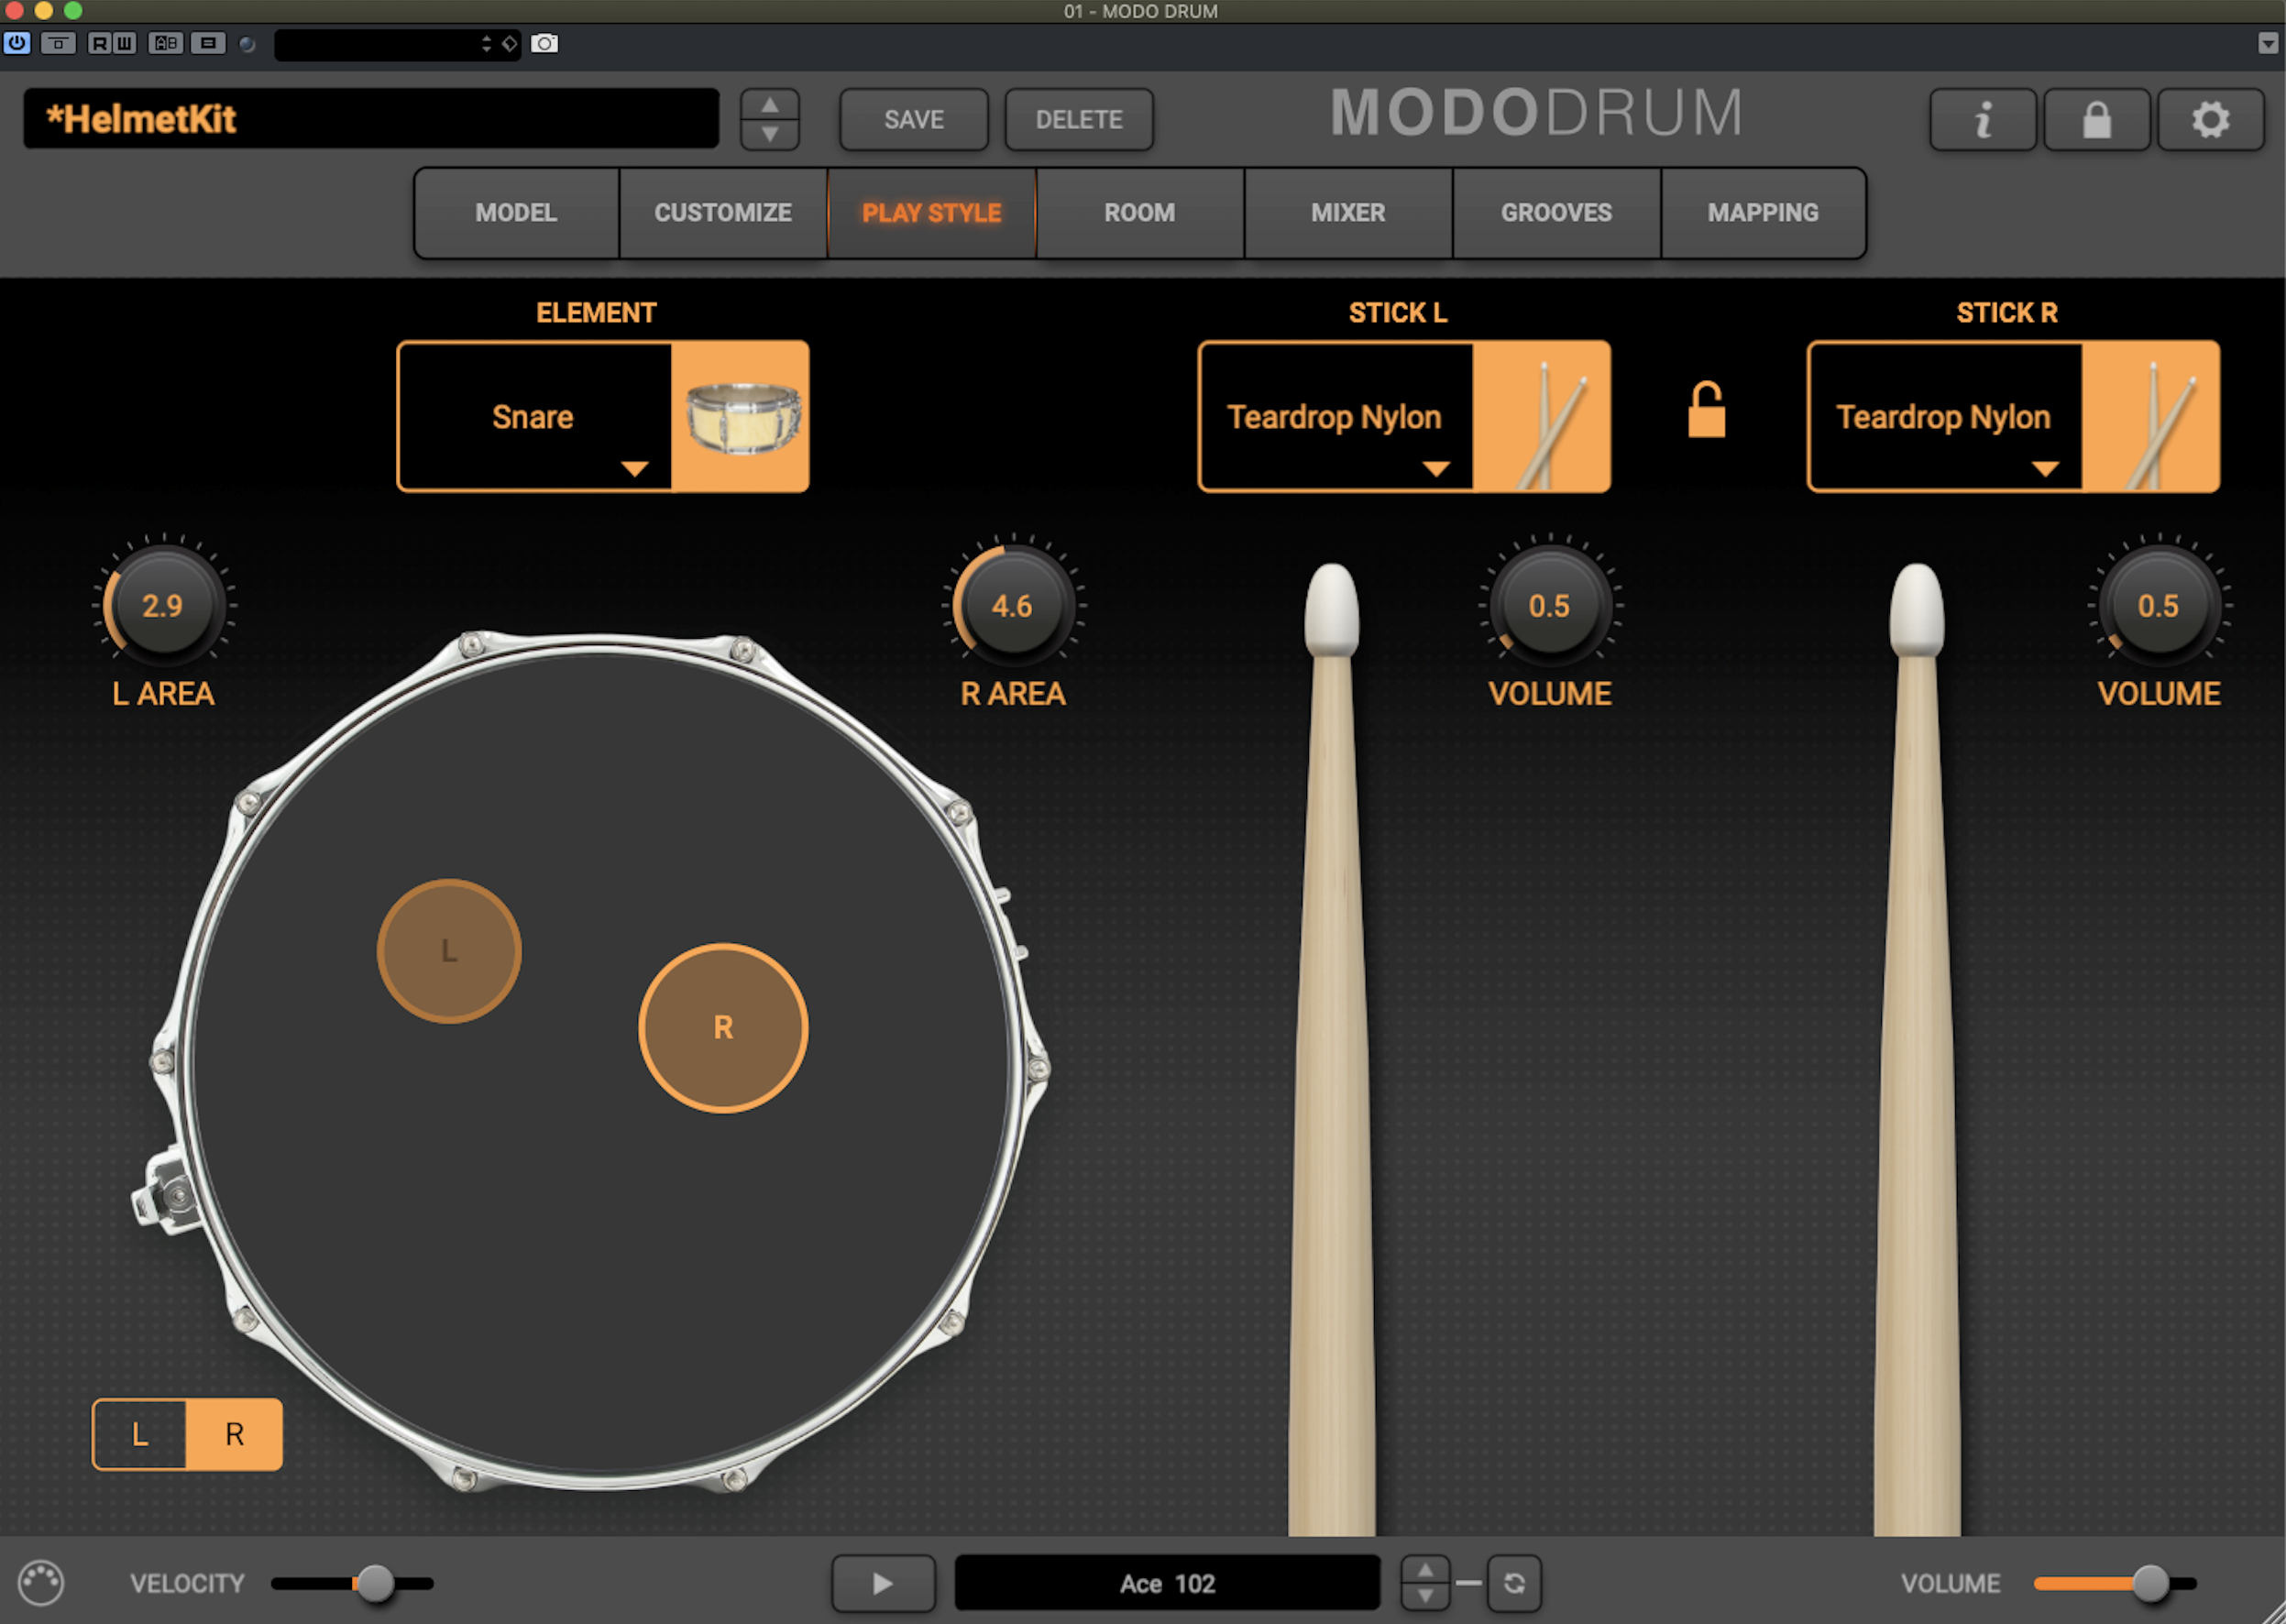
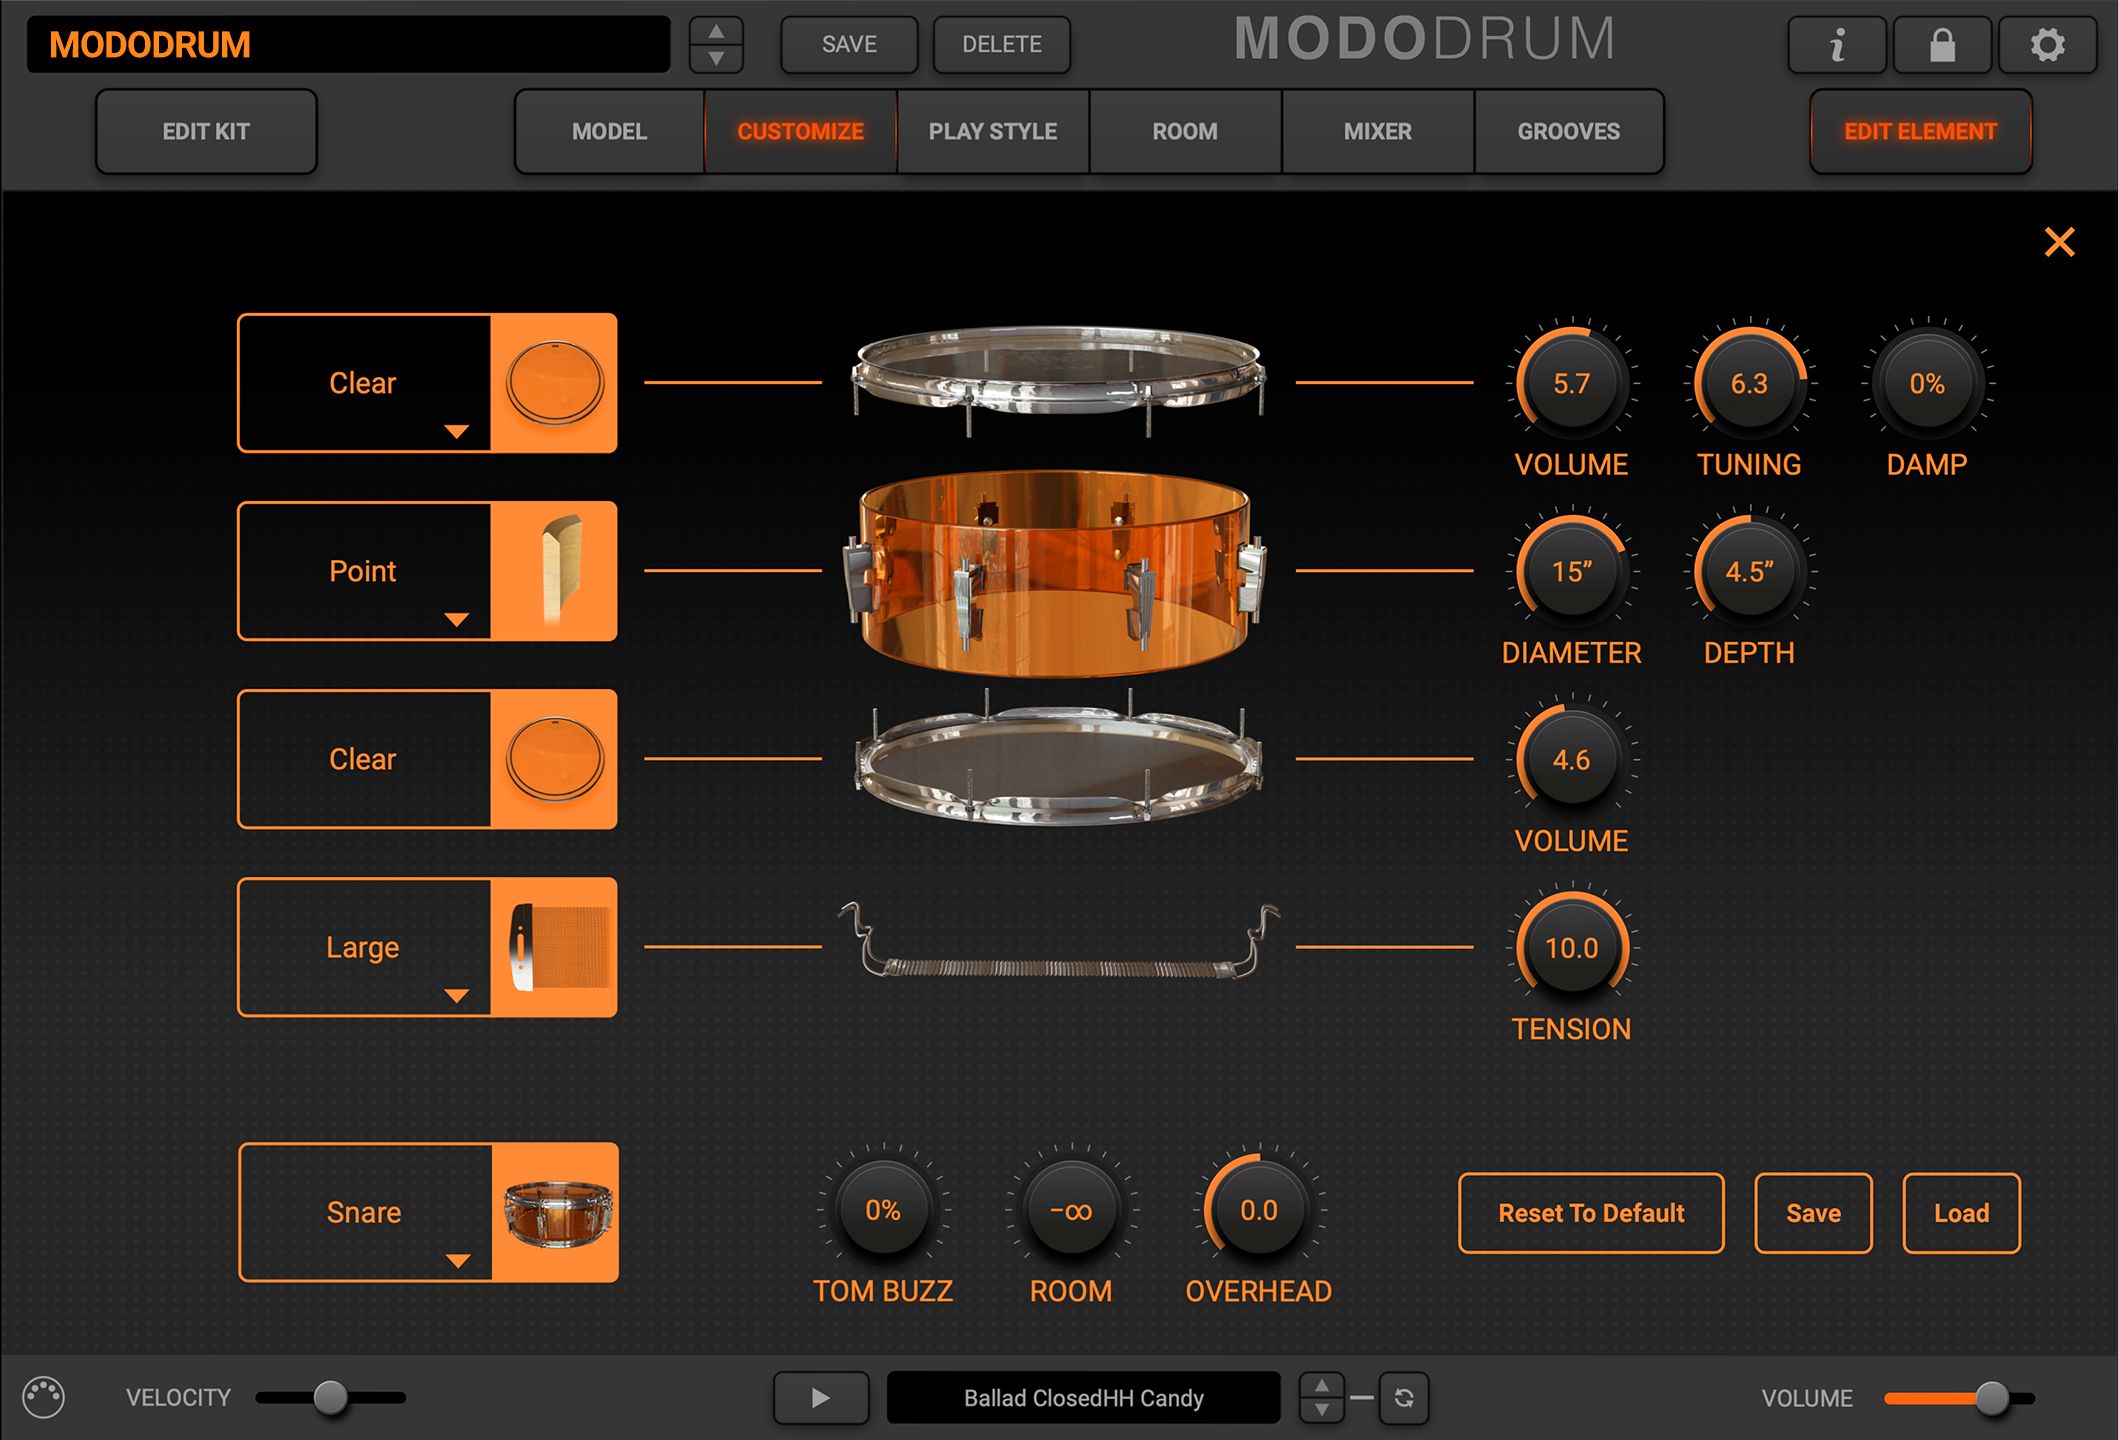

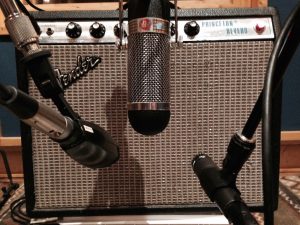
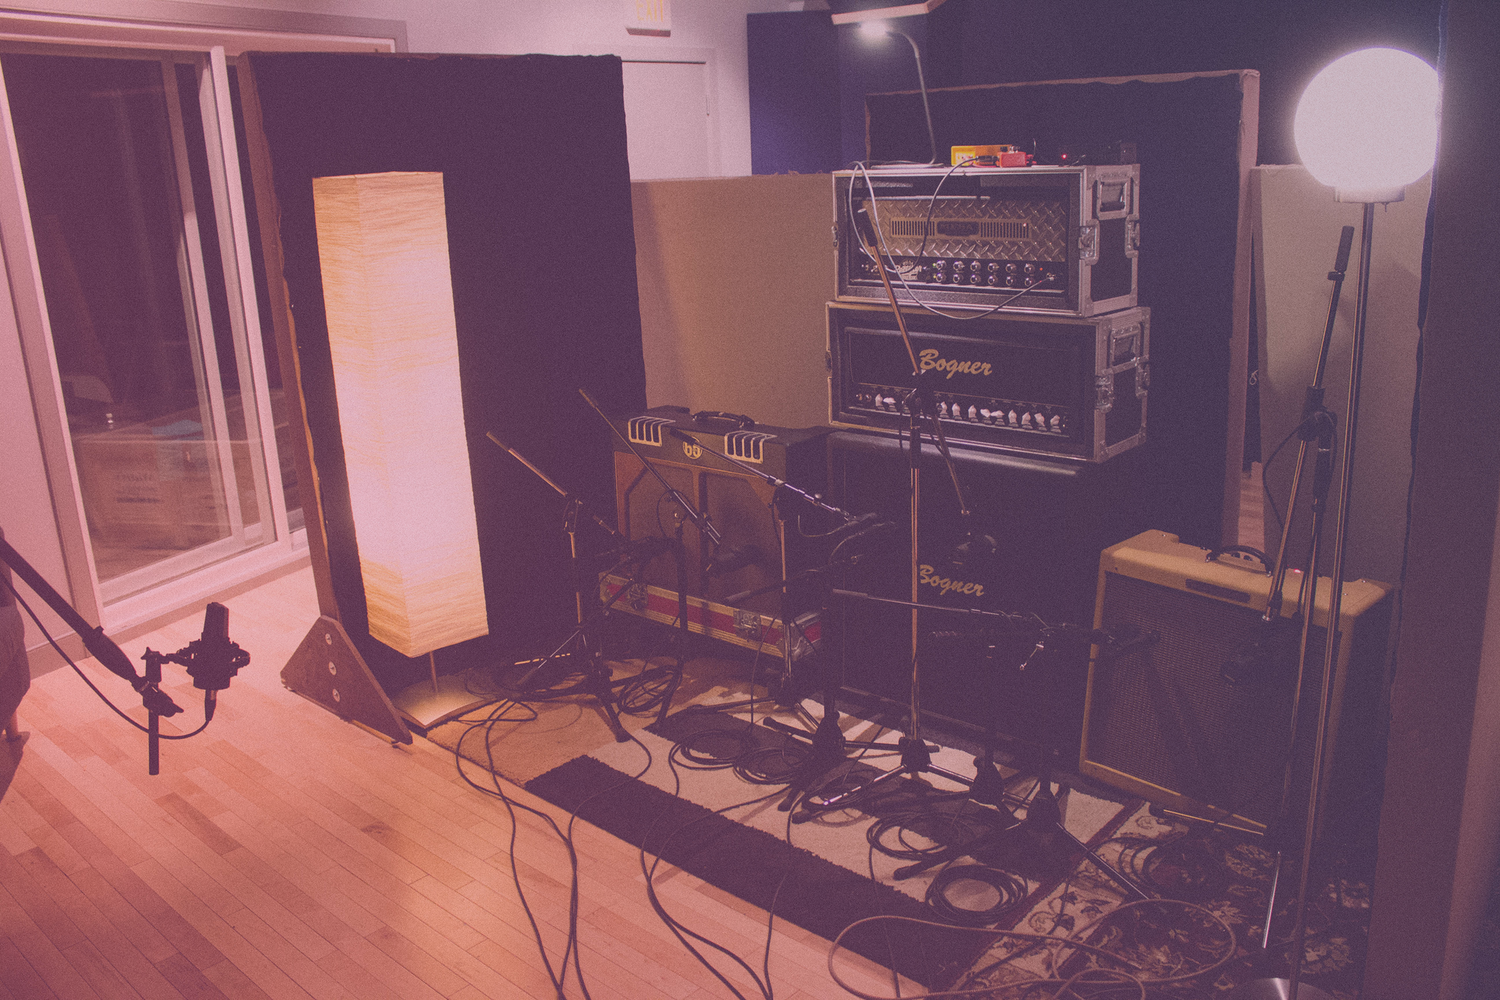
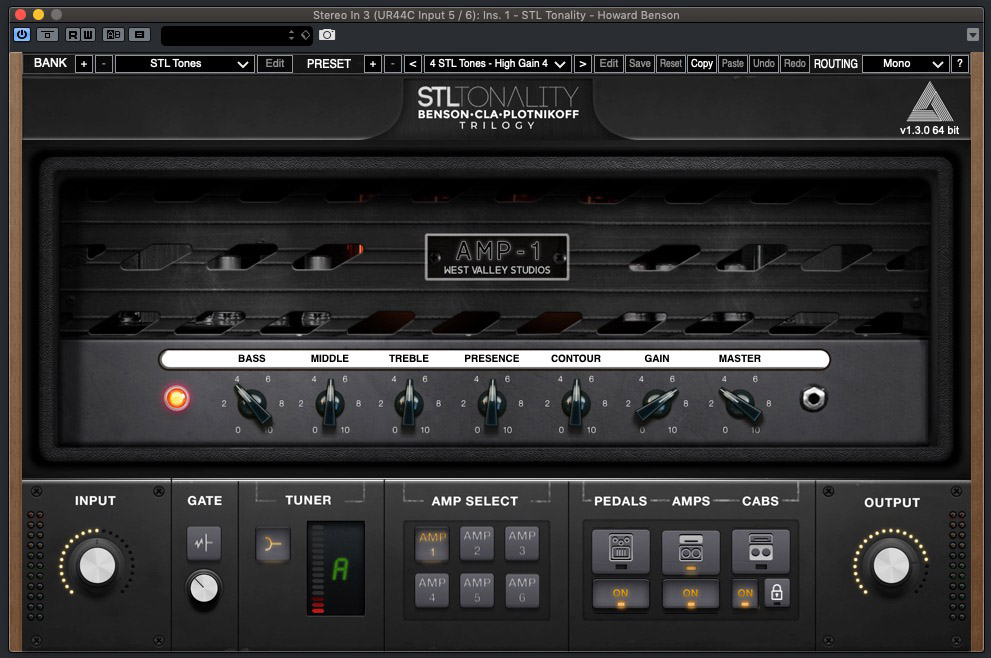
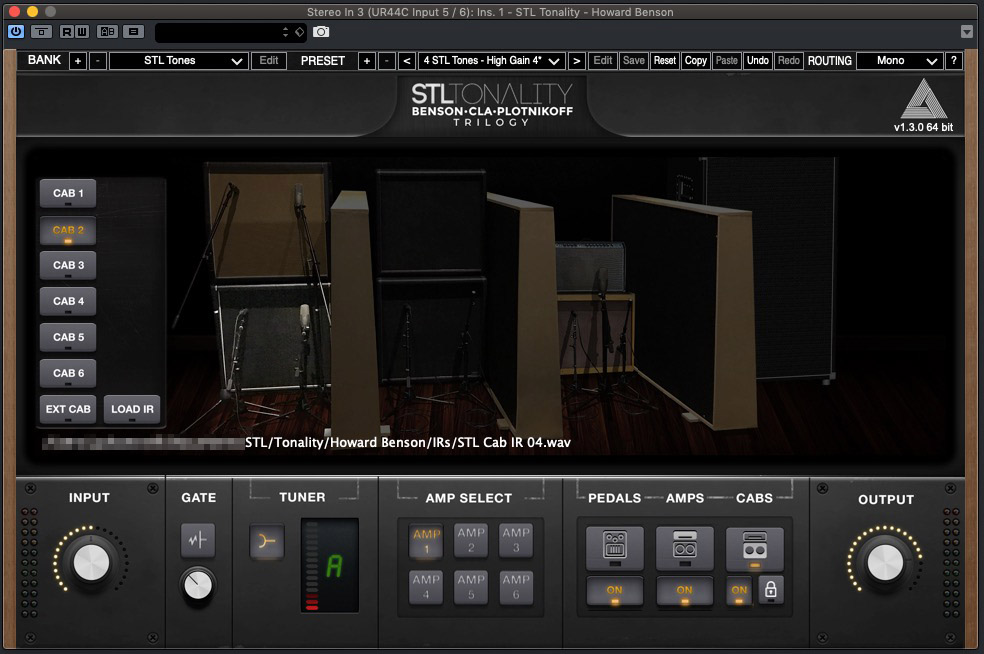
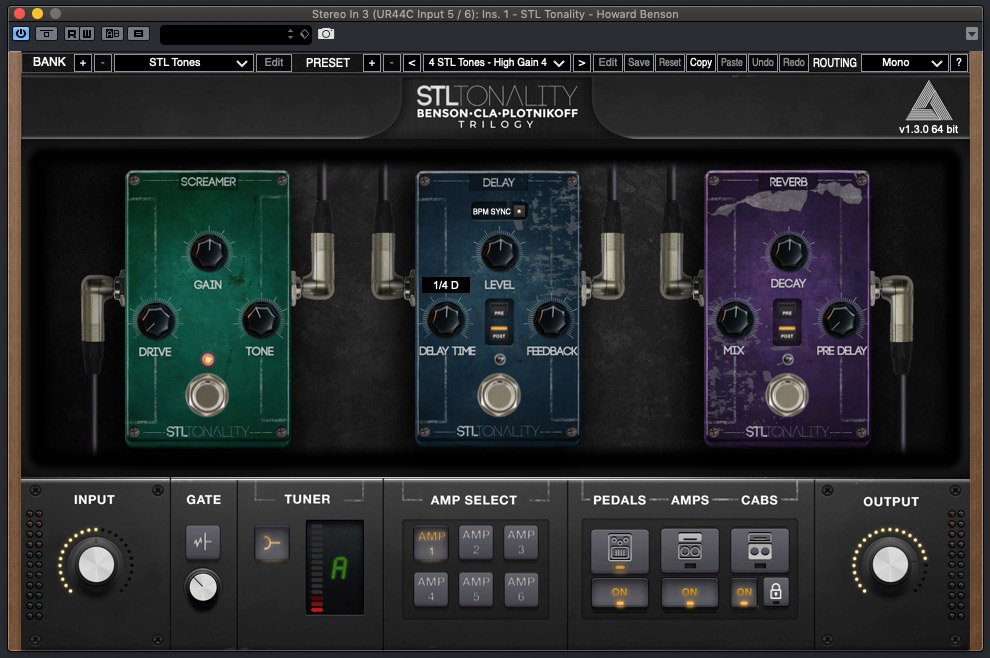
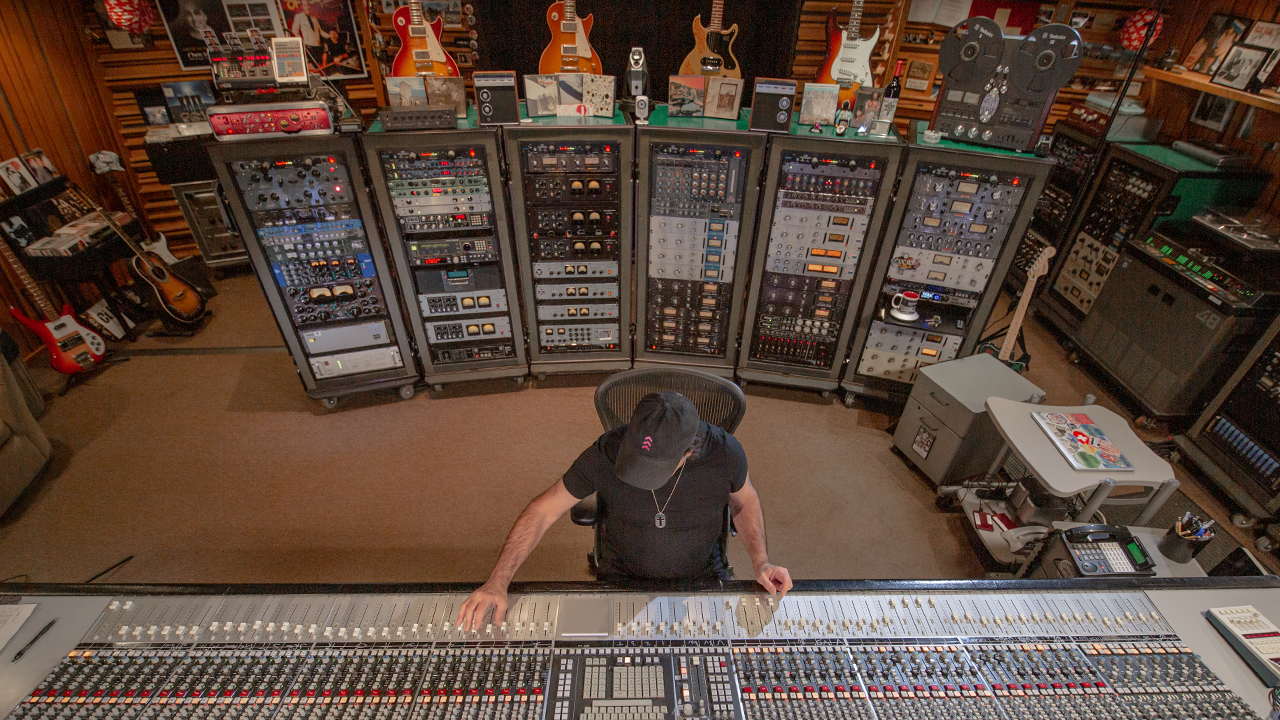
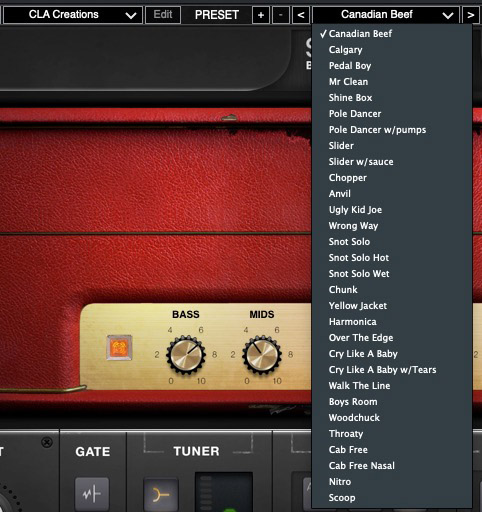


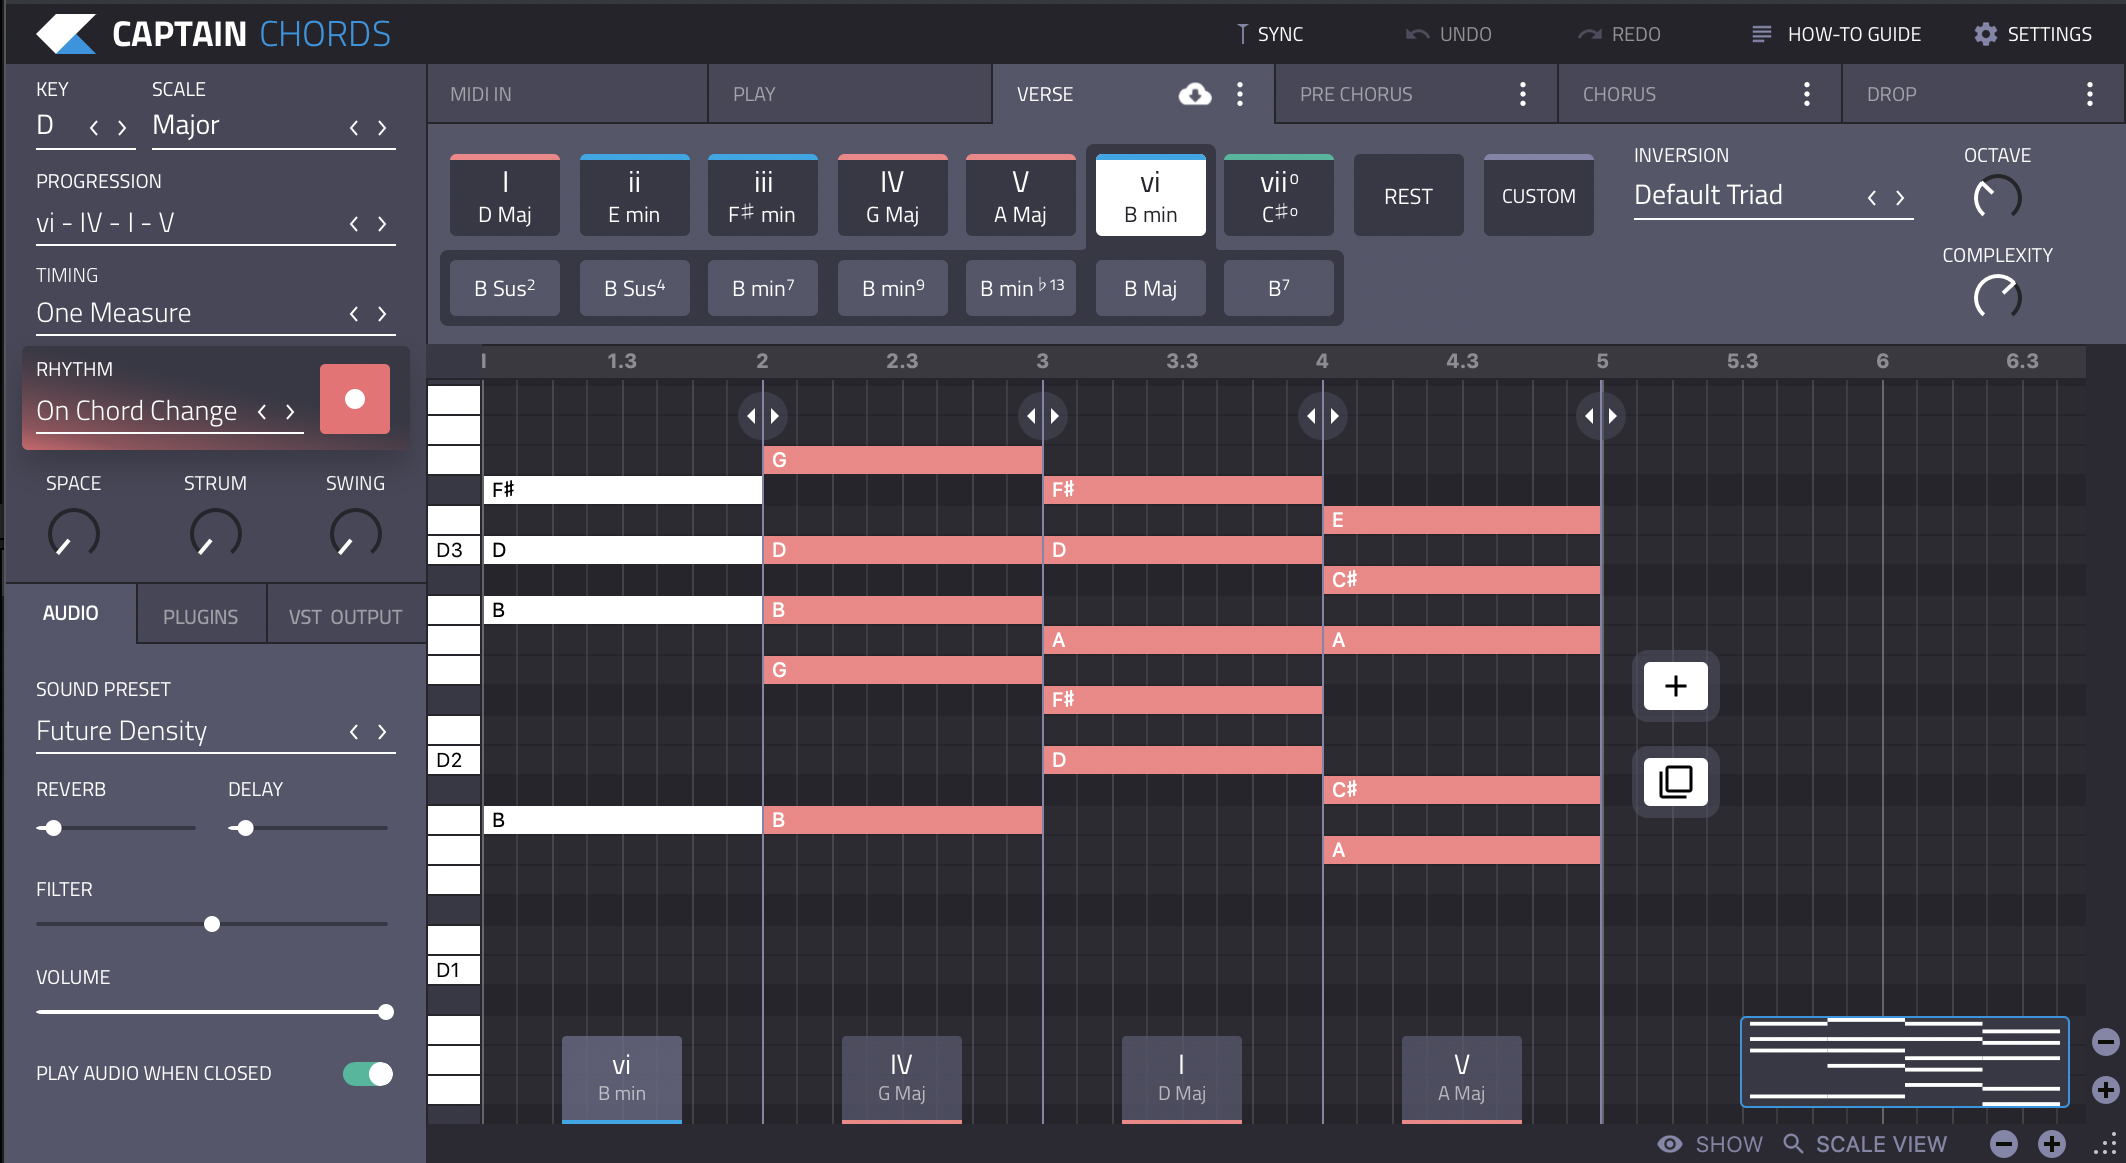
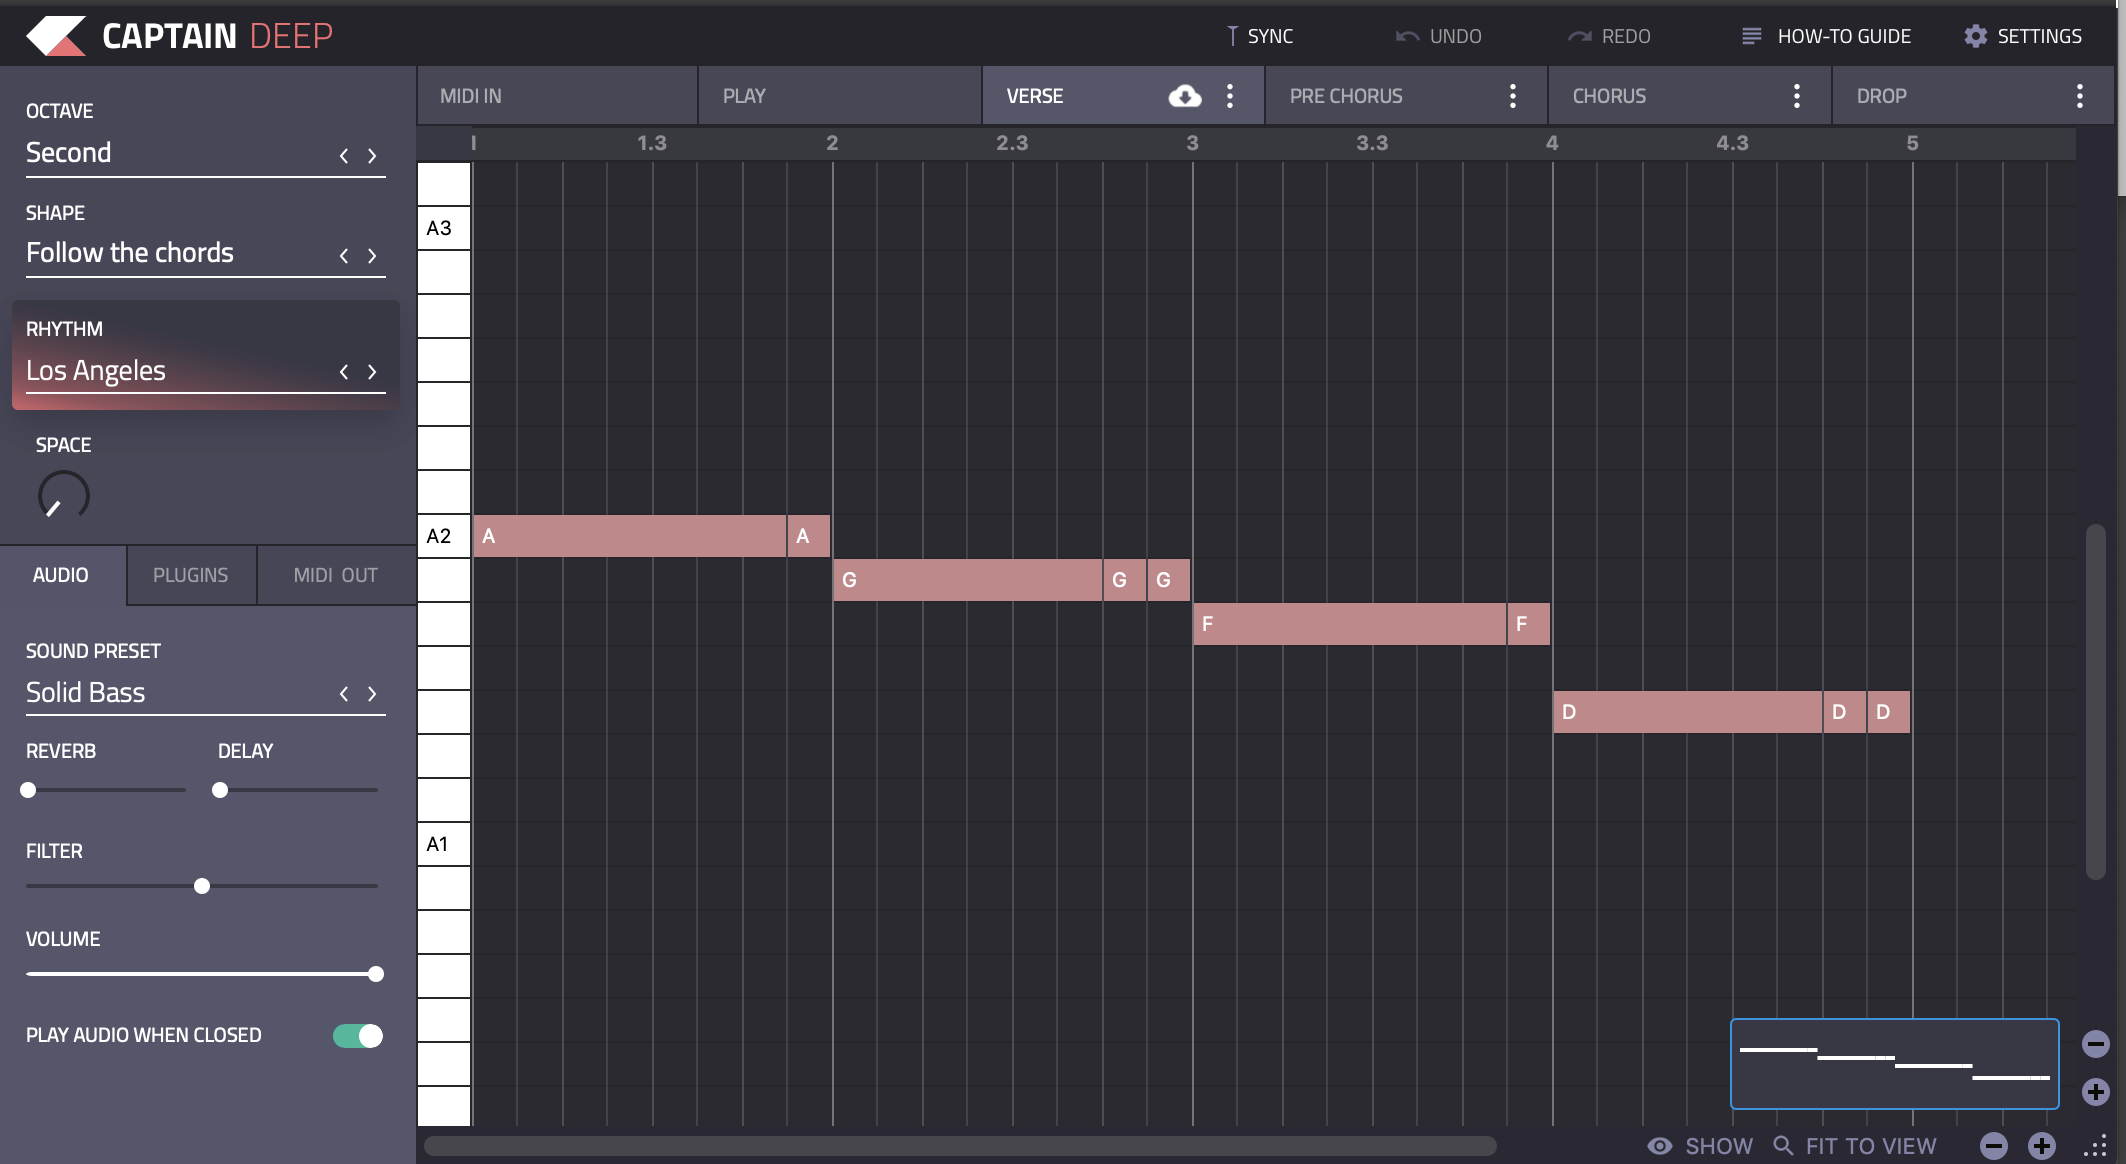
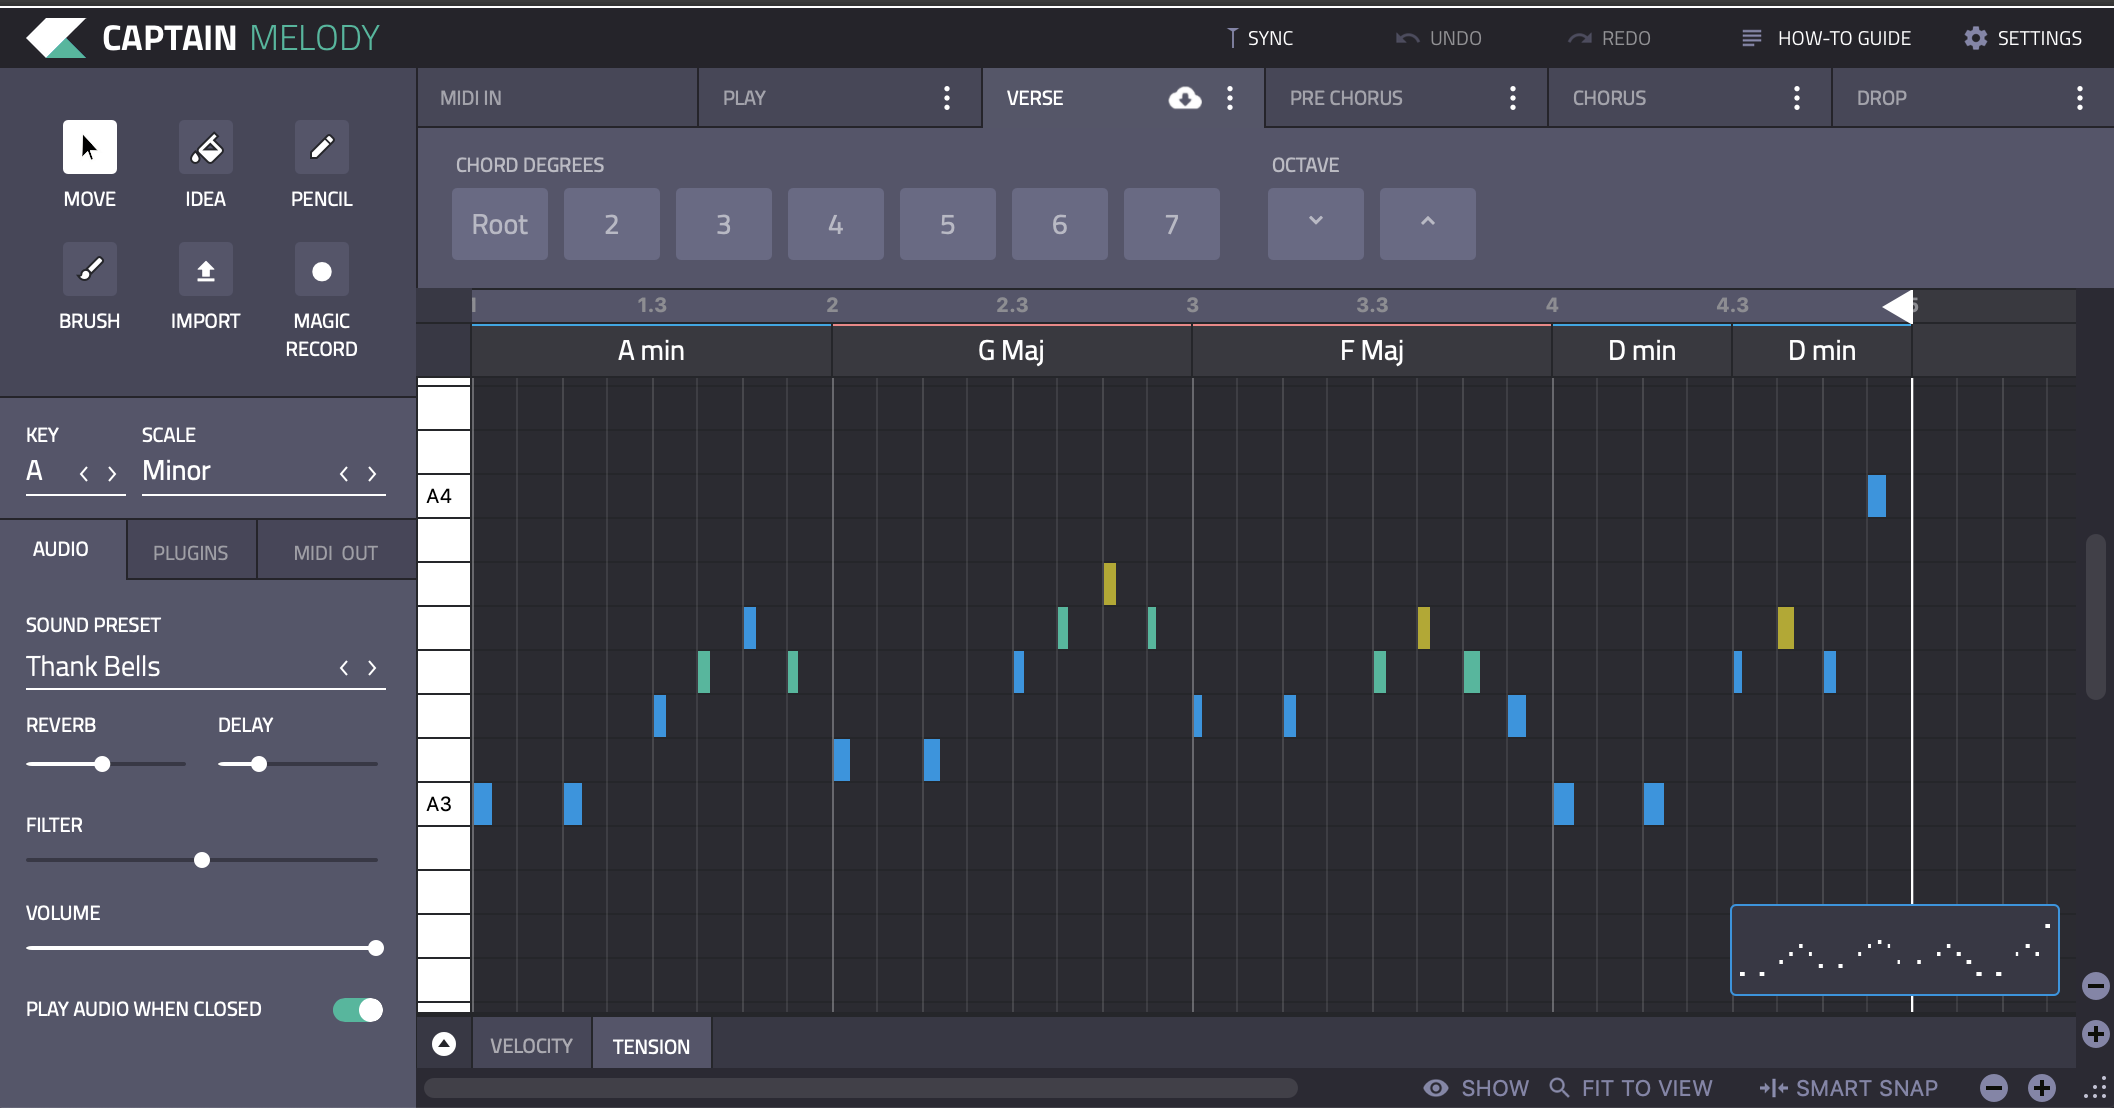
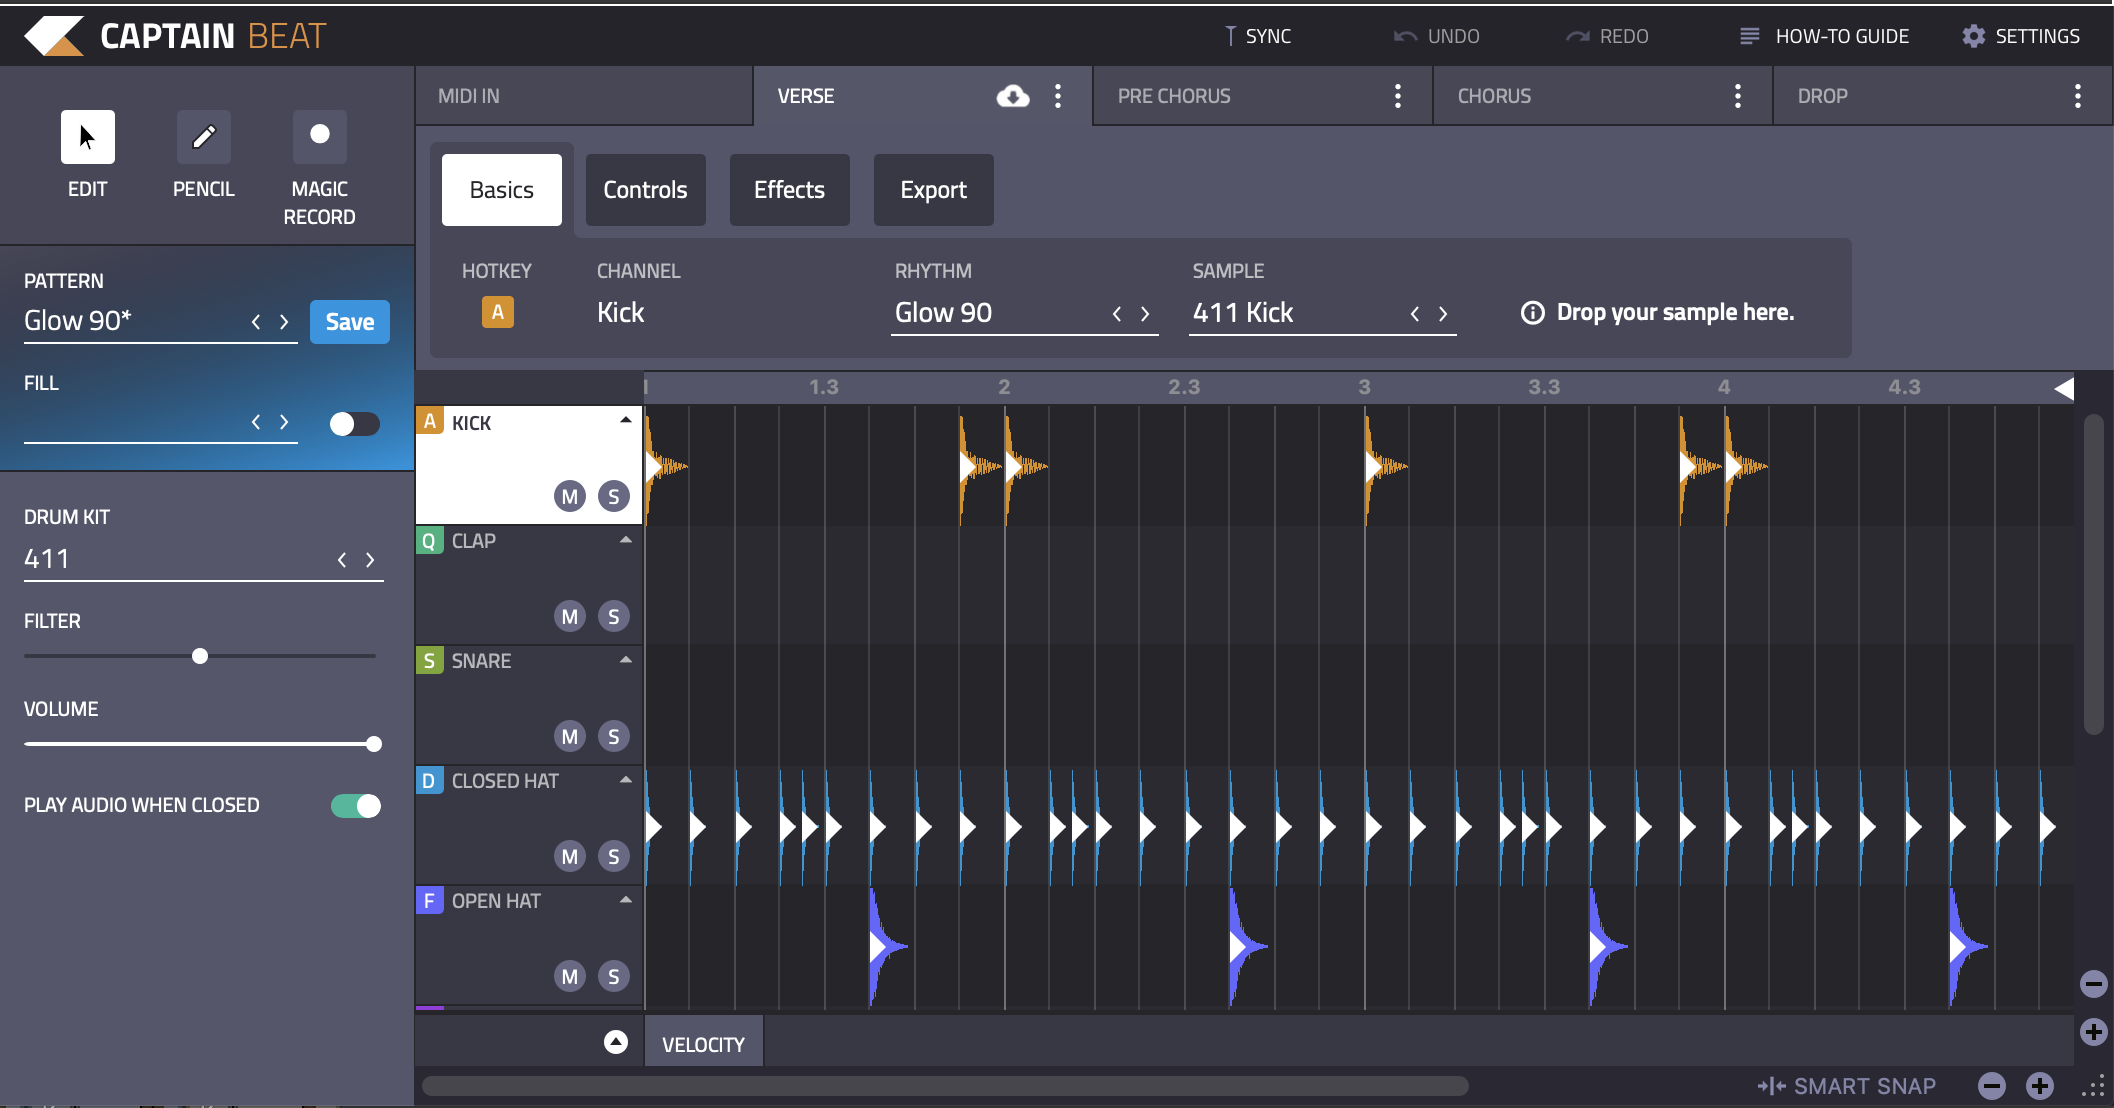
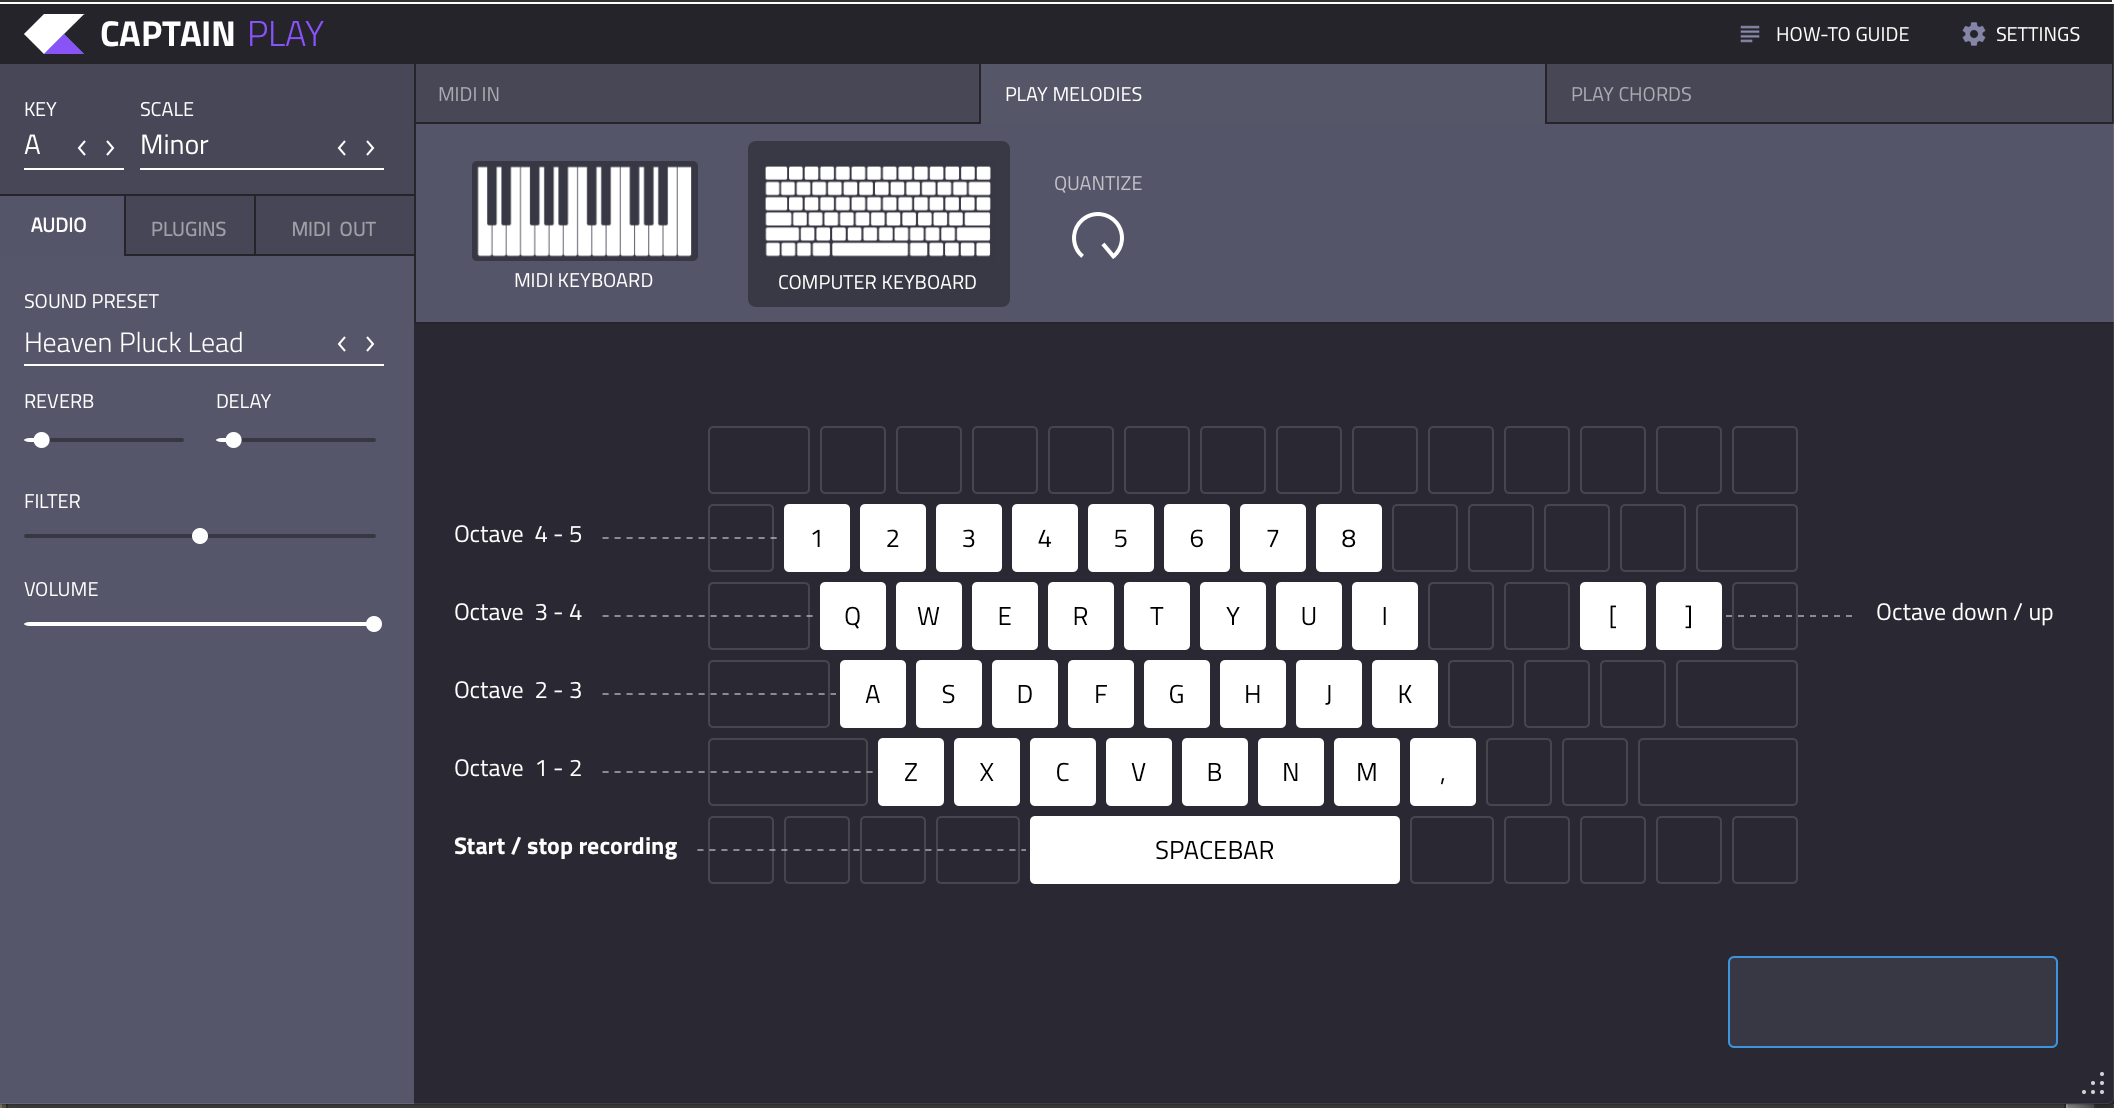


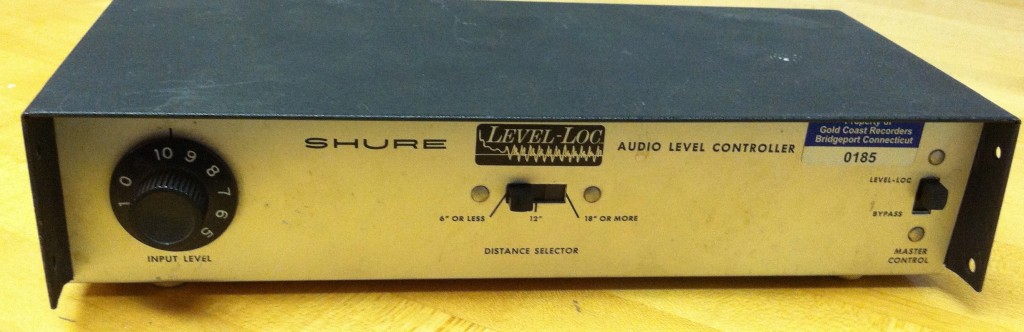
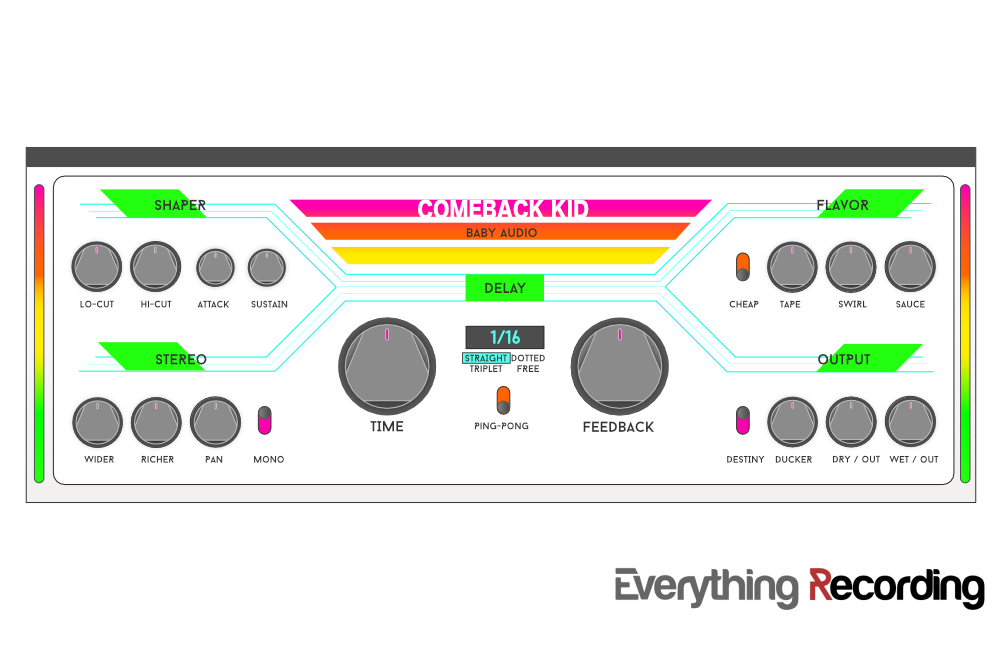
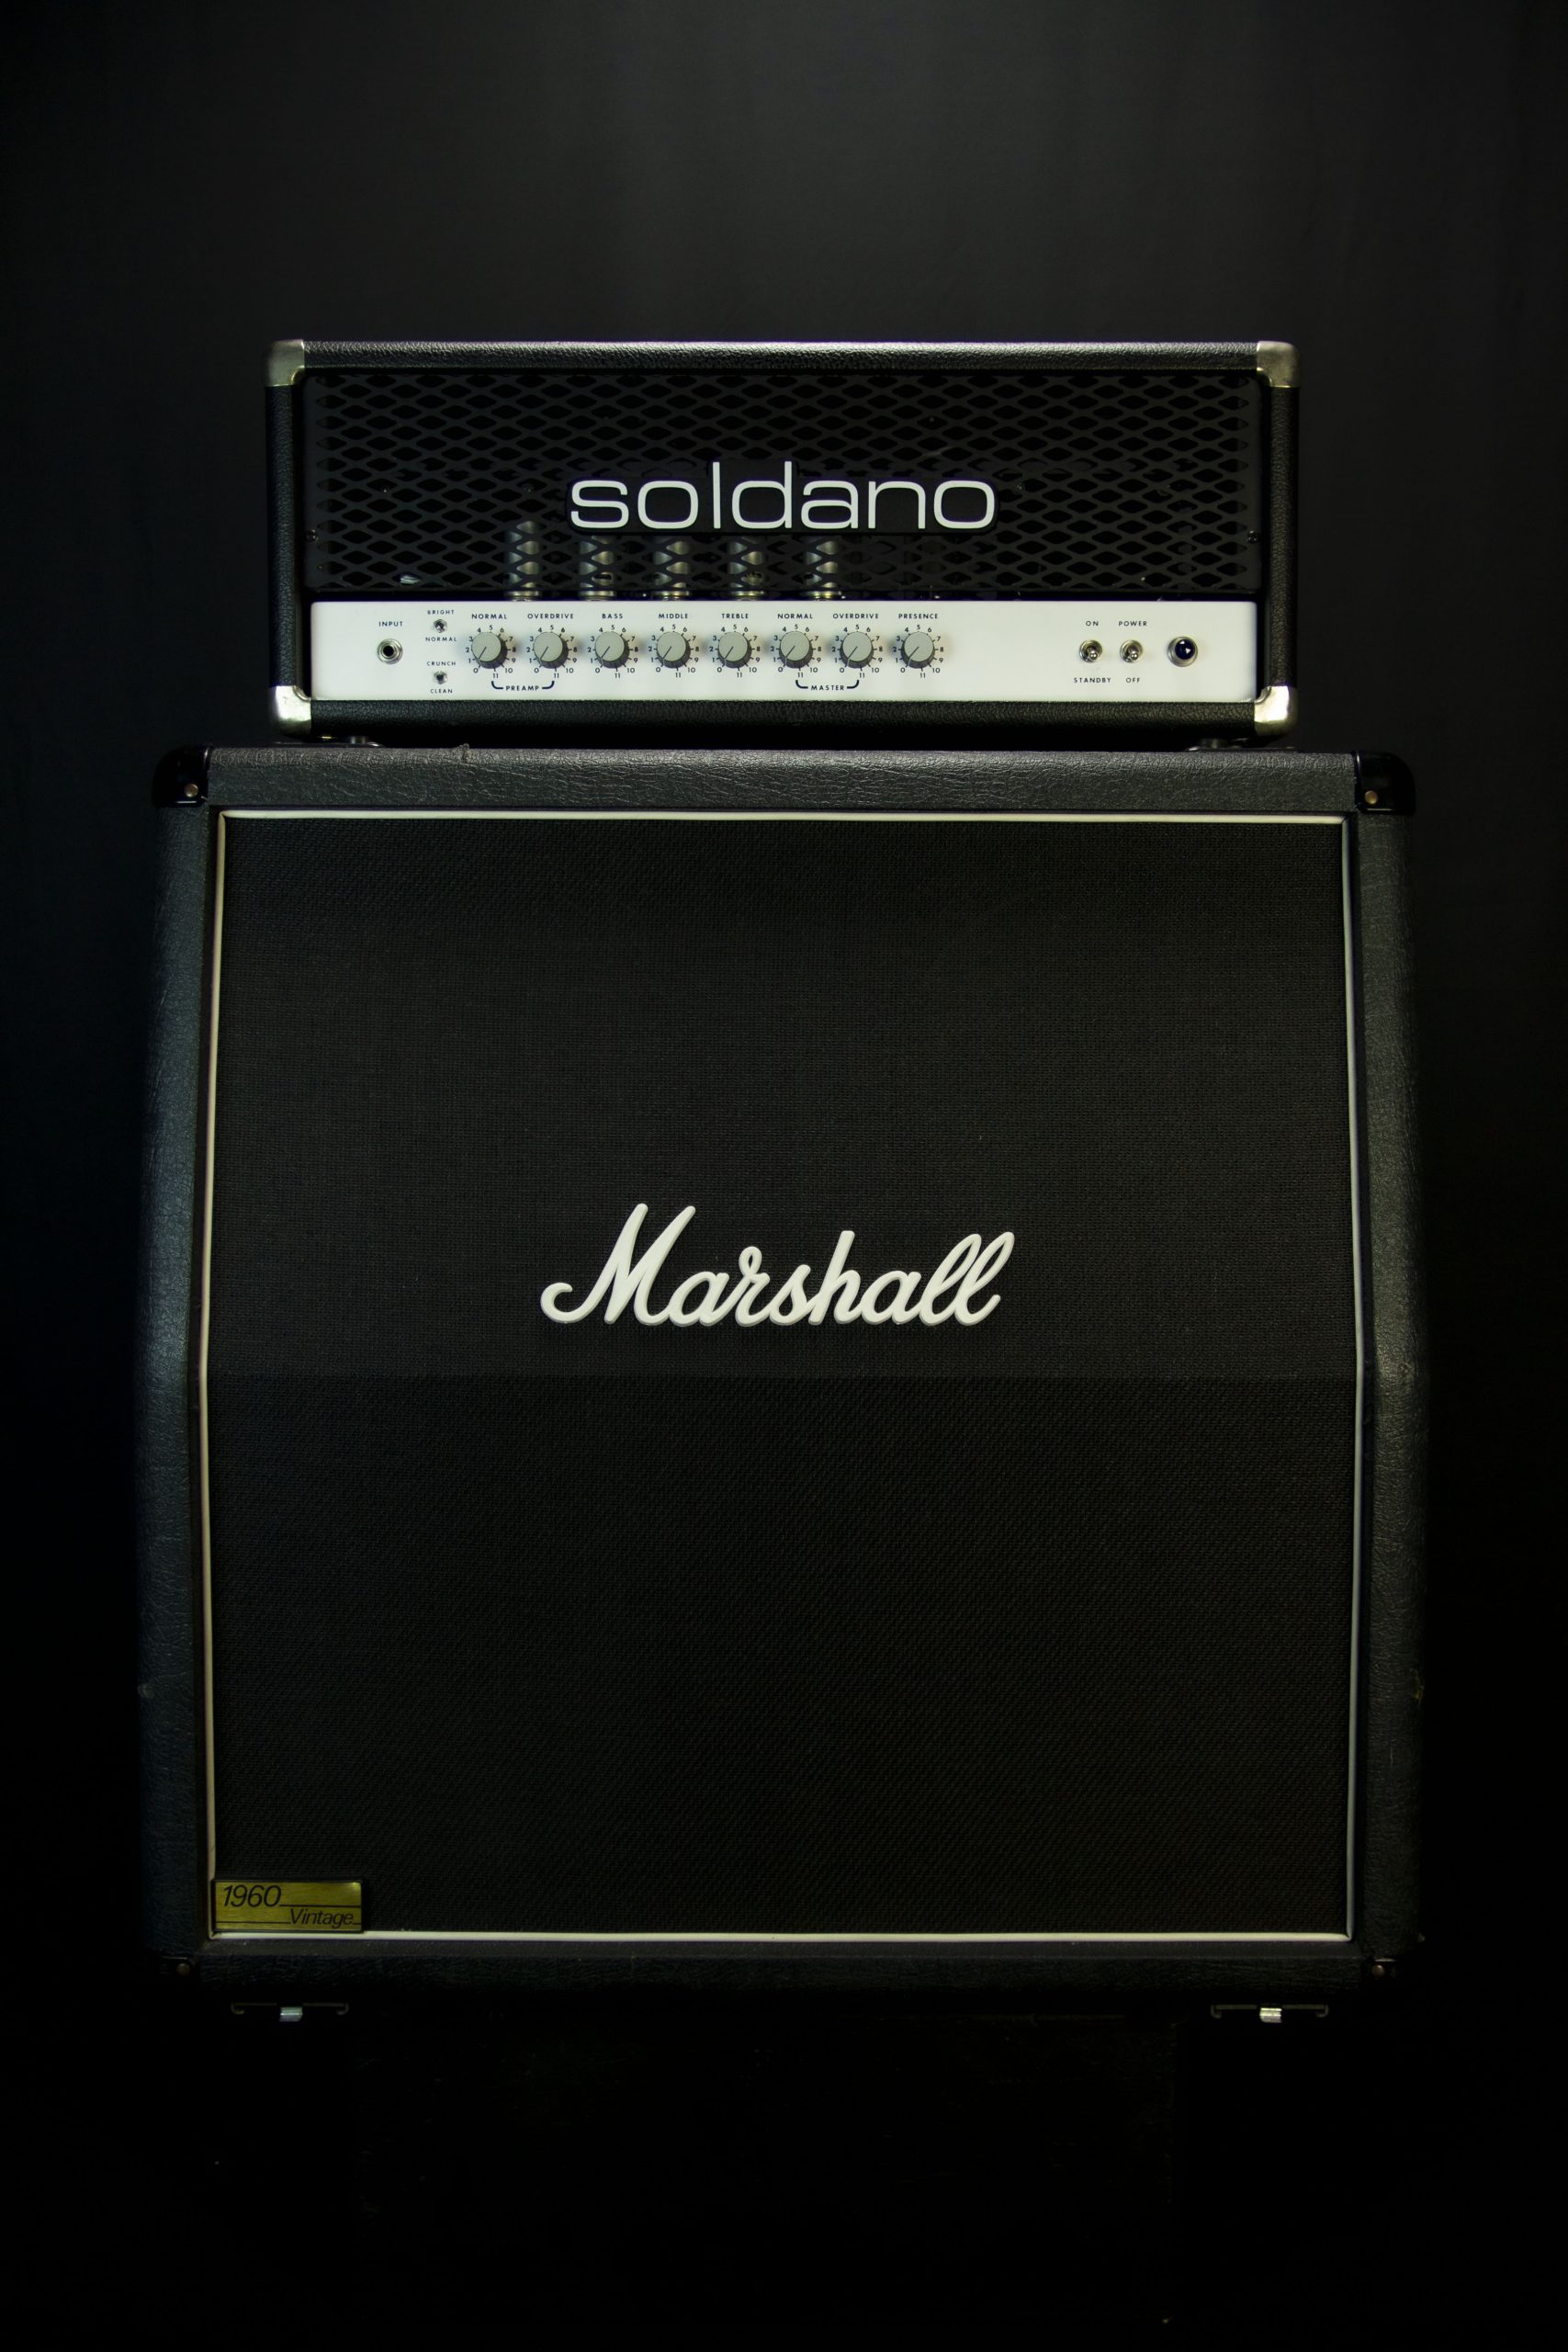